Build an AI Agent Social Media Team | No-Code Guide
45.95k views6638 WordsCopy TextShare

Ben AI
🎁 Get the free template mentioned in this video:
https://benvansprundel.gumroad.com/l/content-repu...
Video Transcript:
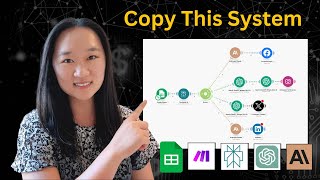
hey guys so in this video I'm going to show you how to set up an AI multi-agent content repurposing team this agent team can take long form content like YouTube videos blog posts and podcasts and automatically repurpose the content across social channels I'll show you the YouTube repurposing agent I personally use that gets triggered when I upload a new video onto my channel it will then write generate and post a blog article about the video onto my website it will also write and post on my X and Linkedin and lastly it will write me an email promoting the new video to my subscribers as always the template will be available for free in the description below and it will be easy to adjust it to your specific use case now in my opinion content agents are one of the best use cases for AI agents now you might have seen some of these tutorials where they automate uh content posting on social media through platforms like make. com and without hating too much on those automations in my experience I have yet to see one company and me included that actually want to be posting AI gener rated content automatically on their social channels without actually reviewing and iterating a bit and that's where the human in the loop aspect of AI Agents come in so if you want a really good use case for AI agents or just want to create your own social media content stick with me and I'll show you step bystep how to set it up so first of all shout out to Samuel Chris who suggested making an AI content creation agent that could specifically post on LinkedIn I do really take these comments into account when I plan my next videos so if you have anything specific in mind let me know in the comments comments and I do really consider them for my next videos also I wanted to say huge thank you uh for the positive response to my first videos uh it does really inspire me to make a lot more of these videos and there have been quite some people reaching out to me about opening a school Community where we could maybe go over more advanced AI agent setups uh use cases and how to actually sell them to companies so if that's something you're interested in please let me know in the comments below too it would definitely help me take action on it if I see more people being interested in it now that out of the way let me get to the overview so I've broken this video down into five steps so in the first step I'm going to go over the system overview then I'll go over quickly when to use multi-agent systems I've seen many people have questions on that too then I'll go over a quick live demo of my agent and then I'll go over the manager sub agent setup and the social media posting tool setup so the software I'm using for this system is relevance AI if you don't know relevance AI yet it's a no code AI tool and AI agent Builder and you can also build multi-agent systems which makes it extremely powerful especially if you're not a coder if this is the first time you are building on relevance AI or you hear about relevance AI I do have a full tutorial beginner tutorial on my YouTube channel about relevance AI this video is a little bit more advanced I'll try to keep it easy but if it's hard to follow make sure to check out that video first so the way this YouTube repurposing system is set up is in the following way um at the center really we have our YouTube repurposing manager agent which is is the one that reports to me and that I interact with this one is also the one that gets triggered uh that has access to the tools to actually post on my social media and to my blog and he also manages for sub agents and the sub agents you can see as Specialists so we have our blog writer specialist we have our email writer specialist we have our LinkedIn writer and a writer so these agents also have these three agents have one tool which is the YouTube transcription tool so how would this work in practice basically we have two triggers here we can either manually trigger our YouTube repurposing manager by just sending it a YouTube link or I actually set up an automated trigger where it watches my channel and as soon as I I upload a new video it will send the new YouTube link to my YouTube repurposing manager my YouTube repurposing manager will then send these links to the different sub agents that are specialized in writing different content types and for example the blog writer will first use the YouTube transcription tool to get the full transcription then write the blog post and then report it back to the YouTube repurposing manager now this YouTube repurposing manager will then report it back to me and if I go give the go-ahead it will actually start posting it to the social channels so that's a quick explanation of how this system is set up I'm going to show you in detail and uh in detail later and I'll also give you a live demo um but I want to go over first why I actually used these sub agents because you might be asking why didn't I just give more tools to my YouTube repurposing agent uh for example blog writer tool an email writer tool Etc and the maybe the YouTube transcription tool now there's a few reasons for using multi-agent systems and in this specific case the most important reason why I use sub agents is because sub agents allow for feedback and interations so as I said before we don't actually want to post this content automatically without actually reviewing and iterating so that's what these sub agents allow for so let's take an example our YouTube repurposing manager sends a YouTube link to our blog writer our blog writer then transcribes the YouTube video and writes a Blog article he reports it back then to the YouTube repurposing manager who reports it to me now that's the moment where I can actually start reviewing and iterating so let's say I don't like the tone of voice I feel like there's something missing in the text and uh you know it has to change uh some some questions in the fu right now if that's the case I can just tell the YouTuber repurposing manager my feedback hm I don't like this part I don't like that part and he will then report that back to the blog writer agent who can then make the adjustments and send it back to the YouTube repurposing manager and then once I approve actually post it to in this case webflow now if we would have done this in a tool we can't actually give a tool feedback right because we only have one input or one standardized step by step to do so we can't iterate on content it's just a a one shot thing so that's the main reason in this build why I've used um uh sub agents now there are more reasons to use multi-agent systems another one is which is actually also the case for this specific setup is you just have higher reliability with more complex workflows as soon as you start to equip these agents with seven eight n tools and sort of complex workflows there are relability will just go down and your agent will get confused with all the information it has gotten so if you want good reliability it's better to separate these parts of the process into a responsibility for a sub agent and then let your manager agent manage these sub agents it is also less prone to errors you can get um less token limit errors and agent mistakes for example in this one if we would would have given the YouTube transcription tool to the YouTube repur in manager he would have to send lots of text to all these different agents and then we can reach token limits we can run into a lot of Errors Etc so it's better to equip these agents separately with these tools because they'll be able to manage those amounts of text lots a lot easier than this manager who al already has lots of responsibilities and then last lastly there are more uh uh reasons to use multi-agent systems but a good one I found too is if you want to have evaluation agents basically those are agents that are specialized in actually checking if what your other agent has done is actually reliable or good now for this specific one that is not the case but we can Implement that and I'll probably make a video on evaluation agents and steps in the future there are more but these are on of one of the main ones I found if you have any other reasons to use multi agency systems let me know uh I'm I'm interested in it too so that's that's it for the setup uh now I'll show you a quick live demo on relevance AI so first I'll show you a live demo of the agent in action then I'll show you a detailed breakdown of the agent setups and the sub agent setups then the tools how I set up the tools to post to social media and to my blog and the YouTube trigger uh lastly so here we have our YouTube repurposing manager so here going in use manager and I'm just going to use my last YouTube video uh as I have not posted a Blog on it yet and in this case I'm just gonna trigger it manually by just sending it the YouTube link so you can see already in the background now hit it has delegated it to the blog writer agent and of course the blog writer agent is equipped with a tool too so he's now using the YouTube transcription tool to transcribe the YouTube video and then he's of course prompted to write a blog post now you can see we got our blog post um back so it's quite long of course that's what I instructed my blog writer to do but you can see my repurposing manager showed me shows me uh the the blog first right so now I can actually read it make sure that everything's fine so let's say just for example purposes that there's something I don't like let's say uh step three in step three change um the length make it shorter and also maybe let's say change the title and make it more compelling but just for example purposes even if it's a really easy change we can even let our man YouTube manager change it but ideally we send it back to the blog writer agent because he's the one that's an expert in writing blog posts so please send send it back to the blog writer agent so that's all we do and now our YouTube repurposing manager will send it back so you can see here it delegated again to the blog writer agent we can actually check if it's going to make the changes we want so in step three change the length make it make it shorter right so let's see here step three connect to Google Docs all right now we gotten it back again so let's check if he actually made you can see step three is a lot shorter and let's see he also changed the title so that's how it works the iteration step so now we can say let's say the blog is good and we actually want to start posting it we just tell our our repurposing manager that we want to post it perfect let's post the blog good now our agent launched the post to webflow Tool and actually I have instructed my agent to um wait for human approval before actually posting it to webflow now you might ask why because I already checked in the step before but it's because we actually need images and I don't want to have ai generated images I actually want to have good images so that's why I have the human approval step where I can also double check if everything's fine here right we have the title we have the excerpt we have the summary we have the date have the YouTube link the blog post and here we have the images so I can just upload the images right here so these are the thumbnails and lastly I also have a free resources link which I have to add in manually so I'll add in that manually here too so I just SPAC it in here and that's it so now I click approve and now my agent through the tool will actually post it to my web flow and publish my website so as soon we're done we can actually check my website and see if it's posted all right so there's used poster web flow so let's check it out so you can see latest post this is this was the one he just wrote so we can check it out here we have the free templates right link we have the YouTube video and here we have the full blog article and that's it so that's the first step now now we can go back and you can see actually um the X post writer agent already wrote X poost and now the post X tool is waiting for human approval so in this case I've just instructed my uh repurposing manager to just automatically go to this post to X tool why because I can still check the actual content here of my expost and because they're very small these X expost I can just adjust whatever I want inside of this box myself instead of sending it back to the agent so in this case let's say I want to change something uh I break new video video effortless effortlessly connect your AI agents to any software I break down a step-by-step guide to seamlessly link your AI agents with any software no coding required save time let's say I don't like this part and I don't like seamless sounds very AI so uh to link your let's keep it short and sweet so let's do it like this all I have to do here is also upload an image because I do want to upload it with an image then I click approve and will post it to X so we can see if it posted it go to my profile and you can see it posted it on X so we can go back to our agent and now it's going to the LinkedIn post writer agent so right now our LinkedIn post writer agent is also using the YouTube transcription tool to First transcribe then write the LinkedIn post now we have our LinkedIn post here so again same setup right we can change whatever we want now I'm actually not going to post on LinkedIn right now uh but you can see same setup I can uh po add an image here for my LinkedIn and that's it actually the LinkedIn one is not connected so I can't just uh click approve because it will not be posted automatically so let's click approve you can see by the way also I've instructed my agent to tag whatever it has done right you can see block posted posted on X posted on LinkedIn so you know where he is in the process and lastly we have our email writer agent right who's now writing an email promoting my new video to my subscribers so here we have the email we can do the same thing right we can iterate we can say we don't like this we can don't like that now in this case I don't I I send my emails through gumroad now gumro doesn't have an API to actually send emails automatically so this is a manual step for me but I'm fine cuz it doesn't take that long all I do is if I like it I copy and paste it into gumroad and send my email to my subscribers now that's it how this is how the the agent works so now I go over the agent setup and then later I'll show you how the tools are set up and the trigger so let's start with the manager agent so the manager agent we have given a system prompt as always and in this system prompt of course we besides describing the tools like we do in a normal agent we also have to describe to this manager agent which sub agents it has access to so you can see I'll go over there very quickly uh you can read this in detail in my uh template right which you can clone for free in your own relevance AI but I'll go over the Quick Step by Step so act as a YouTube video repurposing and promotion agent manager you're my YouTube video repurposing and promotion agent manager you'll be triggered when a new YouTube video is released on my channel and your job is to repurpose this video and promote it across my online presence right now this sop most important right you you'll be triggered when I send you a new YouTube video link I just posted of course sometimes that's automatically to and then the SOP here is important right you start by writing a blog post for my personal blog using the blog writer agent all right so basically you can just instruct it the same way as you do with tools right you just use agents instead of tools now this is the important step if you actually want to be able to iterate right and be in the loop and sort of be able to give feedback on that initial writing of your sub agents so you have to tell your manager agent report the written blog article back to me to be able to verify if the blog post is ready to be posted right only in that case he will output it in in a format for you so you can read it give your feedback so you can send it back right then my third step when I've approved the blog post blog article on my webflow website using the post to webflow Tool right now you you understand the system right write an expost using the expost writer this is basically the SOP right and uh here I still have another breakdown another section of tools and sub agents where I give it more detailed breakdown of what these sub agents do and these tools do and some extra notes if you want to read it in detail again you can see it in uh my template so then we have the flow Builder always important to double down on that sop especially if you get in more complex builds uh does really help in my experience so basically it's just the SOP what I just said but then in this flow Builder uh that's it and then we have our tools now in this case this manager agent has three to tools right post to LinkedIn uh post to X and post to webflow which is my blog uh so I in this case I've done all of them approval required why because first of all I want to double double check and I also want to be able to upload those images myself uh before posting because I want to post these things with images not without so all of them are approval required and then here we have our section with agents and here you can see we have our four sub agents now these settings are important right uh in this case I've use them all on auto run but you can also do the same thing we have approval required um but in this case of auto run and in here we have settings right so first setting is prompt for how to use describe how your agents should use this sub agent this is just letting your manager agent know what this sub agent manager does so in this case send the YouTube video link to this agent he will craft high quality blog article ready to be posted on webflow right and then we have template for communication now this one is important because basically can use variables that our manager agent will use when he communicates with our sub agent so we can literally put in those variables we normally use like in in a tool so we so our sub our manager agent knows what to fill in there so in this case here is the YouTube video link and then I put in the variable Here YouTube video link please write me a high quality the article based on the video here are some additional comments feedback right so this is the part this one part I included so I can actually give feedback to that log writer agent so as soon as you do this uh a variable you can see that below here automatically you get this text field where you can basically describe what this variable is also to this agent so in this case I had two variables here the YouTube video link which is pretty obvious I describe what it is that our manager a has to send to the sub agent in this case the link of the YouTube video and here in the feedback um variable I describe if I have given any feedback please add them here so this is sort of the template that your agent manager agent uses to communicate with the sub agents so this one is very important so I have that set up for all of them basically um then I have in this case this is interesting actually because in the EXP post writer agent I have not a equipped that agent with the YouTube transcription tool why because these X poost are so small and simple that he doesn't need the entire YouTube video transcript and because our YouTube repurposing manager already has access to the uh blog article from the blog writer earlier he can already give a small little summary on what this video is about to the expost writer agent so you can see in this case my template for communication is different I say please write an exp poost for this video I give the video title which he already has from from the blog writer he has I instructed to give a 200w summary of the video video summary and I can you can see here that variable I set it I said a 200w summary of the video you can take this from the blog post right because our manager already has access to that text main outcomes because I do want to communicate that in my expost and the YouTube link of course we need so that's that's that for that and and then we have the LinkedIn post writer agent and the email writer agents which are similarly set up as a Blog writer agent right you can see now let's go over to sub agents quickly so here we have our blog writer agent so in this case we can go to settings and in this case it's it's a lot more like a normal prompt right because we want to be really focus this prompt of this uh blog writer agent on writing good blog posts right of course we he does have one tool right which is YouTube video transcription tool so we do have to give it a short sop and put it in the flow Builder but it's a very simple flow you can see use YouTube transcription to transcribe the YouTube video write a high quality blog article and then report finished article back to your manager agent right that's all his SB is about and his um core instructions or his system prompt is mostly about how to write a good blog post for my website right so that's what this focused on I give it lots of examples of good writing styles and uh P block posts but again you can read this in detail if you're interested in the the template so all I do here really is instruct it to write a good blog post that's it and we have our tool now important here these tools have to always be on auto run because if you have an approval step inside of a sub agent you'll never get a response back to your manager agent which is possible if you start managing different dashboards for your sub agents too but in general clients but also me just want to manage One agent to do a specific workflow or process so in that case your sub agents always need to have their tools on auto run so that's the blog writer agent now the other sub agents are a very similar setup same setup actually the only difference is that the X post writer agent doesn't have access to the YouTube transcription tool but he will get a summary from his manager now the LinkedIn post writer tool agent of course has a a different prompt where it's optimized on writing good LinkedIn posts and the email writer is optimized for writing good emails now I'll go over uh the three tools that can actually post on my blog on LinkedIn and X but you can do a similar process for any other social media channel you'd like to use this is exactly the topic of my last video where I show how you can connect your AI agents to almost any software without really complicated API or authorization setups and and it's a really easy setup I'll go over it quickly here right now too so what we do basically is we have um two user inputs here of course we have the content of the LinkedIn post which our content manager fills out and we also have the image right because we don't want to do an image post now we don't want to do the actual API of LinkedIn because it's going to be a huge mess and very timec consuming so what we do is we use make right so we send this information to a web hook in make and from make. com we just they are natively integrated with LinkedIn we send it to the LinkedIn module to create a post on our channel so all we have done here is image and content right we have in method we have post we we pasted in the URL from the web hook of make which I'll show you in a second and here we have two params or two variables which we actually send over to make so you can see here I put in the variables of what this agent will fill out so in this case the content and the image so if we go to make.
com here we have the setup for this specific one so here we have the web hook right so make if you set up a custom web hook very easy you just go here custom web hook and then you can just add one and then what make does is they give you that URL and with that URL you can then just paste back in there in here that's all it requires this setup and then we need two more things because of of course we have an image post and our image is actually in relevance I'm going to show you is actually saved as a URL right so this is going to be saved the the image uploaded is then converted into a URL and that's being sent to make right so the LinkedIn module actually doesn't um accept an URL they need a file right so very simple in this second step what we do here is we have an HTTP module where we say get a file right so all we do there is we put in that URL variable Right image here in this case and then it will automatically convert that into a file right so that's all we have done in that second step and then in the third step it's the LinkedIn create a user image post step first you connect of course your LinkedIn account and then it will ask here for a file right now it will automatically select this because it recognize that we have a get a file step before LinkedIn so it's already selected and then we can add here the content so this is would be the the variable of the LinkedIn post right so that's all it is and of course we have some Advanced things here but the LinkedIn module very easy the X module is a little bit more complicated but this is all it requires so once you've set it up all you do is you turn it on and then as soon as your web hook has been called by your agent it will send it and create a post on LinkedIn so let me go over now the webflow one so here we are in uh the webflow one very similar setup to the LinkedIn one but this one is a bit more complicated because our blog articles require a lot more Fields right so web flow asks for a lot more Fields uh of course to create a blog post right because we need the title we need an excerpt we need a summary we need a featured image we need a date we need a YouTube link blog post thumbnail image and in this case I also include my free resource or free template link which that's again why I do an human approval because then I can upload these images and these links right now same process agent fills all of this information in and then actually I have one more step here which is convert the blog post into HTML format and make sure every tag is CL so web flow accepts HTML so I actually want my blog to be you know optimized in terms of um formatting right so these headers Etc bold Etc so that's what uh this llm step does so it outputs it in HTML then it sends that in this variable variable HTML blog post and then I have all of these that I sent to my make. com automation so you can see here we have the web flow publish block to webflow right same setup we have our custom web hook here we send all that data there then we have create an item in webflow right and there we can select our site we can collect which collection ID right in this case it's blog posts and then we automatically get the fields here that we need to fill out right and all we do then is add in the variables we get from make from the web hook in each step title body summary exerpt image Etc and that's it and then uh you actually have to to on web flow publish an item too because otherwise it will stay in draft so in this case I've have publish item so all I do is get this item ID from this step right so this will generate an item id which I then that variable I use in this one to publish an item and then in the last step I actually have to publish the site to make it live to make the new changes live so I just publish the site again and that's it that's how it works now for the post to X it's a a little bit more complicated on the make side but I'll show you how you do it so on the relevance sayi side I think you understand now it's the same setup right we have on the X one we have our uh X post our X content text content and our image and of course we send that again to a different web hook in make. com which we have here and from there we have the same setup because we do an image post where we convert the URL to a file and then we actually have two different modules of X here because in the first one we actually have to upload our media that's how it works in X we first have to upload our media and then we can use that uploaded media in uh our create a post module right that's just the setup and in X actually the uh uploader media module is still from the old API version so this one is the V5 version and this one is the V6 version and they both require a little bit of a different setup so let me start with the create a post which is the V6 version I'll show you quick so if you're here on the X you have to click here the V6 and there you'll have create a post right that's the one I have set up here so that's a V6 now how do we set that up uh if we set up a new one what we have to do is we need credentials right from um from X right and we actually have to set up a developer account so what they all ask for is a client ID and a client secret right now how do we do that we go to uh x developer.
x. com there you can log in with your existing X account and then you'll arrive onto this dashboard they'll actually create a uh an project for you automatically so you go here in projects and apps you click on this one and then you go to edit here and here you click you these are your user authentication setups so you basically you're making an application right so you click here read and write direct messages in this option you go web app and then you need to exactly use these two two call back URLs right so exactly these two then this website URL also which is the same as this one and then you will click save and once you click save you will come back to this screen where you'll get your client ID and secret ID in a window save those save them somewhere and you will then you can then um paste them back into make where I showed them here and then you'll have your connection set up with v uh the V6 version now there you can put in your text content with the variable from the web hook right which is the text but then you still need to add your media ID so for the uploaded media module we need to use the V5 module and that requires a different setup a different authorization so you click here on upload media um and then you go here on ADD and then here in advanced settings you see they'll ask for the API key and API ke key secret so those are two different uh codes that you need instead of the the V6 which ask for the client ID so you go back to the X developer and there you can go in keys and tokens and here you'll have your consumer keys so if you don't know them yet you could just click on here regenerate and you'll get your API key and your secret key you then paste them in here you save and that's it and then all you do is let me delete this one you you get out of this upload a media you get of course a variable which you then use in your next uh V6 module which is create the post you can see here media ID which you can select from the previous one that's it for the X uh post now now lastly let me show you uh how I trigger my agent from YouTube where it watches my YouTube channel and as soon as a new YouTube video is posted it will send it to my agent and start a new task slon conversation for my agent so let me show you here have two so so this is basically with a YouTube module right uh very easy already naely integrated with make right so you can see here watch videos in a channel right you do need to have the permission so it needs to be your own channel I think I haven't tried it with others actually but here's my connected Channel ID you fill in your channel ID and that's it that's it and you get of course your variables which you can then use two TR Tri our agent now to trigger a relevance AI agent unfortunately relevance a is not natively integrated with make.
Related Videos
26:38
EASILY Connect AI Agents to ANY Software |...
Ben AI
27,480 views
14:56
AI Social Media Automation: How to Post Da...
Solopreneur
86,709 views

3:50:40
How to Build & Sell AI Agents: Ultimate Be...
Liam Ottley
779,574 views

36:15
How I Run A 0-Employee Marketing Agency Wi...
Marketing Against the Grain
119,374 views

11:20
Microsoft CEO’s Shocking Prediction: “Agen...
Matthew Berman
1,133,146 views
3:14:11
The Only Video You'll Need to Master Make....
Ben AI
23,909 views

13:41
NEW AI Social Media Automation will save y...
Dan Kieft
34,510 views
25:58
From Zero to Your First AI Agent in 25 Min...
Futurepedia
190,088 views

19:52
Create Your AI Social Media Agent in MINUT...
Helena Liu
48,226 views

44:09
This AI Agent Automates Your Sales on ALL ...
Ben AI
21,678 views

46:56
Build an AI Agent Team That Does EVERYTHIN...
Ben AI
149,799 views

54:51
12 Steps to Creating Viral Social Media Co...
Mindvalley Talks
75,170 views

18:45
How to Build a 24/7 AI Agent with Make (No...
Kevin Stratvert
71,984 views

10:09
AI Agents, Clearly Explained
Jeff Su
1,314,507 views

12:25
AI Agent for Enterprise Use Cases - Simpli...
Zoe Yan
1,740 views
19:39
This Social Media AI System Creates Unique...
Helena Liu
1,111,840 views

58:34
The Best AI Chatbots in 2025 | EP19
AI Agents Podcast
3,762 views

19:06
How to Build a Multi Agent AI System
IBM Technology
153,461 views

10:08
I Created THIS AI Agent That Makes Me Cont...
Brock Mesarich | AI for Non Techies
7,658 views

1:09:48
Build an AI Agent That Scrapes ANYTHING (N...
Ben AI
288,711 views