Como Fazer uma ESTAÇÃO de ENERGIA solar de baixo custo (gerador solar)
83.93k views2872 WordsCopy TextShare
PROFESSOR PARDAL BRASIL
#gerador#estaçãodeenergia
link inversor 12v para 110v
https://mercadolivre.com/sec/1cx8zKw
link inv...
Video Transcript:
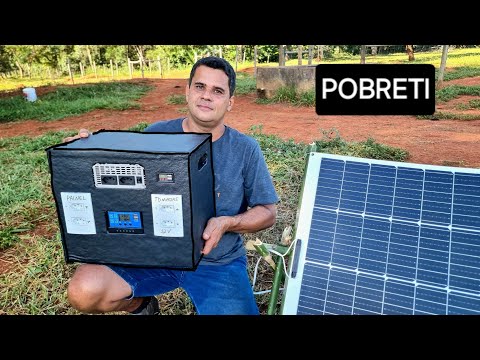
Hello my friends, how are you? Welcome to another video from our personal channel. In today's video, we're going to build a low-cost electrical power station.
A solar plant is a box like that they're selling, like, I've already seen Ecoflow Bluette, but ours is going to be poor because we're going to build a low-cost one . of batteries and also a panel I'm going to show people here Rafael a solar panel that I bought with 240 w This is a personal flexible panel here it's very light for us to carry wherever we need it and also during the video I 'm going to leave you the link from where I bought everything so you know sometimes Someone is interested in buying a product something I'll leave the links for you they'll be in the description and in the comments here my friends oh neither the box nor the MDF I bought it here oh I found a used piece of furniture on the street I brought it although I took advantage of the parts I needed, I cut them using a bad saw, even with a disc, I had already made this support and it looked cool and now we're going to start assembling it, I know guys that during the video, what's going to happen, many people will say Oh, I 'm going to show an example, an inverter like this one, oh, this is a modified wave canup inverter, people say like that, oh no, but there are much better inverters than this one and so on, but the objective here, guys, is not that, you'll understand, I know that when I show you a controller like this will say like this oh but there is a better controller than this one when I show this battery a lot of people will say there is a better battery than this one there is a charger but the objective here is to set up a low cost station that works, ok if we were to buy everything better we would already buy it ready made so the objective is to make a low cost one and here are the materials we will do it using as little as possible used battery cheap inverter a cheap controller but it has to work so now we go to assembly I will show you in detail then everything I will make to measure of this box that I'm also going to make here so for us to start our work here I'm going to show you the measurements of the pieces, so it's two side pieces measuring 33 33. 5 by 27 the measurements I cut the bottom the bottom part is a piece measuring 37x 27 the top cover or the top cover of the box is a piece measuring 40x 30 the front of the Box where the sockets will be located and the front of the controller inverter is a piece measuring 40x 33.
5 and the back is another piece of 40 by 33. 5 now using the front piece the first thing I'm going to do I'm going to draw the front here of the inverter so this part will be showing and I have to make a cut in the wood here to fit it so it will have a fitting at the back This here will appear behind these two sockets and the front here will also appear since on both sides of our poor one, right I'm going to put these two sockets here, what is their purpose in one of them I'm going to put 12 V directly from the battery so it's interesting Sometimes you're on a camping trip something like that you don't need to use the inverter you can get a 12 V direct lamp so with this output 12 V already saves Because the fact that it doesn't go through the inverter already saves the battery and in the other socket I'll decide what I'm going to plug in later so guys everything is marked the two sockets the controller goes here right And our inverter we're going to make the cut I'm going to use it here oh this saw I have this blade here that cuts really well but there's no way for me to start, I have to stick it in there so we come and make a hole I'm going to make a hole in each corner here and this hole from here I come and cut here and this hole I cut here so I'm going to make the holes here and we start cutting then okay let's go oh So my friends oh holey now we're going to make the cuts guys I'm a fan of two YouTube channels One of them is the letter J letter J fanz yours So you see, I watch almost all the videos and the other one is Hugo from the Caleria frame, Hugo is also super top, top top, only Tesourinho said my friends, there are two channels that I really like, hey come on guys, let's make the cut now we already have the hole now the tico tico can now insert the blade to make the cut let's go So guys cut successfully done the sockets the location there for the controller and the inverter now let's mark the back so that the back cover is correct Oh then it will be there to be exactly the way it will be I'm going to put it here, very correctly here and now we transfer this hole only this hole here that will go there to the back the rest we don't transfer and make the cut now it's time for Assembly Guys, I screwed it here on the table that will serve as a square, we just fit it here, we just fit it in. Here you start drilling and screwing guys, I'll leave you the link in the description and in the comments of this screwdriver and drill from The Black, it's very good, cheap, it comes with two batteries, it comes with a case , drills, it's worth it all the time.
it's going to fit here just right, well, it's beautifully fitted, so the front of it will be visible and the back too, what's its function is to have both parts exposed because its fan, if you look carefully, is here, so they, the air here is thrown out towards the back and it sucks it through these holes here at the front . of the terminals here will be exposed, there will be another functionality that you will understand later now we are going to screw the lid on, let's go my friends I had already bought this one which is a voltmeter and it shows how many volts the battery has and this one is illuminated so I made another cut here in the box for us to put it too, I had forgotten about it, it will stay there h k and m C now my friends I already have all the components here on the table assembled in the way that they will work inside the box the box is already here ready for us to put it, I already placed the solar panel there too, I'm going to show you how each item works, so you understand. So we're going to go here first, for the inverter, the personal inverter, it transforms 12 V, which is the battery supplying the automotive battery or a stationary battery, to 110 V, which is this one, then it takes that low voltage and transforms it into a higher voltage, for that, what it needs, it needs thick cables, notice guys, I put these cabins It's much thicker, it's 10 mm and it's going to power the inverter, so simply the positive of the inverter has to be connected to the Positive of the battery.
This can't be reversed under any circumstances, folks. Everything here is in the right order. If you invert it, you can burn the components, the inverter can burn the controller, but there's a mechanism we can do to avoid this risk.
I put the terminals on the battery here, I got a little terminal for me to connect all the cables so I connect the inverter to the battery here I already have 110 V, the drill here, it's connected to it, let's connect it here, we already have 110 V, to do some work I need a blender, like a drill, a notebook computer, everything we need to power with 110, we'll go with whatever works, we'll test it, at the end, fine, it's connected, the inverter is connected to the battery It's already working, how are we going to do it now to charge the battery ? here , it's an extension, now, when we arrive, we'll, for example, get there to a camp or a In a certain place where you go to work and need the panel, it won't get stuck in these two wires anymore, this one we're going to keep is the extension that will work, so from the panel, 12 V will come out, in fact, this panel is not 12 V, this panel is 20 V, more than 20, I think it's 22 V, 22 V will come out through the extension, positive and negative, each polarized, right? I used the connection here on this pin if you look closely so there is no danger of me making a mistake with this pin here, oh , he has it, it's the one in the center, it's a little off center, you see.
So there's no way to connect it any other way, it only fits into the socket in one position, so this here is polarized, I know that here, positive, pin up, left side, negative, and here, positive. If I turn it on the opposite, it gives a minus here, on the multimeter, turn it on the other way around because it's inverted, so the position is correct, the right side is positive, 18. 5 ok , so even though the personal panel is in the shade, it can generate a little energy, even in the sun , it would be working at full speed .
little device in it here I have a drawing, I'll show you, it's the controller, yes, it has the drawing of the battery, plus and minus, the plus is connected with red and the minus with and the minus with black and on this side the symbol of the panel plus and minus here the red of the panel which is the positive here The negative So my friends, I know it 's polarized here and here it's also polarized I can't insert it differently, here it doesn't go in because the pin here is off center it only goes in the way it is. correct So the 18 8 V or 20 or 22 arrives and it converts this voltage this controller converts the voltage to the correct voltage of the battery it feeds the battery in the right way ready we already have the inverter connected to the battery and we are charging it with the solar panel now let's suppose we don't have the solar panel and we need to charge this battery in another way for that I connected this charger here, this charger also has its positive and the negative connected here to the battery it's a 1. 5 charger well It's cheap, it will stay inside the box, also just this socket that will be left out, to charge the battery when we don't use it, just this charger here.
It charges very slowly but it's perfect for lead batteries . When you're not using it, it keeps the box always charged at the correct voltage and when the battery is fully charged, it turns off the battery and starts to discharge. It turns on again.
There's a little green light here that shows it here on this little device here. This voltmeter also has two USB inputs, right, so we can charge our cell phones, so it's better for us to see how much charge the battery is, so we can monitor the battery's charge . inverter not for nothing It is connected directly to the battery so that when we go to a camp or need light we don't need to go through the inverter this saves us we can now buy the 12 v lamp the fact of not connecting the inverter saves a lot on the battery I'll show you and the socket is polarized also the pin upwards on the right side will always be positive and here whenever you turn on the lamp Turn on In the same way there is no way to invert it look, then the lamp is on ok Ok there will be two sockets 12 V direct and finally, for us to charge our phones, electronic devices that charge via USB, we ended up having four USB sockets, these two here, right?
of the voltmeter and here also, on the controller, there are two USB sockets, let's plug them in here, so you can see that it works great, let's put the phone here, let's plug it in, charging, okay guys, and here too, there's a USB socket, we can also plug it in here, charging, ok, so now we're going to assemble it all here in the PR box so we can see what it's going to look like when it's ready, let's go, let's set it up, hey , now my friends, we've already brought our homemade power station to the middle of the woods. This is where we're going to stay. camped today we brought a lot of electrical equipment to do the test fan tools computer and and our solar panel is already here and we are going to make a support for it now I brought some Bamboos the tools are already here too and here is the following guys the sun rises here and sets here we are going to make a support so that we can tilt it according to the position of the sun now our support for the panel is ready we can now position the panel in the direction of the sun so we can get the most out of it I'm going to leave it at that position that the sun is already coming here, its tendency to go there, ok, we're going to take the wire that comes from the panel and we're going to connect it to our homemade power station, let's go and here now we connect the solar panel where it 's already indicated, right?
and the voltage rises So this means that the battery is 100% charged now we already have electrical energy guys I'm going to put this charger here by induction connecting it to the USB so it's easy for us to charge the phone and it's already charging it 's turned blue and when the night comes we'll also have light, right? hours on straight and even charging cell phones and other things Of course there's no need for all that time it could be a lamp that's also weaker on this side here we're going to connect this this extension cord is coming here guys ok well here we can also turn on the fan fan on let's also turn on our computer PR we can work do some video editing browse the internet now we can also use some tools that we weren't able to use because we didn't have power n show you it's a 110 V sander I'm going to turn off the light bulb Let's make a cup of coffee here now and let's turn it on while our coffee finishes brewing, let's connect our mixer here so we can make a toast and a loaf of bread, right? Let's put the mixer here, it's already on, just notice guys, even with our mixer turned on, the coffee is already ready, the coffee maker is still on and the coffee maker is still on and it can maintain the energy well, it's still at 13.
2, it's already keeping it fully charged and now Rafael and I will be able to have a freshly brewed coffee here in the middle of the woods at our homemade solar energy station, guys. Cool, our brewed coffee is now freshly brewed in our Station, also hot bread made there, right? Let's have coffee.
Let's go, another really cool thing that our homemade solar power station can do that no other can do is start a vehicle when the battery is discharged . It can do this, guys, because it has the automotive battery, so I've already connected the cables back here, as you can see the extension . emergency this is very cool, it's a very good thing, my friends, so today's video will end here, I hope you liked it, I'll also leave it for you in the description and in the comments, the list of materials that were used in its construction .
Related Videos

27:23
How to connect a refrigerator to a motorcy...
PROFESSOR PARDAL BRASIL
450,517 views

4:03
Desliguei o Motor em voo
PROFESSOR PARDAL BRASIL
27,579 views

17:36
Off-Grid Communication: No Internet, No Ca...
O Bruno Germano
187,733 views

14:49
💰 SUMRY Hybrid Inverter | HOW MUCH DOES I...
Luciano Batista
42,457 views

5:21
offgrid raiz uso pesado
RLIMA
713 views

22:16
Water pump without electricity that can pu...
Yt Crop - DIY Crafts
2,859,813 views

31:30
Fracasso dos Estados Unidos na Amazônia Br...
Boa Sorte Viajante - Matheus Boa Sorte
727,133 views

6:24
Aeronave Feita no Fundo de Quintal
PROFESSOR PARDAL BRASIL
22,621 views

16:22
FIM DO GASTO Com 🔋Baterias no ☀️OFF GRID ...
TARCISIO SIMONE
115,410 views

17:47
DOES THE ELECTRIC PAINT GUN REALLY WORK? I...
Pintura Automotiva Passo a Passo
175,261 views

37:00
NÃO COMPRE UM GERADOR A GASOLINA ANTES DE ...
PROFESSOR PARDAL BRASIL
936,892 views
1:04:09
COMO É FACIL MONTAR UM SISTEMA DE ENERGIA ...
LetraJota
455,160 views

14:12
Bluetti AC180P solar power station connect...
Luciano Batista
145,693 views

22:20
Every house needs this and no one does it!...
DIYTechTrends
1,742,062 views

25:17
Um tacho de cobre e um sonho: fazer açúcar...
Cleide Lifestyle
149,716 views

7:21
Como a China virou líder em tecnologia
BBC News Brasil
20,995 views

15:47
O que tem dentro da METRALHADORA de GEL? E...
Manual do Mundo
863,774 views

9:40
🔋☀️ 30 ANOS SEM USAR Concessionária com s...
TARCISIO SIMONE
76,620 views

17:58
O que preciso para usar AR CONDICIONADO du...
TARCISIO SIMONE
80,482 views

21:33
Your battery will last forever! Quickly Re...
Creative Passion 88
2,671,358 views