How to Make a Thumbnail for YouTube Videos with Glow Effect: Quick and Easy tutorial for Beginners
1.57M views2668 WordsCopy TextShare
Arti Creator
Check out 7 Pre-made YouTube Thumbnail Templates - https://articreatorstore.com/7-thumbnail-template...
Video Transcript:
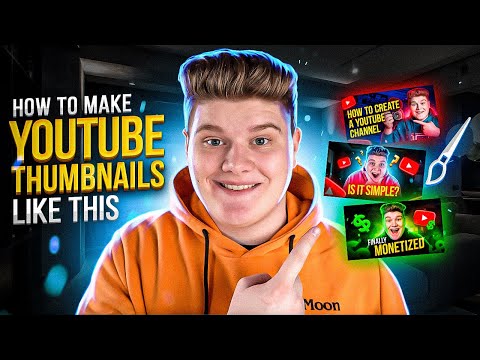
thumbnail is the thing that can double up your views on youtube and since everybody going crazy about my thumbnails i'm gonna show you how to do the same style of thumbnail step by step super quick so everybody gonna ask you how you made this thumbnail because did you ever see on youtube the thumbnails like this i guess no well now you have a chance to have it too and at the end of this tutorial you would be able to do this same style of thumbnails for your youtube channel hey what's up and welcome back to
my channel my name is other creator and i help content creators and entrepreneurs grow on youtube so let's go for this tutorial you would need a photoshop because this is the only software to do all these fancy things to make this high quality top-notch super duper thumbnail we're gonna go back to a tutorial in a minute but i have a great news for you guys i made seven different thumbnail templates in that style so you don't need to create them from the scratch and spend your time basically these are photoshop templates that you can download
and customize add your photo title change font and colors to get your own unique thumbnail there's also a lot of design assets to make your thumbnail in your own way and 100 guarantee that you will have these crazy comments under your videos you can find a link for these seven thumbnail templates down below in the description and now let's go back to a tutorial did you like that move you know kind of cool i'm just a big brand video maker you know okay if you're here you want to create a thumbnail from xero on your
own well let's do this just open photoshop create new to create a new project you need to type in these settings and then just click on create when i record a video at the end of the recording process i'm making video for thumbnail so basically it look like this i just standing in front of the camera and making poses for my thumbnail for example let's choose this one just make a screenshot in any program you want so just drag and drop your thumbnail photo right here and then go to selection tool right here quick selection
tool and press on select subject it would select the subject which means me then you need to check out maybe there's places with the wrong selection so you need to just press and hold alt or option on mac scale up and just click right here to select new areas or maybe you made a mistake like that and you want to delete this area just press and hold alt or option on mac and delete like that just press and hold your left mouse button like that and delete the areas you want okay we are done then
go to this icon right here to make a mask okay cool to scale up or scale down the objects you need to press on ctrl t hold shift and move your mouse to scale up or scale down the object okay let's add some background you can find some backgrounds in google i use black interior background something like that just choose the one you like and download from google okay and let's move this background like that and place under this layer with my photo and let's blur our background you need to select this background then right
mouse click and click on convert to smart object okay cool and then go to filter right here then go to blur and gaussian blur right here and let's make radius 2 and just press ok and to make our photo pop a little bit more we need to make exposure of the background a little bit lower so to do that you need to go to this icon right here and find exposure right here press on it and right here you need to make exposure a little bit lower and right now we need to add titles or
text just pressing this text icon right here horizontal type tool press on it and just click and type in some text now it can be small like that you need to just press on ctrl t or comment t and scale it as we did before like that also you can just scale it by going right here and making this bigger like that you need to just press and hold left mouse button like that and move mouse to the right or left to make it smaller okay so let's make it smaller like that and let's change
the font of this so to change the phone you need to press on t select the text and go to this thing right here and find some font or also you can find some fonts right here at the properties just select the layer and find some font we are going to use b bass to copy the layer text press and hold option or alt on mac and move it with the mouse like that so we need like four lines let's change to how to make let's change the size ctrl t don't forget this one let's
change to youtube thumbnails like this and let's select this layer with a photo and background so it's not moving and this layer too it would be easier for me to do the text so just select the text and ctrl t to make it smaller like that let's make like these smaller to make our youtube thumbnails pop a little bit more and make it on the same line like that right now let's go to youtube text layer double click and here you need to find a color overlay just edit or also it could be right here
but if you don't have it just go right here and color overlay okay so let's go to this color overlay and right here you need to choose the color let's make it a yellow like this okay then go to bevel and and bowls i don't know how to pronounce it but let's go right here press on this one white we need to make it like red or kinda orange like that then this one we need to make it white like that we need to make opacity right here about something like this and like this and
change the angle on something like this also change the depth on 100 percent then go to drop shadow and edit to here you need to make blend mode normal and make color something like this make angle like 90 spread 0 size 1 and distance 5 and just press ok and right now let's copy the settings from this youtube layer to our thumbnails layer just press and hold alt or option on mac and move effects under thumbnails and just drop it and let's correct our white tags go to how to make double click go to bevel
and embos right here choose black and press ok and guys don't forget to change this gloss contour on this one right here then go to drop shadow and add some shadow like this and let's make it 4 and then just press ok and again copy this layer to this layer just press and hold options and just drag and drop right here also guys i forget to set you back if you want to make a different battle and ambos design you need to go here and add this one you can see this one it's kind of
clear just press ok and again change this one right here and change on this one so this effect looks cool okay let's place our text a little bit closer and to chill the text you just need to select all these layers like that and press on ctrl t or command t then press and hold ctrl or comment on mac and just use this one right here to tilt it like that then press enter then to make a cool lighting we need to go to brush tool right here and make your size on 700 smoothing 10.
here you need to make a layer like that and place this layer under all the layers with the text and our photo here you can change the color of the brush i'm going to use blue one like that okay and just click a few times then you need to go to this one right here and change do hard light right here okay cool and again then we're going to brush two let's make it like 400 let's make our hardness on 25 then go right here and create a new layer and let's make a light like
that and in my case i'm going to use my thumbnails for this thumbnail to showcase them and to make this cool glow effect you need to click on the object in my case it's thumbnail just double click then find this outer glow okay and let's change the light this one is green let's make it green like that okay here you need to change the blend mode on screen make the opacity like 50 and just press ok then again you need to copy this effect to other thumbnails too by pressing hold option or out and just
moving this effects to other thumbnails okay cool and let's change the color of these glow effects this one on red and this one on blue like that okay okay okay and right now the moment you've been waiting for how to make this glow effect around you so first thing you need to create a new layer like that then you need to find these tool it can be somewhere right here or in my case it's right here this tool is called paint bucket tool okay let's choose the black light like that and just click bow everything
is black then you need to create a new layer again and press and hold alt or option on mac and again between layers you would see this arrow you just need to click pow and now these layers connect it then you need to go to this icon and choose gradient map right here gradient map and again press and hold alt or option right here between the layers and when you see this arrow just click and all these layers are connected and right now we need to change the color of the gradient map just go here
and do the same things i do just create this one right here click right here double click and change the color to let's say blue this one should be darker blue and this one should be lighter blue so let's make blue and also change this white to blue two something like that okay and okay then you need to go to this layer this black layer and right here you need to change on screen and select this layer on this layer we are gonna paint our glow effect and right now we need to choose brush to
make a white light with a white light with paint glow effect so let's change the size to 25 pixels like that and right now let's move our photo under this layer with all these things like that our layer when we are gonna paint our glow is over this layer with the photo and right now just paint the glow over the all the edges [Music] to create a cool glow effect you need to mix brush tool smudge tool and eraser tool change sizes of the tools to make that cool unique style and right now i'm gonna
speed up the process so you can watch how you can make the glow epic you can also add this glow effect on your clothes like that [Music] on the face part you can make it a little bit smaller [Music] okay here's our glow effect and right now we need to make a cool color correction and add some effects to make it look super duper cool so to add some effects like particles you need to just google it and find some particles you want to see on your thumbnail then download it and add to your project
so i have some particles just drop it to your project okay let's place it somewhere under our photo like here and then go right here and change it to this screen like that and to change the color of these particles you need to go again to this icon and hue and saturation then press option or alt place your mouse somewhere right here and see this arrow and click between these layers right now these two layers are connected and just change the color of these particles like that let's change it to the blue so like that
you can change the color of the particles or other effects you have also don't forget to choose the screen for your effects and let's add some motion blur for this particles first you need to make a right click and go to convert to smart object then you need to go to the filter then you need to go to the blur and gaussian blur right here here you need to make a radius 2 press ok and you have a cool gaussian blur okay but right now i have my own particles right here that i already made
so just make it visible and so let's make the color correction so first of all we need to make a color correction for our photo just press on this photo then go to filter and find camera roll filter then go to detail and right here we need to make it sharpening like that and noise reduction like that then go to the basic you need to add some texture like that and clarity like that also add some vibrance and saturation and just press ok and to make a final color correction over all the layers to make
everything look super professional we need to choose the first layer right here and press on option ctrl shift and e or on mac option command shift and e to make a layer for final color correction and select this layer then make a right click and convert to smart object cool right now go to filter and camera roll filter let's add some texture and clarity then go to detail add some sharpening like that and noise reduction like that just play with it then go to fx add some rain to make it looks cool and cinematic also
you can go to color mixer right here and play with the colors like that maybe add some saturation to oranges like that change you for oranges like that so you need to play with these settings because you guys using different cameras you have different thumbnails so color correction should be different for every one of you and all this color correction should be different and let's go to basic and maybe add some contrast if you want so when you're done with the color correction just press ok and bow your super cool thumbnail is done again if
you don't want to spend your time doing these thumbnails you can have seven pre-med super duper thumbnail templates for photoshop that you can easily customize add your photo add your text change titles change font change colors and create unique super duper thumbnail for your youtube channel i'm waiting for you link down below down below why you still here link down below you're here why dude
Related Videos

25:42
How to Make a YouTube Banner (YouTube Chan...
Arti Creator
99,729 views

20:43
How to edit THUMBNAILS like Mr. Beast!🔥
Nour Art
27,818 views

15:48
I Edited The Same Video on Every FREE Soft...
finzar
428,414 views

16:32
5 THUMBNAIL EDITING HACKS IN CANVA | Glow ...
Modern Millie
25,386 views
![I Replaced ALL my ADOBE APPS with these [free or cheaper] Alternatives!](https://img.youtube.com/vi/5EfqHg49kMk/mqdefault.jpg)
10:18
I Replaced ALL my ADOBE APPS with these [f...
Joris Hermans
1,041,303 views

10:43
How to Make Clickable YouTube Thumbnails
n8wealth
269,863 views

24:21
How to Make VIRAL THUMBNAILS like celebrit...
Nour Art
305,557 views
11:30
How to Make a Thumbnail for YouTube Videos...
Primal Video
4,071,725 views

30:07
how to make a killer thumbnail (for the 20...
Aprilynne Alter
377,304 views

20:28
I built the DREAM Smart Living Room!
Mrwhosetheboss
2,445,982 views

17:22
Editing YOUR Photos in Photoshop! | S1E5
Benny Productions
2,104,620 views

18:13
How to Make a YouTube Thumbnail with Canva
Pod Sound School
91,664 views
8:20
MAKE YOUR VIDEOS LOOK PRO!
Miko Tiotangco
3,723,926 views

6:38
The Quickest YouTube Thumbnail Tutorial (N...
Pat Flynn
65,739 views
6:07
Pro Editor Uses CAPCUT For A Day...
Nicolas Grant
1,980,835 views

19:38
i made the same design in programs never m...
elliotisacoolguy
1,212,528 views
16:43
How to create YouTube Thumbnails with Canva
Canva
94,737 views

35:12
How to Edit A YouTube Video in DaVinci Res...
Think Media
157,948 views

7:39
How to Create a Thumbnail with Glow Effect...
Editing Master
22,447 views

12:30
10 INSANE Capcut Editing Tricks 🤯
Trevor Jones
892,723 views