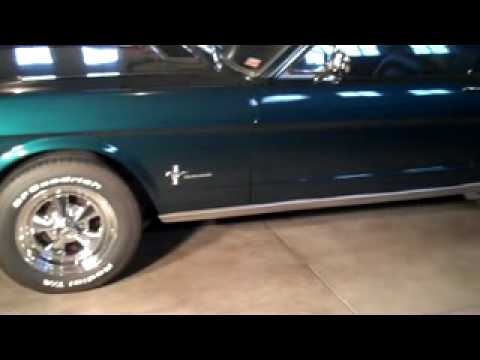
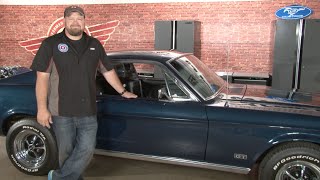
all right this little video I'm doing some rocker panel moldings on my own this is my 66 coupe and originally these had rocker panel moldings on them and when I purchase this car they had been taken off and the original holes filled and repainted so I decided to take this project on myself didn't find a whole lot on the internet they kind of helped me so I thought I'd pass this along to help other folks that are maybe looking at putting these rocker panels on but a little something I highly recommend is pick up a
piece of poster board that's all that is is poster board that I cut up into about five six inch pieces to give yourself kind of a running line or a template to go off of because these cars it's kind of hard to define an exact measuring point in line it up I even tried using a laser level which is a little difficult but anyway I went ahead and made this template up this is the molding here you'll see I've laid the clips out you'll have these two larger clips that will screw in the back fender
well in the front fender well and then you have these small clips here that are going to be riveted in I think the spacing is about 13 inches apart on each of them these clips here are going to go on the front fender well kind of up like this and they'll go in to catch the front of that molding but you know what I've done is I've kind of went along and marked my holes where I'm going to start drilling for these retainer Clips here which are going to be pop riveted in so you're going
to need tool wise a pop rivet gun these kits come with the rivets and everything you need to mount them certainly a drill with a couple of drill bits in I reckon rubber mallet the kind of tap the molding as you get it on there so anyway I'm going to get started here and you'll also need a tape measure and what you're going to want to do is measure off the lip here below the door and the way I'm mounting mine is I think I went down 9/16 of an inch from the top here where
this first bracket is going to sit like this on the mold on the side of the car here on that rocker panel and I'm installing mine just a little bit below that door lip you certainly have a little bit of room to play there a quarter to a half inch down you just want to really make sure that's not right up against that door jamb because the door may have here's one side that I installed already so you can see how that set real nice right along there and again if you open that door up
you'll kind of see you know how that's riding maybe a quarter of an eighth of an inch off that that rocker panel that trim or break right there is it goes across so it's a nice clean clean fit but it's not a hard job you just want to take your time really get things lined up and again I think that post that poster board template works very well to just get yourself kind of a running straight line on it so hope this helps again you can see how I have this template lined up and you
know what I've done is gone again from the lip here 9/16 of an inch down where that top bracket is going to go just like this again that poster board really creates a nice straight template for me probably not going to be 100% accurate but I think it'll certainly certainly work for ya I have that drill position this will also help I think from causing that drill bit to ride along and scuff your paint up real bad it gets kind of a good good start into that one thing I found I'm pretty easy up towards
the front here because you're about 13 inches off the corner of that wheel well to this first side bracket you're going to have these other front brackets that have to go on here and you can see there's a large screw you're going to want to bring those back about an inch off the corner so to get a good line if you just stick that rivet in that one top hole there and you see the center hole is going to line up pretty much right with the center screw there so you can kind of come in
an inch from the corner maybe an inch and a half and then this kind of mark off that line use that again that template to measure down and you should be in good show Kay I've got my mark there you can see that's about an inch an inch in from the corner of the wheel well here to hear about actually I want about an inch and a quarter in and then from here down it ended up being an inch and a half which was basically right to the center of this whole bracket here that's about
where that that screw is going to line up so that should give us a good good clean line there to go off of it again I'm just using that time that rivet is a temporary hold right there to get my measurement and on the back did the exact same thing came an inch in off this inch and a quarter in I'm sorry off of the wheel well over and one and a half inches down for this bracket to go on like so you can see how that kind of lines up that should be about about
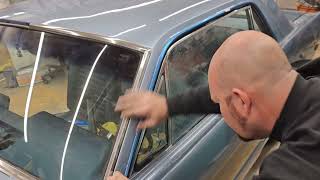
perfect this is a little tool it's a bull's eye laser level that works pretty good you can kind of see how mark and just double-checking those lines there and they look like they line up pretty good so that's another little little trick you can use a laser tool to kind of go off the center of that bracket that large hole to where you're going to be drilling that hole an inch and a corner off that back well now I'd recommend trying to drill that bottom hole for the rivet at the same time and what I've
kind of found easy to do while I've got this template up here so scratch the paint is this maybe take a level and use that level to get your get it set up here correctly get your level to use you know make sure that you've got that that leveled out appropriately and then you can go ahead and drill that second hole while you've got that cardboard template up okay now that I've taken the template off and you can see how I've got all the holes cleaned up drilled all the way down nice and straight so
we're going to start putting our mounting right now these side brackets of course come with a rivet that you're going to be putting in and also a little washer it wasn't any instructions but I assume this little rubber washer is going to go on the inside like that so that way it's up against the metal hole to allow or to not allow any water to get in so you'll put the two rivets on there with the little washer and then it will go right up against the frame like that and you'll pop rivet that in
top and bottom pretty simple okay I've got all the clips installed now you can see they're all riveted in in the front and back one is bolted in fronts not too bad if you've got big tires on the backs a little bit of a challenge so you definitely want to deep well socket to get up in there and get on it and I would recommend leaving those back ones just a little bit loose so when you slide that trim on you can go back and kind of tighten it up it's a little something my family's
a little easier on that other side just leave those two front ones kind of finger tight and then go back and tighten them up after you get the molding on it so we're ready to install them all okay here's the molding and you're going to notice on the front and back there's a little notch to grooved area and that's actually going to slide up around this front clip so you're going to have to kind of start on one end or the other I wreck I started from the back and kind of lined it up with
that little hole there little groove get it on and then kind of tap it with a rubber mallet to slide it up front and then the rest of the molding will just clip or snap over these clips here which will just tap with a rubber mallet gently to knock those in place well there's the finished product at the rocker panel moldings installed I took a couple hours you know I'm not a I'm not a mechanic I'm just kind of a goof around on the weekend guy but I just wanted to show you it can be
done if I could do it trust me anybody can do it I also I was at it added that hood lip molding which had been taken off so and helped us get it back to a little bit more like a right end here's a driver side installed so everything's nice and snug down except to be real careful with those being more of an aluminum product those lips inside lips kind of Bend a little bit so just really make sure you kind of take the time get everything lined up but that's it I hope this helps
those other weekend warriors out that are looking at fixing they're staying up