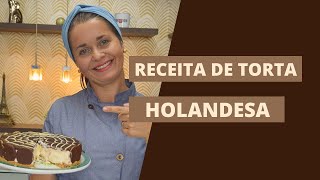
Torta Holandesa - (sem gelatina) | Receita Sandra Dias
2.9M views2249 WordsCopy TextShare
Sandra Dias - Cake Designer
Torta Holandesa - (sem gelatina) | Receita Sandra Dias
Aprenda a fazer uma deliciosa Torta Holandes...
Video Transcript:
[Music] Did you know that the Dutch Pie actually wasn't created in the Netherlands? That's right! It was actually created here in Brazil in the early 90s.
It has nothing to do with the Netherlands! [Music] Hello! I’m Sandra Dias, professional cake designer since 2001, and welcome to my studio!
This is where I make my decorated cakes, my sugar flowers, my macarons, but this is also where I teach practical classes to people who also want to become a cake designer. The purpose of this channel is to help you improve your cake decorating skills, either by sharing with you cake decorating techniques or delicious recipes that you’ll be able to add to your menu, offer to your customer and increase your income at the end of the month. I got to know the Dutch Pie around 1992, 1993.
Back then, it was still offered as a dessert option in restaurants. It still wasn't an option on a confectionery store menu, for example. One day, I took my parents to have lunch at a restaurant, and I had tried this Dutch Pie when I had been there before.
However, at that time with my parents, my mother tried a slice of this pie. Weeks later, at home, she made the exact same pie, only having tried it once, by its flavor. Today I'm going to teach you this recipe created by my mother nearly 30 years ago, as well as give my personal touch to it!
I'm going to start the preparing by the pie crust. I'm going to use 150 grams of Marie biscuits. It could also be Maizena biscuits instead.
It's easier to crush them in the blender. Put them in the blender and crush them until they turn into crumbs. Okay.
Look. It has turned into very thin crumbs, that's how it's supposed to be. Having the biscuits perfectly well crushed, I'm going to melt 80 grams of butter and add it to the crumbs.
Okay. Having melted the butter, now I'm going to add it to the crumbs and mix it really well. Here you can use any kind of biscuits of your preference, actually.
It could be Maizena biscuits. There's even Maizena chocolate biscuits available. If that's your preference, use them, there's no problem at all!
Okay. When it turns into a kind of wet crumbs, that means it's ready. Now it's time to transfer it to the baking pan.
I have here a removable bottom baking pan, because this will make it easier to unmold this pie. Transfer these crumbs to the baking pan now. Then settle down these crumbs in the bottom of the baking pan.
Spread it evenly and try to keep the thickness as even as possible. Press the crumbs very well, like this. Okay.
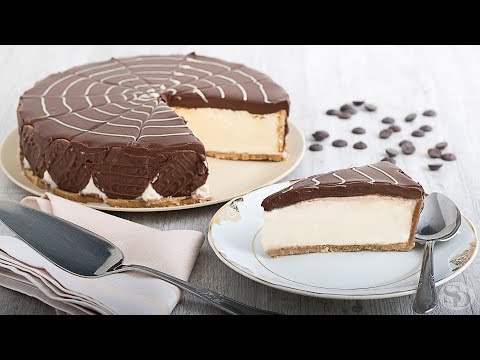
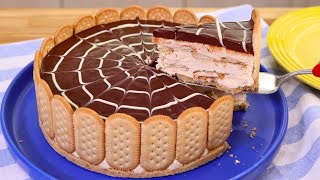
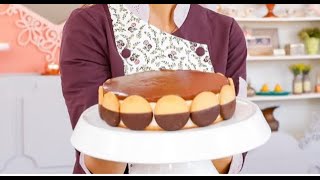
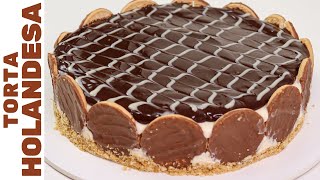
One of the characteristics of this pie is that it's decorated with this type of biscuit. It's called Calipso biscuit in Brazil. It's a kind of digestive biscuit, which is chocolate coated in one side.
This chocolate coated side is going to be outwards, positioned on the edges of the baking pan. Look. Place them all around the pie crust.
Pressure them on the pie crust to make sure they remain in that position. Slightly pressure them. This will guarantee that they'll be in position and won't fall off or lose themselves in the filling.
Therefore, this pie crust usually isn't baked. It's served just like this! This 23-centimeter in diameter baking pan suited exactly 15 units of Calipso biscuits.
Now you're going to put this pie crust in the freezer while you prepare the pie filling. The original recipe takes 200 grams of butter. However, my mother, back then, has chosen to add white chocolate instead.
I have here 150 grams of white chocolate, which I'm going to melt, first of all. So there will be some time to slightly cool down this chocolate before it's added to the cream itself. If you prefer making the original recipe, instead of 150 grams of white chocolate, add 200 grams of butter.
All the other ingredients and their measurements will remain the same, okay? Okay. Chocolate has been melted.
This is high-quality couverture chocolate, okay? Definitely not compound chocolate, made of palm kernel oil. If you don't have access to pure chocolate callets, you can chop a chocolate bar very well and melt it carefully.
Now I'm going to mix 100 grams of unsalted butter. In confectionery recipes, butter must always be unsalted. Along with 30 grams of sugar.
You're going to mix them together until they turn into a light and fluffy cream. Soft butter, okay? It can't be cold, or it'd be difficult to mix.
Now you're going to add 400 grams of condensed milk, meaning one can of condensed milk. Mix it well to incorporate it with the butter and sugar. I also have here vanilla extract.
If you don't have vanilla extract, you can use vanilla essence, However, I'm going to add one tablespoon of extract, meanwhile the vanilla essence, which is artificial, you have to add a much smaller amount, that would be a teaspoon, okay? Lastly, I'm going to incorporate the white chocolate. The mixer is no longer necessary.
Incorporating means mixing it delicately and carefully, neither fast nor strongly. Add the chocolate now. Incorporate it carefully.
Don't do this process in the mixer, because it may curdle the chocolate. Okay. This first part of the filling is ready!
Remember that this cream absolutely can't be made with margarine! Margarine is made of several vegetable fats, different from butter, which is made of natural milk fat. Margarine is definitely not a substitute and won't be appropriate for this recipe at all!
Now you're going to whip in the mixer 300 grams of whipping cream which is 35% fat content. It must be this fat content because I'm actually turning it into whipped cream. If its percentage of fat is less than 35%, there will be no whipped cream at all!
If you don't have access to this specific product, I'll leave a link in the information card and in the description box below, because I've already taught here on the channel how to make homemade whipping cream. This whipping cream needs to be cold, not frozen, just cold, in order to be mixed properly. Since we already have the whole amount of sugar in the cream, I'm not going to add any sugar to the whipping cream, because it's really not necessary.
You have to be very careful when dealing with whipping cream. It can't be neither overmixed nor mixed at high speed because it may curdle. And if it curdles, it becomes butter.
It has begun gaining consistency. Take a look. I'm going to make it firm, so I have to be really careful not to overmix it.
Okay. You know the whipped cream is ready when there are some waves on its surface, just like these. Now it's ready!
Now it's time to carefully incorporate the whipped cream into this chocolate cream. Do it slowly. Look.
Add one part of whipped cream. Fold it delicately, from the bottom upwards, to incorporate it. So it's neither mixing nor whisking it.
Add some more whipped cream now. Adding it in three parts are enough. The last part.
Now incorporate it until it gets perfectly homogeneous. The baking pan with the pie crust and biscuits has been in the freezer until now. Don't worry!
Even though this crust isn't baked, it gets crunchy anyway! Regardless of not having been baked! Pour the cream right here.
Spread it evenly. Okay. Now you need to take it to the fridge for three to four hours or until it gets firm.
If you want to speed up this process, you can take it to the fridge for about an hour or until it gets firm as well. Remember that Dutch Pie is actually a cold dessert! If you’re not subscribed to the channel yet, but would like to continue following my tips and recipes, take the opportunity to subscribe!
Click on the red “Subscribe” button below. Click on the bell also, because it’ll activate notifications and every time a new video is available on the channel, YouTube will let you know about it and you won’t miss it out! Check which are the perks in becoming a subscriber member of the channel.
Next to the red button, there’s the blue button written “Join” and by clicking on it you’ll see all the membership tiers available. And by clicking on top of each tier you’ll see which are the perks that each of them offers. Remember that all these exclusive perks only subscriber members will have access.
If you’re not following me on Instagram yet, it’s worth taking a look over there! You’ll see photos of my work, my students’ work, results of practical classes. Sometimes, I also post an easier and simple recipe that doesn’t need many explanations, but a delicious recipe!
On my Stories normally I share things from my daily life. If I’m teaching I show step by step that the student is performing. When it's possible I also go live and chat with whoever is available and it’s much more fun!
If you use a recipe that’s mine and tag me @sandradiascakedesigner, Instagram will let me know about it, I’m going to see your post, I’ll like it and write a comment for you to know that I’ve been there! If you’re enjoying this recipe and the tips that I’m giving you, like this video as well! I’ll be very glad to know that you’ve enjoyed it!
Now to make a ganache, I have here 180 grams of bittersweet chocolate. Again, this is high-quality couverture chocolate, okay? Absolutely not compound chocolate made of palm kernel oil.
And 180 grams of 35% fat content whipping cream, the same one that I've added to the cream in the beginning. One of the easiest ways to make this ganache is warming this whipping cream really well, and pouring it on the chocolate, because its own warmth will melt the chocolate safely, without the risk of burning it. Now having the whipping cream really warm, pour it on the chocolate.
Slightly shake it like this. Then leave it alone for about 30 seconds. When you mix it, the chocolate will melt easily.
Okay. Now mix it and the chocolate will start melting. If you realize that it's taking too long to melt, return it to the microwave for 20 seconds, it may be enough.
Keep stirring it very well until you realize it's homogeneous. Look. And the chocolate has completely melted, okay?
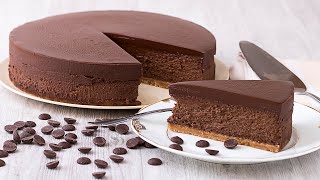
The pie has stayed in the freezer for about one and a half hours. We can see that it's already firm. Now it's time to pour the ganache on it.
Remember to prepare the ganache only when the pie is already firm. Pour it here. Spread it well.
Now I'm going to teach you how to decorate it with white chocolate on top, but this is optional. If you don't want to do it, just return it to the fridge, wait for it to get firm and serve it afterwards. Now to decorate the pie with white chocolate, I have here a cone of parchment paper, specific for this purpose.
I'm going to pour some melted white chocolate in it, just a tiny bit, it doesn't need to be a lot. I'm not even going to pour it all. Close it well.
Then cut the tip at the bottom. It's okay. I'm going to make circles on the pie surface.
Be patient. Don't rush. There's no problem if it gets crooked.
Okay. Having made the circles, now you're going to divide them in four parts using a stick like this. Do it from the edge towards the center.
Then do it from the center towards the edge. Now you're going to alternate it, moving the stick downwards then upwards. Upwards.
The Dutch Pie is decorated! Now this pie needs to return to the fridge for an hour, at least, until this ganache gets firm, then you can unmold the pie and serve it! Okay.
Now it's time to unmold the Dutch Pie and make you all jealous! It has stayed over an hour in the fridge, so the ganache has gotten firm already. Since this is a removable bottom baking pan, it's easy to unmold it.
Remember that if you intend to make this pie for selling, place a sheet of parchment paper in the bottom of the baking pan, before the crust, so you'll easily remove the bottom and unmold it afterwards. Here we go! And there it is!
Look how delicious! Now it's time to try it, right? Wow!
Guys, look at this! It's very very very creamy! Now let me check its flavor!
Mmm! It's spectacular! Look.
For those who love chocolate, the ganache is definitely remarkable! The cream is very soft, it's not too sweet. And the biscuits remain crunchy.
This Dutch Pie is wonderful! Its expiration date is about three days, kept refrigerated. If you have any questions concerning the recipe itself or its instructions, you can use the comments section below!
Leave your questions and, as soon and quickly as I possibly can, I will personally reply to each one of them. I hope you’ve all enjoyed it! I wish everyone has a sweet week!
Take care of yourselves! And until next time! Thanks for watching!
Related Videos
19:17
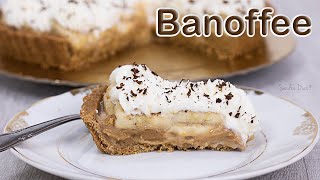
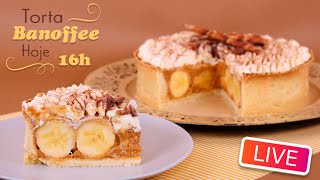
Banoffee Pie: Banana and Dulce de Leche Pi...
Sandra Dias - Cake Designer
475,530 views
8:06
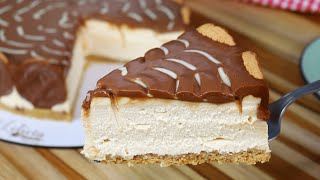
TORTA HOLANDESA SEM GELATINA E SEM CHANTIL...
Letícia Sweet Cake
500,329 views

16:10
Key Lime Pie Cookies | Easy Special Florid...
Momma Friendly
5 views
25:38
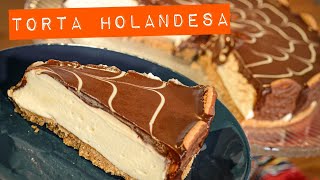
TORTA HOLANDESA COM CHOCOLATE BRANCO (SEM ...
Chef Raquel Novais
50,083 views
25:49
New York Cheesecake w/ Wild Fruits Sauce |...
Sandra Dias - Cake Designer
712,707 views
22:52
The Authentic Italian Tiramisu | Sandra Di...
Sandra Dias - Cake Designer
1,412,572 views
9:58
Sem GELATINA - Sem OVOS - TORTA HOLANDESA ...
Receitas de Pai
776,342 views
24:37
Traditional Strawberry Pie With Pastry Cre...
Sandra Dias - Cake Designer
322,443 views
15:49
RECEITA DE TORTA HOLANDESA SEM GELATINA | ...
Giselli Oliveira - Bolos Memoráveis
279,038 views
8:48
TORTA ALEMÃ SIMPLES E FÁCIL DE FAZER SEM C...
Letícia Sweet Cake
185,765 views
28:18
Lemon Pie with Italian Meringue | Sandra D...
Sandra Dias - Cake Designer
329,834 views
8:29
TORTA HOLANDESA NA TRAVESSA FÁCIL E SEM GE...
Letícia Sweet Cake
1,360,512 views
11:26
TORTA HOLANDESA
Beca Milano
274,655 views
10:56
UMA DAS SOBREMESAS MAIS PEDIDA NO NATAL - ...
Delícias da Thata
70,598 views
23:39
Cheesecake de Chocolate | Super cremoso e ...
Sandra Dias - Cake Designer
135,931 views

52:46
GARANTA SUA RENDA NESSE FIM DE ANO - CURS...
Bruna e você na confeitaria
261,782 views
27:12
CEIA DE NATAL COMPLETA E DELICIOSA / NATAL...
Culinária Da net
196,367 views
11:05
TORTA HOLANDESA - SEM OVOS, SEM CHANTILLY ...
Anelyse Martins
76,152 views
53:16
🔴 Live - Torta Banoffee - Chef Silvia Nic...
Silvia Nicolau
1,149,141 views
22:39
BOLO DE PRESTIGIO TRUFADO SUPER FÁCIL | PE...
Gabriel Freitas
4,703,098 views