D5 Render 2.5 Magic: Crafting Animations Like Never Before
106.67k views2824 WordsCopy TextShare
Show It Better
Get D5 Render Pro for free for 8 days and use this link to get a 5% discount!: https://rb.gy/whmc3
...
Video Transcript:
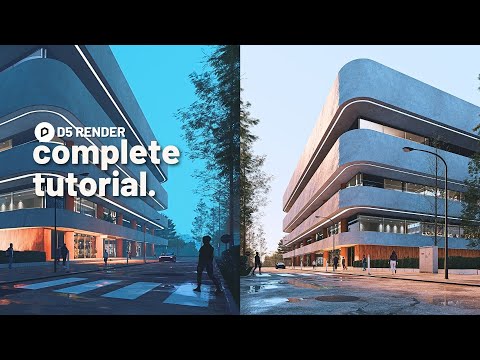
look at this image I created just a few days ago with D5 render version 2.5 if you look up close you can see many interesting details like real-time caustics that are projected onto this wall interior Parallax models that are behind the glass panels to give the impression of interior models and environment presets that I can save and change instantly but how did I create this and most importantly why was it so easy to create now let's start with the project model this project model was done in SketchUp and I used D5 render in the design
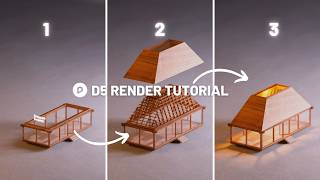
process with the new sync feature that comes integrated into SketchUp to use it just install it from the website you'll have the option to open D5 and depending on your screen setup you can divide your screen in half or use a different setup in my case I use two monitors so for this design process I like to have SketchUp open on one Monitor and D5 on the other and as I'm creating the model I can sync my camera send over my current season to D5 and also add lights with the light toolbar this is how
my final model looks and this is how it looks in D5 as you can see I've applied basic materials in SketchUp but the furniture effects and all the assets are going to be added within D5 I'll now start adding materials within D5 render for this I usually like to flip my second Monitor and have my asset window open all the time here we need several important materials for the concrete of the facade I used a texture that had a nice displacement it added a tactile feeling to the render next for The Columns of the wood
I used an orange concrete and an orangey wood that could give warmth to the color palette finally for the asphalt texture I used a free Texture from texture Haven and for the grass I just used one of the default grass materials in D5 and applied the grass effect to it so one of the productivity tips when adding your assets to your render is knowing where you're going to create your camera and and only adding assets that will affect that specific you you don't want to waste precious RAM and graphic card space with something that will
not appear in the render this is why with the new Advanced camera to a D5 render I can do this in a breeze first I make sure that the camera widget is activated add a new camera and now you have a preview window towards the bottom of your screen you can pin it and make changes that only affect this camera view with the Advanced Camera tool you can add multiple cameras change the aspect ratio of each one modify its parameters and even save it as a scene entirely now with this camera set I'll start adding
the trees to my scene inside of D5 I need high quality trees that will be closest to the camera and also low poly trees that can show up on the reflection of my image and also give me some nice soft Shadows I'll add these pine trees towards the front of the camera and I can scale them up or down by hitting the c key and dragging my mouse to the side I'll search for low poly tree reason my asset library and place them towards the back I'll also go to the Landscapes category and search for
background planes and place this nice nice tree line background towards the back of my image now as you can see in the image you have the feeling of seeing a lot of trees but in reality it's just a couple of trees strategically placed now for the rest of the assets I'll follow the same method of placing them as long as they benefit the camera view so with this in mind I placed context buildings A couple of people to give some scales of the image a car because you know this metallic paint gives it a beautiful
beautiful touch and some light posts to give some repetition and urban feel and now some decals like some Road imperfections some crosswalk paint and more Road batches because let's be honest our streets have Road batches if you ever feel like modifying these in the future I recommend you group them by category so I'll have all my my decals in one layer and in one group and I also have my Urban elements and people in different layers this is the before and the after placing these assets as you can see it gives life to our image
and we can stay with a lightweight 3D model in SketchUp so to add vegetation in a realistic way inside of D5 I'll select the path icon on the top of my screen in D5 to create a path of low scale vegetation now I'll draw the path onto my model select the assets I want to add to that path and then fine tune the parameters like the number size offset and more now since I know I'll probably use this path in other parts of my model and honestly in different projects of the future with D5 I
can save this path as a custom preset all I have to do is select the path click on create preset name your preset and add it to your D5 studio now I can apply it to New models or other parts of my existing project in a fast way now have you ever wondered how some arcvice artists can do these beautiful large Urban Seas with many buildings around and it seems like there are lights everywhere models everywhere and even inside each window well with D5 render you can do this with interior Parallax assets and it's not
as complicated as it sounds all you have to do is go to your asset Window search for the interior Parallax category and select the one that suits your buildings the most in my case I'll use some supermarket and commercial window displays for the first floor I just selected place it behind my window panels and that's basically it I can do the same for the floors above by adding indoor office scenes and as soon as I have these groups I can change the parameters like the light the intensity the position the temperature and now it seems
like I've spent thousands and thousands of hours modeling each interior scene with reality I've just spent a few minutes now for this project I want to add some lights onto each floors balconies to emphasize the building's shapes and form with D5 render there are many ways of doing this I could add a rectangle light and select the show light shape option now I can modify the size of the light and adjust the position as soon as I have it ready I can copy this light by holding shift and dragging it up or down a second
way of doing this is by going to your SketchUp model drawing and extruding the space where the light will be and applying a new material to it now you can go back onto D5 adjust the material and turn on the emissive option here you can adjust the intensity and color of the light and that's basically it so what if you have some water in your project and you need some realistic caustic Reflections well with T5 you just have to first go to your water material which in my case is this one right here and turn
on the caustics option now I'll add a rectangle light adjust the direction and place it beneath my water surface finally I'll also turn on the caustics option inside the parameters of my light I can adjust the softness in 10 city right here now projected onto my wood wall I have some beautiful water Reflections that I can turn on or off at any time now before we start adding the environment effects and rendering our images I want to remind you that you can download a free trial of D5 render Pro for up to eight days with
absolutely no purchase required with the link down below also if you decide you want to purchase D5 Pro click on the link below to redeem a special discount if you're new to D5 and of course thanks to D5 for supporting the channel and sponsoring this video I truly enjoy testing out softwares and showing you my perspective and the team id5 helps us with this Mission so if you want to see more default tutorials let me know in the comments so when we're done with adding assets lights and nice little details it's time to go into
our environment and effects panel to add the magic sauce to our final image to add the secret sauce to your renders inside of D5 you can go into your environment Tab and first select if you want to use an hdri or the Geo and Skylight in this case I'll use the hdri and select the Pure White hdri I'll adjust the light individually by increasing the Skylight and decreasing the background and of course I'll rotate the light in a way that emphasizes my building and creates a dramatic hero shot if you have a building that has
two main facades visible I recommend lighting the one furthest from the camera and having the second facade darker this makes our eyes travel to the middle ground of the image and creates a contrasting experience in the composition and story of the image but adding an hdri is not the only thing you have to do to make your building pop out inside of Z5 what you can also do is turn on the sunlight in your environment tab I adjusted the intensity to a level of four and increase the sun disc radius for some nice soft Shadows
now here is where part of the magic lies I want to First make sure the color temperature of my hdri is very near the blue areas meaning we want a colder light now inside the sun parameters you want to drag your color temperature to the warmest part now this way there's a nice blue and orange contrast in your colors this will make your building pop out and feel warmer than the rest of the seam so one of the ways of adding depth to your image is by adding fog now I don't mean this exaggerated type
of fog that covers up everything I'm talking about subtle fog that separates your building from the background for this you can go to your environment tab turn on the fog option and adjust the parameters I left my fog at a white color high intensity and a low light I also told D5 that the starting distance of this fog is around 65 meters and also adjusted the fall off now although I use a different fog configuration for my knight renders I find this one for my Day images is not that intrusive and creates the effect that
I want another weather effect that can change the mood of your images is the precipitation effect here I'm just using a subtle rain puddle that gives me some general reflection on the floor and duplicates some Skylight and emphasizes the people crossing the street if you wanted you could add more rain or change it completely to snow with this feature just take in mind that as soon as you change this you would have to change your vegetation and your people for a more realistic look so some leafless trees people in bigger coats and jackets and no
leaves on the ground probably now the last thing you will always want to do in an image is add the effects like let's color correction Styles Etc so let's take a look at how I did this for this image first for the Lut I used a lot from the Sony xenophore collection which I downloaded from motion array which nonetheless you can find some installed Luts inside of D5 render or search for free Luts on Google and use the one you like the most I modified the intensity and went on to the post processing tab here
I lowered the exposure the contrast and increased the shadow values I also made the overall white balance my much colder and increase the tint finally you can color grade and add some Styles as well but I left my image just like this now of course sometimes you want to optimize your workflow and work much faster and not have to worry about setting up the environment or effects tab in D5 render that is where you want to use D5 studio all you have to do is go to the top left corner of your screen and click
on this colored ball this will open the studio it provides a preset parameters for environment path and brush settings that can be easily reused to create a diverse atmosphere additionally D5 render offers a selection of pre-made modules that offer a wide range of ready-to-use assets so here you can see some really cool environment and effects presets that if I want to apply it I just have to double click on it and that's it after you have your effects environment camera angles and parameters and assets ready you want to go to the image tab inside of
D5 render to render your image here you can adjust the field of view and focal length in case you haven't already done on it in your camera parameters also select the aspect ratio size of the image and format and render channels since I always like to do some post-production later I'll export the material ID channel and select the 4K output now click on render depending on your model this can be really quick or take a few minutes now this is how my scene turned out so if you're anything like me you like to render your
project from different angles that is why it's important to create different shots of your building these are three shots you must include in your animation first the wide angle Dolly shot where you show the whole product from its best angle either moving forwards or away from the building second a close-up still shot that focuses on an important detail of the building and moving elements inside the frame like in this case the cars and the trees moving with the wind and third a context shot that shows a bit of the context of the building in an
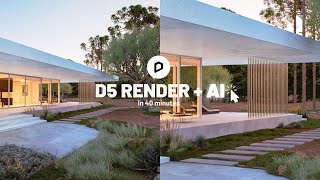
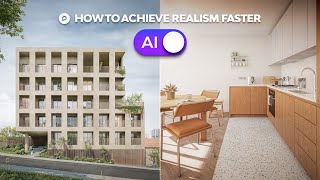
important detail of the building and in this case the camera is moving upwards with D5 render you can create these three shots and render them very fast make sure your movements are not that fast and you show your building from different angles now with all these different tools on AI I could not avoid talking about D5 renders own AI tool D5 high this tool is a specialized AI website that can give you architectural ideas or refine your existing ideas in a matter of minutes so let me show you how it would work in this case
so first I would go to the website and refine the concept scenario which in this case is architecture and facade styling next you can go to image reference and upload your reference image which in this case is this one right here I can also go back to the text creation box and try to describe my design as much as possible finally the advanced option you can control the number of outputs size creativity levels and more as soon as we click on generate D5 will spend some time creating the outputs and here are the results as
you guys can see they're very close to our base render and gives does different ideas on light composition and general mood now I like creating this project so much that I created three different environment presets and shot the building from different angles in at different times the results were truly amazing and left me with so many more ideas with which I could use D5 render now if you want to download D5 render there will be a link down below with all the important information remember we have a free trial to use also if you want
to see more D5 videos you can click on this playlist right here I'll see you guys in the next video bye thank you
Related Videos
36:48
D5 Render Full Beginner Tutorial!
Show It Better
278,856 views
17:40
D5 Render’s AI Tools Explained: A Game-Cha...
Upstairs
54,128 views
16:01
How to Create a Digital Maquette with D5 R...
Show It Better
48,290 views

3:22:50
Forest Cafe Jazz Music | Morning Tranquill...
Tranquill Jazz Melody
8,160,711 views

16:36
From Zero to Hero: Interior Visualization ...
Educk
13,116 views

13:15
D5 vs Twinmotion vs Lumion, a Render Battle!
Upstairs
146,156 views

15:28
D5 Render: 12 Tips
ViaRender
989 views
34:02
This is the most IMPORTANT Update to D5 (s...
Gediminas Kirdeikis
15,267 views
14:37
10 D5 Render Tips every Architect must know!
Upstairs
147,387 views
9:50
Dynamic Sky vs. HDRI in D5 Render: Which S...
Andy Christoforou - ArchViz Academy
5,359 views
10:01
10 D5 Render Tips & Tricks You Never Knew ...
Andy Christoforou - ArchViz Academy
26,589 views
30:02
D5 Render 1.9.0 A Quick Beginners Guide to...
Show It Better
205,012 views
34:07
Enscape for beginners / creating architect...
Show It Better
463,651 views
1:46:48
D5 Render Full Exterior Course 2.0/ Beginn...
Architect Piperr
29,920 views
17:12
D5 Render 2.6 Overview Tutorial | Ground-b...
D5 Render
105,842 views
53:20
D5 Render: The Beginner's Guide to Stunnin...
ArchAdemia
46,470 views
18:36
I created a program diagram in two differe...
Show It Better
85,733 views
1:51:28
D5 Render Full Exterior Course 3.0/ Classi...
Architect Piperr
8,859 views
54:23
D5 Render Full Tutorial Course - High-Rise...
Architect Piperr
6,884 views
3:27:49
D5 Render - Full Beginner Course
Gediminas Kirdeikis
604,543 views