This AI Social Media System Creates Content DAILY! (100% Automated)
26.26k views19514 WordsCopy TextShare

AI Foundations
👉🏼Ai Automations Community: https://www.skool.com/ai-foundations/about
-----------------
This AI...
Video Transcript:
in this video I'm going to show you how to build this 100% automated social media system in make.com that can generate posts for you on autopilot now this doesn't only create the post but it has the ability to distribute the post as well in the second automation that I'm going to be showing you and this works all from uploading a single URL to a notion database now I'm just going to show you how this works because this is super powerful and it only takes about 1 minute to generate four different post post so that would
equal up to 240 social media posts per hour and I'm actually posting this stuff on my social media guys I'm not just saying this is how to do it and I don't even test it or do it I'm actually refining this thing as I go and posting things on my Twitter on my Facebook on my Instagram let's say I'm reading this article on AI is replacing human tasks faster than you think and I want to create social media posts for my platforms around this specific topic maybe I really enjoyed this but all I have to
do for inspiration is grab the URL and then head over to my notion database and from my notion database I can hit start post and then paste in my article URL from there I can either add a bunch more ideas and get a database full of URLs throughout my day that I'm reading and finding but when I'm ready I can schedule out this automation I can either schedule it or I can have it run on demand as soon as something hits the database it really doesn't matter you have to get creative when you're setting this
up we we can set it up on a schedule so that we can set it up to run every day at a certain time every week every month on demand so right when things hit the database we can set this up in so many different ways the creativity lies in your hands and it just really is about what you want to do so for the sake of a tutorial I'm just going to hit run once so you can watch this in action what it's going to do is grab those notion database items that we just
pasted in here or that we gathered throughout our day then it's going to create a summary of those URL contents with perplexity AI you can see when we go into the choices here and we go to the message and the content it has a beautiful summary of everything that this article talks about it condenses it down and it makes it in its own language which is just awesome and from there what it does is these GPT 40 posting agents are going to take that summary and create specialized social media posts for each platform and not
only that but for Instagram Facebook and Linkedin we're generating an image to go with it and the beautiful thing about this is it's sending it all back to our notion database so we have a nice organized workspace when it comes to our social media and I'm going to show you how to build this every step of the way but now when we head over to the ready to post tab as you can see make.com automatically imported this back into our notion for review and now we have a post button that we can then click and
actually upload these and distribute them to our social media platforms after we review them if we even want to review them so I could go to the X poost for example I can see a nice view of it right here and I can edit my post content right here before I send it off it's doing this in a matter of seconds if I wasn't explaining it I actually timed this whole process and it takes about 2 minutes from uploading a URL to actually Post in your content but if I go to the Instagram one for
example we even have an image URL down here so I'm just going to copy that image URL and if I want to post this image I can quickly save this image right here this is a unique image generated based on the post that our agents created so it's taking that post created and creating a unique image for that post and this just turned out amazing I would not mind uploading this to Instagram look at this it's adding emojis it's engaging it it's even adding hashtags for you based on the article it has called the actions
it asks things like what are you doing to adapt to the aid driven world and after this after you've reviewed all your posts and you're ready to go you can just hit post and this is going to trigger your second automation once the status is on posting you now have the ability to run through this automation which I'm also going to show you I'll just hit run once to show you how it works but it's basically grabbing all those database items that have a status of posting and it's scheduling them out using buffer our social
media platform of choice this is just the best app that I found to do this like actually schedule out social media posts as you can see those posts that we've created from our automation are in here and we can actually just share now and just like that within 2 minutes you have four different posts or five different posts whatever you so choose that are scheduled out on your connected accounts ready to go for this LinkedIn post for example I could click in here and then I could hit edit and what I could do is I
could upload that LinkedIn image that was generated that's actually in our notion account so if I go here and I head to the LinkedIn page that was created for our notion database what I can do is I can quickly paste in this image URL I can save it to my desktop and then I can just drag it right where it says to upload a photo and just like that I have a post that's complete ready to go all formatted for us with some call to actions I can hit save and then I can just hit
share now and now if I go to my LinkedIn and we have a nice post that was created in under 2 minutes I mean this is just amazing and I'm currently refining this and editing it all the time I have so much fun with this and I'm super excited to get into it now I'm going to show you how to build this notion dashboard too where you can even come in here and you can group things if you want better organization that's why I love notion is because you can do things like group by platform
you can see past posts archived posts really whatever you want all right but that's enough of showing you how it works let me show you how to build it now the stepbystep structure and guide in building this thing from your organized notion dashboard where you can put multiple automations or single automations all the way to actually building the automation itself with the modules I'm using in make the prompts that I'm using for my assistance in order to generate these posts that way you can have some ideas on how you might be able to change the
prompt or revise my information that I'm giving you in order to make the automation better fit for your industry now if you want to FASTT trck this process and you really just want to get it built a lot quicker then I highly recommend joining our AI foundations Community where we have over 150 members now uh in the AI automation system side of things we don't only have automations in here by Carter showing us how to plan out automations for future success but we have things like my newsletter Automation and right here we have the AI
content Automation and the beauty of having this automation is you get all the tools and resources and nice links you have nice resources for certain posting instructions and if I go to the blueprints tools and cost you have these two things up top the AI content Blueprints and what These Blueprints are going to allow you to do in make.com is actually just go down here hit import blueprint and when you hit choose file all you have to do is upload that download link that I gave you and then hit open and once you hit Sav
the entire thing is built out for you and you just have to go and connect it to your specific API keys I have that for both of the automations that I showed you in this video the creation and the distribution automation so I highly recommend that if you don't only want to join a community of AI enthusiasts where we have tons of live calls that we're doing every month but you want to actually get the blueprints and FastTrack your rate of success I highly recommend you join our AI foundations Community people are absolutely loving it
and I've learned more about AI in these past 20 days than I have over my past year of actually learning it myself so building with a community is much stronger and we also get things that we can Fast Track our success like these automation blueprints but I'm going to show you how to actually build this thing from the ground up first let's get into the tools that you're going to need to sign up for and I recommend just doing this before you get into it that way you have everything you need as I'm explaining it
I'm going to try to explain as in depth as possible but this is going to make things easier if you sign up for the tools that you've seen in this automation so far first you need to sign up for notion this is just going to be like a dashboard for all your automations I absolutely love notion and make.com has so many options you can choose from a notion so very user friendly we show a lot how to use it within our classroom here in AI automation system Carter actually kind of has an entire course and
dashboard that it gives you so this is really nice for our group that's what we're all using in the community it's free you can do this with a free notion account you don't need the plus plan just get the free account and follow along next sign up for the Pro Plan of perplexity this is going to be $20 a month I believe but don't think about these subscriptions like you're only using it for this one automation but you can use these for multiple things multiple different automations and perplexity is nice because it gives you $5
a month in free API credits which is more than enough to get started with this Automation and actually use it quite a bit next a staple within the automations Community you should definitely think about getting the platform. open.com API now you need a chat GPT Plus account and you need to load in like $5 not much money but this is going to save you a lot of time and a lot of money so this is definitely worth it and I'm using this on multiple automations so for me getting in the back end of open aai
platform is just a key factor when it comes to building out automations because I rely on open AIS models heavily such as the new GPT 40 model and next buffer buffer is the scheduling platform so if you don't want to do the scheduling process and the distribution process and you're fine with just having the information in your notion then you won't need this but if you want to have that second automation that I'm going to show you how to build where you actually schedule it out I recommend this app I think it's amazing amazing make.com
has a lot of good Integrations with this app now there might be better ones but this is the one I use it's $12 per month per channel so I highly recommend just signing up for all these tools that I've just given you it's definitely going to save you time I'll leave links in the descriptions and obviously I mean if you're not signed up for make then you should definitely get signed up for make because that's what we're going to be using for the remainder of this tutorial so this is my current automation dashboard but if
you sign up for a new notion account it should be pretty empty just hover over private in your sidebar you can open up your sidebar by hitting those top arrows and then hitting the little plus icon add a page by private here I'm just going to close my sidebar so we have a nice full screen view and then I'm going to in the upper right hand corner hit those three dots and then change the page to full width that way we can get the aesthetic of this page looking beautiful and I can give this a
title I'm just going to call this page automation Elite that way we can differentiate my databases here you can give it a cute little icon I'll give it a little alien and then I'm going to enter down and here I'm going to type in slash2 and I want to make two columns one where I have a button that I can actually use to Quick capture my ideas and my URLs and the other so I have a view column that I can see all my social media posts similar to what you saw when I was demoing
this automation so I'm just going to make two columns and this is really just for organization and looks you don't have to follow along this way you can even just start it with a Google sheet but I recommend an ocean database I'm going to type in SL callout make this look pretty SL callout on both of those columns I'm going to drag this column down cuz all this column is going to be as a button that I just click to upload my URLs to so you can really just change all the icons and give these
call outs titles if you'd like I just changed this side to the control center and this side I titled social media post AI foundations these names aren't really important and these icons aren't important next I'm going to click into the empty space beneath these call outs and I'm going to type in slash button and then I'm just going to drag this button up to the control center until I see that small blue line under control center I'm going to drop it in it's fine that that button has no actions that's okay and next I'm going
to create actually another call out and this call out I want to put in the left colum this is going to help me organize my databases I'm going to call this databases CU every time I have a new automation I'm going to want to create a new database right so I can put in my first database that I have the first automation that I want to create is actually my social media posting automation the one that you just saw in the beginning of this video if I wanted a whole different automation like a newsletter automation
for my YouTube videos I would just create a new database and I can keep everything in this one organized dashboard I'm going to type in slash not page but I'm going to type in slash database and I want a full page database once I click into that full page database as you can see we have this backend dashboard here and this is a completely new page if you want to get back to your homepage just hit the Brad CRS in the upper left hand corner on your page title and as you can see we have
this little page right here that we can click into we have different pages within pages and we have different properties for those pages it might sound confusing but I'm going to explain everything a little bit better and as we build it out you're going to start to get a feel for notion but this prepping workspace is very important because we need a spot to store all of our posts we need a spot to Archive everything and we just need an organized dashboard we can rely on and come back to every single time we know how
it works we know how the backend's running in order to produce the front-end results makes changing things manipulating things a lot easier makes storing your information amazing so you can name your database here what do I want this database to be called maybe I just want it to be called social media posting that way I know what automation this is for social media posting I don't have to say automation because I'm in my automation Elite workspace but we have social media posting as a page right here again you could give this an icon if you'd
like I'll just give it a little check mark list kind of looks like I'm posting on social media multiple times and now we have this database that we can drag under the word databases we can even change the icon again and now I'm going to go in here and actually edit the properties these are going to be properties right here whenever I hit this plus button these are all things that I can pull on make.com so it's a bunch of information I could put in you could put in files in media URLs emails phones formulas
regular text properties number properties multi selects status there are so many different properties that you can pull in for make.com and these are all on the notion side of things that you can edit so you can edit things here and it will dynamically update and make that is the beautiful part about this so we're going to be adding a lot of these properties first I'm going to change the name property you have to have a name property right so I can just name this instead of name we can just put post name we don't have
to change anything we can just rename it just so we have that better organization next we can actually delete this tag property we don't need that tags property so now the only property we have is post name we're going to need more than that so what I'm going to do is I'm going to hit this little plus icon right here and that's going to allow me to add a new property I'm just going to add a text property and this property is going to be for article URL this is just going to be where I
paste in my URLs so that I have something to actually pull and get the summary from in make.com going to hit enter and now we have a new property created just like that so when I open open this page we can actually edit this property for this specific row so if I wanted to type in something like hello in this page as you can see when I open up page number two hello is not there I could type in something different in that page so each page has their own specific properties which is going to
make this very very flexible we're going to be pasting URLs in there though not words so I'll leave it blank for now next we're going to want another text property for post content so I'm going to hit plug and hit text and then I'm just going to type out post content this is beautiful this is where the post content is going to be brought into where we can actually edit the post content before it goes on social media and we can see what we actually posted so two text properties what we've added so far next
we need to add a very very important property how we actually organize our information in notion and Trigger certain automations and make we need to add a status property I'm going to type in status in the property section and then I'm going to add that status property here we have to-do in progress complete and these are our three main categories that we have so what options do we want within each of these categories well for the not started section what we can do is we can change the word not started to new URL maybe we
want a section for new URLs where we know that new things are coming in we know nothing's been manipulated nothing's been done with it it's just a new URL for in progress we want to have two different things here I'm going to make one of them yellow and the one that I'm making yellow is going to be the ready to post status so when I create a post I want to append a status of ready to post to it so that I know hey Drake these things are ready to post just review them and post
them and we're going to have a button that actually changes the status to posting in a second here so in order to add that posting status all we have to do is hit this plus button in the in progress section and then just type in posting and I'm just going to type in posting dot dot dot to give it that posting feel like it's loading I really like that and then I'm going to hit enter okay I didn't mean to add a slash there I like the color blue for posting so I'm going to leave
it at Blue and these are our two in progress statuses that we need to have for complete we're going to have a couple of different statuses because we have pages in here that are only URLs and we also have pages that are social media posts so what we need to do is for the first one we can just leave that status of posted so that we know okay these things are posted they've been uploaded to my social media no problem we can append that property to them from make.com automatically after they are in our buffer
account and scheduled out ready to go the next status we want to add in complete is going to be archived maybe we did not like a post that was created by GPT 40 and we just wanted to save it for later or we didn't really want to post it but we didn't want to delete it either we just wanted to Archive it for later well then we can have that archived section and I'm just going to make archived gray I think that's a beautiful archived look and then we want to have one more category and
this is going to be for past URL and past URL is going to be anything that isn't a new URL and we can change that automatically and make I'm just going to make that another light gray color so we have that in here this is looking great now we have posted past URL and archived and now all of our statuses are ready to go so for each step of the process beginning before the post have been created while the posts are being created and after the post have been created are covered with this status property
so now we can hit the back arrow once all that's done and we can just click out of this property View and now each page has a unique status maybe this is a new URL maybe this one's ready to post and maybe this one's archived or something as you can see each post or article has its very own unique status for every step of the way which is just amazing now we're almost done prepping the workspace a couple more things we need to do we need to finish up our properties right here and then what
we need to do is actually create a front end view where we can see all of this and manipulate the information and what we're seeing in certain views it might sound complicated but just keep following along you are doing great so next what we're going to need is we're going to need a button that actually posts these and we'll change the status from ready to post to posting so what I can do is I can hit plus and then I can type in button once I select button I can name this button post I can
give the button a label of post and when the button is clicked we need to add an action so I'm going to add an action I want to edit this property and I want to edit the status to posting so anytime this button is clicked it will change the status of this page to posting which is just amazing so let's say these are all in ready to post and I review them and it looks good now when I hit Post in notion it changes to posting which when this status changes to posting in notion it
can trigger a different Automation in make.com that's the beautiful thing about having this front-end dashboard is you can start automations from ocean so we have these buttons that when we click them it edits the page status to posting and now there is one more property we need to add that's the platform right we need to be able to see what platform these posts are going to so I'm going to hit the plus button and then I'm going to type in select and this is where we're going to have just a single Select Property we don't
need a multi- select just use the Select Property here and now we need to add some properties in here I can just name this platform so I know what the Select Property is selecting for and then I can hit this add an option button once I hit add an option I'm just going to type in all the platforms I want to build this automation out for you know Facebook we have X we have Instagram maybe we have LinkedIn I mean you can go crazy with this you can have multiple different platforms I'll just leave it
to the big four for now if you want to organize it by colors like that for you people who love Aesthetics I'm sure you're loving this a lot but now we can hit this back arrow now that that property is done and we can click off and these are all the properties we're going to need to successfully perform this Automation and make.com now you may be looking at this going this is way overboard Drake why are you spending 20 minutes prepping your workspace well prepping the workspace now is going to save me hours of headaches
in the future I don't really want to show you guys a messy way of setting up your automation so that's why we're doing it right head back to your homepage in the upper lefthand corner what we want to do first is pull the database to the front end you know we were just editing the backend database and you can add things in here of course but it's just kind of a gross view you can't add any text on this page it's just a full page database so the only thing you can edit is this database
but if we head back to the homepage what we can do is we can type in SLC create and then a linked view of database is what you want to select you don't have to type in create even you could type in slash link view like this SL link View and then when you select this you're going to be able to choose from all the databases on your notion account we want to choose the one that we just created the social media post ing database within our databases section and as you can see we now
have this database on our homepage this is just amazing we can X out of this and just leave the current Table view because we can actually manipulate what view we're seeing later on but starting off what I always do and what Carter always does and what Carter always teaches within the course as well and and within his notion courses is he always says hide the database title it just looks better you know we know what database it is and we don't need that big sloppy title right there next I'm going to select these top six
dots up by where it says table I'm going to drag it under social media posts AI foundations now we have this beautiful view where we can add in multiple different ways to view our data and we can go between them depending on the stage of the process so let's build those out right now this first view is just going to be a URL view so we can just call this upcoming right this is just upcoming content that we need to create or you know what what we could call this is ideas we can give it
a little idea Emoji maybe a light bulb's a good Emoji for ideas and the beautiful thing about creating multiple views is you can select which properties you know all those properties that we just created you can select which ones you want to see at each step of the process because right now we don't have any platform selected because this is just going to be post name URL and Status we don't know what platform it's going to go to yet cuz the automation hasn't run through it so while you're on your ideas view head over to
properties and what you want to do is you want to hide some of these so the only things we want are article URL post name which you actually can't hide and Status we can hide post content we can hide the post button and the platform this is just going to be our URL database where things come in and we can see what upcoming social media posts we have based on the Articles or the blogs that we paste in here now that we have the properties we want in here what pages do we want to see
in here well we only want to see pages in here that have a status of new URL if we don't want to see posted posts in here because this is just the ideas category we're going to make different categories for each step of the way so what we can do is we can add a filter what I want you to do is hit these three lines right here at the top of the database and this is the filter category what do we want to filter by well we want to filter by the status and we
only want to see the new URLs within this idea category so that's what we're going to select now we can click off and anytime a status is not a new URL it will disappear out of the database so let's just say it's in ready to post now we only have two pages in here going to change that back to New URL head back to my homepage but we can create different views for each step of the way so that's what we're going to do now I'm actually going to just duplicate this view since we have
a good structure already built going to duplicate the ideas View and then we can just change the properties we want shown we can just call this ready to post and I will not capitalize post we can just have this ready to post I'll have a little nice thumbs up you know ready to go love it now we can show some different properties because when something's in ready to post we want to be able to view things in a different way now you can change these properties to however you feel comfortable or what kind of things
you want being shown at each step of the way but I'm just going to change the properties to what's worked well for me in the past so what I want in here now is I want the post button and I want the platform I really don't need the article URL since I know what article URL was being used for each post it's not really relevant when it comes to the actual social media post itself so I'm going to hide article URL and post content for now and now we have status post name platform and we
have a button where we can actually send this off to the posting category you can drag these properties around in whatever order you want I'm just going to start with platform so I can see which platforms are coming in first and then I want to see the post name I like seeing that next and then I like having the status and then the post button at the end so this is great but remember since we duplicated this ideas view the filters are still the same what we want to do is we want to change the
filter like this again by hitting those three lines and then selecting the status right here and unchecking new URL and checking the entire in progress section so now nothing's in here because we don't have anything within the in progress status but if I go back to ideas and I change this all to ready to post then they're going to have that status of ready to post so they'll show up in this view but definitely not this view this is only our new URL view in the ideas category right here so now when I hit this
button it moves to posting and we have our two statuses in here of ready to post and posting and now we have one more view to create and that's the archived and posted view so this is where we're going to be storing all of our past URLs that we used all of our past posts and so on so once again I'm going to duplicate the view just like that this is just going to be somewhere where I see all my archived stuff so I'm just going to put a little Trash Can emoji and I can
just call this the archive something as simple as that and for the statuses it really doesn't matter if I see that or not although I will keep keep it in here what we don't need definitely is the post button because we can't post anything once it's in archived and if we wanted to post it we could change the status from archived to ready to post and then post it from there and to be honest we really don't even need platform I just think it'll be cool to see post name and status status will be able
to tell us whether it's archived past URL or a posted social media post once again we need to edit our filter so I'm going to hit filter and then I'm going to change the status of in progress I'm going to uncheck all of those and check the entire complete SE setion that way we can see what each one of these is just like that we have this entire dashboard complete it's going to save us hours on end so great job for following along if you actually built this with me here then you are going to
be ahead of other people who decided to skip this step now I'm going to hit this edit button and set it up so that when that button's clicked it adds a page to a certain database I'm going to hit add page two I'm going to select my database of social media posting and then the post name Untitled that will be fine so I can call this new button start post I can give it a little Emoji of maybe a play button and then I can hit done so now when I hit start post it actually
is going to create a new page if you want to open up this page automatically you can edit your button and you can hit add another step and you can hit open page and where it says select Page hit that drop down arrow and hit new page added you can choose what Peak you want it in whether you want it opening up in the center of your screen full page or side Peak I prefer side peek so we can still see our entire database and you can even give this page a name so I could
just name this new SM post and now I can hit done so now anytime I hit start post we have new SM post here and we can just paste in our article URL while we're here though let's hide some of these properties on this view I'm going to click it and then hit property visibility always hide post I'm going to click it go to the visibility always hide and I'm going to do that with everything except the article URL I could leave the status if I wanted but I'm just going to hit always hide and
now we have this place where we can just come in here upload our URL just like that and then we can get our automation started right now I'm going to head back into the backend database and just delete all of these pages so we have a fresh start and then head back to the homepage now this was an amazing starting point for an organized automation we could have used a Google sheet and just had it watch a certain row within our Google sheet but that just gets really messy now if you want a quicker way
of doing it and you don't want to have to set all that up in notion even though I highly recommend it because it's free and I just showed you how to do it every step of the way uh if you don't want to do that that's fine just use a Google sheet or something and have your trigger of the automation watch a Google sheet row rather than watching our notion database but now it's time to get into actually building the automations out showing you step by step how to create all the modules and so on
I'm excited to get into it so let's do that now so let's get things started head over to make.com and hit create a new scenario in the upper right hand corner again if you want These Blueprints so you don't have to build this part and you can just use the dashboard that I created you can just hit this uh AI content automation one hit open hit save and now you have the entire thing ready to go and all you have to do is make your connections and you can get these blueprints from our community in
the classroom section AI automation systems head down to the automation of your choice in this case the AI content automation Blueprints and then we have them right here where you can just import those we also have more in-depth modules going over each step of the way probably a little bit better since I was putting a little bit more focus into the explanation side of things but this community is also much more anyway let's get into building this thing from the ground up hit create a new scenario and once you're here in this new automation you
just want to type in notion and you can select this notion watch database items module this is going to be the beginning of the automation where it's watching all of our URLs in the database so the first thing you're going to want to do is create a new connection so hit add or there will probably be a button that says create a connection and then connection type you can make it notion public this is just Notions public connection so it's not so it doesn't really have anything to do with privacy but more so the type
of connection you want to do so just hit notion public then you can give it a name I'm just going to name this Auto automation Elite tutorial uh you can name this whatever you want hit save and this is going to pull up a page where you're actually going to connect it to your notion account so make sure you're in your proper notion account in the upper right hand corner Corner hit select pages and then give access to make.com the pages that you want or the workspaces that you want I wanted to have access to
my automation Elite workspace that I've just created actually this entire page so I'm going to select that one and that one only and I'm going to hit allow access and then that's going to allow me to access all the properties and all that fun stuff that we can watch and Trigger the automation with for limit I can just set that to 10 that's how many times it will run through so if I have 10 URLs it will run through that 10 times and create 40 social media posts I don't really want to set it much
higher than that or much lower I just think 10's a solid number maybe even five would be good so I'll just meet somewhere in the middle and go seven instead of by created time you want to switch this to by updated time and then find your database ID by searching what your database is called so our database is actually not called automation Elite that's just our workspace and our page our database we want to call where all of our pages are being held is social media posting so I can just copy that head back over
here to the database ID hit search and where it says query search I can just paste that in hit okay and it will automatically pull in our database ID for us now that we have all of that information what I can do is just hit okay and what that will do is just refresh this module so now everything in here is all good to go if you want to save it you can hit this little save icon near the bottom lefthand corner and that will actually save your entire scenario but now let's test this to
see if it's actually pulling information from our social media posting database I'm just going to head to this database right right here and just hit the new button a couple of times just to add some pages and get some content in here I'm going to head back to our notion integration and I'm just going to hit the Run once button to see if it's pulling in any data as you can see it's pulling in a bunch of stuff we have our pages that it's pulling in with all of our properties which is just amazing so
that button's working good it can see the information in our database if it couldn't what it would say is data size zero so as you can see we have some data in here which is good basically just empty pages but we know it's working next we want to get into the summary and we're going to summarize our URL with perplexity so what we can do is we can hit add another module and this is where things actually start to get very fun we can type in perplexity Ai and then here we can hit create a
chat completion for the model we're just going to use mixl 8 x7b and for the message this is actually going to be the prompt that we send off in order to create the summary and in order have a filter so that if it can't pull the URL it doesn't go to the posting agents so what I'm going to do is I'm going to hit add an item under messages and for roll I'm going to select user since we're the user typing in a message to this chatbot essentially then I'm going to head to the AI
automation system you don't have to do this right now you can just copy this prompt from what you see on the screen and I'll read this to you but this is why I like using the group because we have all these resources and I'm just going to under content paste in my prompt so this is like a prompt that I'm sending off to a chatbot okay and this is a dynamic property that I can edit from this notion database here so the prompt is create a summary of this article and make a very in-depth summary
covering everything that takes place just in a more condensed format so I'm basically just condensing this article down into a summary with AI now ai is super powerful for doing simple things like this but it's going to help us create those posts in the future and where that says properties value plain text I'm actually going to dynamically pull the URL that we're uploading into our page here so whatever the article URL is that's what I want it creating the summary about so as you can see when I hover over all of these notion items over
here on the right that notion module is blinking over on the left that means I'm pulling information from it which is just awesome I'm going to head down to properties value and what I can do is I'm just going to close some of these things up so you can see this a little bit better then what I can do is I can go under properties value and where is this article URL all you need to do is Select that and then hit plain tag and that's going to actually pull in the entire URL for us
down here I just have something for a filter I just say if you can't read the content put na that way for our filter we can set it up so if the response is only the words na a then it won't run through the rest of the process for now this looks great we can just hit okay and now our summary is ready to go we can even test this out along the way let me go get some AI news maybe I found this AI news article I love this artificial intelligence dnews.com webbsite they have
so much good stuff on AI highly recommend it if you're in that space But now I can just hit start post and then I can just paste in my article URL here just as I showed you in the beginning of this video we can head back to this notion integration with make and then hit run once to test it out to see if we actually get that summary generated as you can see it pulled in our database item and generated the summary so if I go to the choices and then I head to the message
and the content we have an entire summary of that article that I just pasted in that quickly for some of you this may be enough this may be all want to do and maybe you want to send that information back to your notion database but now we're going to actually learn how to start our agent cluster and learn how to create social media posts from this summary that we just got using perplexity which in my opinion is the best app for analyzing URLs and creating summaries around web content so what I'm going to do here
is I'm going to set up a little bit of a flow control element I'm going to hit flow control and then select router so that I can go to multiple different posting agents and now that I have that router connected to perplexity what I can do is I can set up a filter here so that only articles without na come through so I'm going to hit this little wrench then I'm going to select setup filter and I can just label this is there a URL maybe that's all I want the label or I could just
put URL question mark it really doesn't matter and then I want the condition to be choices under perplexity message and then I want to select content because the content is the actual response that it generates based on the prompt that we set up in the last step where we were generating the summary is the message content then we need a text operator does it match pattern we need it to not match the pattern I'm just going to put case and sensitive we want to make sure that it does not match the pattern of n/a exactly
because that's all I told it to type out and if it does not match that then it can run through the rest of the process but if it has Na and na only then it's going to stop and say you know what we're not creating any posts because there is no article to create posts about then I can hit okay and now that filter is all set up and ready to go now here's where we actually start creating our agent cluster which is really the fun part of this automation so we have multiple different prompts
you can manipulate the speaking style you can assign a role you can really do whatever you want and have it just be in your tone of voice and find- tune it to you I have prompts that I can use in here that's going to make this a lot easier for us and you can just pause the screen and grab everything off here or screenshot it upload it to chat GPT and then uh do an OCR reading of this prompt and that would be some good practice as well but next I'm going to hit this little
plus button and we're going to add our chat GPT open AI module so I'm just going to type in open AI hit enter and then I want to create a completion I could also message an assistant if I wanted to in the open AI API dashboard but what I want to do for now is just hit create a completion and then link it to the router these are each going to be an agent for us so each of these agents are going to have specific tasks for their specific social media platform I can just rename
this so I can organ organize it better I'll call this the X agent a little exclamation point beautiful X agent and now I can set this up make sure you set up your open AI connection that's very similar to setting up your perplexity connection and your notion connection you're going to want to go and find your API key in the platform. open.com it's very simple create a secret key I'll show you how to do it so when you're actually in platform. open.com head to your dashboard and what you want to do here is go down
to this API key section and from here you can hit create a new sequ key make sure you save this somewhere cuz you're only going to be able to see this once and do not share this with anybody otherwise they'll be able to run up your account balance especially if you don't have limits set up in the back end make sure you keep this a secret and then you'll be able to create your connection much easier for the model obviously I'm selecting the GPT 4 system hit add a message make your Ro a user and
then your message content goes here this is a prompt you're sending off to GPT 40 and since this is our X agent I'm just going to copy my X agent posting instructions here I have this basically formatted so that it creates high quality post for x and I have some custom instructions I use down here so I said depending on the post if x qualifies as breaking news meaning this news has the potential to have that while Factor then at the top of the post you can put this breaking news with the caution emojis you
don't have to use that this is something cute that I like to add because I like staying on top of the news and people really respond well to that but I can just paste that prompt in and there's only really a couple of things that you need to change here I mean you can format this thing a little bit better better so you can see it but I have a spot to go for your Niche so I'm just going to say the artificial intelligence Niche you can go a lot more in- depth on this as
well when you use an assistant and you fine-tune the assistant and and all of that fun stuff now I have some formatting guidelines in here and so many other things but at the bottom here I say do not make anything bold or have any headings each time you say a sentence go to a new line I like this because I think it's just more engaging reading line by line personal preference and I think other people like it too and then I say here's the summary this is where you to add your summary and you can
do that by just hovering over perplexity Ai and pulling in that content that it generated the actual summary so that it can create a post around that summary using all these instructions you just gave it so I'm going to have choices message content right there for Max tokens I'm going to put zero and then I'm going to hit okay and now our X agent is all set up right it's going to create a good post for X so if I use that same URL from artificial intelligence dnews.com I come here I hit start post I
paste it in and I test this out let's see how good of an expost it creates so it passes through our filter which is good which means that there was an article that it could read and then when we go to our message content we can see breaking open AI co- find co-founder launches calent boost to Startup dedicated to Safe AGI Focus area AI alignment robustness and Community Building how will it reshape ai's future share your thoughts it's even providing me hashtags which is just awesome and now we can just do this for the other
platforms it's that simple I'm going to just dup duplicate this module by right clicking it and hitting clone and then I can connect it to the router now we can make this a different agent we can call this the LinkedIn agent and now all we do is just plug and play the instructions right we can keep everything else the same since we've cloned this and we can just change out the instructions the only thing we want to leave is this summary in here that we're pulling from perplexity so we can just leave this bottom part
right here uh this little blue section where you see choices message content and we can just replace all of instructions and you can type in whatever instructions you want create these posts in whatever way you want get creative make it for your audience I'm going to go grab my posting instructions on LinkedIn I'm just going to paste them in here and now I'm going to go reformat all this okay I've reformatted it everything looks good I have my content guidelines now I can just put in my Niche right here just going to say artificial intelligence
beautiful and now I have my summary down here at the bottom that it's creating the post around I can hit okay again I can test this but since I know this one worked I'm just going to keep on moving forward and now I'm going to create my Facebook agent and also my Instagram agent once again I'm going to clone the module leave everything the same since we set it up once we don't really have to do that again all we have to do is change out the instructions so I'm going to come in here and
I'm going to paste that in now what you can also do is you can put this information in probably a code block and it will format it for you so if you don't want to do the whole reformatting process I could just say something like put this in a code block and then I can just paste all of it in and then once I hit enter when I copy the code Block it's actually going to be a lot easier for us to paste in that information without having to reformat it I'm just going to use
gbt 40 for this but pretty much any llm can do this now I'm just going to hit copy code head back over to our automation select this Facebook agent I'm going to rename this to Facebook agent so we can differentiate them I'm going to hit okay now I'm just going to paste in that code block that I just copied just like that and now it's all formatted for us we didn't have to do anything all we had to do is paste in the code block and now I can hit okay and then I'm just going
to do one more agent creation for Instagram going to clone this module connect it to the router and it's just rinse and repeat guys it's very simple it's very fun to do change around your instructions for different platforms get unique test it out that's what this is all about going to grab all this from my school Community going to message chat gbt now this this paste it in so we can get that formatted and while that's formatting I'm going to head back to the Automation and I'm actually going to rename this module to Instagram agent
that way we can differentiate them the exclamation Point's a little unnecessary for all of these I just did that for fun now our Instagram instructions have been completely formatted within a code block so I can just go back in here and now for the message content once again I can just paste all of that in and now make sure that you're saving this as you go so I'm going to hit this big save button in the bottom of my screen here and now the scenario is saved we can test it out and make sure each
of these are generating posts exactly how we want them to I'm just going to be using the same URL that I have been using I'm just going to copy it and the reason I'm making a new post is because it's already read all of these posts so it's already watched for these database items so it's not going to watch for them again it's not going to run through the same post twice so now I'm going to hit start post paste in that URL and let's see how this is working head to the automation hit run
once it got the database item announced summarizing it with perplexity see if it makes it through the filter which it should since we've already tested this URL xost has already been created we can open it up we can see our xost in here beautiful the formatting is a little off but that's something we can edit in notion before we send it to buffer to actually post on social media LinkedIn agent let's head to the result and yeah this is an amazing LinkedIn post it's asking the audience questions it's using relevant hashtags hasht artificial intelligence #
AI Facebook agent using nice emojis maybe a little bit of reformatting but there's nothing going on that's too complicated here Instagram agent hit the result and it's looking pretty good it's even using these big 1 two 3 4 five emojis and it's tagging people as well this is just wild yeah so I recommend editing these instructions to get them exactly how you want them and once you have them then we can move on to the next step which is actually generating images based on these posts that we created for each platform now if you want
to save on the cost I recommend just generating one image and just doing this once and maybe generating the image based on the summary from perplexity that way you can reuse it across all your social medias but if you don't really care and you want a unique image for each social media then you can follow along and you can just make four different image generators or three different image generators whatever you want an image for create an image generator as I'm about to show you so for this step you could really use anything you could
use something like Leonardo AI mid-journey unfortunately does not have an API so unless you're using something like Puppeteer or something where you're doing a browser automation where things are actually clicking on your screen on a different computer or something like that then it's very hard to get mid Journey other than those options but we can use something like do which isn't bad it does have some improvement that it needs but the pictures are actually turning out decent so we can type in open AI once again and here what we can do is we can hit
generate an image what we can do here is we canate create an image prompt based on the actual post and have an image created based on that so for this module I'm going to rename it to LinkedIn image that way I can just have everything in a nice line I know that this is the LinkedIn image I can pull that later on and here we can click into it you may have to connect again for the model I'm going to obviously select Dolly 3 and then this is just going to be your prompt I'm just
going to type in something very quick in order to have a cool image generated okay so here's what I have I have create an image optimized for LinkedIn from the post content make the image very simple in a minimalist duone style but based on this prompt and instead of saying prompt here maybe I want to say based on this post and then I can pull in the LinkedIn post that was just generated into this image module that way it can revise the prompt and create an image based on the contents of it so what I
can do is I can hover over this LinkedIn agent and our Dynamic options that we can select head down to choices message and then the content so I can paste that in there and now it's going to be creating posts based on that content what I could also do is I could just hit this little result thing up top this result button instead of going to the content of the post and this would work just fine as well so I'll just use the result and then hit okay I'm going to just do the same thing
for each of these other platforms I'm going to hit clone connect and I'm just going to change out the name of the platform that I'm doing it for so this one's going to be for Facebook and then I'm going to remap the result to the actual agent that we're that we want the post created for so I don't want the LinkedIn post content for the Facebook image I want the Facebook result for the Facebook image I'm going to hit okay then I'm going to do the exact same thing for Instagram and after that I can
just rename them so I can have better organization going to map the result to the Instagram post make sure that the Instagram module is blinking when you're hovering over result that way you know you're pulling from this module right here and I'm going to change the name so maybe the name has an effect on the image whether it's Dimensions or the way it looks I'm leaving that up to the model to decide but you can also do some AB testing on your own so I'm going to rename this to the Facebook image then I'm going
to rename this one down here to the Instagram image and for now I'm not going to have a an image for X I'm just going to leave the X agent with only text as I think that works out pretty well but now we have an image that we can generate for each one so I'm going to test this entire scenario out real quick to make sure that it's running good copy start post paste in an article URL and then run the automation now keep in mind this is costing money as we're going and and it's
using our open AI API credits as we use this thing and our perplexity AI credits as well now our LinkedIn image is generated and what this is going to do is it's going to give us a URL so here's the revised prompt that it used for the image as you can see I added a parameter in here for do not include any text in the image is I think the text sometimes is a little sloppy and then I'm going to copy this entire URL here and I can paste it in to check out the image
it generated for LinkedIn this is pretty cool it didn't follow my instructions of not having any text but that's just something that we can manipulate or we could crop this image and make it how we want it not too bad I think this looks pretty cool and it's in my minimalist style as well it's using that duo tone color palette very beautiful I can check out the Facebook image that it generated based on our post when going to go to data one then I'm going to copy the URL and paste it in here and this
is sweet I actually like this image that it generated for Facebook so maybe I'd use this one for LinkedIn as well you can right click it hit save as then you can save it to your desktop and I can actually open this up and use this picture now which is very neat and it did that for all platforms and I like how it made a unique image for each one for anyone who is curious here's the Instagram image that it generated very Sleek very clean minimal I love it I love when it doesn't go too
crazy to be honest out of all three of these I think the Facebook image was the best one this looks awesome the next step is we need to assign these each with a post name and after we have the post name we have to send it to notion for the approval process before we get into automation number two of two now this is going great so far we're creating great posts good summaries with perplexity you can edit this as wild as you want I mean if you get into the assistance API if you're in here
creating assistance like I've started for this X agent and for something to replicate my speaking style I mean you can go wild with this you can even set up the model configuration to have a certain amount of temperature to stop the randomness or have it be more direct and follow the instructions to a t you can have file search code interpreter you can go crazy crazy with this and really manipulate the post through examples and specialized output formatting I'm just trying to show you a baseline automation to get your foot in the door so that
your creativity can power you through the rest so let's do this let's create some post names and then send all that content back to notion right here so we can go to our ready to post section and review what's actually happening so now I'm going to create post names for each of these this step is simple but it's just an organization thing that I like doing in notion I'm going to make another open AI created completion module so I'm going to hit add open AI created completion I'm going to connect this here rename it to
X poost name hit okay and this prompt is going to be very simple I'm just going to say Max tokens zero model GPT 40 add a message make sure the RO once again is on user and then I'm going type out a prompt just like I'm talking to a chatbot I'm going to say based on this social media post I'm just putting social media post so I can just copy this prompt for all the other post names I'm going to say create a 2 to four word title just like that then I can put a
call in and I can pull the content from that social media post so I'll just pull the result once again just like we did for the images then I'm going to say in your response give the title only and nothing else do not put quotations even I don't even want it to quote the title I just want it to have plain text and then I'm going to hit okay and just like that we have a x post name being generated based on the social media post that way our post names in notion get updated to
that it's going to help us have some awesome organization on the notion side of things I'm going to clone this module and I'm just going to do the same for all of these other platforms again I'm just going to paste that in here and then I'm just going to change the result to the LinkedIn agent and actually if we're just cloning the module we don't even have to paste it in here because it autop populates so if I'm going to clone this module and I'm going to edit it for Facebook all we need to do
is map the result to the Facebook post make sure you're mapping the Facebook agent and not the Facebook image result I'm going to hit result and then I'm going to hit okay and I'm going to rename these later but for now I'm just setting up the result so that it has good content to make a title around based on that platform Instagram agent result okay now I can go through and rename all these okay beautiful now all of these posts will have a name assigned to them but the name that it's getting is only going
to matter if we pull that back to our notion database this has nothing to do with the social media post but the organization of our automation itself self so now we need to send all of this content that we just got generated right all the images all of the agent post summaries all of the post names we have to send that back to our notion database so we can get some approval through us right we're going to be the moderator all we're going to have to do is set up this to run every day paste
in our URLs review post and hit post that's really essentially what this automation is going to come down to we're going want to be creating database items in here for new social media posts and appending all the content to those items so I'm going to hit this notion module down here you can also hit add and type in notion then we want to search for create and we want to create a database item I'm going to connect that up top to X here then I'm going to click in my notion module make sure that I'm
on the automation Elite connection and then I'm going to hit select from list and we want to pull in our database ID again so I'm going to head to social media posting copy this title and I'm just going to do a query search in order to pull in that database ID just like we did in the beginning of this video and now we can assign certain things to the properties that we created in the prepping workspaces section of this tutorial so for post name obviously we want to assign the post name that we gave to
our post so I can select that and I can find the result for X poost name since we're this go since we're creating a database item for this x poost right now I can assign that result for post content I can assign the content that we received from the ex agent because this is going be the information in the post I can put in that result article URL we don't need to change platform though we can make X so that when it creates this database item for X it automatically assigns the platform and for status
we can make it ready to post so now we have an entire post an entire page in here that's ready to go I'll show you how that looks in a second for now we can just hit okay now we can do the same create a database item for each one of these posts I'm just going going to clone this as we have been to make this faster and then I'm going to keep my database ID the same but I need to change all these properties because we're using it for a different post so the post
name is not going to be the X post name but rather the LinkedIn post name so just delete this and assign all the content for post content we want the LinkedIn agent result here and then for platform since we're editing the LinkedIn module line we want to switch that to LinkedIn and we can leave the status is ready to post I'm going to now clone this and do the exact same thing for Facebook very quickly post name Facebook post name make sure you're on the right module and that you're mapping the right content for example
you don't want to map the Facebook image to the post content you want the Facebook agent result so I'm going to map that and you just want to change the platform like shown I'm going to do that one more time for Instagram very quickly post name result post content result from the agent platform Instagram boom ready to go so now that's all we really need we can just stop right here if we want but I always like going the extra mile for organization I'm all about it right I love organizing the dashboard so I highly
recommend you do this next step with me because we're actually going to be appending the page content let me show you where we're at right now that way you have a good idea of what I mean by append page content I'm just going to run through this entire process copy my article URL and a lot is going to be changed since we last updated and ran through this because now we're going to have things coming into the ready to post section that are good to go and this is where most people want to stop you
don't even have to do the distribution automation you could just have all these ready to go and copy and paste them into your social medias but let's for now hit start post and test this out so you can see where we're at I'm going to paste in my article URL hit run Once on This Automation and it's going to run through create posts create images post names and then create a database item for each social media post and a database item would creating a database item would be the same as me coming in here to
our backend database and hitting this new button right here each database item is a page as you can see our Twitter post is already in and it looks awesome so if I go to the ready to post view on the homepage and I hit open on this page as you can see it looks kind of empty you're like where's our post well that's in the four more properties as you can see we have our post content here so can hit property visibility and I can just put hide when empty since this isn't empty now we
can actually see all of this so we have our post right here we could just copy this and paste it in Twitter real quick and send it off and it's going to be the same for Facebook Instagram and Linkedin when I hit open we can see our entire Facebook post within the post content now that we have that property visibility changed as you can see it's still running through the Instagram agent but it's done with LinkedIn and Facebook so Instagram's complete LinkedIn isn't populating sometimes you just need to refresh the page really quickly boom there
it is this is awesome we now have four posts that are ready to go whenever we open we can come in here we can edit maybe we don't like that rocket emoji up front I'll just delete that and maybe we just don't want any emojis in the first line actually I can delete that then click off and boom that's how you edit a post now we have a post based on an article that quickly that's how amazing this thing is I am loving this now we can append content to the page this part isn't necessary
but this is where I like to pull in my IM URL so I can copy the image save it down to my computer whatever I need to do with it and also so I can have a more fun editing experience when I'm in my page because right now we just have all the information pulling into properties but if you want to pull it into the page so you can highlight things and you can store it in your notes and notion and you want to get crazy with it then I'll quickly show you how to append
the page content I'm going to head back to my automation I'm going to add in the new module section select notion and then type in aen and what we want to do here is append a page content going to add it to the X modules up top and then I'm going to click into here then we need to collect our page ID and our page ID is different than the database ID that we selected over here we want to pull the page that was created from this step remember there are four different pages create that
we just created for each social media that we wanted a post for so we need to pull in their unique page ID so we can edit the actual page that was just created we can do that by selecting aend a page content module and then where it says page ID we can just pull in the database item ID from the notion module in the previous step so if I move over a little bit and I click this and I select into page ID as you can see when I hover over database item ID that notion
module is blinking and that's good I can just click that database item id field and then for Content objects I can hit add item and then this is actually going to be where I'm adding certain fields in notion so this would be the same as me adding items like this if I go into page and I hit here and I hit slash these are all the items that I get to choose from and I get to choose what goes in these items so if I wanted a heading one I could pull in the post name
right there automatically and then maybe I want just text start writing with plain text then I could pull in the post content and here in the page you actually have the ability to highlight things change the color of them I mean you can change the background bold italicize it you can manipulate the text a lot more so if you're somebody who likes coming back to notion to play with your old social media posts or to organize notes this step is going to be for you so then I can add in the things I want maybe
I want a heading three and with that heading three maybe I just want to pull in text and post name so I can claps this notion database maybe I want the X post name here just like that I can then head all the way down to the second add item again and now I can add another item maybe I want paragraph and I just want to pull in the post content now again the step isn't necessary but it's just if you want to go the extra mes so I can pull in that result so I
can manipulate that a little bit more then maybe I want to add another item maybe I just want to add a divider right well I can add a divider and then that will have a nice horizontal line across your screen so that under the post content it looks like this and then I can add in my image URL Maybe way I have a nice spot to copy and paste in my image so I can do it just like that add item item four maybe I just want to add some paragraph text and that paragraph text
will be a URL from the image that was created which we don't have an image module for X since we only wanted text so for X we won't have to add in that module right there we can just hit okay now we can clone it and do the same for the other pages but remember we want to map it to that specific specific database ID so we want to change page ID to the one we created for this module line right here I'm going to select database item ID since we're in this line it's going
to pull the database item ID from that line as well heading three I can leave that all the same if you want the same structure all I have to do is change the content so for heading three I want the LinkedIn post name and for the content here I want the LinkedIn content not the X content I can paste that in here and for LinkedIn we have an image so I can add that image image item down here when to select paragraph since I'm just typing in a URL that I can copy and paste add
item once again content and then LinkedIn image going to go to the data then I'm going to go to the URL and just like that we now have the image populating in now if you want to actually pull the image URL then you're going to need to add it to a property if you're going to be pulling the image in automatically you're going to want to add another property up here as we were doing in the beginning of this video so you're going to want to add another text property and then call it like image
URL and make sure that you map it to that property in the previous step and then create a database item step so this step you would have another thing called image URL in here and you would actually put the URL in the image so that you could extract it a little easier but for me I just like copying and pasting my images and saving the URL just a little bit easier that way for me saves me time rather than waste time for me so and I always don't like using the images as well so it
gives me more flexibility that way so I don't mean to confuse you with that whole image thing but I'll show you what this looks like in a second so you can get a better idea of what all these weird things are here it looks more confusing than what it actually is now I'm just going to clone this module and just keep mapping the fields to the proper social media line that I'm in so I'm in the Facebook line right now so I want to map everything to the Facebook line going to delete the page ID
map it to the page ID within the Facebook line so I'll scroll over here so you can see what I'm talking about page ID when I hover over database item id as you can see that's my page ID if you haven't picked up on that yet and my module within the Facebook line my notion module within the Facebook line is blinking so that's good that's the one we want to map it to and then for the result for the heading I can change that to the Facebook post name and then for the paragraph I can
map that content to the Facebook agent result just like that we want to head down to the image and map it to the Facebook image I'm going to head down to the Facebook image go to data and then select URL hit okay now I'm going to do the same thing for Instagram okay I have all my page content appended now there's one more thing I need to do and that's update the URL that generated all of these posts and all of this content from new URL to past URL we want it to be a past
URL after it gets through all of these social media posts so we can do that with the addition of one extra module that's going to be an update a database item module in notion so I'm going to select notion hit update and then update a database item I can just add it to the end of this Instagram line here even though we're going to be editing something from the beginning and you want to make sure that when you're updating this database item you don't select the database ID or the page ID excuse me from any
of these notion modules that we just created but you want to grab the page ID from this first database item that was collected in the beginning because that's the UR URL that we're going to be using this is the page we want to update the status of from new URL to past URL so make sure you grab the URL page you can do that by selecting this last notion module update a database item and then select from the list we're going to have to type in our database ID which is the ID of our database
so we can just do a query search for social media posting going to paste that in here hit okay it will automatically populate all those weird looking numbers and then database item id we want the database item id of this very first module we started with so I can click into it I can close the first two notion modules scroll down all the way to where it says notion one and then select that database item id after I see it blinking over there on the center left of my screen I'm going to select that and
the only thing I want to change here is status and I can actually assign a post name to this as well so that our URL doesn't just say new M post um as it does right now but it actually has the name of one of these posts in here so I can just assign it a post name of the Instagram post I can just have the result of the Instagram post name and then for status I want this now to be a past URL since it's already ran through it's no longer a new URL we
have all of our content created around that URL so it's going to automatically move that and organize our database accordingly I just realized my face was in the way so I'm sorry about that what I did was I mapped post name and then moved the stat status to pass URL now I can hit okay in the bottom right hand corner and this automation is fully built and complete we now have the ability to test this and we now have social media posts all created so I'm going to test this once before we get into our
second automation maybe I want to go grab a different news article from this website because this website has some amazing articles here so five AI models for multimodal processing meta unveils them that sounds awesome head in here I'm going to actually delete everything out of this database so we have a clean start and then I'm going to hit start post paste in my URL beautiful then I'm going to run this Automation and like I said you can run this automation at certain times of the day you can run it manually as I am right now
you can have it run certain hours certain weeks it really doesn't matter you can really get Advanced with the scheduling let's just watch all these posts populate into our notion so we already have an X post populated in here within seconds and as you can see this is kind of the nice format that we did with the appending the page content uh you it's not necessary as I said but if you really want to get fun with the highlighting and stuff you can do so in here maybe I want to bold that maybe I want
to change the background color to Yellow you know you can get fancy with this and I'll show you where the image is actually populating within our LinkedIn post right here that just populated in as you can see we have the entire image URL down here so now I can copy that paste it in very quickly and all this information is coming from our make automation that we just created I'm sure we have another post about to populate in here I'll head back to our automation Elite home base the Facebook post is generated we can edit
it in here we can copy our link once again everything is working out amazing we now have this multiv view Transformer dang it actually did a really good job of generating the text Data generation music generation uh it spell everything right collaboration it's pretty sweet but yeah just like that the automation is completed we have all of our post in here we now have nothing in the ideas category it's now in the archived category because it's a past URL so when we open this up we can see the link that we use to generate some
social media posts very cool stuff and now the next step is what happens when we've reviewed these we've edit all of our post content up here and we have these ready to post well what we want to do is we want to be able to hit post and have them actually schedule out if you want to go that extra mile right if you want to take the next step and that's what we're going to learn next is building the second autom a so what we can do is we can name this automation something along their
lines of AI content system I'll just call it ACS one of two that way we have some good organization in the make side of things then I'm going to back out of this hit save changes definitely make sure you hit save changes otherwise I'm sure you'll be watching this back again then we can head back once more then we want to hit create a new scenario this is going to be our ACS 2 of two so I can name it that real quick two of two automation content system or automated con of system whatever you
want and here what we want to do is we want to be pulling things from our notion database and we want to be sending it to buffer in order to schedule out and post again if you haven't signed up for buffer highly recommend it it's a pretty good app it's worked out well for me so far and it's relatively inexpensive and here you're going to have the ability to connect all of your channels it's going to onboard you pretty nicely but as you can see I have some of these posts scheduled out one of them
posted from the beginning of this video which is pretty cool so what we want to do is we want to start with this notion module again the watch database items and we just want to make sure we're on our correct connection which is the automation Elite and you might have multiple notion connections or only one just make sure you're on the connection that you set up in the beginning of this video and then we want to watch databases by updated time and again we just want to pull in our database ID grab your database name
head over here query search it right this is going to pull in the URL database ID that appears up here and all these jumbled up numbers and then for limit you can just set that to whatever you want this is how many times it's going to run through usually I only have four social media posts but sometimes I have five pages since I have a URL in there so maybe I want to set that to five or maybe I can set it to 10 to make sure it misses nothing then I can hit okay from
now on that's all right as well I can hit okay and it's watching the database items but now we need to get the database items hit the notion module once again then select get a database item connect those those modules and for this we can just enter manually we want to select the database item ID from the database items that we're watching over here so I can just select that and hit database item id up top here I can hit okay now this side of things is all set up now we need to again set
up a flow control router you just can select that little router button so you can go to multiple different things at once it's very cool then we want to set up a filter to make sure that the page is actually in the posting status because we don't want to run through social media posts that are in ready to posts that aren't reviewed or that are in new URL or posted posts you know we want only the posts that have a status of posting to go through the rest of this automation here so that's what we
can set up I can hit this little wrench icon and hit set up filter I can call this if in posting right then I can set up the condition now what I want to do here is I want to pull in properties but we can't see any property values because we haven't run through this autom yet so what I want to do is I just want to change choose where to start and I'm just going to have all instead of from now on just temporarily and then I'm going to hit run once and it's going
to run through and fetch all these database items uh which is very very nice and now we have updated information in here I'm going to change choose where to start from now on instead of all and now I can set up this filter properly so I'm going to hit these three dots in the middle of these two modules and for condition I want to set the status of the condition the name of the status I want that to contain and then I'm just going to type in the exact name of the status that I want
it to contain so I only want it to run through if it has a status of posting make sure you type that in exactly how your status is labeled over here I have posting with three dots with a capital P over here that's what I want to type in over here so if the status is in posting then it will run through the rest of this Automation and now that we have the router what we want to do is add some buffer mon so we can actually schedule these things out so hit add and type
in buffer you can hit enter and then create a status update here you're going to connect it to the router and for each social media post we have we're going to want to connect it to this router first I'm going to start with X so make sure you create your buffer connection and it will automatically pull in all your profiles for now I'm just going to select the X module here and if you want a single post for all of your platforms then for one you're going to need an image because Instagram requires an image
but for two you're going to need a post that would look good on all platforms that's why I'm doing this separate I like having unique post for each platform for the text what you want to do is you want to scroll down to your notion one and you want to select properties value and you want to go post content text and then that content right there beautiful and this will be the content of the post content property within your notion database then for publication I like adding an update to the top of the queue this
will schedule it out but it's not going to post it automatically so you'll have time to go to buffer and check it or you can hit post immediately if that's what you want which in my opinion if you do the review process and notion and everything checks out to be good then you can just have it post automatically when you hit post right that's how cool this is but this is how to set it up for each one of your social medias you're going to have to assign the notion one property value of post content
text and then content then you can hit okay but we have to make sure that we set up a filter so that anything that isn't an X poost doesn't get through so we can hit this little wrench here and hit set up a filter we can just label this if forx we can set the condition once again head down to the notion watch database items module that we had in the beginning and then we can go down to properties value once again and then where it says platform hit the drop- down arrow and select name
this is going to be checking if the platform name is X so for text operators we can select contains and then just type in a capital x and that'ss what our platform is within our notion database a capital x so this is going to check is it a post for X if not it's going to move to the next one the next one might be at Facebook is it a post for Facebook if not move to the next one right it's kind of this cool thing that we can do here so now I can hit
okay and I can rename this if I like to X poost okay now we just do the same for the other platforms right it's that simple Le I'm going to duplicate this module by hitting clone heading over here changing my filter so that it's if for LinkedIn this time condition once again we want to scroll down we want to head to properties value platform name if that contains then we're just going to type in the exact name of our platform LinkedIn then it can run through and post it on LinkedIn rename this to LinkedIn hit
okay and then I can actually edit the text content in the profile that it's uploading to so I just want to select LinkedIn and I can leave that text content actually the exact same since it's going to be pulling that property in from every single database item that we are watching publication once again I'm going to add an update to the top of the queue hit okay and now I'm going to do the same for Facebook I would be doing this for Instagram but my Instagram needs an appeal for whatever reason Instagram and Facebook are
always doing that for some odd reason but that's okay I'm just going to rename this module to Facebook post I'm going to hit okay set up my Facebook posting filter again same process for this a lot of the things we do with automations are quite repetitive but you know if you learn it once you know how to do it forever condition scroll down the properties value down here platform name we want it to contain Facebook so I'm going to switch the text operator to contain p and then type in Facebook exactly how I have it
labeled in my notion database okay then I want to click in here and make sure that I change my profile to Facebook and that's all I have to do I can leave everything else the same make sure my publication is how I want it then I can hit okay now this is very good but we have one final step we need to do for organization right you know I'm all about it I'm all about organizing the database we want things to be organized so that once all of these post the status actually changes to post
did rather than rather than keeping it on posting We want it to change views and we want it to change statuses so that's what we're going to do we're going to update a database item in notion by hitting add selecting the notion module and hitting update a database item we're going to be doing this for each one we're going to be grabbing the page ID that we just updated and then updating it to posted after it runs through this process so I'm going to select my database ID and my database ID is different than my
page ID my database ID is what holds all of my pages going to go to social media posting do the query search as we have been this entire video if you're sticking with me congratulations because you are learning a lot right now paste in your database ID just like that and it will automatically populate in then we need to pull in our page ID and that's just the database item ID from each one of these pages so we can pull that in from notion module 2 get a database item going just select get a database
item ID and now this is the same as a page ID and here we have the ability to to manipulate all the fields we can change the post name we can change the platform the status whatever we want all I want to do down here is change the status to posted because this went from being in the posting category to scheduling on our on our platform to actually being posted so we just want to update that accordingly and I can just clone this to run for each step of the way so I'm going to clone
that twice then I'm going to come in here make sure everything looks all good database item posted good and then database item ID and posted is what we're looking for on this final update item all right we're looking all good and this is the automation fully complete I'm going to hit save in the bottom of my screen here make sure you're saving along the way but that's it that's all we have to do and now we have both automations all complete I'm going to run you through the entire process and I'll show you how you
can schedule out the post on Buffer as well so this is awesome make sure you're testing along the way but make sure you're not accidentally posting to your social medias with the publication make sure you don't have it on post immediately before you test otherwise it's going to accidentally post for you when you're in the testing phase and you don't want that you want to be able to come in here and actually delete posts like this and hitting confirm if you don't want to actually post it and you just want to test it so let's
head back to the AI content system one of one that we created in the beginning of this video right here the ACs one of2 and now we can look for an article within our industry maybe the rise and fall of AI McDonald's drive-throughs looks super interesting and I think my audience would love it I can just copy this article head back to our notion database after I delete everything again this is I'm using everything that we've created in this tutorial from start to finish so what I can do now is I can hit start post
paste in my article URL and now I can run this automation or I can schedule it out to run at a certain time it's going to get that summary for us and create all the posts all the images we need and it's going to send that all the way back to our notion database for review Once you have this built it may seem like a lot upfront to build but once you have this built it's going to be very beneficial for you and your brand and as you can see down in the bottom right hand
corner by my head this scenario was initialized at 1119 and it finished at 1120 you know I'm not that good at math but 1119 to 1120 is 1 minute so we've created four social media posts for our Platforms in one one minute now if we do this for 60 minutes then we can have 240 posts in an hour now people are usually charging thousands and thousands of dollars to create hundreds of posts per month this can create 240 posts an hour based on one URL if you have a big database a blog post that you've
created and you want to repurpose that content for your brand this is going to be huge you can even do this with video URLs as well as I showed you in my newsletter automation you could have the beginning of this automation hook up to a video transcript URL URL and instead of having it be based on an article you can have it be based on a video transcript watch my newsletter automation if you haven't watched that yet I linked it earlier in the video but now that all this is complete let's head back to our
notion database and let's take a look at all of these ready to post items as you can see the URL we posted moved from ideas to Archive to a past URL which is beautiful that worked out great and now we have these ready to post modules here I can open them up and edit them if I'd like as I showed you earlier we have the Instagram one which I won't be posting cuz my Instagram's currently down but we have Facebook right here nice solid conversation starter for a Facebook group a LinkedIn post with some funny
burger and robot emojis and some other emojis that are relevant with hashtags questions call the actions beautiful all of our page content is getting appended and finally we have our X poost and it overuses the breaking a lot so I might have to change that a little bit but breaking McDonald pulls the plug on its AI power drivethru initially praised for Speed and accuracy the AI faced hurdles with complex orders Tech issues and ethical concerns would you prefer a human or AI taking your order so that's going to spark some conversation just like that and
all I had to do was sit here and watch the magic happen after building at once I've reviewed them I liked them let's say I want to post them all I have to do is hit the post button and I can have it be watching the database on demand in the next automation over here so that it runs automatically but for now I'm going to run it manually and as you you can see this second automation we just built once we hit run once after scheduling all the posts if all your filters are set up
properly as I've showed you in this video it's going to schedule out those posts on buffer for you accordingly which is just awesome I'm going to hit run Once on This notion module right here it's already scheduled out the Facebook post the X post and now it's waiting on the LinkedIn post but just like that our posts are scheduled if I wouldn't have been talking and explaining and pausing this whole process would have taken under 5 minutes for four social media posts based on a single URL this entire process could probably take 2 minutes if
you weren't even editing it and you were just running through your automation maybe even less so now want to go to buffer as you can see all these posts are scheduled out we have our LinkedIn post for AI at the drive-thru we have our McDonald's post all scheduled out ready to go you can edit them in buffer or you can even delete them you can hit share now as well for now I'm just going to delete these since I don't really feel like making a post about McDonald's and I just posted on all the social
medias in the beginning of this video but I'm going to hit delete on all of those just wanted to show you that you can hit share now you can schedule them out and get creative and buffer but this has been the automation this has been the AI content system that I've created in order to automate the process you can incorporate images within your properties you can do so much now if you want to talk about this automation you want to see its full potential you want to see more capabilities then you can definitely start a
conversation about it within our AI Foundation School Community which is growing every day we have so many different live calls coming up in 5 days we have one coming up on AI security if you go to our calendar we actually in July have a five part series on automations called automations unlocked and throughout July we're going to be going through everything you need to know about automations we also have a bunch of live q&as in here again lot of automation systems and not only that but large language model Mastery courses AI image generation Mastery by
Carter there is so much this community has to offer that's why I want to give you the opport to join and that's why I wanted to bring it to your attention because AI is much better learned when shared with other people I've learned so much in these past 20 days of the community being open so I'll leave a link in the description in the top pend comment if you want to we even have a little poll going on this morning three hours ago 13 members have voted 29 comments of what our favorite work days are
so we're just in here talking you know it's just a good group of friends and it's a beautiful community so I recommend you come along for the ride if you like automations and just AI in general but with that being said I hope that this could help you automate your content system please like And subscribe if it did I would highly highly appreciate it I'm going to be coming out with more automated content systems in the future so I highly recommend you stick along for the journey with that being said I hope you have a
great rest of your day and I will see you in the next video
Related Videos

44:33
Manus is out of control
Wes Roth
177,514 views

47:59
ChatGPT Full Tutorial for Beginners in 202...
AI Foundations
48,999 views

3:33:33
Just Listen! Frequency Of God 1111 Hz: Une...
Frequency Harmony
3,441,109 views

39:38
Zelensky House of Cards in KURSK crumbles
The Duran
58,325 views

58:57
Mastering Data Security: Advanced Strategi...
ESTHER IGBE
3,871 views

58:32
Revolutionizing Business Efficiency — An I...
CrewAI
8,575 views

2:06:26
432Hz- Fall Into Deep Healing Sleep, Regen...
Healing Inner music
3,353,336 views

1:43:06
🚨LIVE! RUPERT LOWE SPEAKS OUT AS HE RESPO...
Dan Wootton Outspoken
65,171 views

3:43:24
FREE DeepSeek-R1 Course: Build & Automate ...
Julian Goldie SEO
118,708 views

34:47
GPT Store: How to Create GPTs that SELL! (...
AI Foundations
53,054 views

26:57
10 Secrets for BETTER ChatGPT Outputs! (Im...
AI Foundations
30,293 views

1:04:30
36 ChatGPT Tips for Beginners in 2024! (Be...
AI Foundations
528,259 views
1:58:33
JAM Protocol by Dr. Gavin Wood | The Decen...
Pala Labs
2,209 views

10:46
Katie Hopkins: Todays headlines: Three exa...
Katie Hopkins OFFICIAL
165,145 views
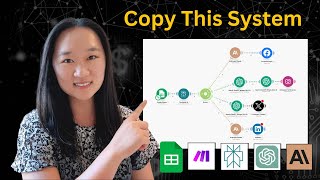
19:39
This Social Media AI System Creates Unique...
Helena Liu
1,026,543 views

13:15
This Could Bring Starmer Down
BlackBeltBarrister
175,305 views

1:59:31
How to Start an AI Business | STEP BY STEP
Liam Ottley
700,742 views

18:53
Feed Your OWN Documents to a Local Large L...
Dave's Garage
522,203 views

26:27
15 Free Ai Tools That Are Making People RICH
Wholesale Ted
491,041 views

1:01:32
100% Automated Content System (with AI, Ma...
Stephen G. Pope
66,916 views