KLING 2.0 INSANE VFX Videos | How-To Tutorial | 4 Pro Methods
36.71k views2876 WordsCopy TextShare

Atomic Gains
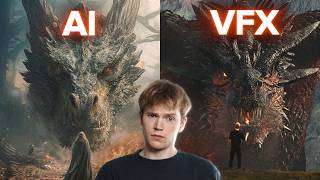
Kling has some incredible new updates that allow you to create some incredible VFX, I’ll show the be...
Video Transcript:
I'll show you some really creative ways on how you can get the most out of these tools and I've got to say I have been blown away with the results. Okay, let's get into it. So, Cling have recently released their 2.
0 model which greatly improves dynamics, aesthetics, and prompt adherence. I'll show you how you can use this new model to create some really believable VFX, but I believe the secret source is in the multi-elements mode. I'll show you how to use the swap, add, and delete features of this groundbreaking tool.
To start off, I'll show you how you can create some believable VFX using Cling's 2. 0 model. It does work really well from text to video to create some really nice effects, but I really like using it with the image to video.
So, I'll show you an example of one of the shots I've created. I recorded a couple of videos in my garden, and I wanted to create a shot where the ground crumbles away and smoke pours out of the hole. So, I filmed the ground here and I took a screenshot of the point where I want the effect to happen.
Then, all you have to do is drag the image into Cling and I gave it a prompt of the ground starts to crumble and reveals a deep sinkhole with smoke coming out. And I also add in handheld footage as Cling does a really good job at keeping that natural camera movement, especially as the original footage was handheld. So, it just helps to keep that continuity in the movement of the shot.
So, let's have a look at the result. And I am blown away with how that looks. It's pretty incredible as it's noticed that there are tiles in the shot and it breaks those tiles up individually and the smoke element looks really realistic.
And then when I stitch it up with the original footage and add a bit of sound, this is the video that it creates. It's very simple, but with Cling 2. 0, 0.
It really does a great job with the simulation and physics of objects. For this second video, I shot a clip looking out at the hill that I can see in my garden. And I had this idea of a huge tsunami wave coming over that hill.
So, I took a screenshot from the video and prompted it with a tsunami wave of water comes crashing over the hill in the background towards us with handheld footage motion. And again, I am blown away. It adds that really nice handheld zoom effect.
And the water effects coming over the hill look incredibly real. I can see this saving so much time for VFX artists. If you're working on a small project, it's very, very good.
Then when stitched together with the original footage and some sound effects, you get a really cool shot. [Music] For this other example, I wanted my car to levitate and then turn to dust. And Cling did an incredible job at following the prompt.
So, as you can see, I get in the car and then I just start to float away. Does a really good job at incorporating the shadow from the car as it floats away. And the dissolve effect is really cool.
So, yeah, you can definitely have a lot of fun with the image to video using the new 2. 0 model. If you do want to experiment with different stock footage, then I would definitely recommend pixels.
com as they have tons of free footage to play around with. Now, let's have a look at the multi-elements swap feature. The swap feature is one of my favorite ways to create some really cool effects.
For my first test, I filmed myself holding this extremely large pumpkin. So, I thought, what if I change the pumpkin into a cute character? I actually created the images of the characters in Clink, which was really useful.
and I didn't have to go to another website. So, I used image colors 2. 0 and I prompted it to create a cute round creature on a white background and it created these four really cute creatures.
So, I downloaded a couple that I really liked. Then, all you have to do is switch to video generation mode and make sure you're on elements and swap mode. At the time of recording this, the multi-elements mode does use the older 1.
6 model, but the results I've been getting still look really good. By the time you're watching this, they may have changed it to the 2. 0 model.
So, I've added in my video of me holding the pumpkin. Then, all you have to do is go to this edit button, and you click the object that you want to be swapped out. So, in this case, I click the pumpkin.
Then, just click confirm, and I've added in the picture of that cute creature, and it should add in a prompt below with your reference video and your image included. So, I prompted it was swap the orange pumpkin from this reference video with cute creature from the image. And the video looks awesome.
So, as you can see, I'm holding this creature. I'm really impressed with the contact details. So, as you can see where my hands are in contact with the creature, it looks believable.
I've added a bit of shadow and it actually looks like I'm holding it and it's not just floating there. And here's another version, but with the cute octopus. And again, it looks really good.
Then I had the idea, could I make myself hold a big pile of gold bars? So I generated some gold bars and added them into the shot. And I was blown away with the details on this one.
As you can see, when I shift the gold bars around, there is a really nice reflection coming off the golden texture. And you can even see some reflection of my hand in the bars where I'm holding them. So this was a test to see how different materials would work in these situations.
And I'm really happy with the results. Another great method on changing the object in your video is using Clling's image editing. So, I've got this video of this small dog running and I wanted to change it into a different creature.
I took a screenshot from the start of the video, then click on the image editing tab, upload the image, and it gives you these different tools. So, you can either use the quick selection tool and click on parts of the object that you want to select. And it does a pretty good job at finding the areas.
And for fine-tuning, then just click on the brush tool and just fill in the sections of the dog. Then in the prompt box, add whatever you want it to be changed into. So in this case, I put a baby hippo.
And it gave me these results, which I think look really, really good. So I found one that I want to use. I'll download this.
And my preferred method is to get rid of the background and just have the hippo isolated on its own. So to do that I usually use Canva but you can use free alternatives like photo. I'll just quickly show you in Canva all you have to do is upload the image and then they have a background remover tool.
It may have some extra things in there so you can just use a magic eraser. So I'll save this image. Then back into cling I'm on the multi-elements swap feature.
I've added in the original video of the dog and I've added in the image of the hippo. Then in the prompt, I've put swap dog from the reference video with hippo from the image. And this is the result I got.
It's done a really good job at animating the hippo in the same style as the dog. And here's another version where I generated a robot dog as well. And again, it looks great.
You can do some really funny things with the swap feature. So here I've got a man doing weights. And I thought I'll change his weights for some hamburgers.
And as you can see, it does a great job at putting the burgers onto the weights. And what's impressive with this one, as the weights go off screen, as they come back up, they're still on the weights. I found this stock footage of someone touching a horse, and I thought, could I change the appearance of the horse while still having the person touch them in a believable way?
And the results are incredible. So, I used that same impainting method with the dog, but to change the horse into different styles. So, in this one, I've turned the horse into a dragon style horse.
And as you can see, the contact on the horse looks incredible. This is something that is really hard to do with VFX, as if you've seen most films, it doesn't feel like they're actually touching the CGI character that they're interacting with. I know this isn't Hollywood quality, but I'm very impressed with how the hand interacts with the new dragon style horse that I've created.
And here's a few more versions of different styles of horse just so you get the idea of how you can play around with this tool. I also did a similar thing with a recording of my cat. So, first of all, I just did a slow orbit around her, then used the impainting tool to change her into different creatures and then swapping her using the multi-elements tool.
And I think you'll agree that the results look pretty good. It's actually kept the head movement of my cat and put it onto the new creatures. All with really believable lighting as well.
I even turned my cat into a brown bear and Toothless from How to Train Your Drgon. And this video here blew me away. So, I did another one of my cat lying down and the result looks very, very real.
I'm very impressed with how it turned out. And in this one, I turned it into a lizard. While it's not so believable, it's still a pretty cool effect.
Another awesome thing you can do with the swap feature is turn yourself into different characters. I've got loads of footage of myself with different props. So, I wanted to create myself into a knight.
And to do this, you can either use the impainting feature within Cling or another method that I really like is using Magnific's structure reference. So, the key is to keep the structure the same but change the style of the image. And this image was created in magnific and I gave it the prompt of person is wearing full body night armor.
And I've got to say it did a really good job at following the prompt. So back into cling I've added the video of me and I gave it the image of me wearing the knight's armor and I made sure to remove the background and the result looks pretty epic. I made sure the background was green so that I can key it out.
So here's what it looks like with a different background. Here's some other characters that I've created using this effect. It gives you so much flexibility on creating custom characters and using your motion as the driving performance.
Hey, if you're enjoying this video, please consider liking and subscribing to our channel. That would be awesome. Okay, back to the video.
Now, let's have a look at the multielements delete feature. The delete feature is exactly what it sounds like. It will delete whatever object you select and fill it in appropriately.
So, I'll go back to the video of me holding the giant pumpkin. And I want to delete the pumpkin out of the shot. So, all you have to do is click on the object and then click confirm.
And in the prompt, I put delete the orange pumpkin from the reference video. And I'm blown away with the results. It's managed to fill in what was there really well.
Like you can see my shirt looks very realistic. Now, I know there's these little bits from the pumpkin off the side, but that's because I didn't select it. But it's very impressive how it's filled it in.
And here's another video where I've got someone bouncing a basketball, and I selected the ball and prompted it to delete the ball from the shot. And it looks really good. There is a bit of blurriness on the hands, but overall it looks pretty solid.
And again, in this one, I've deleted the ball from the shot, and it does a fantastic job at removing the ball. And for a trickier shot, I've got this couple sitting on a sofa, and he's got his arm around her. So, I made sure to select the lady and then I said, "Delete the person from the reference video.
" And it did a great job at filling in the blanks, the background, and the gap that she was filling. again looks really good. This is something that will save a ton of time as deleting things and filling them in, especially with video, is something that would take a very long time in the past.
Now, a downside to cling is that these shots are only 5 seconds long. And in my opinion, it's just too short. But the thing is, this is just the start and it's only going to get better.
So I can see these kind of elements being added into say like Adobe Premiere Pro if you want to remove certain things and hopefully you can remove it over a whole shot, not just 5 seconds. But this is very very promising. Now let's have a look at the multi-elements add feature.
So with the add feature, you can put any object and add it into the scene. So here's another example of me holding the giant pumpkin. Just make sure you're on the add tab and I've added in the cute octopus.
So, I've put in the prompt add creature from image one onto the orange pumpkin. The creature is animated and is laughing, and it adds the octopus on the pumpkin perfectly. As you can see, his little tentacles are wiggling slightly, and he has an animated face.
So, I'm extremely impressed with how it's added the creature into the scene. And with this video here, I've got a truck driving through what looks like to be some kind of desert. And I impainted some things into the scene.
So you can see I've added in some kind of flaming wreckage and a city skyline in the distance and the video looks really cool. What's great about this is it gives you the ability to do set extensions and matte painting into your shots. So you can see the city in the background was added in and it's tracked really nicely.
And for another test, I wanted to add an animal into my garden. Now I live in New Zealand and I've never seen a kiwi bird, mostly as they're nocturnal and they kind of stay hidden. So, I shot a short video in my garden, then took a screen grab from that and used Cling's inpainting tool to add a kiwi into the shot.
Then, in the prompt, I said, "Using the context of the reference video seamlessly adds the kiwi bird from the image. " And I think it creates a really believable shot. There's just some subtle motion to the head of the kiwi, but I think it looks very realistic.
So, you can definitely have a lot of fun with adding elements into your shots this way. One of the downsides to Cling is the price. As with Cling 2.
0, a 5-second clip costs 100 credits, and a 10-second clip costs 200 credits. But if you use the multi-elements mode, which I've been showing you in this video, they are a bit cheaper at 50 credits per 5 seconds. If you were to get the $7 a month plan, you only get 660 credits a month to use.
If you did need it for a project, I would recommend going for the Pro or Premier and just buy it for one month and plan out your shots and use the credits wisely. All right, so we've reached the end of this video and I hope you can see how powerful these new updates are in Cling. If you have any tips or tricks on how to get the most out of these features, then please leave a comment down below.
Remember to like and subscribe to our channel for more videos like this. And if you'd like to see one of our other videos, then feel free to click the image you can see on screen. Thanks for watching.
Related Videos

24:20
Kling's New AI Video Generator is Insane!
Curious Refuge
36,586 views

14:53
Create AMAZING Videos & Ai VFX | PIKA Ai 2...
Atomic Gains
40,921 views

22:21
Create AMAZING VFX Videos With Runway ‘Fir...
Atomic Gains
21,796 views

14:31
*FINALLY* AI Filmmaking Tools I DESPERATEL...
Haydn Rushworth
15,278 views

6:10
5 Places You Can Get FREE VFX Assets!
Buzzsaw
9,779 views

19:15
Midjourney's NEW POWERFUL AI Image editor ...
Wade McMaster - Creator Impact
12,499 views

14:52
I generated 8,036 images on Midjourney V7,...
Glibatree
12,702 views
11:04
I Remade an AI Video With VFX
ErikDoesVFX
552,594 views

14:21
Create Ai VFX (Visual Effects) | With Runw...
Atomic Gains
155,351 views

13:22
Kling 1.6 Multi-Elements - Swap, Add And D...
Astrovah
7,163 views
27:40
The Biggest Misconception in Physics
Veritasium
6,255,378 views

14:25
If You’re Creative But Lazy, Please Watch ...
Luc Forsyth
458,287 views

16:51
How to Create Full Animated Stories Using ...
Emmanuel Crown
27,996 views

11:29
Why I Quit After Effects (to work in Holly...
Josh Toonen
340,081 views

11:53
Kling AI 2.0 is HERE: The BEST AI Video Ge...
CyberJungle
68,876 views

10:04
Pam Bondi details judge's actions before a...
Fox News
1,710,412 views

18:48
The Best Character Consistency Methods For...
Atomic Gains
20,285 views

24:02
How Flying Cars Became a Billion-Dollar Be...
Bloomberg Originals
207,978 views

8:57
Confused Trump tries to use words to form ...
David Pakman Show
219,338 views

8:53
STOP Making AI Videos Until You See This: ...
metricsmule
12,739 views