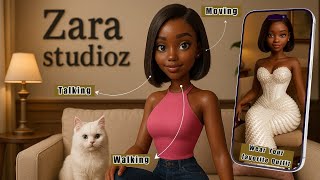
How to Create an ULTRA REALISTIC TALKING AI Avatar for FREE | Full Guide
12.78k views3085 WordsCopy TextShare

Asnat Tech Tips
How to Create an ULTRA REALISTIC TALKING AI Avatar for FREE | Full Guide. Want to create a realistic...
Video Transcript:
you've probably seen AI avatars like this talking moving looking so real and wondered "How do they do that?" That's the number one question I get on my channel how did I make mine so in this video I'll reveal the full step-by-step process so you're not left guessing or wasting time on tools that don't work but first let me give you a quick look behind the scenes where the whole process begins i'll walk you through how I turn a single image into a character that moves talks and feels alive it all begins with a single prompt
detailed consistent and full of personality just describe your vision and let the AI do the rest and just like that your character comes to life styled to reflect your vision now it's time to add some motion so you'll need a prompt with subtle movement expression and emotion but it's not just about how she looks it's how she sounds voice is what gives her soul it adds warmth and makes her feel real and finally once the voice is recorded it's time to sync everything together motion timing emotion by the end you will know exactly how I
bring my AI avatar to life i'll also share a few tips and my personal technique for syncing emotion with voice that's what makes it feel real so stay with me till the end miss just one moment and you might miss the key that makes it all work i created my avatar before GPT40 released their new image generation model and as much as I love the update when it comes to building a reliable reusable avatar I still think midjourney is the better choice let me explain why when you're creating a character that you plan to keep
using midjourney gives you something really important style detail and consistency you can switch up the outfits change the hairstyle and the face stays exactly the same that's huge with GPT even when you try to edit just one area like the shirt or background the face still shifts a little it's subtle but if you want a recognizable character it matters with Mid Journeys in painting tools I can literally select just the hairstyle and restyle it the face doesn't change at all that's a game changer when you want your avatar to stay exactly the same across different
videos there are a lot of ways to create a prompt for your character for example you can ask Chad GPT to write a full midjourney prompt with your reference photo if you'd like you just describe your vision the mood the style the personality and GPT builds the prompt for you or you can upload your reference photo directly to Midjourney and use the describe feature it gives you several prompt options based on your image which you can remix however you like now if you want your new image to really look like your reference use the character
reference tag abbreviated as C R E F written with two dashes like this followed by the image URL to get your image URL just send your reference photo inside the MidJourney Discord chat then click on the three dots and copy the link that's the URL you'll paste right after the character reference tag then control how closely it matches using image weight IW or character weight CW and one really important note don't use images of celebrities real people or even characters from other AI YouTube channels as your reference because you never know if that AI avatar
was created from a real person's photo even if it feels like just inspiration it can still lead to copyright issues i always recommend creating something unique either from scratch or using your own photo if you'd like because the last thing you want is to spend weeks building your channel only to get flagged or even banned for using someone else's likeness so let's continue if you want to match your reference image closely try starting with an image weight of 0.8 eight or a character weight of 50 the higher you set the image weight the more closely
midjourney tries to follow your reference image if you push it to something like 100 the result might end up looking too similar which can make the image feel flat or even a bit unnatural but if you go too low like image weight 10 or character weight five midjourney starts to drift away from your reference and create something more original which is great for experimentation but you might lose that sense of consistency i usually test a few versions at different strength levels and pick the one that hits the sweet spot similar enough to feel like the
same character but still fresh and expressive now this is important make sure your avatar is facing forward looking straight into the camera and if you want her to gesture like mine make sure to include the hands and fingers in the image that tiny detail makes a huge difference later when animating once you have got that base image the rest is easy everything you've made is saved so when you want to give her a new outfit or change the lighting you're not starting over that's why midjourney is still my go-to tool for building AI avatars especially
ones I want to keep using again and again like a virtual co-host or the face of a brand just a heads up Midjourney does require a subscription but the good news is you don't have to keep it active every month so what I did was create a few variations up front different outfits hairstyles so I've got a nice little collection of images ready for future videos all your images stay saved in your account even when you're not paying so later if you ever need to update something you can just reactivate the subscription for a month
and jump back in and if you're looking for a free alternative you can try Leonardo AI let me quickly show you how to do this first head to Leonardo's site and create an account once you're in go to the image generation section for the best results you can choose the Flux diffusion model it tends to create more lifelike faces with clean soft lighting then under the style dropdown pick something cinematic like portrait cinematic it gives your character that soft high quality look we're going for make sure to set the aspect ratio to 16 by9 especially
if you're planning to animate later next scroll down to advanced settings and turn on fixed sit this gives you more control and lets you create new versions of your character without changing the face now the most important part the prompt you can ask Chad GPT to help you write one or customize it yourself just like I explained with midjourney make sure to include things like where the character is positioned sitting at a desk facing forward the overall tone calm confident friendly detailed elements like clothing lighting camera angle and most importantly phrases like hands visible on
the table or no distortion to avoid animation issues later on once you have found a look you like click the three dots on the image and copy the seed number then paste it back into the fixed seed field that way your character will stay as consistent as possible every time you generate a new variation don't use the exact same prompt over and over if you do you will probably keep getting images that look almost identical like the ones you see here on the screen even small changes like adjusting the color of the hoodie or background
help create fresh images without losing the core character once you're happy with the result click to download your image it might take a few tries to get the look just right and that's totally normal you can generate a consistent character using just their daily free credits and if you haven't seen my full tutorial on how to create a consistent character definitely check it out i walk you through my full stepbystep workflow plus a secret no one really talks about so if you're not ready to subscribe to MidJourney just yet this is a great place to
start also with MidJourney you can upscale your image and the quality turns out very detailed but if you're using Leonardo AI the images usually come out in slightly lower resolution and I'll show you a quick way to fix that the first thing I recommend is removing the background there are lots of tools for that but one of the easiest is remove.pg it's super simple just upload your image and it takes care of the rest in one click then download the transparent version we'll need that in a second now let's enhance the image a bit open
Canva and start a new design using the YouTube thumbnail size then upload both versions of your image the original and the one with the background already removed first stretch the original to fill the entire canvas this will be your base layer you can simply drag the corners or right click the image and select set image as background that way it fits perfectly and stays locked in place then place the transparent version right on top and carefully align it so everything matches up exactly this gives you much more control when upscaling or refining details later to
sharpen the image we'll use Canvas built-in enhancer click on apps type image upscale in the search bar and choose the image upscaler tool now a quick note this tool used to be free for 2x or 4x upscaling but now it's part of Canva Pro so to access it just start their 30-day free trial that unlocks all premium features including advanced upscale options once the trial is active you'll see different upscale levels 2x 4x 8x and even 16x i usually go with 16x for the sharpest result but feel free to test what looks best for your
character after it finishes upscaling click edit and adjust the brightness or highlight slightly this can really help your character stand out and look more polished and when you're happy with the final result click download since you're on the free trial make sure to select the highest resolution available and that's it now we've got a clean high quality image ready for animation i've tested pretty much most of the top image to video tools out there and here's what I found when it comes to animating avatars like mine in a way that feels natural and lifelike runway
is still my favorite nothing else I've tried gives the same level of smooth realistic motion make sure to select Gen 3 Alpha Turbo it's fast expressive and gives you results that feel much more natural upload the image and enter a motion prompt you can even ask Chad GPT to help write it for you here's one example of how I write prompts to get the best results a man with short styled brown hair and trim beard wearing a mustard yellow bomber jacket over a black hoodie is sitting at a desk he is talking directly into the
camera with high energy and engagement smiling warmly as he explains a topic with enthusiasm his hands are fully visible and expressive he frequently gestures while speaking spreading his palms and moving them slightly outward to emphasize key points his gestures are natural smooth and purposeful typically lasting one two seconds each occasionally he brings his hands closer together or points toward the table or screen in front of him matching his verbal explanations his posture is upright and animated leaning slightly forward with both elbows occasionally resting on the desk for support the camera remains static with no zoom
or panning the background lighting glows in vibrant orange and teal tones and remains unchanged throughout the video enhancing the modern studio setting the more specific your prompt is the better your animation will turn out once you submit the prompt the animation usually finishes rendering quickly and you will be able to preview it before downloading you've probably noticed that a lot of AI talking avatars online just reuse the same short animation maybe one or two clips that loop over and over they sync the lips once and repeat it throughout the video and that works just fine
for many creators but personally I like to generate more than five different versions with different movements and expressions so when I edit in Cap Cut I can match the gestures to the actual words it just makes everything feel more natural and expressive don't worry if not every animation turns out perfect i've definitely had some that looked a little weird i either trim those parts or just skip them completely that's totally normal now there is an extend video option in runway but in my experience the second half always drops in quality the face sometimes even starts
looking older or a bit distorted so I usually stick with five or 10 second clips 10 seconds gives you plenty of motion but keep in mind it uses 40 credits once your animation is ready just hit download and you're good to go a quick note if you're using the free credits in Runway your video might come with a small watermark to remove it you can either upgrade your plan crop it out or do it right inside Cap Cut just import your video then add the original image you used to create the animation and place it
directly above the video layer then use the mask tool to crop the image just enough to cover the watermark area that's it the animation stays clean and the watermark is gone with the free version make sure to export in full HD 1080 it's the highest resolution available without a paid plan and it still looks clean and professional now comes the fun part syncing the voice to match the animation you can use any AI voice tool you like i personally use 11 Labs for my talking avatar if you don't want to use your own voice 11
Labs offers incredibly realistic voices that sound natural and expressive just type what you want your avatar to say pick a voice you like for example this one and hit generate in just a few seconds you'll have a voice file to start with hopefully you can create your own AI avatar and take your creativity to the next level but that's just the beginning and let me tell you voice quality really matters even if your video is amazing poor audio can turn viewers away in seconds it just feels unprofessional so investing time into getting the voice right
totally worth it that said I'm not going to dive into every single setting in this video that's a whole topic on its own and I'll be making a separate tutorial just for that where I show you exactly how I use 11 Labs to make the voice sound natural and as close to my real voice as possible i'll also share a few extra tools I use to make everything sound polished and professional basically my full voice over workflow next before syncing I bring all my animations and voice over into Cap Cut this is where I start
matching the gestures to the actual words adjusting the clip so everything feels natural expressive and aligned with what the avatar is saying and here's the real magic emotion it's not just about singing the mouth it's about getting the pacing tone and energy right so it really feels like your character is alive once that's ready I move over to Dream Face for the final sync i upload the animated video with the voice already combined in Cap Cut and Dreamface takes care of the rest if you're using the free version there will be some limitations including a
watermark to remove it you can either crop it out or use the same cap cut method I showed you earlier once everything's in place just hit generate and let Dream Face do the rest and when it's done your avatar talks moves and feels alive hopefully you can create your own AI avatar and take your creativity to the next level i'm wishing you the best of luck and I truly hope it all works out for you so this is the process and before we wrap up let me quickly break down how much this whole process actually
costs midjourney $10 per month basic plan which gives you 200 generations more than enough to create your avatar you'll likely only need it for one month or you can use a free alternative like Leonardo runway free credits or $15 per month they offer 625 credits which is enough to create around 17 to 20 short animations 5 seconds each plus about five longer ones 10 seconds each you also get the option to upscale for better quality 11 Labs free plan available cap cut Canva remove.bg all free dream face free with daily limit so overall if you
are using the free plans you can create your avatar almost entirely for free this part is really important especially if you're planning to grow your channel and eventually get monetized always always check the terms and conditions of every app you use it might sound boring but it can save you from serious copyright issues later and if something doesn't work on the first try don't stress sometimes I have to redo the prompt tweak the voice or adjust the animation that's all part of the process and if you ever get stuck feel free to drop a comment
i really try to reply to everyone who reaches out thank you so much for watching and if this video was helpful feel free to like subscribe and share it with someone who is also starting their AI journey in the next video I'll share some huge mistakes I made early on including one that forced me to create a whole new account hopefully that helps you avoid the same missteps and start your YouTube channel the right way from the beginning see you there
Related Videos

6:53
How to Create Ultra-Realistic Talking AI A...
Dan Kieft
54,065 views

13:12
Create a Talking AI Avatar That Moves, & C...
Digital Bossq
13,917 views

24:03
1 MINUTE AGO: Jamie Foxx Testifies, What H...
WhatIsMyStarWorth
479,202 views

17:59
FREE AI Tools to Turn Text Into 3D Animate...
Asnat Tech Tips
78,222 views

22:23
How To Create Consistent Characters With A...
Authority Edge
1,006 views

34:25
How I Created a Singing 3D Pixar Style Ava...
Code And Create
11,194 views

18:33
How to Create Ai Animated Stories Using Ch...
Tao Prompts
17,760 views

13:10
20 BEST GPT-4o Image Generator Ideas You N...
Asnat Tech Tips
3,483 views

15:18
Create 3D AI Avatar That Talks – Pixar St...
Code And Create
19,420 views

25:59
This MUST Reach You Before Tomorrow! Rare ...
Cosmic Wise
6,040 views

13:20
How to Create 3D AI Animation Stories in M...
The Zinny Studio
5,565 views
25:45
Create Your look alike Avatar, talks, walk...
Zara's Studioz
4,748 views

19:36
1 MINUTE AGO: Courtroom ERUPTS After Will ...
WhatIsMyStarWorth
1,391,022 views

7:28
How to Create Ultra-Realistic Talking AI A...
RiRiSTUDIO
5,427 views

24:41
How to Make Consistent Characters With AI ...
Roboverse
26,185 views

5:32
How to Create Consistent Characters with AI
Blue Lightning
130,912 views

9:55
How To Make Talking AI Avatar for FREE
Dan Kieft
164,202 views

18:39
How to Create Conversational 3D Animated S...
Diary Influencer
29,394 views

7:08
Make UNLIMITED AI Videos Free (No Watermar...
xAI Vision
3,319 views

31:43
Mastering Consistent Characters in Leonard...
Blog With Ben
104,349 views