Become an Awe$ome Linux SysAdmin In Under 2 Hours
111.05k views22254 WordsCopy TextShare

Hank Hackerson
This video was created as a response to a request from one of our community members. We go over begi...
Video Transcript:
in this video we are going to go through the Linux command line and we're going to go everything from beginner to intermediate to Advanced commands and you'll learn everything that there is to know about navigating the Linux system and uh creating new directories creating new files managing files searching through files creating new users creating new groups and doing pretty much everything that there is to do as a system administrator on the Linux operating system my name is Hank hackerson your host for today and to find videos like this and really any other type of video
on cyber security system administration ethical hacking pentesting I encourage you to like subscribe and turn on notification Bell so that you can join our community of amazing cyber Security Professionals and learn as much as you can about this amazing pathway and as an extra incentive if you're interested in furthering your education we have the hackaholic anonymous Community which is essentially our YouTube membership program uh that includes everything for system administration cyber security pen testing and just a tier for showing support if you're interested in that I used to include this 15minute video inside of all
these videos but I got some bad feedback about it so now it's just going to be a very short plug to just remind you that this exists so if you want to know what all of the different perks are what all the great things are that you would get as a part of being a member in our membership Community I very much encourage you to click on this video even if you don't want to watch the whole thing you can just go through the uh read more section right here and just look at the breakdown
of all of our membership perks there's a lot of perks uh this is not something that we just say hey you know what if you want to show become a supporter go ahead and give me whatever money amount of dollars per month we actually give a lot of great perks in exchange for the membership contribution that people make to join our community so I'm very very excited about it it's something that I worked very very hard for to make sure that we give real real value to our members and if you're interested in getting any
of those membership perks I very much encourage you check out hackaholic Anonymous all right without further Ado let's jump into this so there are some basic like very very very basic commands that you need to know as a system administrator if you're trying to get good at the Linux operating system or any of its other variations CU there's so many different variations um inside of Linux so this could be the I think there there's one called Parrot uh there's Ubuntu obviously there's Cali Linux there's so many different versions of Linux but it all runs the
same way and actually Mac OS also runs on Unix which is the original language that was developed prior to Linux launching and becoming an operating system so Unix is the foundational language that both Linux and Mac OS operate off of so a lot of these commands almost all of these commands are also going to work on a Macos system so just in case you want to kind of know what the two general sets of languages are there's the windows version of the command line and then there's the Unix Linux version of the command line and
that's what we're going to be talking about today the Unix Linux version and there are some really basic commands that you just need to know we'll call these the the basic bash commands that you need to know and these are things like for example uname so if I just type in un name it'll says hey I'm Linux right this is the the name of the uh system itself then you can do uname a and that'll bring all of the information right so it brings the actual name of the system that we're in it also brings
the IP address or the username so this would technically be the username of the the person that's logged in and working and in this particular case it's just our IP address so you see right here that root is the specific user and then this is the overall system name which is the ip- 10101 93 da that's what this is right here right so you have the system the operating system itself then you have the users information and then you have the version of the system that you're running so it's a 4.15 whatever 204 generic it's
Ubuntu this is the date so on and so forth so this is just the uh the general information that you would need about the system that you running including the operating system itself the user information so on and so forth okay now the next one that we have is Mount so Mount is going to show us our uh Library file system or technically our file system that's currently mounted and when you look at this it's a little bit crazy to kind of analyze but anything that's after these colons right here so this is the the
LI uh lib Docker overlay Etc Etc and then after this one so there's it's a little bit jumbled up together I'm going to show you what it looks like on my system cuz it's a little bit more organized on my actual computer and I'm currently running a Mac OS one as I do this so I'm going to show you what it looks like on a little bit more organized of a system so this is what it looks like on my system and you can see it's a little bit less busy it's a little bit little
jumbled up together muddled up together and it kind of shows you like this is dis 3 S1 dis 3 S6 S2 so on and so forth and these are the various volumes that are current currently running uh including the hardware the data and even my external drive that I have over here right so these are the various volumes volumes are essentially your your hard memory drives and there's the internal memory the internal storage that's inside of your computer and then there's external storage that's on the computer so when you run Mount it'll show you the
name of the various uh storage devices that are attached to your computer or included on your computer and then you can connect to those by saying Mount and then the name of the drive itself or the name of the storage and it'll actually connect to that specific mounted device right then we have who am I so this will actually show the username so this this probably should have come like right after the uname uh user that we ran but essentially you can do uname right so uname was the name of the system that we're on
which is Linux and then who am I is the name of the user and then remember when we did uname a or not X excuse me uname a uh it showed all of this various information but it doesn't include the specific who am I user right so un name a shows us this piece right here which is this piece right here and then it has the user that's who am I that's attached to that so when you're trying to connect to this particular device for example and you want to connect through it through secure shell
and you want to do SSH into this you need to do something like SSH and then you do root at the IP address and it's not IP dot dot dot dot dot it's the actual IP address which is this piece right here so it would be username at 101193 196 and then you would press enter and then it would say are you sure you want to connect you say yes and then it asks for the password of this particular device and then you would SSH into this assuming that you had all the right information and
it allowed for remote connections to come in like that so that is how you find the specific username is you just do something as simple as who am I and it gives you the users information the next one that we got is if config and this is the information about the IP addresses that are currently connected to this particular device and if you had a VPN that was connected the vpn's IP address would show here as well including the name of the system that's connected to it and when you look at this it doesn't seem
very crazy because there aren't very very many IP addresses that are connected to this I'm not going to show you the one that's actually connected to my computer cuz the one on my computer is insane um but when you we look at this so you have the docker and then you have this guy right here so the ens 5 uh and this is this specific IP address that is the IP address that's been assigned to our virtual machine right here so when you want to find out and there is a very similar command to this
is called ip config and you run that on Windows and I'll just show you what that looks like on the Windows tutorial but when you run ip config there's very similar information that comes on a Windows machine and it just shows you all the different IP addresses that may be connected to your specific device and so you have IPv6 and then you have ipv4 uh this is a very very standard version of ipv4 so what what you see these they're just separated by three dots and they look like this this is a inet 6 and
you see it right here inet6 which is for an IPv6 version which is much longer uh more because there's so many more variations of IP addresses that can be generated like this when you have this specific uh version of formatting for IP addresses eventually you run out of the numbers of IP addresses that you can generate and after a certain point there were more devices that were created in the world then there could be potential IP addresses that's why IPv6 came out because there's more variations of IP addresses that can be created from a format
like this so when you want to know your own IP address or if you're doing some pen testing exercises and you want to see the IP address of the machine that you're connected to or anything like that you would just run if config and and another cool information is that 1271 is the local address so this will be the local machine and this thing uh applies to every single machine so doesn't matter what system you're running and doesn't matter what version it is none of that matters when you do 12701 that's the local machine it's
referring to the local machine so if you wanted to go and connect to some kind of an instance for a server for example Splunk server that you set up on your specific local machine you could either do 12701 or you could do Local Host and then go to the specific port number that was assigned to it and Local Host the words Local Host as well as 1271 both point to the same exact machine because it's being assigned to the local machine so every single computer every single machine has 1271 attached to its Local Host uh
identity and that's how you know that you that it's very uniform it's literally standard across all the different machines so there is that and now the next one the next few that we're going to go through are like super super basic so this this is the date so you just type in date and it shows you the current date and time that you're on there's the up time meaning the amount of time that this machine has been on and the amount the specific load time that it takes and uh it's been up this uh I
think since that time so not specifically uh this many hours but it's been up since that time and it's been up for this amount of time and so on and so forth that's the up time the amount of time that this thing's been up and then the last thing that we're going to do on our basic command list is going to be the man command so man stands for manual and so if you do manual who am I it'll show you the manual for the command who am I and this is very basic it's like
a super basic command so obviously there aren't too many attachments to it but for example let's do man Nano Nano is a text editor and we're going to use it uh in a little bit we're going to go over uh what it can do these are all the different things that it can do uh for Nano these are all the various options that you can run under Nano and there's so many things that you can do with Nano so if you ever wanted to know what you could do with a specific software that's installed on
Linux you can just do man and then the name of the software uh one of the really important ones or I mean some of the really important ones for example could be man John JN is a short oh it doesn't it's not included on this particular thing but uh John is a short uh the reference name for John the Ripper so if you wanted to use John the Ripper and you didn't know what specific diff uh commands was available for John the Ripper you would go inside of that uh manual and then you would see
all the different options that are available for John so man is essentially the term that you would use to look at the manual for any of the other installments on a Linux machine and just like that we are kind of done with all of our super super basic commands we're still going to be going over a lot more basic commands but those are like foundational commands to find out information about the system itself and then now we're going to go into using some of these commands or some of the other basic commands to navigate the
system so right now we just learned about the system so now what we want to do is we want to learn how to navigate the system so let's go into those things okay so now we're going to talk about system navigation or they call it directory operations um but system navigation is you being able to navigate through the system so this is that series of commands and these are really really important as well so everything everything that you're learning right now even though they may seem super basic they're so important uh when you get into
scripting and creating automations because you're going to need to refer to all of these things later right so being able to do something like Echo date um it literally just prints the date but if I went and created for example uh a variable so let's say we want to do the current date as our variable so you would do current date equals and then you do a dollar sign and then you do the date command that we already covered and you just press enter and nothing happens because now inside of the CLI inside of this
particular session environment I've created a variable called current date and I want to Echo this back to myself and Echo basically just prints whatever you got back onto the screen for you so I want to go ahead and print this this specific variable that we just created back to myself on the screen I would just do that and then now it gives me the date now you say okay well why would you take an extra step when you could just do that and then it would give you the date the specific reason for this is
when you're creating a script for the Linux CLI using bash you can save a lot of these commands that we just talked about inside of a variable so you can go ahead and change the like for example info will turn into for example right it would be uname uh I can't spell today un name a would end up being that variable and now I can say Echo info and or excuse me Echo the variable info you got to put that dollar sign and now it gives me all the information inside of this so if I
wanted to use this inside of a script I could go ahead and save that entire command output the entire command output here I could save it inside of this little variable and then refer to that variable at any point inside of my script and this is why these things are important so they're super basic these are basic commands that we're going through but it's important to understand what they do because later on when you get to scripting you want to learn how to refer back to these things so for example let's go into some more
system nav navigation types of commands that you can use for scripting later on for example right so you the one basic one is PWD is print working directory meaning in the current directory that you're in you want to print that specific directory the path to that directory okay now there's another one that we it's actually falls under the basic navigation which is called CD right so CD will change the directory into a specific directory okay so you say we list LS stands for list so LS is going to list everything that's inside our current directory
so for example desktop is inside of our current directory so I can do CD desktop and now I'm I'm inside of desktop and if I do PWD my path changes so you see originally I was in the root folder now I'm inside the root desktop folder and then let's say now we're going to do LS inside of the desktop folder and it's going to show us everything inside of here so that there's tools so let's change directory to tools and now my path has changed so if I do print working directory now my path again
is different it's a completely different path now so these are the various ways to uh navigate and then find out where you are inside of a specific machine so one of the greatest things that you can do when you log into a new machine and we're just going to go over some of our uh commands that we've covered so far so let's say you you uh you SSH into this machine and you've landed on this part particular directory for whatever reason when you ssed into this machine or you got like a webshell as you were
doing your pen testing exercises and the only way that you could get into this machine was to get into the tools directory so on and so forth so now you're inside of the machine the first few commands that you would run is who am I just so you can see what user you're running and then PWD print my working directory to see where I am inside of the system and then I would do if I wanted to if I know that I'm inside of the root desktop uh tools directory if I I'm here I know
I got to go up two steps to get into the root directory to be able to get access to all the goods right so I can do CD change directory and here's a new thing you do dot dot and it just takes you up one directory and then if I do dot dot again it takes me up and another directory and now I'm inside of the root folder so I could do this I could change to desktop tools and I would end up in the desktop tools again so just like I went up two directories
or EXC I guess down technically I went up I went down two directories inside of the desktop tools folder I can do the same thing to come up to directory so I can do dot dot SL do Dot and it'll bring me back into my root directory so this is how you change directories back and forth and if you know the path of where you're trying to go so for example let's say let's see what's inside of the desktop tools we go to desktop tools and we see we have this other thing right here so
let's do cdpas and then inside of this we also have Lin p and now that's my full directory so I'm going to do clear to clear the screen that's also like a super super basic command that you should probably I should have probably already covered that by now but clear clears your screen but now we can see my entire path already on the screen but if I do print working directory now I see that I'm inside of this long path right here and I need to go up what so that's one 2 3 4 I
got to go up four to land back inside of the root directory so I do this and now I'm back inside of the root directory this is called path traversal when you do this you see if you see this inside of any requests that are being made to a web server when you're looking at logs and things like this you can kind of anticipate that whoever hacked into your system was trying to Traverse their path and get inside of one of the main directories that's very important so that they can get access to some other
things so on and so forth so if you just see this inside of your logs uh for any requests that are being made you can guess and pretty much be sure that they're trying to Traverse their path just so they can land inside of the root directory and ultimately inside of some other really sensitive directories so this is called path traversal we'll talk about this later we're just talking about system navigation right now so these are the basics of navigating the system right so you can do um uh printwork directory you're looking at your current
directory you can do LS to see what's inside of your current directory and then you can change your path by doing change directory and you can go inside of one of the other directories again you do LS and you can see what's inside of that and change paths so on and so forth now there is a way that you can also shortcut this so if I do LS and then I look at the specific directories that exist inside of this without changing to desktop so without doing CD desktop I could do LS desktop and it
will list what's inside of the desktop for me and now we can kind of go a little bit further into uh some of these like uh kind of details of the ls command because the ls command does like a lot of great things as well so let's clear back the screen so we see this right so if I do LS I just see basically everything that's inside of the correct current directory but what you don't see is that there's actually some hidden files and hidden options inside of this path so what we want to do
is we want to see everything so you do LSA and it'll show you you everything now you see there's a lot more stuff in here and specifically a lot of the stuff that's hidden are the ones that are preceded by a DOT so these are some interesting things that's like oh we didn't even know this was here and burp suite for example is a pen testing tool for web applications and then so if I wanted to now see what's inside of that I could do CD burp Suite like this or I could just do LS
burp Suite right so I could just do ls. burp suite and then here's a quick little tip if you press tab if you just click tab if you've gotten the first portion of that specific word right or that directory right if you press tab it'll just fill in the rest of it for you so you do LS burp Suite press enter now it shows you everything that's inside of that specific hidden directory which is again very very useful there's another version of LS which is lsla so instead of all it's going to bring all of
the attached parameters or attached options uh we call it the long list format so uh lowercase L is the long list format and then lowercase a is all so when you do lsla a it'll show you everything that's inside of this directory but it also shows you the long list version meaning it was created by root it belongs to the root group this was the date that it was created this is the specific ID that's been attached to this the 4096 all these things that you see right here that's the specific ID group ID that's
been attached to this and then this is really important especially when you're pentesting these are the permissions that are attached to each individual file or folder so this first group is the groups uh of permissions this or this first group of permissions I should say this first set of permissions belongs to the person who created it okay so we call this the user permissions the uh the owner permissions is what we call this the second set is the group permissions so whoever this uh whoever belongs to this group or let me I'm like completely not
even able to speak today whatever group this belongs to so CTF Builder Capture the Flag Builder whatever group that belongs to the group has executable and read permissions and then you have this last bit which is the person who is currently logged in what type of permissions do they have and for example this is execute permissions this one you don't have any permissions you can't do anything with this one supposedly uh I'm the root user so it belongs to me so I can do uh whatever I want with this because I have all of the
root permissions attached to this but if I wasn't root if I was like John Smith or whatever and I'm not a root user and I don't belong to the pseudo users uh or the root users group then I wouldn't have any permissions attached to this and I wouldn't be able to do anything with it I wouldn't be able to read it I can't obviously write to it I wouldn't be able to execute it any of that stuff so these are the permissions that are attached to this right and the the key important permissions are the
WXR W stands for write to X stands for execute and R stands for read these are the most common permissions that you're going to see especially when you get to the group levels and the user levels those are the most common permissions that you're going to see and so if someone only has R permissions that means they can read only they can't do anything inside of that file or that directory they can't write to it they can't execute the file or directory which means that it's uh you know it's pretty much the lowest access form
I guess the lowest access form is that they wouldn't even be able to read it but the second lowest access is that they only can read it and this is really important because when you get into pent testing one of the things that you are going to want to find is the permissions of each individual directory that you're in and the permissions of each of the files that are available and whether or not you can write to those files and you can execute those files because if you can write to those files that means you
can modify them and you can add certain you know code to it to do certain things that you want so on and so forth so permissions are very very important this is not a permissions topic though we're still talking about navigating files and directories so I don't want to get ahead of myself but that's how you can list all of the stuff inside of a directory as well as the permissions that are attached to them so on and so forth there's another version of list called list R so if I run list again I see
all of the stuff that's in here if I do list capital r this is called recursive and this is gigantic so obviously recursive means it shows you everything that's inside of all of the individual folders that are in here so this is gigantic because we're literally looking at the the root folders the all of these specific uh directories that are in here and there's a lot of stuff that's in here so if we went to something that's a little bit smaller Maybe so let's say CD a o let's see what's in here okay cool great
so if I just uh this might be a little bit better so if I do CD like this and now we're inside of the pictures and if I do list R now it shows me everything that's inside of the pictures recursively meaning it'll show me everything that's inside of the first level which is what we saw already right here so these things are exactly this so this is all of that information and and it shows you right so dot stands for the current directory so if I say uh if I do this instead of the
double so if I do CD double it'll take me back one if I do CD pictures it'll show me this again um actually probably a better example would be the ls command so if I do LS uh dot dot it'll show me everything inside of the previous directory because it's going back into the root folder right so but if I do LS dot it'll show me everything inside my current folder so the dot stands for your current folder so now if we look at this the dot right here and then there's a colon it just
says that inside of the root that or not root inside of the current directory that you're in these are the output this is all the stuff that exists in here but if you do dot sloc which is this one other directory that we got inside of this there is also this other file right here so it will show you everything that's inside of your current directory and then if there are any other folders if there are any other directories inside of your current directory it'll also show you what's inside of that so in this particular
example inside the pictures we have all of these specific things so recursive means it shows you everything that's in your specific folder as well as every other folder and then the folders inside of that folder so on and so forth so it will show you all of this stuff so desktop was one that had like a few things in it so we have tools and additional tools and so tools is probably better cuz tools has still a bunch of stuff in it so if we go inside of tools and now we do LSR you see
all of the stuff that's in here right and so it shows us so if we go back to the very very top let me see can I even go back to the very top I don't think I can can I am I where am I let's see where I am yeah this is there's a bunch of stuff there's a bunch of stuff inside of a tools directory so we still have not touched even and it's stops I mean like there's so many things in it that I couldn't even make it to the top cuz I
ran out of space to go back to the top so but I think you get the idea right so it's like it's the recursive list of things that it'll show you everything inside of your current directory as well as all of the other following directories that are in there and then the following directories that are in those and so on and so forth and so on and so forth so that was it for that so uh let's go back to our uh root and now we're inside of the root directory again here's another thing for
LS you can do lowercase R and it'll show you the reverse order of things so if I do LS regular you'll see that burp JS n is the very first file if I do LSR you'll see that burp JS n is the very last file so R just reverses the order lowercase R reverses the order um you can do LST lowercase T and that'll show you the order of the last modifications so it says which file in this entire directory was last modified and in this particular case it's our scripts file the scripts folder I
should say uh you can do uh LS and then do a capital S and it'll go ahead and sort it by the size so if I do lssr it'll reverse it and it'll sort by size but it'll sort by the reverse order of size right so there is that um let's clear and now we got the long listing format and everything that we already did um if we do LS one I believe yeah so if we do LS1 it's basically just kind of I I actually prefer this view cuz I like seeing things one per
line so if you just do LS1 it'll do one per line instead of doing it in kind of a I guess like a grid format and if especially if you're trying to see what was last modified or the size of things or the reverse order of things it's easier to look at it one per line because now when it reverses the order you can actually see much more clearly what's happening so let's do this one more time so we do LS1 that's the normal order if I do LS1 reversed right or excuse me not recursive
now you see that it's actually been reversed and it's much easier to see the reverse order of things so burp JS n was first here and burp JS is last ti so I like the one per line view it's actually in my opinion it's a much uh cleaner output I really enjoy that a lot and while we are here I want to show you something that is it kind of resembles the ls command except it gives you much more of an output so it's it's kind of similar to what we did with LSR which was
the recursive that will show you all of these things but you kind of see that it's like it's it's a little bit tough to figure out what's what and what's going on um so let's clear this out we'll go into our tools or desktop as probably easier right and oh tools was inside the desktop or let me actually I'll do this so I'll go into pictures that's what that was a good one um pictures there we go um so we see that this is inside of the pictures directory and then I could do LS R
like this and it'll give you recursive output and then you'll see what's inside of the Al and so on and so forth so we see that there's something called tree uh tree will show you a tree version of everything and again it's just about the visual aspect of this to see how easily things can be read and found and you can see like this right so this is our root that dot right here at the top it means that inside of where we are there is something called AOC which is a folder and then there's
these individual files and then inside of the aocc folder there is this one file and it's just so much nicer it's like such a nicer output of information and so much easier to read so if I let's go into a folder that's a little bit bigger so maybe let's go Postman what's inside of the postman there's files inside of the postman and then there's nothing else in there so that's not good enough for us to find so let's let's go back into desktop CU desktop does have a bunch of stuff in here and if I
do lsla we'll see that we have all of these things and so inside of additional tools there's the opt folder so maybe we can do additional tools and then we'll do opt and it says None So that's annoying um because it literally just says that there's something called additional tools inside of that we have oh that's probably what it is so there's all these things inside of the additional tools so that's probably too much information so let's try I'm going to try I'm trying to find something that doesn't have too many things in it so
we can get a decent uh drop down so I think wordless is probably a really good one okay so there you go word list is a pretty good one so if we do tree for word lists and it's still gigantic obviously as you can tell if we do tree for word list it'll give us a tree view of everything that's inside of here and it actually is a lot of data I didn't realize how many word lists exist and obviously we didn't get everything but if I do lsla for the tree or for the word
list you see that it has these various folders for word list and then if I do tree maybe SE list maybe could we do that yeah so this should show me everything that's inside of SEC lists and then you see that uh it shows you everything inside of the folder as well as what's inside of all of the other folders you get the idea right that it basically shows you a tree breakdown a tree version of this and it makes it easier on the eyes when you're trying to analyze what's inside of all of those
things so this is It's I in my uh perspective in my opinion I like the tree version especially if I know there aren't too many things inside of it directory and I just want to see the visual breakdown of how everything is uh cor collected and corrected that's kind of what I prefer uh when I look at things instead of Ls um if I do use LS I always do lsla because I also want to see all of the hidden files uh as well as the visual breakdown of their permissions and so on and so
forth at the very very least you can do LS1 just so you can see everything broken down vertically instead of horizontally Al in a grid format and then that way you can kind of just manage the rest of it and view the rest of it so that is essentially what we got for navigating so going back and forth inside of folders and trying to find things inside of folders and trying to find uh things inside of directories and going back and forth between directories so now the next thing that we want to do is how
to read files or how to create new files as well as create new directories and deleting directories so on and so forth so let's go into that it's it's a little bit uh it's a little bit more nuanced uh compared to directory operations I would say it's uh it's kind of like managing I guess operations technically could fall under but whatever you get what I'm talking about so we were going through navigation oh navigation there you go it's it's like it's different from navigation it goes into operation that's what I was trying to say so
everything that we've done so far falls under navigation cuz you're trying to navigate and then now we want to go into operating and working with these files so that is my uh the next piece that we're going to go through together okay so now we want to talk about how to create files and folders and how to read files and folders and go through all of that good stuff right there so first thing that we want to talk about is a creating a folder right or a directory in this case make dur or make directory
creates you a directory so for example we're just going to create a directory called dur right and so inside of our current folder now we see that we have a directory called dur now if I go inside of that there should be nothing in there right because it's a blank directory we just created this thing even if I do lsla um it should show me H my gosh I messed that up um if I do lsla it should show me nothing it should literally show me this is theur current path so the dot stands for
what we are on currently and then if you do dot dot it'll take you back to the previous directory that you're in and that's basically it right that's all you got so there's nothing inside of our current directory so what we can do is create a file so the command to create a file is called touch so touch file.txt now I've created a file called touch or file excuse me now I've created a file called file.txt but if I want to see what's inside of this so concatenate cat stands for concatenate and Cat actually displays
what's inside of this file onto the screen but there's nothing inside of that file uh onto the screen and there's a lot of different ways that we can put something inside of the file one of the ways we already talked about which is the echo command so I can technically do this I can just do Echo file information onto the file txt and now if I do cat file.txt we'll see that we have file information inside of that file and remember earlier that we were talking about the information about our uh our variables right so
if I created a variable this is where it gets interesting right so you create a variable um which is called info and that info variable is going to have the uname uh a information which is everything that's about that our specific machine inside of it and we just create that variable and now we can do Echo info into file.txt and if I go ahead and read file.txt we'll see that we have all of that information inside of the file isn't that interesting you'll also see that instead of adding the information the on top of what
was previously in there it replaced all of that information so this is also very important to understand when you do something like this you're not adding the information to it you're replacing the information uh with whatever you're currently trying to do so the next way to do this the better way to do this is by opening the file to write into it and that would be using Nano Nano file.txt will then open the file and now you can add stuff into it and then mess with it later but we're going to talk about Nano in
a little bit I don't want to jump ahead so we're specifically talking about making file removing files copying files so on and so forth so we are currently inside of our sample directory which is called dur and there's a file in here called file.txt I can create another directory in here and we'll call it dur 2 and now we have two things inside of our test directory which is dir to and the file.txt okay so now let's say for whatever reason I want to have multiple versions of this multiple versions of this file and I
think it's very important to have a redundancy where you know I have a backup basically copy so CP stands for copy so I want to copy the file.txt file that I have inside of the dir 2 folder right and I just do that and now if I go inside of the dir2 folder I have a version of the file.txt so let's clear this out and let's go back one and let's do tree and now we see that inside of our current directory we have the directory there two we have a copy of file.txt and then
we have file.txt itself right so this is very very important right that's what we have inside of this thing now I want to for whatever reason um I want to change the name of this file just not even whatever reason just because I don't want to get lost and I don't want to get confused right so what I'm going to do first and foremost because I don't want to have duplicates right so I'm going to go into dir 2 and I want to remove what I currently have in here because it's going to be confusing
for me or I I just want to rename this so let's say you want to do that right so let's say you want to rename this particular thing so you do file.txt so MV stands for move but it can also be used to rename something so let's say I want to move file.txt to file 2.txt and now I do that and now we see that it's changed the name of the current file that we had into file do. txt but now let's say I actually want to move file 2.txt I actually want to move it
from where it's currently sitting into our previous folder so I just do one of these the back the two dots in the forward slash and then we'll see that it no longer exists in the current directory that we're in because we just moved it we moved it back one so if I go back one and LS now I see file one or you know the original file and file two are both inside of our home folder so that's how you move something right so now file 2.txt I want to just move it back to the
dur 2 folder and now we see that it's no longer here and if we go into dur2 we'll see that it is inside of the dir 2 folder right that is how you create a file we created a file using touch how you create a directory using make directory we learned how to uh copy a file which was the CP command we learned how to move a file or rename a file using the MV command and we learned how to read what was inside of it using the basic can catenate or cat command so right
here if I do cat file to just to confirm that it had everything that was inside the original file I can see that it actually does have everything inside of the original file so I can confirm by just reading it onto the screen or I can always just go into it using Nano and see what's inside here if I want to make sure that I can potentially add some other things to it or whatever you can do that with Nano so we've done some of our basic file Creations reading of the file uh directory Creations
reading of the file so on and so forth right but what if the file that you want to read is really big so what if there's a lot of information inside of it and this is a really good one because uh usually when you're looking at a log file so let's see if we can go to the folder that holds the log files uh which is usually I believe the log or the VAR yeah there we go ver log directory this is where all of our log files are so you see these are all log
files there's a bunch of stuff inside of these files okay so this is not something that you can easily read by doing a simple cat command so if I wanted to do cat off log for example this is a lot of information buddy there's a lot of Intel in here um and in this particular session that we're in because the IP address for this machine is new so on and so forth it doesn't it's not a lot so this is the authentication file and it just shows you who tried to access and who opened the
session closed the session so on and so forth so because for this specific IP address it's a new IP you know for the length of this video is basically how long this IP address has been live we don't see much information but usually when you're looking at the authentication log for a computer for work it's going to be a much larger file so you'll need to display a certain number of information about this particular file and this is where the head command is very very useful so if I do head off log then it will
show me the first 10 lines of this specific authentication file instead of showing me everything if I do tail uh tail off log it'll show me the last 10 lines of this particular file and if I wanted to just re show like just a few lines of this whole thing then I could actually say show me X number of lines right and the way that we would do that would be this I could do head and I will do the off log file and then we can do n for number and then we just do
five and it shows me the top five and then same thing right tail al. log and then do N5 and'll show me the last five so you can show the number of lines that you want to see by doing uh the N uh parameter and then giving in an argument of whatever the number is that you want to see on the screen so that's one of the ways that if you're dealing with a really large log file or just a large file in general if you just want to see certain portions of it you can
go ahead and display it by using the head command or the tail command and that's one of the the simplest ways that you can just read something um again you can always do Nano and you can do Nano do off log and it'll show you the entire file and you can just go inside of this whole thing and then once you're inside of it you can use something like where is right here which is the control W command and you can search within this file for a specific uh string or for a specific value to
see if you can find it but we're getting a little bit ahead of ourselves so that is the basic file operations of creating a log uh or creating a file and navigating with file and uh creating a directory navigating the directory uh cop in files removing files so on and so forth so that would be our file operations so now now that we've done that let's get a little bit more into the advanced stuff and now we can kind of start combining a lot of these things and obviously intergrading some new commands as well but
now you will start seeing a lot of this stuff come together and you'll be able to uh really get the power of navigating and operating inside of a Linux computer okay now we want want to find certain files so a lot of times you uh won't know where something is especially when you're doing Capture the Flag exercises or pent test exercise or really just doing system administration in general and you have to go find something inside of somebody's computer uh they have a really messy computer and a messy desktop you have no idea where they
stored their information um for there's a lot of different use cases for this particular command so we have find and then we have grep so let's talk about find find as the name implies finds whatever you want uh inside of whatever directory that you uh implies so for example if I do find forward slash and I just leave it at that that means I want you to look at the Entire Computer right so again going back to this right so if we do print working directory and then we see find uh or we see root
but you see there's a forward slash in front of root that means that in the current directory so if I went up one more directory now I'm inside of the the overall computer right so now if I do an LS command now we see a few other things than what we saw when we did the ls of root so when you see LS of root you see oh inside of the root user there's the desktop and all these things that exist but if we go inside of the root of the actual computer there's a bunch
of other things that kind of don't really make sense uh and then inside of that we have root as one of the users that exists right so the form for slash is very different and then you can also pay attention to this right so when we're inside of the actual root user our command line has this little squiggly line when we're inside of the root of the computer the command line has a forward slash so that's also something else that we can pay attention to to kind of notice what how things change and where we
are right so this is the the big piece right here when you're going through find and using something like that so let's say I'm actually inside of the root folder and I can see that this is all here but I want to do a search inside of the entire computer so I can do find forward slash and just leave it at that right so find forward slash meaning find inside of the computer um anything by the name so you give you this is how we search by the name of the file and I want everything
by the name of John so previously I was trying to find John the Ripper but I didn't know where it was and I now I just want to find John okay I'm going to run this as it is because I want to show you something but then I'm going to show you the modified version of this command that's actually the better version of this command so we're going to do I want you to find anything inside of this computer that has the name John in it just press enter immediately it shows up then you see
this thing right here you see permission denied and then we're going to probably going to see different versions of this thing where the path is different but then you're just going to find uh actually you know this one this one was easy so this one didn't have a lot of permission denied stuff more often than not when you want to find something you'll get a lot of these permission denied things and then it just kind of pollutes your results you get so many permission denied lines that it's tough to sort through them and try to
find what you want so if I did the same exact command and right now I just pressed up on the arrow keys and it brought the previous command that I ran there's something called two Dev null which basically sends all of your permission denied stuff to this temporary folder Dev null that it doesn't show you anything anymore oh let me try do that one more time there we go I just needed to put a forward slash in front of it so it ran the same thing but except you'll notice that the permission denied result was
no longer inside of the current results that we just saw right here so we only actually see the actual results that we find and now we're like oh okay you know what so there's the John folder for this oh inside of my password attacks this is the path of the John folder so previously I wanted to see the manual for JN I wanted to see what I could do with JN and so now I can do that so I can do man and I can just paste the path of JN over here and it should
show me what I can do with the John Tool uh obviously now it says there is no manual entry for it so maybe there there is no manual entry for the John tool which doesn't really make sense but there should be a freaking manual entry for the John tool so um let I'm now I'm kind of obsessed with this so I really want to see where I can find that okay there you go that seems to be a little bit more uh usable but again that's just it's it seems to be a lot of gibberish
and a lot of garbage that just showed up for manual for this so that's probably not the information that we're looking for so let's see what else we can find okay so that was not a good example and I can't find I can't find the manual for John so this is actually probably um I'm kind of like what is it what is it it's like when you put your foot in your mouth or something like when you eat your own words basically that's kind of what it feels like in this moment but I promise you
there's a manual usually for a lot of these things that we can do but that's not important right now the important thing is find oh you know what find man find there you go I know I can find a manual for find so there you go so man for find this is what we get over here these are all of the different options that we can run when we're doing find and it'll show you things like so for example uh let's go and try to see that if we can find actually instead of doing that
I'm just going to go search I'm going to do find and I'm going to do name see if I can find anything by name okay so here we go let me see seems to be that that thing didn't show for whatever reason I don't like that sometimes the the find command inside of this search thing it doesn't work the way that it should because I know for a fact that there is something that we can do by name because we literally just did it so there's I name so like name so see not name does
exist so maybe I was supposed to search for name with the uh the dash in front of it no that doesn't show either that's so annoying okay well whatever now we know that it doesn't work there you go name it does exist see that's so annoying whatever so this is what we have name and then pattern and then you can just go search by something by the name and then you can do the name of the file and so many different versions of things so let's do find and then we're going to look again inside
of our root directory one we want to search by the name and I don't know uh I'll do this I'll do asterisk dolog because I want to find all of the logs for example and now I know that when I run this there's going to be a lot of results and it's going to keep going and it's going to keep going there are so many things and there may be some lines right here that give me permission denied it doesn't seem like it because I'm a root user so I probably have access to a lot
of these things so I shouldn't be denied permission to any of this stuff but you see that now I can find everything that has to do with log right so all of the logs I was able to find which is pretty crazy especially when you think about how many logs exist inside of a computer so that's how you find something that's basically it so now we want to find something in our root folder that we're in so root and then desktop and then for this I want to go find uh something by the name that
has John in it which I know that also exists and then I'm going to press enter right here and it automatically just shows me the only location that there's something called JN inside of that so this is how you find something and this is very very important to understand so if I wanted to find something that has um inside of the root folder and it goes by the name I don't know let's see what we can find um we'll do ATT and then we'll do asterisk on the front and the back of it this will
show me anything that has ATT inside of it so asterisk is a wild card character and if you put asterisk in front of it as well as behind it it's you're saying that anywhere inside of this name as long as at exists I want you to show me what is here and it's literally so many freaking things cuz battle for example has ATT in it uh unattended has at in it so it'll show me anything that has ATT inside of it and that's very important to understand more for the concept because the concept is what
you can put asterisk in front of something and you can put asterisk behind something if as long as you know what it is and it'll kind of just give you that information so I could do asterisk uh root and then do asterisk again and it'll show me anything that has root and obviously it's so many freaking things so it could be root. CRT it could be uh fake root it could be Crypt root it could be so many things it could even show me the name of the directory that actually has root as one of
my uh forward slashes right so home root right all of these things could show because of the fact that this whole freaking thing is going to show me anything that has to do with root and that's what fine does for us and it's very very useful okay so the next thing that we want to do is we want to use the command grip now this is what's really really important cuz this is actually very useful little tool here so um let's use our find command and we want to search inside of our entire um machine
for something that has the name of log in it right so we want to find basically a log file and let's say inside of these log files we have you know something right here called VMware Network log so in the VMware Network log I can either go inside of this directory you know CD into the ver log and then try to concatenate this or I could just concatenate it right I could just do cat and then do V log VMware Network log and then now we see everything that's inside of this and there's lot of
information that's inside of this but I can't you know I don't want to I don't want to visually search through all of this information I want to find something inside of this so the one way that I would do this and let's see if this actually works cuz I I can't remember the order of which that I could do this so if I just do GP uh by just searching through this inside entire thing and then go look for my string so for example active yeah so I it doesn't I don't think it works like
this manually so I think we actually have to first list what's inside of it so by doing concatenate inside of it and then pipe the results of this into our grip command so this is what's a useful little tool as well so when you use pipe this thing that you see right here let me Center this when you use this pipe symbol you're taking the output of this which is all of this stuff that you just saw right here this is all the output of this command and you're taking the output of this whole thing
and you're going to use it as an input for the GP command so you're saying Hey listen I want you to read the whole thing and then I want you to search through this so grep does searching for me so I want you to search through this and search for the word active inside of it and now you see it only brings me the lines that actually have the word active in it so for example we see right here one of the things that we had was enss 33 is already active and boom it actually
shows me -33 is already active right so this is actually super useful believe it or not this is very very useful and it's super quick that's the thing that I really love about the combined force of using concatenate and grep together because you can search through a massive log file for certain keywords or users or whatever it is and it'll bring it onto the screen real quick and what's nice is it also highlights the word that you were looking for so you can just see what line it's on and it's just I mean it's really
really freaking useful and I think there's actually even a command don't quote me on it but let's see it's actually the N command so it's not the L command it's the N command or the N parameter excuse me the nend parameter will show me what line of the file it found this specific thing right so that's this is probably one of the things that you want to always use with GP is the n command or not command uh parameter or option the N option will show you what line of the file it found this particular
result in so ens 33 is already active is found on line 90 and that's very very useful if you have a giant freaking file that has thousands of lines and you want to find that specific item and you don't know what line it's on so on and so forth this will make it extremely extremely easy for you and it's quick right so if you just know what word or string or phrase you're looking for and then you go ahead and do that so let's say that we want to do the same exact thing and instead
of doing active we want to do uh a string a combined string so we do already active is the thing that we want to search for obviously our results are going to be much smaller because active was included in a few other results as well but there's only two results that give us already active as our specific search phrase and now it's shown us what line they're on as well 90 and 91 show these two phrases so on and so forth so grip combined with concatenate is amazing it's one of my favorite tools and I
think it's like super super freaking useful for you as well so you can definitely use it and it has a lot of other options as well so if I go and try to show you all of the GP command options you'll see that it can do a bunch of things right so um generic program information so GP version output the version number of the GP an exit so that's specific to the actual command itself if you want to look through the specific pattern controls or matching controls you can say e pattern which would be a
regx pattern using pattern as the pattern itself instead of using a specific uh phrase or string if you know anything about reg X we I already made a video on regex and you haven't if you haven't seen it go check that out cuz it's very very useful regex applies to a lot of different things so you can use it by even inside of the GB and so you can uh grip the file itself um that's what it was so instead of instead of using concatenate you could actually use that see I just learned something myself
so instead of doing this so instead of doing this Command right instead of doing cat whatever whatever whatever you could actually do GP and then do the file name that's what I was missing last time so file name needs to be here and then you can search for the string inside of it no suchar file or directory so you know let's do GP and then I think it was F was what I was supposed to do so you could have used the file uh option to actually go specifically search from a file instead of using
concatenate um you could go um count so this is really this is another really useful one where it's like how many times do you see a specific term so it says it suppresses the normal output meaning it won't show you the actual output where it shows the lines and where it found the text it'll just count the number of times that something shows and then it'll just give you that count number um then uh L files without a match L files with matches so on and so forth so let's use the count one cuz count
I think is a really really useful one as well and another useful version of a search command is actually locate and this is a much quicker version of find because it just does a uh quick search of the system index so it just basically looks through the index so if I just did locate JN it'll do all the searches of JN inside of everything in the system uh previously we had to declare where we wanted John to be and there were different uh things that we had to include in it for example the search location
uh the search name uh all of these other things and that's what we had to do for find for locate you literally just do locate and then the the term that you're looking for and it'll pull up everything that has that name potentially in it or that term potentially in it um and it could also work with something like this where you do locate dolog and it'll show you all the dolog information and everything prior to that so it's a much quicker version of find and a lot of times I would lead with this actually
I wouldn't start with find um I guess in the tutorial I kind of just went with find first but I would lead with locate first and then if you can't find it using locate then you start doing doing something specific where you do find inside of the root folder desktop yada yada yada and then you go through the rest of the command using fine fine is more of a specific search uh I would say um and it has a lot of different parameters like you can search instead of by name you can search by the
user so for example if I did find inside of the root by user root uh it would show me everything that belongs to root or has the name root associated with it and you can see obviously there's so many things and I'm we're going to do contrl c to end the the running process control C is actually one of those kind of gimmies I should have probably mentioned this also at the very beginning um but if you want to cancel a command uh as it's running it would be controlc especially a command that's as giant
as the one that we just ran because the user route has so many things that belong to it and uh it's just it'll probably bring up everything inside of this system because everything inside of this system uh belongs to the user root so that's the other thing where you can kind of go ahead and try to find um uh information using theed command um and an individual user and then what's um what's interesting is that theed command does a lot of really useful things especially when you're going for uh searching by user or by searching
for the other parameters inside of find so for example um we can do find uh let me make sure I'm actually in here um we can do find and then we can go by the parameter of minimum uh minute minimum and then uh it goes you uh essentially shows you the the files that were modified less than a certain number of minutes ago so for example I can do find this and then do M Min so minute minimum and then we can do I don't know 10 and it'll search through everything to see if we
can find everything and and you see how it gives us the permission denied stuff and then if anything it might give us something else that we can view uh as it searches so it's still going and then interestingly enough it says there is no such file or directory but it actually gives you the path to the individual file of the directory but specifically for this command that we just ran it showed us basically all the files that in the last 10 minutes have been modified or updated in some capacity all right and then you can
I believe there's even a version of this where you can do an hour minimum so let me just make sure okay so there is no hour minimum I think you would just have to extrapolate and go instead of like uh uh one hour you would probably do 60 Minutes Or 120 minutes so on and so forth um that I could be wrong if you want to go do some extra research and update me in the comment section please go ahead and do so I would love to uh get more results from this and I mean
you can always go check with Gemini or any of the AIS or the chat box and it'll help you with those parameters and those options as well so uh that is a very useful portion of find and then um there's something that we can do uh if we just kind of go back a little bit so we had the user parameter and then we ran and search for everything for user um but let's say you don't you know you don't want to look for everything that belongs to user but let's say you want to see
every uh all the different users to try to find something for individual users how do you find the names of the users and then how do you add users we're that's kind of like a great segue to getting to the other more uh I would say definitely not uh beginner uh commands that exist inside of this thing so how do you add users how do you find people with certain permissions right how do I find data with certain permissions how do I find uh files that uh belong to certain people so on and so forth
that's a really good uh segue to kind of get into permissions and then changing permissions and of course um creating and modifying users the first thing that we want to do is we want to find where all of our users are stored and there's something called the Etsy password file and it's PWD and inside of this but unlike the names cuz the name kind of implies that there's passwords in there but there's no passwords in there it's just the users that are in there so we can just do our cat command and do Etsy password
and it lists all of the users that uh exist on this particular machine right and so it's basically the first series of characters here so pulse is a user xrdp sshd Ubuntu is a user postgress statd so on and so forth and then when you go to the top of this document there's always at the very top of the document is going to be the root user then the Damon user the binary system so on and so forth so the main user at the very beginning of every single Etsy password file is going to be
the root user but then we have all of these other users as well so if we wanted to go and find something that belonged to a specific user we can go ahead and do it this way so previously we ran find by the user but I can go in this case and do finds by Ubuntu for example the user is Ubuntu and it still gives me a bunch of data because obviously Ubuntu is probably going to have a bunch of stuff as well or you can just do find by literally any other username as well
so that's another way that you can find something then then you can go and this is where we're kind of leaning into more of the pen testing cyber security stuff but I feel like it's worth it to just teach you this as well you can find things by permissions so earlier when we were going through uh analyzing the various permissions of files and everything and we were looking for things that we could write to or we were looking for things that we could execute those are really really important um especially when you're going through pen
testing and things like that so one of the great ways to do that is by searching for the permission option so again find inside of the entire machine for permissions okay and then I can just do permission X like this you can also do the permission by the permission number so 755 could be a potential permission uh parameter po uh potential permission uh number for example um and it gives you uh I think 755 gives you right permissions um cuz it would be it has all of the permission so it's uh 755 read is a
digit of four WR would be a digit of two and execute would be a digit of one so if it has seven as the entirety that means there is read write and executable permissions and that belongs to the original uh person so if we just run this real quick and let's go this is a giant uh results that we're going to get so we're going to stop this real quick okay I have to rerun that one more time so so um so let's say for example windows so everything inside of the windows we have web
apps inside of Windows and we have all these other things inside of the the web apps folder and then we have exploits and inside of exploits there's all these different things so let's say that we want to see the uh the permissions of the stuff that's inside of the uh exploits uh directory for example so we're going to copy this and we're going to do lsla and then we'll just paste that uh thing and hopefully won't be too too large of a result and then we get all this stuff right so these are all the
things that are inside of the the specific directory of um windows or Windows exploits uh search exploit exploits my bad so inside of the search exploit exploits directory we have all of these various things uh for example Android exploits and Athos exploits so on and so forth and then attached to all of these are our permissions right here right so you want to just confirm and make sure that these are the executable readable writable permissions right so we have 755 was the original number that was attached to it and so seven represents the initial Creator
so obviously the creator has read permissions which is four write permissions which is two and one which is executable so that would be a seven value the group only has execute and read permissions right so that would give us uh read is four execute is one so that's five and then the specific user that's running this as well only gets executable permission so it's one that that I don't really know how that actually plays out I think they it calculates this specifically and but for me personally I I don't like searching by the number because
it gets a little bit confusing for me I'm not that smart when it comes down to these things so what I like doing is by I like searching by the actual uh letter that's been assigned to it so for example instead of searching by permission of 755 I could just search by the permission of executable so I could just say find inside of this anything that has the execute permission like that and then uh X in this particular case I guess isn't working so let's try maybe it's X like this and that doesn't work either
okay so actually the syntax is like this so you do find and then perm and then we got to just make sure that we assign something to it so for example the user we want the user to be able to execute and then it shows us all of the files that can be executed by the user and then we're just going to do contrl c to stop that from running um so you can search that way so it would be find this and then you can even do this where you can do type f so
for example the type would be a file type D would be a directory so if I want to find all the directories that have the permission for the user to be able to execute and then it'll show me all the directories that have the permission from the user to be able to execute right so this is how you find things by permissions to be able to run them this is it goes more into uh pen testing and uh more so about ethical hacking than system administration but it's also useful to be able to find these
things as well and you can again find by the user themselves and actually go and say find this uh by user root and then you can do perm would be uh execute for example or maybe not that way I think it would be uh perm would still have to have the user execute and then there you go that's what it shows so it shows all the stuff that belongs to the the root user or any particular user that has the executable permission attached to it and then you would be able to find whatever those files
are and then you can continue your investigation or your Administration that way then we this is like the perfect segue to now go into uh changing permissions as well as creating users and modifying users so this would be now a new level of uh education now we can definitely just kind of move on from uh find and searching and things like that and now we can go into users and permissions okay so the first thing before we get into provisioning new users is that we need to understand what CH mod is or change mode essentially
is what the what that stands for and that's the permissions command so you can add or remove permissions to any uh file or direct directory using that so if I go in here and I look at all the stuff that's inside of my uh root directory and I see there's a bunch of things that are here and let's say uh we want to see um we'll just do LSL just to kind of keep the list short and we see that our desktop has executable we have all these different directories that have it the burp JSO
n has read uh but it doesn't seem to have executable permissions so let's see if we can give permissions uh um plus x to the burp. JSO n file and let's see if that actually worked and now we can execute it so previously we couldn't so let's see if I can scroll up a little bit so burp. js1 previously didn't have any executable permissions attached to it and I just did chod plus X meaning uh execute to burp JS n and it gave it to the burp JSO n and now it actually has the executable
permission attached to it and now let's say I want to remove it so chod minus X and then same thing burp. JS and now I can do LSL and now we see that burp JSO does not have executable permissions attached to it anymore it's that simple you could literally add or remove any permissions to any file uh or folder using the change mode command and then you can do multiple uh additions so we could do multiple uh we could do X and what is it X and W in this particular case and then add it
to both JS n and then do LSL and now we see that it has the X attached to it I think execute kind of encompasses writing so you can just also write to it if you can have execution permissions to it um execution sounds sounds really bad um but again we could also just do minus xw and then burp. JSO and then listed and then now it removes it so it's that simple it really is not uh it's like it's a very it's a fairly easy command to wrap your head around but it's also a
really important command especially again when it comes down to uh ethical hacking pentesting but specifically for system administration this is a really big one change mode removes permissions from certain things right so you can give permissions to people or you can remove permissions from people and that's one of the big things that you would do as a system administrator is that certain files or certain folders or certain programs should have temporary permissions and then you have to remove the permissions for that person as their job is done and they move to a different department or
whatever it is so permissions are a really big deal when we're talking about system administration this is one of the big things like there's a part of system administration that requires that you find things and move things and create things but the big part of system administration comes down to managing users and creating users and removing users modifying users all of that stuff is really important but then it's giving them permissions and removing permissions from them that becomes a really big deal when it comes down to system administration and becoming a really good CIS admin
so that's one of those things that is going to come up a lot so you need to know how to do uh permission changes so chod ends up becoming one of those tools that you're going to end up using very very frequently as you add users and as you uh remove users add groups and remove groups so on and so forth which actually reminds me of giving specific permissions to uh specific types of people so for example if we have uh if we just use this command by itself typically it defaults to giving permissions to
the user but let's say you want to give permissions to the group uh as well so you would do G for group and then you would do plus X and then you would do the file name and then in that situation ideally it would give uh executable permissions to the group itself right so it instead of adding x to the very last piece which is the user it added x to the group which is this piece right here right so that is what we could do in that regard and again again we could do G
minus X to remove that execute permission from the burp JS file and then now we can go and verify that and now we can see that it removed it from the group level so if you want to add it to the group instead of adding it to the user you would need to proceed it with that or if you just want to specifically add it to the user then it would be chod uh U plus X burp. JSO n like that and then you can do LSL to confirm and then you see that that exists
over there as well so this is uh the user level right here that you see right here so this is how you make sure that you add it or remove it to uh specific groups or specific and I just got to make sure that I do this cuz I don't want to uh accidentally mess anything up here and then we do that and then we see that the the permission has been removed because the user was root which is the current user that we're logged in so if we want to give ourselves permission or remove
permission from ourselves we would do that and then that's how that works so change mode CH mod very very important command and it's very important to understand what it actually does and it doesn't assign uh permissions to uh or it doesn't add somebody directly to the access control list the ACL but it just changes file permission so that's something that you just need to understand we're not by doing this we're not adding a person to a specific Access Control list you would need to use the user modification commands for that um we're all we're doing
in this particular case case is we're just adding or removing permissions from files and folders and that's the big thing to understand so um that is it for CH mod so let's now move to the new user ads or user provisioning portion of this okay user provisioning this is another really big responsibility for a system administrator so um this is what we will uh I think this is this will end up being kind of like the biggest portion of this the change permissions one was like a really big one uh but I think this is
probably one of the biggest things that you're going to end up doing especially as you uh become a specific Linux uh administrator and uh you can do this by uh I've actually created a script for user provisioning that is available to all of our uh members from hackaholic Anonymous and that specific script does a lot of this for you by just running the script um because that this is one of those things that when you become a system administrator you're going to have to create a bunch of uh users all the time you're going to
have to delete users and it becomes like a really big repetitive process that you have to do all the time and so this is going to be one of those specific uh steps that it would just be very useful if you had a script for it um but once you kind of study scripting it's not hard really to create a script for something like this it just needs to make sure that you actually do it really really well um which is why I I just made it for our members and you get access to it
it's just one of the extra perks that you get on top of all the different perks that you get that's just one of the perks that you would get um at the very beginning as well it's actually one of the first uh sets of scripts that I end up giving to people uh because it just makes your life so much easier as you become a system administrator to have a script that does your user provisioning for you but anyways here is the first command here the first command is the user add command so you want
to add a user right um more often than not if you're not a and even if you are a root user you will probably have to do a pseudo uh preceding the user ad command because pseudo is it specifies that you definitely know what you're doing and you actually have the permission to do what you're doing um adding users and modifying users is something that is only reserved for administrators and root users and people who actually have domain admin permissions and all of that stuff so you need to do this as a pseudo user and
you have to just prede your command with pseudo so uh if I let me see if I can just do it by this so user ad will do John Smith oh I guess I can do it because I am a root user right so if I do this again so if I do this I am root so technically I can actually do that so now I'm good but if I wasn't root and I was just a person that was added to the pseudo list of people that actually had root permissions I would have to proceed
it with doing pseudo so um if I want to just make sure that this person exists right who my current uh list of users are right let's see if we can verify if John Smith has now been created and there he is so we just checked our Etsy password list and we see that John Smith was the newest user that was added and now this is his home he actually has a home folder and then this is his Direction uh his path to his bash shell his director um the directory that accesses shell for John
Smith so very good so now John Smith is now one of our users great so let's say we want to set up a password for John Smith so what would we do for this so This is actually the list of all the commands that you have for the password command so p a sswd uh this is the list of all the commands that are available for that and you can see over here that you can obviously just check the status on all the accounts for their passwords you can delete the password for somebody you can
force the expiration for the password on somebody uh you can gain help obviously you can keep tokens and activate something so set password inactive after expiration to inactive you can lock somebody's account so you can uh this is also a very big deal when you're creating uh scripts so you say you know uh somebody attempts to log in three times I want their password to be locked right um uh check the status for something unlock somebody's password uh all of that stuff after maximum number of days we want the password to change and we want
it to force being expired so on and so forth this is where that specific command comes in when you're trying to create scripts to uh provision not not just provision but um administer and uh modify manage users so in this case we want to add a password for our John Smith user so we're going to do password John Smith and it's going to say enter the new Unix password and I'm going to do Superman uh with a exclamation and a capital S exclamation capital S and password for John Smith has been updated successfully so there
you go um now we got John Smith password and we just set that John Smith's temporary password and now when they log in uh they can go ahead and use that password and then they can you know manage it as such um we can set it so that uh their password forces them to uh reset their password upon logging in now the way that we would do this is that actually once we create their password we literally just set the flag that we want their password to expire so that's basically it so it's like you
do this and it says that the password expire information has changed meaning that their password has technically expired so that as soon as you set up the new user you can set up their password obviously and then as soon as they log in because this is assuming that it's a new user and they haven't logged in yet so as soon as they log in they're going to be like hey your password has been expired you need to set a new password and they go ahead and create their new password in that regard and now they
have their own password and nobody else knows their password right and that's basically the way the kind of like the workflow of how this whole thing works and so now I have this guy we forced him to do this thing or to set up this password and something has happened and now for whatever reason he's no longer at the company or he did his job because he was like a temporary person that came and worked and now we just want to make sure that we delete this person so this is like one of those things
that again just becomes very very very quick right like really easy and that would be Dell user so delete user John Smith and there you go and removing User Group John Smith has no more members oh that's actually a really important thing as well so uh because John Smith was created and he wasn't automatically added to any groups Linux just creates a group for John Smith right and so John Smith now belongs to the John Smith group but we just deleted him and what happened is that we removed the user but now it says warning
the group John Smith has no more members meaning the group itself still exists so one of the things that you want to do is you want to delete the group too so you want to do group delete and then John Smith and then now you delete the group itself so group John Smith does not exist anymore there you go so that is one of the great things that you can do to just make sure that you've covered all of your base and this is also something that again that just happens in scripting when you create
a new script and you want to create a script for deleting a user you just make sure that whatever group that person belongs to also gets deleted if it was like a temporary group that was created if you added him to a different group then you can you don't want to delete the overall group because there's probably other users that belong to that group does that make sense so one of the things that we can do and it we'll just re John Smith this time around and then we'll use a new uh par new command
to kind of make this thing a little bit easier this is probably what you want to do uh temporarily right like so you or not temporarily you just kind of want to do this from the very beginning so you do user ad We'll add Jane Smith this time so we'll add Jan Smith and then what we're going to do is for the password we're going to create Superman one for the password so we added a new user Jane Smith with a temporary password Superman and now we have that password and that user so if we
went back to our Etsy password file we should now be able to see a Jane Smith and we do see a Jane Smith at the bottom of our file so now we know that we have Jane Smith inside of our group so now what we want to do uh since we know that Jane Smith was added to their own temporary group for Jane Smith we want to just make sure that we add Jane Smith to any specific group for example so whatever group that we want to be able to add them to we want to
just transfer them to that group and let's say for the for the sake of argument cuz I don't want to modify anything inside of this particular machine that I'm in so I'm going to create a group and the way that I would do this you guessed it is by doing group AD very simple to you very similar to user ad so I'm going to create a group and then we're going to call this group marketing right so group AD is now marketing and now we want to add Jane to that group right we want to
transfer Jane Smith to that group the way that we would do this is that we would go ahead and uh modify the user so there is called user mod previously had we had user ad now we have user mod and now we want to add so you would do das a and then capital G so you're adding it to the group um marketing and then the person that we're adding is Jane Smith like that and so now we've actually added Jane Smith to the Marketing Group now if we want to see what group Jane actually
belongs in just to confirm that we did add her to the right group so we would do groups and that's the very simple command groups and then we now are looking for Jane Smith and then it says Jane Smith belongs to marketing look and of course the original Jane Smith group as well so now I want to see if I can potentially delete the group uh Jane Smith right I just want her to only belong to the Marketing Group I don't want her to belong to any of the other groups so what I'm going to
do is I'm going to run the group Dell and then I'm going to delete Jane Smith and okay so now we learned that we can't remove the primary group of user Jane Smith because that was the group that was created for Jane Smith when we provisioned her and that's the primary group that she belongs in so it's all good so now we can make sure that that stays or we can try to modify her primary group so let's see if we can do that and the way that we can do that is by using the
user mod option again now if we do a lowercase G uh we're referring to the primary group of this person so we want to add this person or change this person's primary group so in this particular case it would be the Marketing Group and we want to change Jane Smith's primary group so user mod primary group group would be lowercase G marketing and we do Jane Smith and now there change so if I run groups Jane Smith one more time uh I should see that Jane Smith only belongs to the group marketing and you will
notice that automatically their previous group The her previous primary group which was Jane Smith has now been deleted right so this was her previous grouping and now this is her new grouping right and so this is now uh their primary group for Jane Smith right so n what I'm going to do now I'm going to add another uh user to the Marketing Group and then I want to show you how to find all of the users listed inside of a certain group okay so just I added a new user and we can now see our
new user which is John Doe so we had Jane Smith and now we have John Doe and now we want to see and I also obviously just added John do to the same group which is our Marketing Group because now we have two people inside of marketing because our company's expanding so what we want to see now is we want to see um how many people are listed inside of the Marketing Group or essentially how many people are listed inside of any group right so we would do this by get ENT which is get entries
essentially that's what that stands for so get ENT and then group and then marketing and so it says oh marketing is Jane Smith oh you know what interestingly enough John's uh John Doe is not added to this thing so I'm very curious to now see why John Doe was not added to my group so I'm going to do groups and I'm going to do John Doe and let me see here I have John do and marketing but I don't see what uh the various users are inside of my Marketing Group so there's something off here
right there's something interesting here so if I do groups Jane Smith she's also on marketing so I know I have two people inside of the Marketing Group but for some reason when I do get ENT group marketing I don't don't see everything so let's see what's going on here okay there we go so our first command for whatever reason the user modification command didn't work and we weren't able to add uh John Doe to the Marketing Group so we are now introducing a new command just in case the user mod command fails which is the
G password so group password I guess I think that's what that stands for uh but G password and then a for adding and then John do is the user and then we're adding them to the Marketing Group and then we got a notification that we're adding John do to the group marketing and then when I ran the command to see uh the contents or the entries inside of the group marketing we see now we have Jane Smith and John Doe inside of the group marketing so that's how we were able to find whether or not
our person was actually added to the group that they belong to so now since we've done all this we got to clean up so I've modified these things inside of this temporary machine and I just want to make sure that I don't leave anything uh behind and I don't uh kind of leave these things without doing proper cleanup so we're going to go ahead and do a user delete so delete user and we want to delete the user joho and they've been delete because it's the primary group of your so group John do not removed
because it is not the primary user of John do so that's done so now what we we want to do is we want to delete the group John Doe and so that should be now completely done uh because we didn't get notified previously before that there was nothing that existed so that's all good and then the next thing that we want to do is we want to delete uh Jane Smith and we should get the same thing group Jane Smith not removed because it's not the primary group of user Jane Smith so what we're going
to do is we're going to group delete Jane Smith to make sure that we delete that group as well so that should be all good and now we want to make sure that we delete our group itself that we created which is the Marketing Group and there we go now we've deleted the Marketing Group as well so how do we check to see if all of these things are good right how do we check to see if everything that we just did actually work so first and foremost we're going to check the password Etsy file
to see if our users are gone and lo behold we no longer have Jane Smith or John Doe in our users file and the next next thing that we want to do is we want to check our groups uh to see if the group itself has been deleted to be able to check to see if a group has been indeed deleted we can check a few different things so first and foremost we can just do a cat of the Etsy group list and we can pipe that since we just learned what that is and we
can grab marketing from that output to see if there's anything exist that it actually doesn't so if I went and checked inside of the cat Etsy group itself I'll be able to see these are all the different groups that I got and it's a long list of stuff so I don't want to manually search through that that's why we did our grep Command to see marketing exists and indeed marketing does not exist there's another way that you can do it which is just doing the get entries of the group marketing and if you do that
if it existed if there was an actual group name marketing it would show us the contents of that but it doesn't because we actually verified that it has been deleted so we were able to delete our group and this is one of the ways that you can just make sure that all that stuff was gone and so here's how we're going to combine all of these things to be able to add a US add a user add that user to a certain group and then modify the permissions of that user by modifying the permissions of
a group right so this is how it gets this is like a full process of what you're going to end up doing when you get hired as a system administrator somewhere all right so starting from the top we're going to use the user add uh command and we're going to add another person in this particular case we'll do Hank H that's going to be our new user and um I actually need to now modify my password because I forgot to modify my password uh so user mod uh p uh for password right I think that's
basically what it was uh nope let's see what the actual command is going to be yeah my bad so it's not a user mod command it's actually the password command so we're going to do password command and then we're going to do Hank H and now it's going to say set their unic password and so it's going to be I'm just going to do password which is a very weak password but whatever so now we have our password updated and so now since we have a temporary password assigned to this person what we want to
do is we want to force them to change their password on their next login to verify how to actually change somebody's password like force them to change their password we would just go through all of these things and so it says uh delete a user's password or make it empty this is is a quick way to disable a password for an account it will set their name account passwordless that's not what we want to do we want to expire it so immediately expire an account password this in effect can force a Cho uh can this
in effect can force a user to change their password at the user's next login so that's what we want to do is we want to expire the password for the new user that we just created so that's what we're going to do we're going to do password and then we're going to do e and then we're going to do Hank H's password so their information has now changed and now they're forced to change their password on their next login okay so great so now we have a new user named Hank H and Hank H has
their password expired so that on their next login they're going to be forced to change their password that's great so now the next thing that we want to do is we want to add Hank H to a new uh group right so that's the piece that we need to make sure Hank actually has a new group that they're working from so we're going to create a new group and we're going to do group AD with that thing and group AD we're going to have we'll just do Tech as like our new uh group so group
AD is going to be Tech and so now we have a new group and we want to make sure that our new user is now inside of that group so we can do user mod AG because this was the original use uh command that we used so hopefully this will actually work and then we'll do Hank H see if Hank H has now been added to the uh the the tech group so let's now we need to actually verify that Hank H has actually been added to the tech group and we would do that by
running the getent so get entries group Tech see y there he is so Hank H is actually inside of that group so perfect so now we created our user we modified their password we expired their password so they can reset it we created a new group and now we added Hank H to that group so the next thing that we want to do is we want to modify the permissions of that group right so we want to give Hank a specific set of permissions and those specific permissions could be anything just depends on the specific
environment that you're running and what type of permissions that person should have so we can do something obviously you already know what the command is so it would be a chod command and we're giving the permissions to a group so we want to give read and write permissions to the group Tech it didn't work because we're actually not inside of our group's directory so that's probably one of the big things that we got to make sure that we do and this is something that you know I'm I'm kind of being re- reminded of all of
these things as I go through this so I need to First be inside of the groups directory to actually see all the groups that we got so we're going to go into our groups directory so CD at group and okay so it's not even here so let's see if we can find it and we do indeed actually have a location called Etsy group so there might be a reason why I can't go in there so let me see if I can manually go in there so I'm inside of the Etsy location and inside of here
I definitely do see that there's something called group here um but it's not something that I can mess with so if I ran LSL here and we went over here we we will now be able to see that in this particular location specifically the group's directory so let's go look at this real quick or actually it might not be even a directory I think the group's directory is actually a file so we can verify this right now as we go to check this CU I think it's not a directory yeah it's a file so this
is actually not even a directory so this is a file so the one thing that we got to make sure is that we got to be in the particular location to be able to change the permissions of that group so that's the one thing that we got to make sure that we can do now unfortunately in this particular case it seems to be that since this is not a directory that we're uh using we need to just make sure that the permissions for that uh are going to actually work so let's see what we can
do to bypass this okay so I actually may have skipped the step it seems like so um the thing that we have to do because we're in a Linux environment I was kind of thinking like we were in a Windows environment because in Windows you can actually change the permissions assigned to a specific group and then you literally just drag and drop somebody inside of that group and then they would inherit all of the permissions and all the objects that they could access so on and so forth because of the permissions assigned to that group
it's not the same way in Linux in Linux you got to take an extra step here so we need to First create a directory that would belong to the group so in this particular case I'm just going to go back to Our Roots home directory here and uh we just need to make sure that we create a specific path to a shared directory uh for this specific group so for example we're just going to actually I'll even go one more up so we're inside of this like root folder that's over here and then now we
see that we have the root user that's inside of here as well as a bunch of various different groups as well so we can make a directory here and we will call this the tech users and then now we can check to see if that exists and now we have a directory called Tech users so what we need to do is we need to give access to the tech users directory uh or ex excuse me we need to change the ownership of the tech users directory by using the change ownership command so this is another
new uh command that you're using uh learning excuse me so CH own very similar to change uh mode which was chod CH own is changing ownership so we're going to change ownership to the tech group and we're going to change it for the uh the folder Tech users so now the tech users group so if I do LSL we should be able to see hopefully that the tech users group have right here boom so we see that the tech users group have the group ownership of tech so the group Tech actually owns the tech users
group and now what we can do is we can change the permissions of the tech users group and we can start giving them various permissions or remove various permissions from them so I can do now a change mode command and I can give group permissions uh read and write to the tech users group or the tech users folder right this is a shared folder that everybody in the group Tech actually has access to so now we can verify the ownership of this and then we see that they have all of these permissions that's been added
to the tech users group now they can read they can write they can execute everything that's inside of this thing and that is a great environment so now we've done multiple things right so we created a new user we added the user to the tech group and now we assigned uh we created a new shared folder for the tech group then we change the ownership of the tech group or the tech uh folder excuse me the tech users folder we Chang the ownership the group ownership of the tech users folder to the tech group and
then we change the permissions of that so now everybody that has access to this will have access to that specific group as their uh their main shared folder and then they get access to all the files inside of that and then everything else they don't have access to right so hopefully that actually makes sense so we created a new user using the user ad we made sure that their password expires using the password expiry uh option option we added that new user to a new group called Tech and this is our group right um then
we added a shared folder for the tech group and we made sure that we changed the ownership of this folder to the group text so that the group so you see right here is root was the user that created it and then the folder of the group that also owns this is actually the root group right so which means that these are these things are all owned by the root group as well as the root user but in this particular case this particular thing is owned by root but then the tech group also has ownership
of it so anybody who's inside of the tech group has ownership of this inside in this entire folder and they can do essentially all of the permissions that have been assigned to this group they can do it anybody as long as they belong to the tech group they can also do those permissions that's basically what we've done here so that's all the the stuff that we just did so now we can do house cleaning right we just got to make sure that we remove all of the things that we just did so what we're going
to do is we're going to delete or remove the tech users uh directory so it's a directory um I think it's actually directory it's not remove but it's like how do we delete a directory I got to remind myself I'm sorry it's remove directory so it's not a file remove only works for a file so if you want to remove a directory is remove dir and then we do Tech users there we go and now we've been able to remove uh Tech users so let's just make sure that it's not there anymore and it is
no longer there anymore so now what we want to do is we want to delete everything else that we did right so we want to delete the group that we just made there we go and now we want to delete the user that we just made and there we go and there should no longer be a group called uh Hank H so let's just make sure that that's also true so cat see and let's see if we have a hank H Group which I don't think we do yeah he's gone the user is gone the
group is gone all that stuff is gone CU we changed this primary group as well but we can always do cat Etsy group and then pipe that into the GP command and see if we can find Hank H and we can so we made sure that that was deleted as well so we deleted our user we deleted our group we deleted the shared folder that was assigned to them and just like that we are back to normal we back to the regular standard position that we were when we started this exercise and just like that
we have wrapped our Linux tutorial Linux CIS admin tutorial so we went from very very basic commands to start the whole thing and we got into some more advanced commands and ultimately ended up with user provisioning group provisioning and doing a lot of great things as a Linux administrator as a system admin for Linux and um I did create create a specific file that automates a lot of these things there's actually multiple files so there's the the file that uh automates the creation of new users inside of the Linux environment um there's a file that
creates new users inside of the Windows Active Directory environment um and then there's the version of it where we work with the API of azure ad uh because it's cloud-based and a lot of computer a lot of companies use Azure active directory to provision their user so there's also an automation file that includes that so all of that stuff is is provided to our members for the CIS admin um group the membership group at hackaholic Anonymous under the CIS admin tier which I believe is tier number two uh they get access to all of those
uh automations because it's one of the perks that I love providing to our members is that we I I just create a lot of these automations for them so this is actually something that is provided to all of our tier 2 CIS admin members and they're going to be getting access to that so it you know it's great that you know all of these things now you should know exactly how to do all of these things manually but when you go into a large environment and you work at a company they're going to probably want
to do this uh dozens of times hundreds of times you probably need to do this repetitively all the time and it's just time consuming and sometimes when your mind is cluttered or something you forget to do certain parts of this process and when you create an automation script it just guarantees that every single part of that process is done and it's done properly that's why I like automation so that's one of the things that I think is very very important in this regard is that uh it's good to know exactly how to do this but
it's also good to know how to automate all of this stuff so this was the first step for you I'm going to create more videos around Linux uh system administration as well as Windows system administration um but there from now on since we have this one and this was kind of like a beginners to intermediate type of uh environments what we're going to do is in the future videos is we're going to be working on more advanced CIS admin stuff in Linux and uh ultimately in Windows as well so uh this was basically it for
our Linux tutorial of the command line and how to be a CIS admin inside of Linux if you got any value from this tutorial or if you've gotten any kind of value from this channel I do encourage you to like subscribe and turn on the notification Bell so that you get notified the next time that a video comes out out and of course I would love to hear from you in the comment section uh this video came out because somebody in our comment section requested a video about Linux Administration and becoming a sis admin so
I was like hey you know what that's actually a really good idea let's go talk about that and let's go create a video about that so that's basically how this video came out so go ahead and thank that user um his name is David I don't know what his full full username is but uh he's actually one of our community members inside of hackaholic anonymous as as well and he wanted to have more scripts on this so I was like hey you know what I'm going to create videos for you guys we created scripts for
them so that's all going to be accessible to them I listen to the community it's the point that I'm trying to make so if you drop a comment and you make a request for some kind of content I will listen and I will do my very best to create that content for you so that's how this video came up so hopefully you found value from it and if you did I would like for you to like subscribe and turn on notification Bell and join our community of amazing professionals who are trying to become sis admins
and ethical hackers and cyber security analysts so on and so forth it's your boy Hank hackers and at Hank hacks hackers your favorite network and system attacker SL protector love peace and chicken grease if no one else loves you Hank loves you and I will see you in the next video later
Related Videos

50:16
CySec 101 / EP.4 / Linux Basics Pt.1 / Try...
Hank Hackerson
847 views

59:51
Master Linux System Administration, Earn B...
cuSTEM Journeys
42,373 views

2:34:06
Linux - Introduction
Eli the Computer Guy
30,487 views
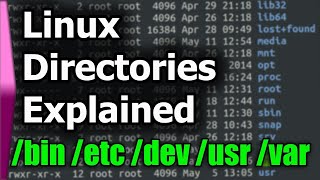
15:59
Linux File System/Structure Explained!
DorianDotSlash
4,252,242 views

33:39
Goodbye Passwords: Secure Secrets Manageme...
Vadideki Geyik
41 views

12:23
100+ Linux Things you Need to Know
Fireship
1,422,113 views

18:51
Why More People Dont Use Linux
ThePrimeTime
323,375 views

3:23:09
Linux Command Line Full course: Beginners ...
Geek's Lesson
1,411,365 views

9:23
How I became an IT system administrator wi...
GPS
70,026 views

11:33
The Making of Linux: The World's First Ope...
ForrestKnight
1,329,041 views

54:12
DEF CON 32 - Anyone can hack IoT- Beginner...
DEFCONConference
99,095 views
9:45
The Best Way to Learn Linux
Mental Outlaw
157,047 views

2:21:28
Linux Crash Course for Beginners with Labs
freeCodeCamp.org
122,188 views

28:30
How do Graphics Cards Work? Exploring GPU...
Branch Education
2,035,778 views

21:02
Linux HATES Me – Daily Driver Challenge Pt.1
Linus Tech Tips
3,873,480 views

39:02
Arch Linux Experience - Hyprland
Bog
394,179 views

3:50:19
Data Analytics for Beginners | Data Analyt...
Intellipaat
2,166,219 views

3:03:31
TCP/IP for Programmers
Eli the Computer Guy
232,966 views

30:21
ClamAV + Wazuh, powerful Anti-Virus protec...
Christian Lempa
14,763 views

13:01
The Painful world of Linux Ricing | A Hypr...
typecraft
71,321 views