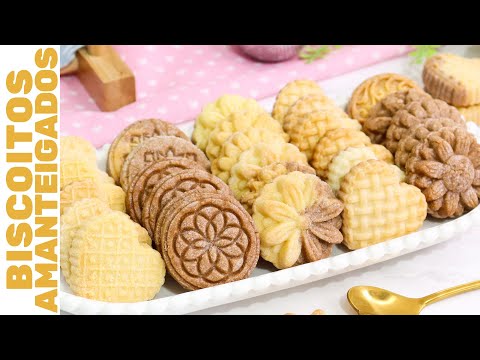
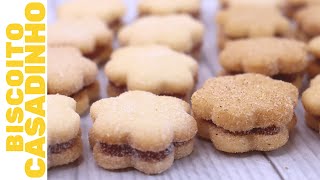
BISCOITO AMANTEIGADO QUE DERRETE NA BOCA! PERFEITO PARA VENDER NO DIA DAS MÃES! Fácil de fazer!
252.82k vues1558 MotsCopier le textePartager
Anelyse Martins
Hoje eu vou te ensinar a fazer Biscoitos Amanteigados lindos e deliciosos. Eles são super fáceis de ...
Transcription vidéo:
crunchy on the outside and soft on the inside, these buttery cookies melt in your mouth and are super easy to make, they are beautiful, they leave everyone's mouth watering and they are perfect for you to make for your family or even to sell because no one can resist the deliciousness of these cookies They are also an excellent option for commemorative dates, so stay with me until the end because today we are also going to talk about packaging and to not miss any of our recipes, just subscribe to the channel and the notification bell to be notified as soon as new videos come out. forget to leave your thumbs up and also to share this video with your friends because this helps our channel to grow a lot and I'm counting on you, hey Now let's go Prepare your kitchen and let's go to the recipe to make the Cookies, I'll start by adding the butter here in the bowl the butter needs to be at the creamy point, which is this point here I use the spoon and it marks the butter now I'm going to add the sugar and I'm going to beat it with the mixer when the butter and sugar turn This light cream I'm going to add the egg yolk and also the vanilla flavoring paste now I'm going to beat for another minute the cream is whipped and its texture is like this now I'm going to sift the all flour flour now I'm going to stir the dough until everything is well combined I flavor the biscuit with vanilla But you can use different ingredients such as orange and lemon zest cinnamon ginger pistachios chestnuts and almonds to make new cookie flavors when it starts to get difficult to move with the spatula you will use your hands the dough is ready and its texture is this Here is a dough that is very easy to work with, very soft, very delicious, now I'm going to measure here and I'm going to separate half of the dough . This part I'm going to reserve will be our vanilla biscuit.
of chocolate biscuit and then I'll stir again so that everything is well integrated Ready now we have our chocolate biscuit dough here now we are going to portion and shape our biscuits if your city is very hot the butter will get softer as you go that you are mixing the dough in this case I recommend that you pack the cookie dough in a plastic bag and take it to the fridge for about 15 minutes just to make it easier to work with. My dough was in the fridge for 10 minutes now let's portion it and shape it Look what a perfect dough for portioning, we can use the scale and weigh balls of 12. But I prefer to use the Blue Star candy roller, which I think is faster and more practical.
I'm going to open the roller, position the dough, close it, now we invert it. position the rolls and cover again, remove the edges Because they are out of the standard and you already have the cookie dough portioned out, just roll it lightly if you want to make two-color cookies, it's very easy to separate part of the chocolate dough and place it on top you can even remove the vanilla dough and give it a pradha PR they stick well now I put it back on the roller and make the cut Look how the straws look reposition to make the second part of the cut and now just roll it once more I'll go repeat the same process for all the pieces now my balls are all rolled up and I'm going to use the Blue Star candy ejector to shape the cookies. Assembling the ejector is very easy, it comes with these three parts that fit together with the first one The next step is to fit this screw-on part here on the ejector, with the stamp part going to make us do the stamp, we have two that are going to attach the stamp to the ejector, then push the stamp here inside the ejector to the bottom and I'm going to turn this lever until the stamp is well fitted then I turn it and when it clicks it's because the stamp is already stuck and the ejector is ready to be used today we are going to use the heart model, the arabesque model and also the flower model so that the design is clearly visible.
I'm going to put these balls in refined sugar and then I'm going to put the balls in the pan lined with baking paper and then to shape the cookies I just use the eet pressure and as we put sugar in balls They can be easily removed from the ejector, if needed, you can help release them with your hand. In addition to the flower ejector, I will also use the heart ejector, which is one of my favorites. There are several models of ejector and they can also be used in brigadeiros.
We have a super complete video here on the channel teaching how to use the ejector, I'll leave the link in the description and also on the cards for you. The Cookies are all modeled and now we have a big jump, I'm going to take them all to the freezer for about 10 minutes before baking so the details are very visible and very clear. I like this leap of faith because we are making shortbread cookies, cookies that use a large amount of butter while we shape them, they return to room temperature and Then when I put it in the oven, this slightly softer butter will melt too quickly, this could cause the biscuit to lose some details of the design.
10 minutes in the freezer And look how the biscuits are already very firm, perfect for us to put in the oven Look at this model, what a perfect thing now I'm going to put it in the oven at 180 g for about 10 or 12 minutes until the edges of them are starting to brown. The Cookies were in the oven for 15 minutes and after baking this is how they look super pretty, beautiful with a very visible design and a very crunchy texture when you bite into it, the correct point is this one when they are starting to get golden edges This is the back of the Biscuit, these cookies are delicious, it is impossible to eat just one and then stop to pack the Cookies you have several options you can pack them in simple bags like this Pepê bag you can pack them in this type of bag here that already comes with the zipper you can pack them in Turbo Pets in boxes and also in the Blue Star cake box this decoration is perfect PR dates commemorative Just place the Biscuits inside the zipper and it's ready delivery and pack the Biscuits in the heart cake box I line the bottom of the Cinha with tissue paper printed using this flower print But you can use a heart print or any other print you prefer now just place the Cookies inside here now I attached the ends of my ribbon here to the packaging with hot glue to make it easier to tie the bow the ribbons are stuck this way And look how much easier it is to tie just tie the knot and make the bow I remove the excess from the ends and a heart cake box full of delicious cookies is ready for delivery Look what a delicious gift we have more videos of delicious cookies here on the channel and I'll leave the link to them in the cards at the end of the video and also in the description for you to watch, you're still here with me so head over to the comments and tell me what your favorite cookie flavor is and take the opportunity to leave a thumbs up if you want to stay up to date with what's happening in mine kitchen Also follow me on other social networks these cookies are perfect for gifts So take advantage of the commemorative dates to sell a lot Mother's Day is coming so take advantage of this recipe to make a profit The cookies' shelf life is up to 15 days as long as they are well packaged To avoid delays, I left the recipe's yield and cost information below in the description of the video, don't forget to check this information after the video is over, you can freeze the already shaped raw Cookie dough for up to 90 days and that's it.
Vidéos connexes
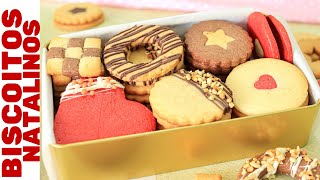
17:21
BISCOITO DE NATAL: 6 SABORES COM APENAS 1 ...
Anelyse Martins
195,448 views
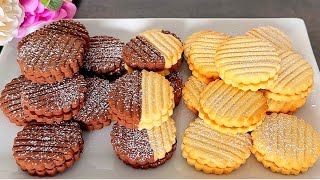
8:02
I finally found the cookie recipe I was lo...
Recette rapide sucrée
1,328,214 views

3:53
Recipe for making Who Pudding from How the...
Jim’s Kitsch Kitchen
13 views

8:32
RECEITA SIMPLES DE BISCOITOS DE LIMÃO| DEL...
Jana Cabral
611,123 views

17:27
THIS COOKIE MELT IN YOUR MOUTH! | Beautifu...
Anelyse Martins
711,577 views
8:30
GANHE DINHEIRO 💵 DE MONTÃO!BOLACHA SUPER ...
NA COZINHA COM A GERUZA
399,071 views

11:43
🎄🎅 So cute Santa Bear and the best Chris...
오늘도 베이킹 Baking again today
929,728 views

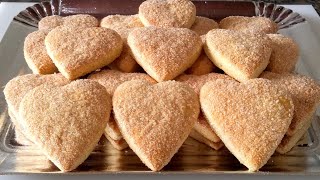
6:42
RECEITA DE BISCOITOS AMANTEIGADOS SEM GLÚT...
Jana Cabral
20,970 views

16:41
COMECE SUA FÁBRICA DE BISCOITOS AMANTEIGAD...
Se Vira nos 30
322,053 views

17:16
ESSE BISCOITO É LINDO E DESMANCHA NA BOCA!...
Anelyse Martins
51,124 views

10:03
VEM VER COMO É A PRODUÇÃO DE BISCOITOS AMA...
Dicas da Pri Confeiteira
26,180 views
13:23
Melhor Massa para Biscoitos Decorados de N...
Biscoitos Incríveis - Amazing Cookies - Chef Mii
128,288 views
16:39
Biscoito Alemã derrete na boca uma delícia
Padaria sem Segredos
747,749 views

18:55
Receita - Biscoito Amanteigado
Beca Milano
77,091 views
11:57
Learn how to make shortbread cookies for C...
Cozinha da Lulu.
2,710,325 views
13:11
Biscoitinhos amanteigados
Padaria sem Segredos
82,668 views
13:29
ESSE BISCOITO É IRRESISTÍVEL! 2 SABORES CO...
Anelyse Martins
189,327 views
19:07
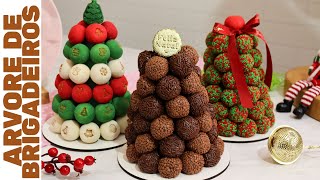
BRIGADEIRO TREE: THE PERFECT MAKE AND SELL...
Anelyse Martins
190,683 views

12:28
A RECEITA DE COOKIES QUE MINHA FAMÍLIA AMA...
Anelyse Martins
220,325 views
6:52
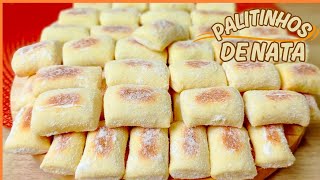
BOLACHA DE NATA I RECEITA EXCLUSIVA DO CAN...
Receitas Luciana Venâncio
311,295 views