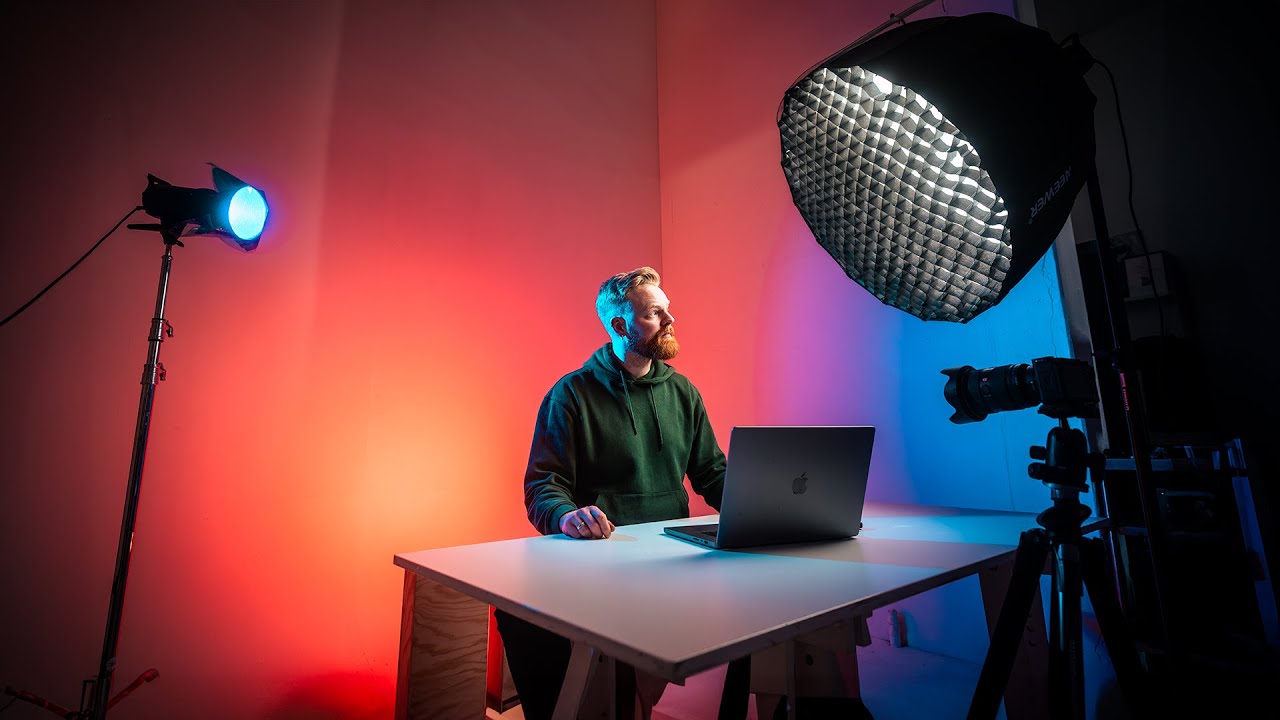
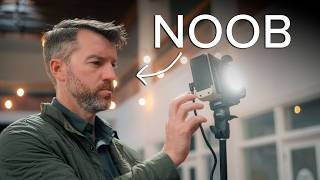
now this does not look so good while this looks pretty good and the best part is that all of this is achieved with some entry level lighting equipment really simple all you need is just the knowledge and in this video right here I'm not only going to share with you guys in step by step detail exactly how I've lit this scene but also I'm going to share with you guys some practical tips on how to take any YouTube space no matter where it is to the very next level plus my secret sauce you guys ready
let's start all right so the first light that I have here in this setup is without a doubt the most important one too and that is the key light now the key light is your main light and it's the light source that is going to light your subject and lighting me here and lighting you in your setup at home now for this particular setup I have it in a 45° angle from me so it is just here all right now the reason I have it in a 45° angle is that that creates a really nice
sh Shadow on my face making more contrast and just allowing me to get a little bit more cinematic and a dramatic look really much appreciated if I were to move the key light just in front of me behind the camera right here I would get a light that is directly on me and I would lose this nice shadow that I've created here and get a more like Beauty Dish more flattering light similar light is you would get on a ring light there's nothing wrong with that it's just a different type of lighting setup but in
my opinion op I just personally like to have it here more because it allows me to get a little bit more dramatic in a cinematic feel now the light that I personally use as my key light is a godu 100 watt I used for a long time the 60 watt you can easily use that too it's just a cheaper version The 100 has a little bit more power and I have it on like I think 25% you know uh the intensity of it so you could easily use the 6 whatever you want now these lights
are fairly inexpensive especially in the realm of video production and photography and all this like everything think the gear can cost so much and this was like one of my first lines that I ever bought and I had it for years and I still use it and I totally recommend it now on it I have a soft box what a soft box does it diffuses the light and makes it much softer without it the light would be much more harsh kind of like if you're on a really sunny day and you start to squint the
eyes and they like light is just so concentrated and so hard so by putting a soft Bon on it you even the light out make it much softer and more flattering and just much more beautiful in general so I would say that having a softbox is mandatory and then on the softbox you can see that I have honeycomb grid now this is important in my opinion and especially for this lighting setup because a honom grid it concentrates the light and it prevents lighting spill so without it the light will spill away basically it would go
to the wall and it would start to compete with the red light sources the back light that I have here but with it it like kind of concentrates it so it allows it to you know shine to me instead of shining to me and then also starting to shine on the background and all over the place so you can like um kind of direct the light better if you have a hondon gri so I have it here and I really like like having one now how far away should you then position the key light well
to answer that question properly you kind of have to understand what the distance does to light now really simply speaking the further away you move the light the less intense it will be on the subject on me cuz of course you're taking the light source and just moving it away but also by moving it away You're increasing the area on where the light will shine basically there're much more spill so you have light on more places imagine you have this cone here of light like we have with the softbox and then we move it further
and further and further away the light source will become bigger and bigger and bigger on where the the light hits the wall but also less and less intense on the wall itself so where I position the key light it will totally depend on the situation because if I were to move it further away from here then it would light up the background much more and maybe I don't want that so you kind of have to do trial and error and obviously if you move further away you will have to crank up the intensity to light
up you more I think a good rule of thumb is just to start with 0.9 M or 3 ft for you Americans there and to start with a there I think this is like kind of yeah kind of 1 M away something like that and then I just check it out so just put it here press on the record and then I put in the computer and check and see if everything looks good that is like a good rule of thumb in my opinion to start with it in 0.9 M or 3 ft all right
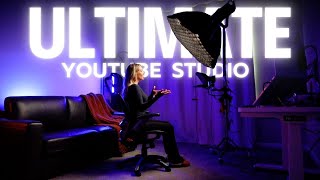
now the next light in this setup is of course the rim light it's the light that is behind me now Rim light is often called backl sometimes even hair light and the reason we like to use it is that it helps separating ourself from The Background by lighting up our back features here giving us this nice Halo now the reason also is called hairlight sometimes is that the lights up the hair here giving us this cool little Halo and just helps with the background separation and this particular setup right here I made the key light
blue to get this cool color TR contrast now this entire color theme is inspired by my friend Peter lingren you if you watch his channel you see him using this type of color setup a ton and I think it's really really cool now the rim light I use is the first light that I ever ever bought the goog 60 watt it's an nice entrylevel light source and how I got it to be blue I just taped this like cheap gels on put it over and uh turn blue having gels in your like kit very nice
cuz you can uh like easily change the color of your lights but just putting them over in a really cheap way works flawlessly now where should I position the key light the rim light I position it just out of the frame and then I play with intensity until it's right now the cool thing with this setup here this gives me this blue here which is nice but also if I'm showing you product or whatever you also get this cool blue rim on the product itself super super cool and then you can put an overhead camera
here as well very simply if you want me to show you how to do an overhead rig I can show you that let me know in the comments down below but this is like the main uh two lights that I have you'll also notice that I have a little what we call flag um behind the OR at the side of the rim light the reason I have the flag there this just prevents spill to the background so if I would wouldn't use it you would get much more blue on the background itself because the light
obviously spills to the background but I don't want it here cuz I want to have this red light here or orange light behind me so I just put a little flag this would be just a simple cardboard if you don't have like a professional flag at home just to like make sure that the light is not hitting the wall as much very like simple now I just want to point one thing out quickly is that the beauty with this setup is that because we are using like either RGB light tubes or lead lights with the
gels then we can change the colors to any spectrum that we like for instance if you want to use a blue background then you can easily do that the key with this setup is just to use contrast color so whatever color you want to have on the background then use the opposite color on the rim light now I truly believe that it's important for all of us that are serious about our content game and just YouTube in general think about our set design and the studio and just the lighting because it's such an easy way
to make our videos so much better and level them up and make them look much more professional just make them more professional in general but just understanding color theory set design and then lighting I mean the lightings around me they aren't expensive this is all old enter level lights that I've used for years but just knowing how to use them it's an easy way to make the professionalism of my entire content much higher and you know when people see your content for the very first time they're quick to judge people judge really quickly on your
appearance and on YouTube and here on like social media our like how we come across and our set design is the first thing that people see so having it look good and professional is something that I just truly believe will increase the credibility because we come across as we know more what we are doing and th like just increasing views viewer retention and all that good stuff that we love now for those of you who are truly serious and want to level up your studio game fast then for the last few months I've been creating
a courses and taking me so much time to make this is one of the most comprehensive things that I've made is over 40 different lessons hours of content where I'm just pouring everything that I've learned over the last almost a decade of doing YouTube and building multiple different sets designs in my life very different mistakes that I've made I'm diving deep into lighting lighting setups color theory set design cameras what camera I use the lenses my secret sauce and all of that good stuff if you're interested there's a link down in the description and I'll
see you guys there it's the YouTube Studio Master Class how to build your perfect social media space anyhow I see you guys there now there is more to it in this particular lighting setup than what we already covered so far we covered the key light and we covered the rim light but as you can see there is a light source also behind me plus what camera is it that I'm using here and what lens do I have and why did I choose this focal length instead of a different focal length we'll cover that all now
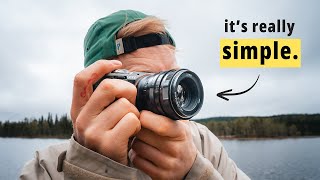
so let's start with the camera and then we'll go into the light so the camera that I'm using right here is my Sony a74 the type of camera body is kind of irrelevant because I I think that the focal length is more uh interesting the focal length for this P scene I have is 35 mm and the reason I chose that is that I think it looks like good here now usually when you're seeing me here online especially when I'm using my main like Studio setup my main angle that you see all the time then
I'm using a 20 mm lens I personally often prefer a 20 mm lens in like a YouTube Studio scenario because it allows me to get close to the lens while you're seeing the whole studio around me and I think that makes a little intimate feeling I personally like the 20 mm a ton and then I usually have a second camera angle that where I have a 85 mm and I think that complements each other very well but here I decided to go with 35 mm and the reason is basically just the limitation of the setup
here the wall bike behind me it's a little bit uh how can I say too small so if I were to take it to to you know let's just show you guys here to the this direction to 24 mm which would be a really cool look cuz I could be all the way here we could move it even closer but then you're starting to see everything behind me I don't like it that much plus the 35mm look is just really really nice I like the 35 mm Aon let me see if I can right here
so there's nothing wrong with the 35 mm look it's a very flattening look the face looks nice the compression is beautiful plus if you were to have a little something more behind you then just a play wall with a light you can get more background separation cuz the more compression the more bokeh you can get and we do like a bokeh now the light sources behind me are two different light tubes one is a tiny nonl and then the other one is a like cheap ol Lamy light tube I basically just put them on put
them on Orange and then I just place them behind me and they shoot up to the wall and this does a nice little like color contrast with the blue here like or the blue or the teal with the red and orange type here very nice and this is a a classic color U like color contrast colors that we have now you can of course switch all the lights out if you like for the rim light you could easily just have a one of these light tubes as blue could be really nice instead of having two
different light tubes you can have one or just one of these longer power tubes they are really really nice but they're pretty expensive but man those are like Investments cuz you can own them for very long time and that's something that I want to buy very soon but for now I have these two that I just owned and it did a really like pretty decent job now since all of you guys are serious about your YouTube and content game and you want to learn as much as you possibly can then next you should watch this
video cuz here I'm breaking down and giving you guys all of my secrets on how I light up my main YouTube Studio