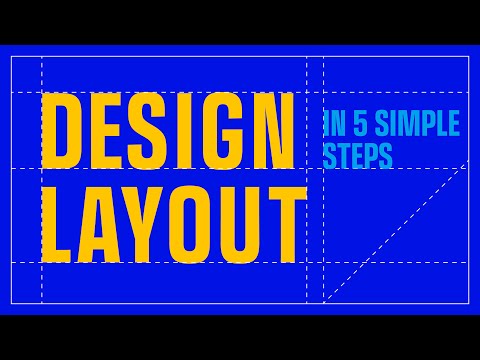
5 laws of design layout & composition *golden rules*
610.87k views1484 WordsCopy TextShare
Shapes By Sean
Thanks for visiting! I Hope you find this helpful. If you have any questions or feedback, drop it in...
Video Transcript:
hello everyone in this video we have five laws of layout and composition that are instantly going to make your designs look more professional and engaging lore number one grid systems modular grids are made up of a series of rows and columns these are separated into modules which can be used to organize text and imagery this helps with alignment and gives you a professional layout structure to use in your designs it can be used for simple Graphics more editorial style designs or even more complex examples like these now I work mainly in illustrator so I'm going
to show you how to make a modular Grid in illustrator I'm going to take the Marquee tool we'll press the m key and we're going to draw a rectangle around the entire artboard now I want a three mil gutter around the edges so I'm going to reduce the height and width by six mil [Music] and I'm going to come to object a path split into grid I want a six column grid with a three mil gutter so I'm going to come put those values in turning preview on so I can see what I'm doing then
I'll hit OK and draw another rectangle around those columns now to apply the rose so I want eight rows with a three mil gutter now if I select all of that and go to view guides make guides you'll see that's turned into a grid system text imagery and shapes will snap to this making alignment a little bit easier and you'll see this sort of grid system in use throughout the rest of the video law number two hierarchy and proximity this is probably the fastest way to create pace and better visual engagement in the design it's
going to make whatever you're designing more destructive to catch the viewer's attention as well as help communicate in the right order so if you take a look at this simple text layout here we have the headline Black Friday sale which is taking up half of the page because that's the first thing we want viewers to see we're then telling the viewer what they get exactly with 20 off everything directly underneath we're doing this in a black bar to underline Black Friday sale and notice I've locked those two up together in the same proximity the reason
being because those two bits of information relate to each other we want the viewer to sort of read them together one after the other we've then got the logo applied again to create a bit of pace and visual disruption but not in a way that's overbearing or drawing your eye away from the headline too early we've then got some product information at the bottom of the page which the viewer can get into once we've managed to get their attention using icons in this case really helps to pull each point apart and make them more individual
and I've personally kept the photography more paired back be more of a mood setup we don't want this to be one of the main pieces of communication in this instance now I'm going to show you how not to do it so in this example I've still technically got okay hierarchy but there's just not much Pace or visual engagement and everything is kind of bunched up together in the same proximity so it's going to be harder to get the viewer to read the design in the correct order that's why it's always important to consider hierarchy and
proximity law number three create layering this poster set is for a fictional company called Blue Skies they provide a creative shared workspace with the aim of lifting creative opportunities and creative businesses to the next level so I really want to create this sense of uplift and you can do that with layering so let's take one of the posters for example I've got all the information laid out and step by step I can create much more layering depth and movement so first I'm going to bring in a second font which instantly starts to create a little
bit more Pace then we're going to layer that over the photo start to create some depth in the poster so I'm going to layer that a bit more having some of the text in front of the photo and some of it behind so you really start to get the sense of movement going up the page I've also added a bold blue border to frame the poster and really draw your attention and finally to add a sense of creativity and organization I've added some subtle grid systems and handwritten notes over the top of the imagery just
to give that a little bit more depth and here you can see the full transformation the principles of layering and depth can be applied in all sorts of other ways and we'll get some more of that later in the video law 4 harmonize colors so look at this garish mess the only thing really wrong with this is the color palette I'm going to show you how I create color palette that integrate into your workflow and are easy to keep consistent across large or complex designs so I've just drawn two squares here I'm going to use
the eyedropper tool to select one of the lighter colors in the background of the photograph that's slightly too yellow so I'm going to make it a bit more neutral then I want a darker color so I'm going to take that from the tree then I'll select both of them that come to my swatches panel click new color group you want selected artworks tipped or you can leave the settings as they are and click OK and you'll see that's created a new color group in your swatches panel you want these to be Global colors you'll see
why in a minute so just double click each one hit Global and click ok now we're going to come and change my background to the lighter color and change my text to the brown easy way to select all the text if you click one element come to select and then select same fill color foreign let's say I decide the background is a bit too yellow and I want to make it more earthy because I made it a global color I can just come in and double click the Swatch and change the color from here which
really helps when you're dealing with a lot of artboards or if this color is applied to a number of shapes and text it just means I can change it all at once without having to select anything so I've made that more green I'm going to click OK and then I'm going to change the brown a little bit as well make that a bit more green and I'll come in and change the stroke to Green as well just by breaking the feel to The Strokes down the left here now let's say you want to pre-define your
color palette there are a lot of fancy tools out there but personally I just like to come to Google images and just search for the sort of color palette you want so I'm just going to go for a natural color palette and as you can see there's a multitude to pick from so yeah keep it simple onto law number five create focal points so let's come back to this design that we saw earlier I've created a clear focal point on the man on the left in the suit but he is layered on top of the
background Graphics which is sort of cutting across him in a slightly different direction that gives him a lot of standout so he'll be the first thing that viewers see when they look at the design next we have the quote on the right again much larger than the rest of the text in the design so that will be the first thing that viewers read then we've got some qualifying information locked up with that in the same proximity so viewers are likely to read that after quote and finally we have a call to action in this yellow
band at the bottom and the reason we put that in this bright yellow is to make sure it's not forgotten about and try to Spur the user into actually clicking it so in this design you can sort of see the other four laws of layout and composition all coming together in quite a clean and simple format thanks for watching today guys I hope you found it helpful for more creative tips and tricks just click through to my next video [Music]
Related Videos

13:32
20 Design Hacks to Master Adobe Illustrato...
Dansky
43,851 views

22:57
The Secret to Perfect Design Layouts
Typefool
226,338 views

18:54
Can You Fool A Self Driving Car?
Mark Rober
3,189,642 views

8:25
Master Layout Design In 8 Minutes! (IMPORT...
Satori Graphics
64,670 views

15:45
How To Create STUNNING Layouts - 5 Tips 😲
Will Paterson
131,414 views

7:32
Create Text Wraps in Adobe Photoshop CC
HF Creations
323 views

20:11
Swiss Design: Iconic & Influential (Origin...
Design Smith
193,932 views

14:00
Poster Grids YOU MUST USE For Professional...
Gareth David Studio
549,231 views

19:32
I paid 5 designers on Fiverr to create a c...
Mel Torrefranca
970,859 views

6:25
5 Effective Design Tips. Save time. Do More
Shapes By Sean
5,732 views
40:57
Abstract: The Art of Design | Paula Scher:...
Netflix
2,897,273 views

31:46
🔸 The ONLY Colour Theory Video You Ever N...
Satori Graphics
688,875 views
5:15
Beginning Graphic Design: Layout & Composi...
LearnFree
3,643,998 views

16:42
The first secret of great design | Tony Fa...
TED
2,099,974 views
6:18
60-30-10 Color Rule
Jesse Showalter
2,065,778 views
11:25
How to Use the Golden Ratio in Graphic Des...
Will Paterson
233,687 views

11:26
7 Advanced Tips For Layout & Composition I...
Typefool
69,096 views

24:46
Color Theory for Beginners | FREE COURSE
Envato Tuts+
256,471 views

7:21
The Secret To "Great" Design Is Simpler Th...
The Futur
396,652 views

12:06
5 GAME CHANGING graphic design TRENDS for ...
Shapes By Sean
1,985 views