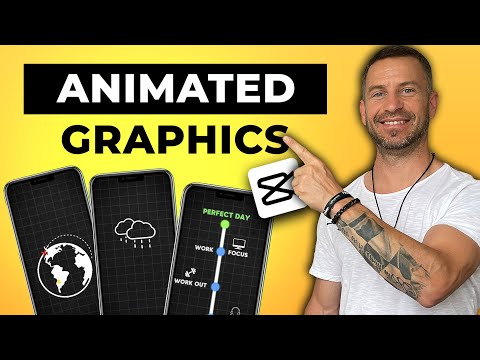
3 AMAZING Graphic Animations For Level UP Your Videos | CapCut Tutorial
435.06k views1214 WordsCopy TextShare

Rene Mlekuz
In this video I will show you 3 AMAZING Graphic Animations for Level UP your Videos and how to creat...
Video Transcript:
I'm sure you already know how many cool things you can do with cap cut but with Graphics animation you will put your videos on another level let me show you how to do it we will start with our first easy animation open cap cut and create a new project import the grid background sound and the clouds with the rain you can download all the pngs that we will use today down in the description or you can also go to canva click on elements and search for the sun choose graphics and if you want animate Sun
you have to go to filter and click on animated always set the background to Green drag the grid background on the timeline andjust the ratio of course depends on your needs and scale it go up to the adjustments scroll down set the brightness to Minus 5 whites to 15 and vignette to 25 we will also add the black noise effect go to effects find black noise drag it to the background and set the speed to 20 drag down the Sun go up to the video cut out chroma key Color Picker click on the green color
and drag the strength slider to 100 scale it in set the position drag down the clouds and place them above the Sun go up to cutout chroma key Color Picker click on the green color and drag the strength slider to 100 scale it and set the position now we will use key frames to make animation interesting with clouds highlighted move your playhead to the beginning drag them almost completely outside of the screen set the opacity to 15 click key frame on opacity and position then go approximately 40 frames forward drag the clouds on the middle
set the opacity to 100 and key frames will be created automatically click on sun turn the opacity to zero click key frame on opacity then go 20 frames back and turn the opacity to 100 so if we play it now we have something like [Music] this let us move to our second animation which is airplane animation I already imported the earth and the plane if you don't have them go to the link below and download them drag the Earth above our background and remove the green screen drag it up rotate it a little bit move
it down and resize it if you want go up to text add default text and write Dash plus space a couple of times then scroll down and set the character to minus three and if you need you can add some more dashes and spaces scroll down click on curve set it to around 150° resize it if you need and drag it down close to the Earth stretch the dashes line to the end of the video right click create a compound clip go up to mask choose horizontal rotate it to 180° pull it down so you
don't see the lines and set the feather to four move the playhead to the beginning click on key frame on rotation then move playhead to around 4 second Mark and rotate the line to 0° and key frame will be created automatically move to the beginning and drag the plane above the lines remove the green screen resize it and rotate It Go few frames forward so you start to see the dash line move the plane so you see the line behind his tail rotate it and click key frame on position and rotation move six frames forward
using arrow keys on your keyboard move the plane forward rotate it a bit to match the dash curved line and key frames will be created automatically now continue that process till you reach the end of the line when you're done you can also add the airplane sound effects for even better effect move to the beginning go up to music sound effects and search for Jet Plane sound effect click plus sign to drop it down and adjust the length of the [Music] sound [Music] if you like it till now I would be really happy if you
hit that like button and help me my channel to grow let us move to our final animation where we will create a nice progress bar for better day we will add text first go to text add text write your text choose font I will make it capital scroll down click on glow and adjust the settings pull it down to the bottom make it smaller and stretch it to the whole clip now we will create a line add text write Dash a couple of times go to character set it to minus 3 add some more dashes
if you want rotate it to 90° scroll down turn off uniform scale and increase the scale height scroll down click on glow and adjust the values stretch the line to the whole clip right click and create a compound clip move to the beginning go up to mask choose horizontal rotate it to minus 180° set the feather to four and pull the line to the bottom so you don't see it and click key frame on position move your play head almost to the end pull the line to the top but not all the way because we
still want to see that feather and key frame will be created automatically now we will create a few dots which will indicate stages in our day add text and right dot increase it drag it to the first step p on our line which will be somewhere here scroll down click on glow and set the values move your playhead to around this point drag dot to the play head and stretch it to the end go up to animation choose fade in and set it to 0.6 seconds let us also animate our first text highlight it scroll
down choose mini Zoom and set it to 0.6 seconds now we want for this dot to change the color when the line gets to it so we need to duplicate it with the dot highlighted click on control+ C or command plus C to copy and control+ V or command plus v to paste it go up to basic and choose the color I will choose blue go to the beginning of the first dot go two frames forward and drag our second dot to the playhead we need three more dots so copy these two move them up
drag them to the second stage and repeat the process to the top then highlight the last Dot and change the color the last thing we need to do is add some more text to our stages copy the first text change the text drag it to the second stage and align it to the moving line repeat the process for the other stages you can also change the color for the last text move your playhead to the end of our background highlight everything and click on W to cut the right parts and this is how it looks
at the end thank you for following and see you in the next one
Related Videos

1:24
Count UP Effect in CapCut Mobile Tutorial
Rene Mlekuz
113,155 views

8:04
Create 3 Dynamic Motion Graphics In CapCut
Rene Mlekuz
69,136 views

10:15
Edit Like After Effects in CapCut PC | Mot...
Contentia
1,703 views

6:44
5 Graphic Animation Tricks in CapCut | Vid...
Deny King
159,992 views

11:36
Keyframe MASTERY Explained | CapCut Tutorial
Rene Mlekuz
16,940 views

7:21
How to Use After Effects Tricks in CapCut ...
Davinci
231,690 views

7:29
3 MIND-BLOWING Blending Effects (CapCut Ed...
Deny King
174,387 views

5:03
3 MIND-BLOWING Blending Effects In Capcut(...
Fusion Frames
1,989 views

8:19
Make Viral Motion Graphics Animations with...
SocialTimer
62,935 views

13:32
5 CapCut PC Hacks to make SHORTS like ALI ...
Trevor Jones
252,155 views

15:00
Recreate DEVIN JATHO Edits in CapCut
Rene Mlekuz
14,958 views

8:05
Edit with CapCut SO good, they can’t look ...
Davinci
122,395 views

8:50
Create Cartoon Animations with Vectors on ...
Incyte Feedbacks
220,609 views

10:45
5 Must Know MASKING Tips in CapCut PC
Rene Mlekuz
3,942 views

19:47
CapCut Keyframe Mastery: Level Up Your Edits!
Collin Michael
329,231 views

12:30
10 INSANE Capcut Editing Tricks 🤯
Trevor Jones
937,402 views

10:51
How to Create TRENDING Motion Graphic Shor...
EditsPro
42,249 views

12:43
5 Masking Mastery Tips in CapCut | Step-by...
Rene Mlekuz
323,067 views

14:32
How to edit SO good your viewers get addic...
Learn By Leo
2,523,487 views

8:01
CapCut Just Dropped 5 Game-Changing Features
Trevor Jones
57,648 views