How to Model Interior in Blender
154.45k views1973 WordsCopy TextShare
Architecture Topics
👍 Free Addons Playlist ► https://www.youtube.com/playlist?list=PL4-Q7MyUxdZEvTkrEyhzQIBCWrwtZoSmG
�...
Video Transcript:
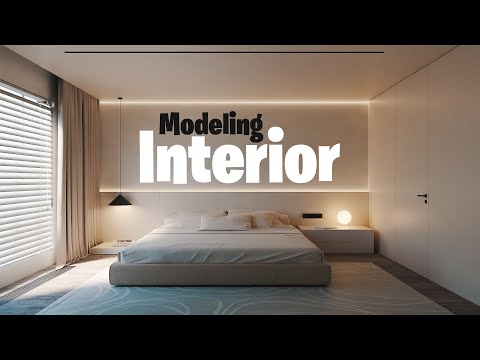
back to Interiors hello guys and welcome back today we will see the basic steps in making Interiors using blender this should be a fun and simple scene for beginners to follow so have fun now as most of you know I am an advocate of the default cube right to survive so select it hit tab for edit mode and move it up while holding control to level the bottom of the cube with the grid this way we can scale from the floor level after that press n to open the side panel there we can put some dimensions for the room a 6x5 should be enough with a height of 2. 7 for the bottom ceiling plus 20 cm above that for the roof to make the bottom ceiling we can copy the top face with shift d and move it down by 0. 2 M then hit P to separate it from the cube to position the camera go to front view and hit control alter number pad zero I usually put the camera height around 1.
2 depending on the shot and change the camera frame to a ratio of one to capture the ceiling for the first shot I want the left side to show part of the window so I will add that first then get back to the camera once you select the face for window add couple of cuts on it with controlr use the bevel shortcut control B to easily make a space for the window or use the numbers to to add specific cuts for any exact Dimension you have after that extrude the face to outside by 0. 1 and delete it now back to the camera first set the focal length to 28 for interiors then move it back until you include all the things you want to show in the frame now if a wall stand between you and your shot use the clipping in the camera setting to remove it this value can expand the view range without messing the focal length switch now to render view then change the engine to cycles and use the GPU device we can change the viewport samples to something low around 20 samples can show you what the render look like while working and make sure to turn on the D noise option for the World Lighting let us first add a sky texture we also need a sun in the scene and to link the sky and Sun together we can use the sun position addon so turn it on from the settings assign both the sun and the sky to direct their light in the world settings we have mainly two values at top the sun intensity and size and at bottom we have three fields to control the light Direction I did experiment with it and you should too and if you want you can copy the same numbers if you're working on the same axis I will make the Sun size on 15 to lose the sharpness and give it around 0. 2 for the intensity value we can make the render happened in the camera frame only from either the camera display settings or from the render region option under the frame dimensions now before we start modeling some basic Furniture it's better to turn on the back face culling option and make sure your normals are in the right direction you can check that from the overlays the blue should be inside if not select all faces and flip the normals this can help us see inside the room from outside to the modeling part we will start with this wall piece behind the bed so add a cube and place it in the corner we can turn on the snap tool and make it on vertices to easily align objects and snap them together this tool is a must in Interiors so get customed to it I don't have any specific dimensions for it it will be around a 1 M height and we will place behind it a hidden light then make couple of pieces from it along the wall or you can make it as one then cut it later both works the same let us add a cut on this piece to make a hidden place for the light then copy the mesh in edit mode three times so we end up with four pieces once you're done add a bevel modifier to the mesh to smooth the edges and always remember to apply scale with control a in object mode if you're using any command or modifier on any mesh we can also shade smooth the object then turn on the auto smooth from the normal on the right side of the front wall we still have one meter which we can use as a closet or a wardrobe if you want I will do a simple door frame on it so nothing special I will also model some simple stands or drawers around the bed area now the that we are done with the front wall let us bring the bed model you will have the file for all the models in the description box packed and ready to use once I place the bed I need to reposition the camera to center it in front of the model I will also adjust the bottom ceiling to make some opening around the walls for the surrounding hidden light move it around 0.
1 for the front wall the right keep the same 0. 1 value however make it low around the cabinet since we make it go above the ceiling I will leave the back wall for now and focus on my camera view and for the window side make the opening 0. 2 for the curtains to add some lights in the scene make a new collection I will move both the camera and Sun there to keep things organized we will start with the front walls hidden lights in the small area we made on those four pieces along the wall add an area light and scale it to fit then direct it to cast light on the wall in the area light settings hit the use nodes button this way we can adjust the color of the light with the temperature value using the black body node a value of 4,200 should be warm enough for this scene we did make a video on the black body node if you want to learn more around it switch to render view to adjust the light before making a copy of it above the ceiling this way we cast light on the wall from top and bottom for the floor material I will use use the kit Library you can get the add-on from the main site and install it in blender then log to register and get free models and materials directly inside blender now from the library top bar switch to materials and search for wood or floor this will be a pick and choose process so it might take you couple of minutes to settle on the best flooring option I will go with this one but let me first select the floor faces and assign them to a separate material once you assign the faces drag and drop the material on the faces to show it we also need to UV edit it to do that hit the U key while the face is selected and choose smart UV then scale it to fit let us switch to render mode to adjust the material saturation add a hue saturation node before the base color put the saturation on half and increase the brightness value to 1.
5 or two up to your preferences I will also use the library since we have it now to search for a wall plaster I need it to be white and smooth so let us look for one I end up with this material but the color is offwhite by a lot so I will add a gamma node before the base color and crack it down to brighten the wall most the remaining models we made will have one of two materials either a reflective white or a metallic dark one for the white material make the roughness on 0. 35 and experiment with the color or copy the hex code I used I will add the black material on the ceiling and for that I will add a cut there to make a place for the spots though I won't add them since it will be dark on dark and it's a day shot after all so I will leave it to you once you inser the face on the ceiling extrude It Up by 0.
Related Videos
31:28
How to make 3D interior office in blender ...
Architecture Topics
44,639 views

29:13
How to Make Interiors in Blender (Tutorial)
Blender Guru
1,667,653 views

1:55:27
Worst Fails of the Year | Try Not to Laugh 💩
FailArmy
2,827,694 views
19:38
Modelling Practice in Blender | Water Bott...
Joe Omeiza
3,434 views
14:34
Power of Cloth Filter in Blender!
3Dnot2D
160,875 views

2:47:34
The First Blender 4.0 Exterior Archviz MAS...
iMeshh 3D Models
248,529 views
15:44
Create a Kitchen in Blender, in 15 minutes
Blender Guru
2,116,211 views
18:35
The Easy Way To Make Beautiful Interiors I...
DECODED
366,272 views

8:52
Why do Studios Ignore Blender?
Film Stop
445,771 views
40:25
How to Make Realistic Curtains in Blender ...
Blender Guru
394,642 views
16:31
How to Make Simple Realistic Interior in B...
EPICMAN 3D
114,968 views

16:00
Make ANY FURNITURE in Blender in 15 Minutes
Vertex Arcade
83,662 views
13:26
Photorealistic Lighting in Interior Design...
CG Arch
54,586 views
16:01
The Ultimate Render Engine Comparison for ...
Upstairs
690,869 views
35:41
Blender Modeling Introduction: How to crea...
ExplainingComputers
419,391 views

1:53:10
Blender Texturing for Beginners - Tutorial
Blender Guru
681,680 views

9:47
The BEST Way to Learn Blender in 2025
Ducky 3D
41,768 views
![Step-by-Step Floor Plan Guide for Blender [Updated 2024]](https://img.youtube.com/vi/u2Ywe1vbl30/mqdefault.jpg)
27:06
Step-by-Step Floor Plan Guide for Blender ...
Dude Blender
50,556 views
25:36
How to Make 3d Floor Plan in Blender
Architecture Topics
161,973 views