How To Become a Master at Compression (in Only 10 Minutes)
291.66k views1868 WordsCopy TextShare
Akayo
⬆️ Improve your music kickstart your career: https://www.akayosound.com/accelerator
0:00 Does thi...
Video Transcript:
I first started producing an NL studio in 2016 so around 8 years ago and of course when I first started I would watch tons and tons of tutorials and every single YouTuber including myself would say use compression and after trying to learn it over and over again it kind of made sense but it kind of didn't it's one of those topics that feels complicated but also looks so simple with that being said I'm about to break it down in such an easy to understand way so that by the end of this video you feel completely
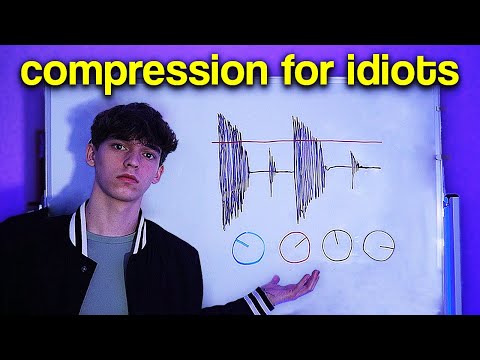
confident in using it okay so before before we start anything you might be like well what does a compressor even do all it does is just squeeze down the dynamic range of a sound and you might be like well what is dynamic range well if I draw something here real quick let's just say that this is a simple drum Loop or something like that the dynamic range is just the difference between the quietest parts and the loudest parts of this audio so a sample or a song with a lot of dynamic range would look something
like this you have these very very quiet parts and then you have these very loud Parts but a sample with very little dynamic range would look something like this where the whole sample or song just kind of has a consistent volume right just so this is clear this part of the song or the sample would be considered very dynamic in other words there's a lot of difference between the quiet parts and the loud Parts here and then this other section that we've drawn would just be considered not Dynamic right and now you might be like
well why would you want to squeeze the Dynamics of a sound you can do that in order to bring up the character of a sound or maybe you have some vocals with some very loud parts and some very quiet parts and you want to kind of even those out it can also help your sounds sound more glued together it really just depends anyway let's go into these specifics of compression and I'm going to break this down in such a simple way that anybody will be able to understand let's do it once again I'll draw some
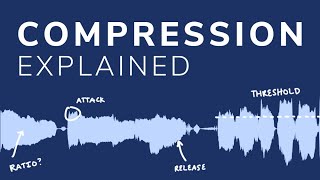
audio like a kick drum for example I'm running out of ink here now that we have our audio here there are four main settings on a compressor number one is the threshold now what is a threshold well think of it as like the line or the trigger point that you set that turns the compressor on so let's say that we set our threshold to right here whenever sound passes through this threshold right here this trigger point that's when the compression will turn on and of course having a very low threshold will affect a big chunk
of the sound now the next thing here is the ratio all the ratio is is just how much the sound gets compressed or gets squashed after it passes the threshold you could have a ratio of 2: 1 for example we'll cover this in more detail a little bit later it's kind of hard for me to show you with a drawing but this essentially means that for every 2 DB above the threshold it'll get compressed down by 1 dbel and for example this would mean that for every 4 DB that goes above the threshold it will
of course get compressed by 1 dbel right like I said the ratio is just how much the sound gets lowered in volume after it passes the threshold that's all you need to think about right now the third thing here is the attack now all the attack is is just how fast fast the compressor takes to react once the sound passes the threshold so the ratio is how much it gets squashed down and the attack is how long it takes for it to get squashed down does that make sense so for example if you have a
fast attack immediately the compressor is going to start clamping down and it's going to immediately catch this peak here but let's say for example you have a slower attack it's going to let this peak this transient come through and then it will start clamping down right anyway the final thing is release let me write that in real quick and all the releases it's just how quickly the compressor stops working after the sound gets quieter so a very fast release might look something like this where the sound gets compressed down and then it kind of just
goes immediately back up again and then a slower release would look something like this where it kind of takes a while for it to get back up to its original volume so this is extremely simplified like I said we'll go into more detail in just a second but really these are the fundamentals this is all you kind of have to understand for now so to tide all together I'll give you a little analogy let's say that you're a teenager for example living in your parents house and you're just living your normal Teenage life blasting music
and so of course your mom is going to come into your room and start yelling at you to turn down the music the threshold is how loud you can turn your music before your mom starts yelling at you the ratio is how much that you agree to turn down your music the attack is how quickly you turn down the volume after she's yelling at you and then the release is how quickly you go right back up to the original original volume when she leaves anyway hopefully that kind of helped you understand it and now I
think it's actually time that we look at some real examples in the do let's do it okay so now that I've given you a very basic explanation of what compression is I have this project here you might remember it from one of my past [Music] videos and we'll be specifically focusing on this muted guitar Loop right here so you can see it's a pretty Dynamic Loop it has these loud Peaks here and it's very sharp and then all we're going to do is just use compression to kind of smooth that out so in FL Studio
we have the limiter to kind of squash it down and smooth out these transients all we have to do is of course lower the threshold and then increase the ratio and as I adjust the settings here here just kind of Watch What Happens and listen so here's a before and after and like I just explained the attack is how long it takes for the compression to actually start working so of course if we have no attack then the compression is just going to instantly start but if we increase this a little bit you can hear
the compression kind of opens up and lets those transient Peaks through and once again the release is how fast it goes back up to its original volume after the compression so if we do a really slow release take this all the way down and a really quick note make sure you're not relying on visual cues to mix and compress and stuff like that you want to actually listen and hear if it's making your track sound good and while the visuals might be helpful it's just a lot better to listen and it's going to train your
ear anyway let's play this with the whole [Music] track okay it's a little bit too much in my opinion so I'm going to loosen this up [Music] yeah that's good okay so now we're in Ableton and I'm doing this because I hopefully want to help out the Ableton users as well this is a German based track I just started working on [Music] like I said I just started working on it so it's definitely not finished but I want to give an example with this main syn here I'm not a huge fan of I guess how
Punchy the syn is so we can go ahead and just apply the default compressor here and we can mess with it this is the threshold [Music] and I want a decently fast [Music] release a pretty fast attack because I just want it to catch that initial [Music] punchiness and I actually want this to be pretty subtle and so whenever you're compressing because we're squashing down the Dynamics of the sound might sound a lot more quiet right and so if we wanted to we could just increase the out gain by a little bit here or click
on this makeup button this is just going to automatically compensate for the loss of that level hopefully that makes sense one more thing we can cover is actually a glue compressor now I wasn't going to cover this because I wanted to just simplify this video as much as possible so I have this group with all the top drums like the snare and the symbols and I'm going to apply a glue compressor to this group The reason I'm not including the kick is because I don't want to squash the kick with everything else I want to
keep it separate so it punches through and especially in EDM it should be the loudest element in the whole track cuz it's the foundation anyway a glue compressor is exactly what it sounds like it glues your sounds together so a little bit of history on this most glue compressors emulate I believe it's an SS cell bus compressor and that specific compressor was loved by a ton of Engineers for its ability to of course glue sounds together right and so that's what it's trying to do here let's mess with it I want it to be a
little bit faster so I'll turn down the release just a little bit and I want that snare to just snap through so we can increase the attack as well that way the compressor doesn't catch the initial peak of the [Music] snare it's a very subtle difference but it kind of just helps everything glue together all right hopefully all of that made sense like I said I tried to just simplify this video as much as possible I just wanted to give you like a a crash course that you can refer back to if you need as
always if you want to you can check the link in the description below I think it'll be really cool we can work oneon-one get your music to sound really professional and also if you want to please subscribe it will help me retire my parents you've probably heard me say this like a thousand times already but anyway make music now and you'll thank yourself later peace
Related Videos

14:19
How To Produce BEAUTIFUL Melodic Drum & Ba...
Akayo
29,123 views

15:46
How To Become a Master at EQ (in Only 15 M...
Akayo
239,161 views

10:02:50
How to Use Compression (10-Hour Course)
Mastering․com
826,931 views

18:36
The #1 Trick for CATCHY Melodies
EDM Tips
289,933 views

3:28
These 5 Mistakes RUIN Your Songs
Nitrur
13,737 views

9:55
Give me 9 minutes and I'll give you 10 years
Brad Arthur
607,385 views

15:09
OUT OF SPACE - How did The Prodigy get awa...
Gyu Beats
233,349 views

10:01
Are You Using the Wrong Compressor? Compre...
In The Mix
237,204 views

14:27
Will These New AI Tools Make Songwriters I...
Rick Beato
529,792 views

15:28
The Secret to Become a Master at Reverb (I...
Akayo
8,919 views

19:33
Give me 19 mins, and I'll Improve your mix...
Alex Rome
64,484 views
25:02
The RIGHT way to use Compression - Detaile...
In The Mix
2,003,603 views

12:52
Transform Your Song from Trash to Pro (in ...
Akayo
28,489 views

8:23
Every Major Audio Effect Explained in 8 Mi...
Goobster's Room
77,668 views

13:16
7 Music Production Tips I Would Pay $7,000...
Akayo
99,652 views
6:32
I HATED Mixing Until I Learned This Hack
TheCosmicAcademy
443,569 views

14:44
How and Why to Use Your Compressor's RATIO...
SonicScoop
16,594 views

21:59
The Real Reason Why Todays Music Is Starti...
Freaking Out With Billy Hume
850,697 views

9:17
I FINISH a Beginner Producer's Song (in un...
Alex Rome
74,901 views

10:49
10 Years of Mixing Advice in 10 Minutes
In The Mix
1,069,256 views