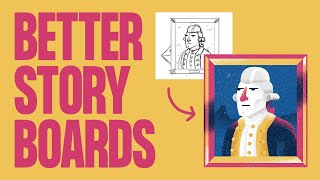
This is one of my favourite projects I have ever made in After Effects and in just 15 seconds there are 10 subtle techniques I'm using that you might be missing from your work that you could apply right now to take it to the next level These are quick tactical methods with simple effects that reinforce big picture animation concepts So get your eyes into a comfortable viewing position and let's begin Oh and please do help yourself to a fresh serving of Project File down in the description For these stylized splashes I used a very neat trick Here's what it looks like without any effects First I drew a spiky crown shape and then I key framed its path every two frames just moving the spikes randomly with the pen tool for just four different poses Then copied and pasted them to create a loop Now this can work great for a very simple graphic fire But to get it rounded for the splash we can use the effect simple choker which shrinks or expands the edges of your layer And in doing so it removes the detail especially the points I choked this to minus 8 to make it bigger and then added a fill effect to get the same color back But if you want to keep the same size and just make it more rounded we could also duplicate that simple choker effect and put in the opposite value which here would be eight So we have minus 8 and then 8 And we could dial that in to suit our needs In the final animation because I had two splashes I did adjust the key frames to put them out of sync so that they weren't showing the same shapes at the same time and it looked less obvious like I just duplicated them For the streams of blood from the vampire bite I used CC Particle World Now to match this particle system to the designs of those streams I changed the physics animation to a directional axis to get it to point in one direction I made the producer emitter which is the point where all the particles come from as small as I possibly could just by lowering the radi I increased the gravity way up and the resistance and lowered the extra as well Now I don't use particles often so really I was just messing with the settings until it matched the rough shape of the designs Now it was important for me to have that stream pulse and vary as the heart contracted And the particle simulation made that a lot easier and more accurate than doing it by hand because I could just animate the position of the producer where all the particles are emitted from So I key framed the X and Y position of the producer and lined that up with the holes in the heart and it creates that wonderful wave in the stream as the heart pumps Now the edges were still very crunchy so I used the old simple choker technique I chugged it larger to remove the crunch and then chugged it smaller to get it back to the same size and make it a little bit smoother Then put a fill effect on top and duplicated it The tip of the producer was still too pointy so I added back the original design layer and masked out just the top to be visible Lovely lovely streams One of my favorite details are these little splashes when the fangs puncture the heart Seeing the result of an action makes you feel the impact much much more Here it is without the splashes and it doesn't feel as strong With those back now we have something to look at and linger for a second in the result of that action And we also get a clear visual cue that those fangs really have pierced the flesh which up until this point who knows This could have been a couch cushion And this splash is just a shape layer with three key frames With the pen tool I drew a splash shape that I wanted I key framed its path at the height of the splash And on the first frame that it would be visible after the puncture I shrank it down animating its path property so it looked like a smaller splash So I've now got two poses for the splash And then about half a second later made the splash bigger and moved the peaks of the splash moving further outwards and then just moved the whole thing down under the surface of the heart And this made it feel like the peaks of the splash would follow an arcing motion I added a drop in the same way I drew a rough blob shape This time animated its position with three key frames so it would move in an arcing position across those same timings I animated its scale going down as well And I animated its path property very slightly just making some tiny adjustments every couple of frames so it felt a little more like a wobbling liquid and not the same static shape Now it does look very smooth and kind of motion tweened but once all the effects are on we don't really notice it The lowered frame rate from the posterized time on the effects layer set to 12 frames per second really helps make it feel a bit more like handdrawn frame by frame animation And we've got a lot of control because we did draw most of the five frames that that blood is actually visible for If you're not super confident with animating shape paths something like this is a great place to add something a little extra without going full frame by frame Gate weave is a slight subtle shake over the whole animation that is mimicking the instability of a film projection and scanning And that's caused by mechanical imperfections in the film gate which is the part that holds a frame still And that's film gate Not to be confused with the film "The Gate" [Someone has opened. . .
the Gate. ] Gate Weave is subtle but you can notice it especially on older titles or graphics which is really why I love it It adds a subtle complexity and richness to the motion that makes it seem just a little bit less clean and digital Now we can create this by adding a transform effect to an adjustment layer which adds all of our transform properties And what we want to do with this is move this whole composition's position very slightly very randomly And we can do that with a wiggle expression So I'll alt or option click the stopwatch next to position That'll open up the expression window And we'll just type in wiggle And then in parenthesis we have to put in two numbers separated by a comma The frequency and the amplitude So I'll just put a frequency of 12 and an amplitude of three which means it'll change position randomly 12 times a second and up to three pixels in either direction And here is what that looks like We have gate weave And you can adjust these values to your own taste I like these ones because it keeps it subtle and jittery but still noticeable This is about as extreme as I would go but you can weave more at your own risk Now because this is on an adjustment layer at the very edge of our composition it will start wiggling it away from the edge but it's very easy to combat this I just like to go to the scale property in that transform effect and change it from 100 to 101 That makes everything a tiny bit bigger and covers it up Unless you have an absurdly large wiggle but at that point you've got bigger problems [You got demons] And if you want extra gate we could even copy that transform effect and paste it onto an individual layer like our title here So now it and the background are weaving independently It creates a tiny bit of separation from the smallest amount of parallax possible But now the motion is doubled So it is twice as intense So we might need to dial that back a bit just so it doesn't feel like we are mainlining Earl Grey freebase Now why that cake weave helped a lot with this puncture scene in particular is because it adds a subtle tension to the motion That shake kind of feels like the pressure from the fangs against the heart right before it pierces is kind of causing them both to shake with that tension Now I didn't end up using this but I experimented with adding an additional layer of gate just to ramp up this tension in here even more So on a new adjustment layer that we will call shake because we always label our layers I pasted that same transform effect I ramped up the wiggle's amplitude to 12 and I trimmed that layer to right before the pierce happens and made it last about half a second And now you can feel it even more It's even more exaggerated Now it's probably a bit too much here but if you'd like to do the same but make it more controlled we can animate that on a null that is attached to everything And we can key frame its position property and then maybe every other frame just nudge it slightly in any direction and then slightly increase the amount you're nudging it as we get closer to the puncture and they get more erratic So now that shake builds up over time Again this is way too exaggerated but now we have complete control And to make it subtler we can pull these positions closer to the center there That feels a little more natural Another extra bit of path animation was this drop of blood falling from the fang Now I've used this technique before to animate drops of melted ice cream And I'll show you on an ice cream that I've got set up First we are just going to animate the position of a circle dropping We'll start a little bit away from the ice cream and then have it dropping out of frame There we go I'll easy ease that first key frame with F9 so it accelerates a little bit as it drops And we'll work backwards to create that main dripping shape So I'll deselect that layer select the pen tool and start drawing to create a new shape layer And I'm going to try to create a drippy shape and kind of trace over our existing circle to try to match its position there That looks pretty good I'll adjust it slightly to get it as smooth as possible And make sure those shapes blend into whatever it's dripping from here An ice cream And then we'll key frame that shape's path right here where it overlaps our circle And we'll trim the end of that layer to finish right there And we'll also trim the start of that circle layer to start there as well Now maybe a second before this Let's key frame it again And this time we want to move all of these points up to align with our existing ice cream Move them up roughly first I am also going to move them all further outwards as well And try to make them roughly equal in distance I'll grab the convert vertex tool to make smoothing these out much quicker And because we spread those vertices out evenly it all feels like they're pulling downwards into that one single drop Now it's almost done It's just a little bit snappy when that drop falls So let's extend that layer a little bit more And we can copy that first key frame of our smooth ice cream And we'll paste that maybe 2 seconds later this time So now we have that drip forming back up into our spherical ice cream which doesn't look right So let's add a key frame immediately after our circle appears and starts dropping down And then go in to adjust these points to make it look like that mass of the drop has just been removed And we can flick back and forth between those two frames to see where things are kind of moving around a bit and just smooth those out There we go We kind of just want it to feel like this section here is disappearing and everything else is staying as still as possible There that feels much smoother And the blood drop is even simpler than this because it falls off the fang completely It is just a circle falling down And then I have this layer which is parented to the fangs and it's just a Vshape that forms a bubble at the end over the last two frames And then that layer ends as soon as the circle comes on and takes over the drop Now that drop also adds a nice bit of eye trace Eye tracing is how animators direct the path of the viewer's eyes to guide them to what we want them looking at Here it's directing the path of the viewer's eye downwards So we start with the main motion following the fangs upwards Then this drop becomes our main motion and we start to follow it down And whilst our eyes are down here maybe we're noticing the holes slightly shrink before the streams pour out Eye tracing like this helps keep what's happening on screen clear The other two shots are very static This is the only shot where things are leaving and entering the scene So that drip was a nice device to keep the eyes on the action Really in every shot that you make you should know what the most important thing is that you want the audience to see and understand If there's too much going on they might miss what's important while they're trying to catch something not important distracting them over in the corner We solve that by having a clear hierarchy of what the most important things in the shot are I want to show you these amazing frames that use hierarchy in their composition incredibly well These are designed by Greta Radzeviciute for their major project in my course Design Breakthrough Art for Motion I really love how this frame in particular tells a story so quickly and cleverly is organic jam made from real strawberries Immediately with the most saturated shapes and the highest contrast we are drawn here Strawberries then led down here They squish into jam Clear hierarchy One strawberries Two jam Three the background character Color has much lower contrast so it is less important But designs like this don't appear out of thin air They were built with a process with mood boards with storyboarding and experimenting Greta also created many other amazing designs throughout the course I love how these ones use shape language and composition so well to create a contrasting sense of stress and calm If you want to level up your design and animation skills I teach all of my courses with practical projects and processes like these You can also access bonus content and save 20% when you bundle two or more together Enroll now at benmarriott. com Here's a tip for creating starves or any other symmetrical shape So I'm in a square composition and I'm going to hit control or command R to drag out our rulers because we're going to drag out some guides onto here First I'll turn on title action safe so I can see where the middle is I'm going to click and drag this ruler to drag one perfectly into the middle horizontally I'll get a little closer to line that up And then one on the left to get it vertically there Turn these guides off now and the rulers Now with the pen tool I want to draw a part of a star up in this left quadrant And we don't need to be too precise yet Then we are going to add the mirror effect to replicate this in the other quadrants I'm going to grab the reflection center and drag that right to the very center And we've got it reflected Now we can just duplicate that mirror effect again The reflection center still right in the middle So we just need to increase the reflection angle to 90° And now our shape is reflected perfectly symmetrically We can grab our pen tool and we can adjust everything here We can make our star more pointy We can make it a little bit more chunky make it more tall than it is wide It is really quick really easy to adjust and experiment And we could even animate that shape property to create something quite hypnotic If we wanted to go really crazy we could even try stacking more mirror effects up here changing the reflection angle again and moving this center around to create some more interesting wild shapes and then have some fun with those Music and sound effects have a huge impact in your animation I am not a professional sound designer so I don't think my sound design here is brilliant by any means but it certainly enhances it and it's a fun process For my YouTube videos I do all the sound in Premiere just dragging in clips and adding a few effects and that works fine for what I need it to do there For this project I used Ableton Live because I wanted to add some simple synths to score it as well I use sound effects that I got from Epidemic Sound I have an account there where I get the music to use in my YouTube videos and they have sound effects as well so it works great for me There are plenty of other options available Going to freesound.
com is a perfectly great place to start Even recording your own just using your phone And even without the sound effects you can find a music track you think suits your project and animate to that Ideally choosing the music before you animate so you can really enhance the timings It can do a lot of heavy lifting for a scene really enhancing the mood and also keeping the audience engaged if there isn't much animation happening on screen Which one of these do you think has the most impact Now my favorite detail in the sound design here is that I I filtered the heartbeat to sound like it went underwater when the hard was fully submerged It is barely noticeable in the full mix and I wouldn't really expect anyone else to pick up on it but I know it's there and that's that's enough and and now you know So that's at least twice is enough Now I love to spend the time to get the tiny details just right on a project My favorite part of the process is working over multiple layers of feathered masks to get the reflected light and the subtle ripples just right in the shot Individually any one of these details are not essential but together I really think they make the animation At the end of the day this animation is a heart scaling up and down with a red rectangle getting higher up the frame It is not technically complex at all but all those little touches the splashes the shadows the sound design the attention to detail that I really enjoy is what takes this beyond those bare bones And these do take time And I know that is a luxury we really have on client projects For years I was so used to churning out quick animations for clients that I started to think that all animation must be made that quickly and rushed out the door because there was no time no time to plan or play or storyboard anything other than the first thing that came to mind Because any time spent thinking was time not spent animating It wasn't until I freelanced at Buck that I really learned just how much time care and attention goes into everything the design the animatic before even the final animation starts The real value that great motion designers have is in their thinking and in their ability to craft the best possible result It is not in how fast they can churn out slop Now more than ever when the bare minimum is getting easier and easier and the bar is just getting lower and lower taking shortcuts might seem like the best way to get ahead But in my experience that is just not the case In order to show what you are capable of and make your best work you need to take extra time So I would encourage you for your next personal project do give yourself extra time to consider those details And I really think you will enjoy the process and the results even more And if you want to dive even deeper you should watch this video And to enroll in my courses go to benmarriott. com to learn more It is the most Rootin'est Tootin'est place for motion design on the whole internet Yeehaw! This video is now cowboy themed right at the end.
You can't stop me.
What are the key takeaways?
Based on the transcript, here are the key points...