AI Video Generator: Convert Text into 3D Animated Stories | AI Animation Maker | Text-to-Video AI
197.94k views2418 WordsCopy TextShare
ImanGlobal
Discover the ultimate AI Video Generator that seamlessly converts text into 3D animated stories, pow...
Video Transcript:
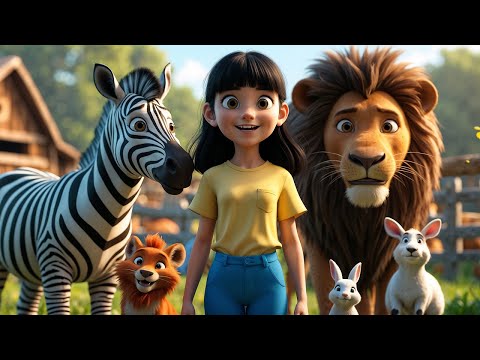
Do you dream of creating breathtaking animations in the iconic 2D and 3D styles of Pixar and Disney? Do you want to turn your ideas into real stories? If your answer is yes, welcome to this tutorial!
Here, you'll discover revolutionary AI tools that transform your simple text into stunning animated videos. Nowadays, creating animations akin to Pixar and Disney doesn't require expensive hardware or expertise in complex software like 3ds Max, Maya, Cinema 4D, Blender, and more. With today's AI-powered image and video generators, you can create incredible videos and animations without technical skills, in minimal time, and at no cost.
These AI tools support a wide range of animation styles, including 2D, 3D, photorealistic, cartoon, anime, and comic styles. This means you can bring your most creative ideas to life, whether it's a promotional video, a game trailer, a short animation, or anything else you can imagine. You don't even need storytelling or screenplay expertise; with the help of ChatGPT and AI, you can get started right away.
In this tutorial, I'll show you how to craft effective text prompts to describe characters, actions, backgrounds, and animation styles. Pioneering AIs like Leonardo, Cing, PixVerse, and Minimax have revolutionized image and video production, so let's explore how they work. I'll guide you step-by-step on how to use AI for turning your ideas into stunning images, videos, and animations.
Hi everyone, my name is Ean, and this is the Ean Global YouTube channel. Welcome back to another AI tutorial! Please support my YouTube channel; don't forget to like and subscribe.
Let's get started! The first step in creating an animation is writing a good and impactful story. For this purpose, I have written a template with customizable parameters that includes everything you need to create a story.
You can find this template in the description of my video on my channel, Ean Global. Simply copy it, customize it based on your preferences and needs, and give it to AI tools like ChatGPT, Gemini, or Claw to generate a story for you based on the template's rules. I have divided this text template into two sections.
In the first section, which is editable, you need to define the story's theme and the appearance of the main character based on your idea. For instance, if the main character of your story is a playful and mischievous girl, you should specify her features such as age, clothes, hairstyle, shoes, and other details to create a text prompt for generating an image. Why is this necessary?
Because image-generating AIs process each prompt separately, and if the details of the main character are not consistently repeated in every prompt, the images may differ in each generation. However, using this organization, the prompts will have similar character descriptions, ensuring consistency of the story's character across all scenes. In the second section of this guide, we ask ChatGPT to provide a story based on our inputs, including prompts for image creation and narration text.
I have already defined the character's appearance in this prompt. Now I simply copy and paste this prompt into ChatGPT, and as you can see, ChatGPT creates the entire story based on our requirements, prompts for image creation, and narration text. I copy the first prompt to create the first image.
Next, we use an image-generating AI such as Piman, Design, Mid Journey, or others. My choice is Leonardo because it provides sufficient credits in its free plan to create images and is one of the best image generators in the world. We visit the Leonardo AI image generator website, create a free account, and log in.
From the left menu, click on the image creation option. In the Leonardo dashboard, you'll see a prompt box at the top of the page. I click and paste the first image prompt copied from ChatGPT into this box.
From the left panel, in the preset drop-down, select the Phoenix 1. 0 model, which is Leonardo's latest image generation model. In the prompt enhancement drop-down, select off.
In the preset style section, choose Dynamic, set the generation mode to fast. For image dimensions, since I want this video in horizontal long format for YouTube, I select a 16:9 ratio. I set the image size to medium, and the number of images generated in each step is set to four.
Once all settings are done, click generate. My request is queued, and after a very short time, the images are generated. Four thumbnails are displayed.
I click on one of the thumbnails to review the images. There might be issues in image generation, and if you are not satisfied with these images, you can change the settings and regenerate new images. I am very satisfied with this image and want to download it.
The download button is below the image frame. Our animated story begins with this image. We repeat the previous process.
I return to ChatGPT, copy the image prompt for the second scene, and again paste it into the Leonardo image prompt box with the same previous settings. I click on generate again. My request is queued, and after a few seconds, new images are generated.
Four thumbnails are displayed. I click on one of the thumbnails to review the images. I am not satisfied with these images and believe Leonardo can generate much better ones.
I repeat the image generation process. I click generate, and after a very short time, the images are generated. Four thumbnails are displayed.
I click on one of the thumbnails to review the images. One of the images is good, and I download it. Before creating the next scene's image, let me tell you something.
Click on the three-dot icon at the top right corner of the images and select copy seed. This command copies and saves the seed number; it ensures that the character's form remains consistent for subsequent images. This goes to the advanced settings in the side menu and enables the "Use Fixed Seed" option.
Paste the copied seed number into the corresponding box; this ensures the creation of a consistent character form across scenes. Keep these tips in mind while creating images with Leonardo AI. We repeat the previous process: I return to ChatGPT, copy the image prompt for the third scene, and again paste it into the Leonardo image prompt box without changing the previous settings.
I click "Generate. " My request is queued, and after a few seconds, new images are generated and thumbnails are displayed. I select one of the thumbnails, review the images, and download the one I like for the third scene.
We must continue this process for the remaining scenes. Copy the image prompts for the subsequent scenes from ChatGPT, paste them into the Leonardo prompt box, and generate the images. Reviewing the images, you will see that the characters remain almost identical with different backgrounds and scenarios for each scene.
As demonstrated, following this method ensures that the character does not change. You can create images with Leonardo for free; you receive 150 free tokens daily, which are replenished the next day. If this is insufficient, you can opt for paid plans, which are not too expensive.
The work must proceed to the third step; the images generated by Leonardo AI are converted into videos and animations using an AI called Clling. Visit the Clling AI website, click on "Try Now" under the Clling trial package option. However, if this option is unavailable, click on the "Sign In" button at the top right corner of the site to create an account and log in.
If you have already created an account, simply enter your email and password, and click "Sign In. " Otherwise, click "Sign Up for Free," enter your email and password, then click "Next. " A window named "Security Verification" will open, featuring a puzzle piece.
Drg the slider connected to the puzzle piece to the empty slot to complete the puzzle. Once done, a verification code will be sent to your email. Check your email, retrieve the code, and enter it in the verification code box.
Click "Sign In," and you will be logged into the Clling AI website. Upon creating an account, you will receive many free tokens to use the website's services. From the top right corner of the website, you can access your account and its details.
From the left menu, click on the "AI Videos" item. From the right section, access the archive panel of images and videos created with Clling AI. On the new page, you will see two tabs: "Text to Video" and "Image to Video.
" In the left panel, click on the "Image to Video" tab. Through this panel, you can upload images in JPG and PNG formats, up to a maximum size of 10 MB and a minimum dimension of 300 pixels. To do this, click on the upload icon in the center of the box.
In the opened window, select your desired image and upload it. After uploading, the thumbnail of the image will be displayed in the panel. Then, in the prompt section, you can type your ideas for animating the image, and the animation will be created based on your idea.
Skip the motion brush section, as this feature requires a separate tutorial. Further down in the settings panel, there is a slider that allows you to choose between creativity and relevance. In this case, I don't change this item.
In the mode section, the standard mode is offered in the free plan, which enables faster generation speed, while the professional mode provides better visual quality but is only accessible through the Premium plan, which requires purchasing the Premium plan. In the duration section, you can set the video length between 5 and 10 seconds; however, the 10-second duration is only available in the Premium plan. The camera movement option in the image-to-video section is currently disabled but is expected to become available in the near future.
In the negative prompt box, you can specify items you don't want in the scene. Click on the "Generate" button; again, 10 tokens will be deducted from your credit. My request is queued and after a short while, my image is converted into a video and displayed.
Now I play the video. Below the video frame, there is a download button to get the video for free on your device. However, note that videos in the free account have watermarks.
To download watermark-free videos, you need to purchase the Premium plan. If you are not happy with the generated video, test and adjust the settings several times; with multiple attempts, you will surely achieve excellent video generation. This process needs to be repeated for all images.
After creating the story and converting the images into videos and animations, the story must be narrated by a voice actor. Now we need a narrator's voice. You can record the story text yourself using a professional microphone, but if you don't have the resources, don't worry.
There's another option using AI-generated voices. Search for the 11 Labs AI website on Google and visit it. 11 Labs AAI offers a text-to-speech feature that allows your text to be read by various narrators.
Creating an account on this website is free. You can log in using methods like entering your email or using a Google account. I click on "Sign Up with Google," select one of my Google accounts, and log in.
After logging in, some questions are asked, which I skip. Now I return to ChatGPT, copy all the voiceover sections, and paste them into the text-to-speech section of the 11 Labs AI website. From the right panel in the drop-down list "Voice," you can change the narrator's voice, listen to various voices, and choose the one most suitable for your story.
Then click. . .
On the "Generate Speech" button, and the work is done. Next to the "Generate Speech" button, there is a download button to get the narrator's audio file. Now the story animations and narrator's voice are ready, and we move into the editing phase.
We need to combine them to create a long video, and based on our story, make a full-length animation. You can edit using CapCut or free tools like Canva. I use Adobe Premiere Pro for my projects, and I recommend you learn it too.
In Adobe Premiere Pro, I first create a new project. You need to name this new project and specify its save location. Click "Create.
" Now a new project is created. Right-click in the project panel and use the import option to bring the animations into the project panel. Repeat the same for the audio files, importing them into Premiere Pro from the file menu.
Execute the "Create Sequence" command to make a new sequence. Define the sequence dimensions and assign a name. This way, we create a timeline to combine the materials.
Drg and drop the videos onto the timeline; the clip mismatch warning window will appear. Here, choose "Keep Existing Settings. " Select all video layers, right-click on one of them, and choose "Scale to Frame Size.
" This ensures the video dimensions match the sequence dimensions. Here, I arranged the short videos in the timeline sequentially to combine them into a long video based on the story. I also add the narrator's audio file to synchronize the video with the narrator's voice.
Use the razor tool to split the audio track; this allows placing the narrator's voice exactly at the correct points to match the video. After this, click "Export," name the output file, and set its save location. In the format section, set the output to H.
264. In the preset section, set the output size and dimensions to Full HD. Now click the "Export" button.
After a few minutes, my long video is ready. If you are interested in video editing with Adobe Premiere Pro, let me know in the comments. If there are many requests, I will create tutorials for it.
If you found this tutorial useful, don't wait—hit the like button and share this video with your friends. We've gone all out for you here; it's time for you to show your support, too. A vast number of exclusive AI tutorials will soon be uploaded to the channel, so subscribe and turn on the notification bell so you don't miss anything.
AI is changing the world. Do you want to be a spectator or a part of this revolution? The next tutorial will amaze you, so stay tuned!
Related Videos

14:58
Free Text-to-Image AI Generator – Turn You...
ImanGlobal
19,277 views

13:46
The BEST AI Video Generator For 2025? FIND...
The Zinny Studio
26,034 views

16:56
AI Generated Animations Just Changed Forev...
Emmanuel Crown
430,407 views

8:26
How to Create 3D Animation Story Videos wi...
AI Playground
25,347 views

11:28
You'll REGRET Not Knowing These 3D Animate...
TubeLab AI
3,055 views
16:00
Make $500/Day in Under 20 Minutes Posting ...
Jay Brown
131,576 views

27:47
How I Created a Viral Dancing AI Influence...
AI Samson
421,545 views
20:09
How to Make 3D Animation MOVIE with AI 🤖
Website Learners
1,534,112 views

13:24
Create Stunning 3D Animated Stories With C...
ImanGlobal
10,985 views
20:15
Make $13K /MONTH by Creating FACELESS KID...
Virtual Money
974,632 views

17:47
The ONLY 8 Faceless Niches That Will Make ...
InVideo For Content Creators
490,544 views

15:43
Full Course: Create Free 3D AI Animated St...
MR.AI.JO.
42,428 views
13:48
How To Create Faceless Kids Animation Vide...
Journey With The Hintons
101,744 views

11:05
Earn $1000/Day by Creating kids Nursery Rh...
SkillCurb
34,629 views

6:36
How To Make Consistent Characters With Ai |
Planet Ai
28,141 views

16:02
10 AI Animation Tools You Won’t Believe ar...
Futurepedia
679,031 views

18:54
BEST AI Video Generator in 2025: Invideo A...
Youri van Hofwegen
102,980 views
10:19
The End of Tutorials? This Free AI Changes...
Kevin Stratvert
312,312 views

9:07
How to make Viral Monetizable 3D Film usin...
Comicscape
231,823 views

19:07
Earn $20,000 Per Month - Create AI Animate...
Caffeinated Blogger
54,702 views