Create Trending Instagram Reels using Canva: A Simple Guide
104.33k views3136 WordsCopy TextShare
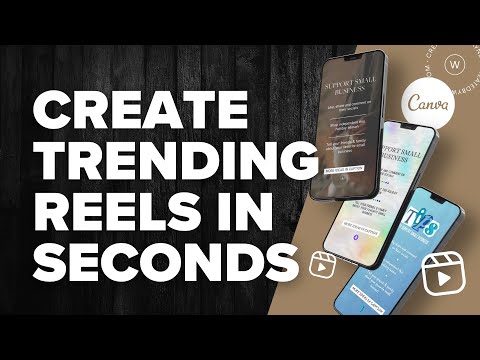
Created by Wayne
Instagram reels are an ever-changing art - but in this video we have a little fun with a trending re...
Video Transcript:
When it comes to Instagram reels, between the ever changing algorithm and the many, many instagurus, it's hard to figure out what's working and what's not. But you can add a bit of fun back into creating reels by looking at what's trending, what you think is working well, and trying to create them in your own brand style. So today I'm going to show you how to create a trending reel style in just a few minutes.
And we're going to use a simple and repeatable system to then recreate the same reel in three completely different brand vibes all quickly and with style. We've all seen the Instagram reels that have a few strong statements over a video and then they get you to read the caption for more information or to add more value. Now things work for a number of reasons.
The first is that the video is basically in the background, so you don't have to worry too much about it being perfect or it doesn't need to take a lot of production time. Secondly, you don't have to appear in the video. Now, don't get me wrong.
Talking head videos are still one of the best performing reels. But this way you can actually use videos from Canvas Stock library, put them in the background and it can still feel good. Of course, it's great if you've got your own branded videos or B-roll that you've shot at home or at your office.
But using just the videos in Canvas library works just as well. Number three, you can get people's attention really quickly with just a couple of strong statements. So it means that you don't have to worry about putting too much on the slide and you can add the real value in the caption.
And number four, these reels get great engagement because people see the real watch in for a couple of seconds and then hopefully there is enough value on there for them to read the caption and spend more time on that real. Which obviously is great for engagement. and just as an aside, if you find that when you're browsing and looking through reels, then they move so quickly that you can't read the text on each of the slides.
Trust me, it's not you. It's intentional. People do that because it means you either.
Then rewatch the real multiple times to catch what's on the screen or you read what's on the screen and then go to the caption to see more details. Either way, you spend more time on that reel, which of course pleases the almighty algorithm gods. Now, as last weekend was Small Business Saturday, we're going to create a reel with just a couple of tips on how to support small businesses.
So let's do this. We're going to start with a blank Instagram reel design in Canva. And then what we're going to do is we're going to work through a process that helps us get everything in place as and when we need it.
And the first thing we have to start with as part of this process is the background. Now, as I said, we're going to duplicate or mimic one of those Instagram reels that you see. And so you can go to videos and then just search and find a video to put into this background.
But what I do want to show you is if you just search for videos here with any search term, when you go to the filters, you don't have very much way of filtering anything. if you go to elements and you put in your search terms in elements and then go to videos, you can actually then use the filters to filter by color palette and also vertical, horizontal or square videos. So we're going to use this video, which is a woman making tea, and we're going to use that as the background for our real.
the first thing I want to do is, although I like the colors of this video, I want to make the elements to go on top of it, stand out a bit more. So I'm going to do that by going into the edited video and then adjust tools. I'm going to take the brightness down a little, but I'm going to take the contrast down almost all the way and you'll see that just kind of softens the difference between light and dark in the image.
And you can just adjust that so you can still see the colors, still see what's going on. But it allows the elements that are going to go on top to stand out a bit more. The next thing we're going to do is to format our placeholders.
Now, obviously, this depends on how many different things you're going to have on your reel, but we're going to start by just putting in a heading. So I'm going to add a heading and I'm just going to type in my support a small business adding going to receive that. And as I said, as part of the checklist, we're going to format this.
So that means adjusting the sizes and spacings so that we make sure it works for us. And that's going to be our heading. The next thing we're going to do is to add a subheading, which is where we're going to put our content in.
Now, this is somewhere that we want to format this placeholder before we put in any other content. And the reason we do that is that if we can format this placeholder first and we can make sure that styling and even the animation is the way we want it, we can then just duplicate that and change the actual content within it. So I want to also have a line dividing these elements and I'm just going to use the shortcut on the keyboard by hitting the letter L and it will put a line in and I'm going to then just re space it and resize it underneath the text and so that actually forms the first placeholder that we're going to use.
I'm going to get the animation for this setup straight away. So for the heading, what I would like to do is just a very subtle fade animation. And then for this one, for the actual text, I'm going to add a typewriter animation, I'm going to speed it up a little from the standard, and then I want the line underneath to actually animate with just a wipe.
But now you'll see that they all happen at the same time. If we drag or scrub this, it'll play head on the timeline. You'll see everything comes in at almost the same time and we want that to change.
So after the heading is in, I want a couple of seconds and then I only want this line that starts with like and share to animate in. So if I click on it and then click on show timing, I can then click and drag in the timeline, the left hand side of it, the handle, and you'll see that now if I click and drag and scrub this play head, it only starts a little later. And then we want the line to actually underline it after it's finished with the typewriter effect.
So when it gets to about there, I want the line to come in. So leaving the play head there. I would then click on the line and then click and drag the left handle so that it only starts after that text comes in.
So if I go back and hit play, you'll see the heading comes in. Then the first line and then the line. Now this just makes it so much easier because we can then just duplicate these.
spaced them the way that we want them. And that then becomes the content for this reel. I'm going to remove that line at the bottom, and then I'm going to just check again on the timing.
So once that first line underline has happened, we want the second text line to come in. So leaving the play head in that space, I'm going to click on that and click on show timing and then click and drag. So that's where it will come in.
Likewise, the line underneath it should be after the text finishes. So we'll move the play into there. Click on that and drag the left handle so that it starts after the text is finished and then we'll go to the last text box and we'll click and drag that so that it comes in only after the second line.
So now we've got the content in and we've got the placeholders formatted. Now what we're going to do is we are just going to change any fonts that we need to. We're going to change any colors that we want to for the text.
For this one, it's actually all right, because I want these to stand out being white on this background and now the next thing we need to do is check that there is a call to action. So what I'm going to do is I am just going to add a text box with a call to action. and larger so we can play with it a bit better, put our text in and then we're going to go through the process again of just formatting that text.
Now, to make this stand out, because it's the call to action is what we want people to do. I'm going to use an effect on this text and I'm going to put a background onto it. The options here, I'm going to change so that it's not rounded, the corners, it spreads out a little more around the actual text, and then I'm going to make the box white and change the text just to a gray.
And then I can, of course, change the actual font within that so that it reads better depending on what we actually wanted to say. And then the last thing I want is I think I want a little animated element just to draw attention to the fact that the caption is below the real. If people want to read the captions, So I'm going to go back to my Elements tab.
I'm going to type in down Arrow hit enter and then I think I'm going to filter by animated elements and then see also I can choose something here to use as a down arrow. I'm going to use this really clean little arrow. I'm going to resize it because it doesn't need to be large and I'm going to place it in place there.
Now all I have to do, I've got the call to action in. I need to just check the animations and the speed and timing of those. if we scrub through, we can see those three points come in and then after those three points we want to have the button or the call to action coming in.
So again, click on it. Choose show timing and I'm going to click and drag the left handle until it's where I want it. And then the animation I want for that one is just a simple fade in.
I'd like the animated icon to only appear after that comes in. So again, I'm going to scrub until that button pops in and then that's where the animation will start for the element underneath it. So if we now play this through, you'll see that I've used a very kind of generic background, added some text onto it, and then just added those elements and animations to bring it to life.
And this is very simple, very clean, and it's very much in my kind of style. One of the great things, though, about using a process checklist like this is that you can just walk through this checklist point by point every time you're going to create a real like this. It doesn't matter what your brand style is, it doesn't matter what elements you're including.
If you follow this process, it makes it this easy to create and recreate any kind of reels like this. Within minutes. Before we create the other two designs of the surreal, I am stupidly excited to announce that my new Canva course called CanvaOS is now open for enrollment.
If you spend hours trying to find the perfect Canva template and then halfway through you have to start again because it's not working. Or if all of your design elements are scattered all over the Canva dashboard and you don't know where to find them, or if you just get frustrated that Canva isn't doing what it's supposed to do and you know you're not using it to its full potential, then this is the course for you. So here's the key.
Most people who use Canva are not professional designers. They're coaches, entrepreneurs, small business owners, content creators who just want to create stylish, unbranded brand materials consistently. And Canva is perfect for that.
But while Canva provides us with all of these tools, what it doesn't teach you is a process or a workflow to use them reliably and consistently and get results every time you use camera. Of course, the irony is that small business owners and entrepreneurs are the people who need an efficient system because they're often already playing multiple roles in their business and they're a little short of time, which I'm sure you can relate to. Well, CanvaOS will help you unleash the full potential of Canva so that you can create consistent on brand materials and do it with calm and confidence.
And here's the part that's really fun for me to share with you from today until the 4th of December, which is just in a few days time. CanvaOS is on sale at a 50% discount for presale after the 4th of December and the price goes back up to the standard price. So if you want to upload all your Canva skills and elevate your brand materials, now is the time to join me inside CanvaOS.
Just hit the button up here in the corner or in the link in the description below the video and join us now while you can get that presale discount of 50%. I genuinely have not seen another Canva course like this and I think it's going to be fantastic. So hopefully I will see you in there.
Now let's get back to the reels. Okay, So we're going to create another style of this real. I'm going to start by just adding a blank page here because we're going to create it in the same document and then we're going to follow exactly the same process.
So for the background of this reel, I'm going to go to videos and I'm going to type in water sparkle videos and let's filter them by vertical. And then I'm just going to scroll down till I find something that's just got a gentle water movement. Okay, so I'll bring that in.
But this is going to need to be very light for my text elements to go over it. So again, I'm going to go to edit video. This time I'm going to take the contrast down, I'm going to take the saturation all the way down and then bring the brightness up a little.
Now that's still very gray, but if I try and make it too much brighter, you're going to not really be able to see what it is. So what we're going to do is we're going to use the keyboard shortcut of the letter R to put a rectangle or square on the page. I'm going to size that over the video.
I'm going to change its color to white, and then I'm going to just change the transparency and take it down so that it's mainly white, but you can actually see the video playing behind it. If I go to the start and just hit play, you'll see you have that nice gentle water movement. Then what I'll do is I will work through using that process checklist and I will go through each of those individual steps amending them depending on what my content is and also obviously what my brand style is.
and I'm going to use that same process just so that I can show you how easy it is to come up with things that are on brand, but using something that is templated without you feeling like you have to start from scratch. so working through that process, so that workflow, this is what we end up with. So we have the first one that we originally created, which is very simple and elegant.
It's very much in a style with a kind of neutral, esthetic and simple animations. The next one I wanted to add a little bit of color, but still subtle with that white background. And so I've changed the font, made it a little more playful, added in some colored elements, and of course added a call to action that fits a little more with a bright button.
The next one I added this animated paper background which ties in with these cut outs of tips that I've included on here, and I've just made it a bit more playful. And the last one I've tried to make a little more elegant, a little more fashion and feminine. And this one I've included some animated gold elements.
I've kept it very simple with the text and again, some simple animated elements to bring it to life. If you have found this helpful and you enjoy learning these kind of things with me, then you can get much more of this inside CanvaOS. So please do make use of that 50% presale discount and join us.
While enrollment is open for the next week or so. We'll be doing loads of more hands-on demos inside the program and I'll be showing you more of these processes and checklists for you so that you can make all of your content creation so much easier for you. In the meantime, if you don't want to or you can't join us inside CanvaOS right now, please share it with your friends.
Let somebody know that you think it might be a value of. That would mean a lot to me. Otherwise, please hit the like and subscribe buttons as always and have a fabulous week.
Related Videos

10:24
Unleash Your Creativity: Design a Fine Art...
Created by Wayne
4,347 views

17:15
Boost your CAROUSEL ENGAGEMENT with these ...
Created by Wayne
25,187 views

0:11
New Remote Jobs!
The Work From Home Queen
1 view

8:56
Create EASY Instagram Reels with Canva AI ...
Kate Hayes
44,768 views

21:21
The New Way To Make Money With Canva Ai ($...
Wholesale Ted
191,449 views
15:52
How To Create 30 Instagram Reels in 24 Hou...
Brandon Washington
948,188 views

27:33
Create Instagram Reels with ONE Click—No F...
Erin | Ecomera
3,641 views
21:04
Easily Create Trending Faceless Reels in C...
tabitha emma
17,134 views

2:20:07
Canva Tutorial For Beginners: A Free 2 Hou...
Bring Your Own Laptop
96,654 views

11:52
If I was starting Instagram from 0 in 2024...
Elise Darma
239,046 views
13:11
The Secret to Engaging Videos: B-Roll Made...
Created by Wayne
37,236 views
![FULL CANVA TUTORIAL 2025 [NEW] | How To Use Canva For BEGINNERS!](https://img.youtube.com/vi/bFT2mSQ6HZc/mqdefault.jpg)
2:06:12
FULL CANVA TUTORIAL 2025 [NEW] | How To Us...
Natalia Kalinska
19,869 views

14:08
Canva Animation: The Simple Guide to Stunn...
Created by Wayne
10,193 views
![Master Canva in 20 Minutes with EXPERT'S Top Tips [Canva Tutorial 2025]](https://img.youtube.com/vi/vvJK4sY8eyA/mqdefault.jpg)
21:24
Master Canva in 20 Minutes with EXPERT'S T...
Natalia Kalinska
1,231 views
18:58
2025 Graphic Design Trends You Should Know
Kittl
373,069 views
10:18
200 Social Media Posts In 10 Minutes Using...
Modern Millie
924,860 views
18:26
How to make viral Instagram Reels - NOT ho...
Katie Steckly
316,550 views

4:30
Create Instagram Reels In Canva
Deena Rutter
5,437 views
9:58
15 Genius Canva Hacks In Under 10 Minutes
Wholesale Ted
642,236 views

12:36
2024 REELS TUTORIAL: Film & Edit Reels on ...
Stephanie Kase
146,492 views