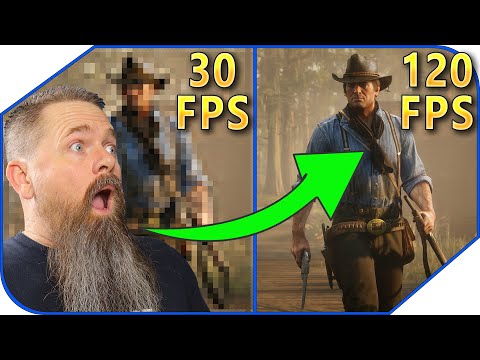
Huge FPS Boost With Lossless Scaling
47.79k vues4290 MotsCopier le textePartager
CyberCPU Tech
Today I'm going to show you how to massively increase your frame rate by 2x, 3x or even 4x with noth...
Transcription vidéo:
today I'm going to show you how to Triple no I'm sorry quadruple your frame rate for less than a cup of coffee at Starbucks stay tuned a few months ago somebody in the comments recommended that I download and check out lossless scaling it's an app available on Steam that cost about seven bucks this app promises dlss style upscaling for every game and Promises to do this with little to no loss in quality this honestly intrigued me and the fact that the app included frame generation made it well worth the $7 that they were charging for
it unfortunately though I couldn't get it to work I fought with it and fought with it and finally I gave up that was until I decided to give it another shot and this time figured out what the problem was and I have to admit this is probably the best $7 I've ever spent on Steam so that's what we're talking about today but first I got to pay some bills so check out today's sponsor is your copy of Windows 10 unactivated well it doesn't have to be because with today's sponsor VIP SCD key you can get
a valid Windows 10 license for under $20 stop dealing with that stupid watermark on the desktop the valid license for Windows 10 also with an activated copy of Windows 10 you can upgrade to Windows 11 for free just go to the link in the description below and pick up a valid Windows 10 license key during checkout use the code cyber CPU for a 25% discount once you have your key go to your activation settings in Windows 10 and click on the link that says change product key enter the product key you just purchased and hit
activate now you don't have to deal with that stupid Watermark that come with running an unactivated copy of Windows 10 now on with the video so one of the benefits to nvidia's RTX cards is dlss this is a technology that allows you to play games in a lower resolution and then the GPU through the assistance of machine learning upscales the image to match your monitor's resolution and you know what this works really well but the downside is that games have to be specifically written to take advantage of it you can't just get a game that
was made 10 years ago like GTA 5 and enable dlss that's where the lossless scaling app comes in what this app does is it captures the game it does its magic to it and then displays it on the screen for you so in the case of upscaling you can take a game and play it at 1080 and then upscale it to 1440 and get similar performance as you would have gotten at 1080 but this app goes one step further and also adds support for frame generation essentially your frame rate is based on the amount of
frames that your GPU can display on the screen per second what frame generation does does is it tries to guess what's happening in between say frame a and frame B and then it creates the middle frame and sticks it between them so if your GPU is producing 30 frames a second and lossless scaling is generating a new frame in between each frame the GPU generates then it essentially is displaying 60 frames a second on the screen even though your GPU only has to do the work to generate 30 frames in the L less scaling app
it will allow you to generate up to four times the original frame rate so if you're producing 30 FPS you could potentially be displaying 120 FPS unfortunately though the more frames that lless scaling has to produce the higher your latency becomes this can make games feel kind of sluggish and hard to play but we'll go more into that a little bit later but ultimately though this app functions extremely similar to a screen cap program it's capturing your gaml and say kind of like the way that OBS would do it and then modifying the capture data
and displaying it on the screen it does all of this in real time so it makes you feel as though the game is running at a higher resolution and a higher frame rate with exactly the same GPU now because of the way this program works I can't screen capture it like I normally would so you're going to have to bear with me cuz we're going to be doing most of this video by just just recording the screen with a GoPro I'm going to flip back and forth between screen recording and the gr GoPro while lossless
scaling is running because if I didn't all you would see is the screen capture that lossless scaling originally sees and not the modified screen that lless capture produces so let's jump on the computer and play around with this thing okay so to start out with we have to download l scaling now like I said this is a program that is available on Steam for about $7 $6.99 so it's super cheap and it's worth every penny I highly recommend it however before you really start playing with this program we have to set up the game itself
first because there's certain changes that we have to make within the game to make it work with lossless scaling now for the example today I'm going to be using cyberpunk 277 because it's a program that no matter how I set it up will not run at my monit monor's refresh rate which is 144 Herz so the first thing we need to do is actually launch the game so the game's going to take a second to launch so I'm going to fire it up real quick and then I will meet you once it's fired up into
the game okay so here we are in cyberpunk uh got a regular game save right here and as you can see in the top corner it's running at 3230 about 30 frames a second which is about typical with the way the settings are set up right now I have the settings set up relatively high and it's currently running dlss as well so what we can do is we're going to go ahead and hit Escape so we can jump into the settings and there's a few changes that we're going to have to make and as you
can see we can kind of go through my Graphics settings right here you can see I have Ray tracing turned on I have a lot of the graphic settings set to high and this is way more than what this computer right here could normally play on a regular basis especially since it's right now set to 3440 by 1440 and that's essentially one of the settings that we're going to need to change but the primary one is this one right here where it says full screen so you need to set this right here to windowed borderless
and this is really important this was the problem that I had that stopped me from using this program originally and then also we're going to set our resolution down because there's no point in pushing 1440 if we have to so I'm going to go ahead and drop this all the way down to 1080 so 1920 by 1080 we're going to go ahead and hit apply since it's windowed borderless it has our game essentially in a window so at this point we can go ahead and drop back into the game so we're going to go ahead
and resume now and as you can see I'm sitting at about 64 is 62 63 so we're about 60 frames a second right now it drops down yeah really close to 60 right here so with at 1080p it essentially doubles my frame rate but at the same time it's just a little bitty window instead of it being you know full screen and that's what we want to do with lossless scaling all right now setting up your game to function in lossless scaling is pretty important this is the stage that screwed me up originally at caused
the program not to work if you don't set the game to be windowed and borderless then the program just won't work as soon as you enable it it will create a black screen and you won't be able to see your game this is the problem that stopped me from doing a video earlier on this program so let's jump back on the system and configure the program itself okay so now that we're in game as you can see we can't actually move our mouse out of the game in order to do what we want to do
so the way you do that is just by hitting alt Tab and you can jump into your regular Steam app right here so from here we're going to scroll down we're going to click on lossless scaling and we're going to go ahead and launch the program and then we can minimize Steam and once lossless scaling starts you'll see that we have a lot of different settings right here now we're not going to mess with frame generation right now I'm going to go ahead and turn that off for right now what we're going to mess with
is the actual scaling mode right now so for the scaling mode I typically leave it at Auto however you can set it to custom and you can set your scaling Factor if you want to however I'm not going to go into that in this video right here I'm just going to go ahead and leave it to Auto and let the program itself figure it out and then for the aspect ratio you can either have it set to full screen or to aspect ratio by default it's just set to aspect ratio I'm going to go ahead
and leave it at that because if you don't do that then what it does is it just stretches the 1080 screen across the monitor now if you're using a monitor monor that is the same aspect ratio as 1080p like if you're using a 1440 monitor that isn't an ultrawide then you can go to full screen if you want to however on mine it makes the game look really funny and stretched out so I'm going to leave it at aspect ratio and it'll essentially put black bars across the side of the screen when it's playing the
game now for the scaling type there's a couple of different options for scaling type so the scaling type is essentially the protocol that you want to use for doing the upscaling in the first place by default it's set to LS1 which is the built-in scaling that comes with lossless scaling however you have a wide variety of other protocols that you could use this includes AMD FSR as well as Nvidia scaling protocol here's an example of LS1 compared to amd's FSR and Nvidia as you can see all three are extremely close unfortunately this was captured through
a GoPro and isn't the best image so it's hard to make out the differences but I noticed amd's FSR and LS1 are pretty equally matched and Nvidia was a little blocky however when it comes to these scaling protocols it's going to be a matter of preference so let's jump back on the computer and I'll show you how to flip between each one so that you can decide which one's the best for you so to start out with we're just going to go to the LS1 protocol right here and to start the actual scaling itself in
the app all we have to do is push the scale button right here and click on the app in the background now it's going to take a few seconds and you'll see it Go full screen and of course I have to jump on the GoPro at this point because you know you wouldn't be able to see the scaling otherwise but as you can see we have the black bars on both sides of the screen and in the top corner right here you can see the frame rate now we're not using frame generation at the moment
so we're only going to see the frame rate that we are getting all around what this frame rate right here is for is as you can see right here it says 6262 um once we do frame generation it'll tell what your actual frame rate is and what the generated frame rate is and we'll get into more of that later but as you can see we're still running at 60 frames a second and we're upscaled to 1440 now we're at least upscaled to the size of the Monitor and the picture is pretty good and the response
time actually is pretty good as well so you can see I am losing a little bit so as of right here if I come out onto the street you can see that I'm well I'm right around 62 still so it it's really close it dropped to oh there we go it's dropping to 50 56 57 so you lose a little bit of performance by doing it this way but in the long run you lose very little and you get a lot you get 1440p now if you want to switch between the different scaling methods like
say you want to try the AMD FSR all you have to do is hit alt tab to jump back into your lossless scaling and then from here you just go ahead and push the unscaled button and choose a different scale type so we're going to go go AMD FSR and then we're going to go ahead and push scale again and we're going to let it do its thing and you start it exactly the same way as you did before and there we go we jump back into it and as you can see this one is
pretty close to the last one and it doesn't really have I didn't see much difference between AMD FSR and the um LS1 I thought they were extremely close however I did see somewhat of a difference between the Nvidia scaling and the AMD and plus one let me show you so if we hit alt tab again we jump into Nvidia image scaling and then we go ahead and jump back into the game and there we go we jump back up now our frame rate is still the same however what I noticed was with the Nvidia it
kind of shows if we get real close onto objects you'll see I don't know if you'll be able to see this with the GoPro but you'll see kind of blockiness in lines where it's not real crisp sharp lines on things and it's kind of Blocky in certain places and that's just an artifact of the upscaling itself however it was weird that the Nvidia one would do that but the AMD or the LS1 wouldn't so if we were to jump back out so go ahead and jump into AMD FSR and jump here it should switch over
to that now now as you can see a lot of that blockiness is gone now there's still a little bit but not as much as there would have been if it was still on the Nvidia protocol so now that we've done that let's go ahead and jump back out here we're going to go ahead and unscaled again and now we want to play around with frame Generation Now essentially what this does is just like like I explained earlier frame generation is going to put new frames in between the existing frames that you used before so
for this one we're going to go ahead and choose lsfg 2.3 and this is the newest one so this is the new from the update from the app so and then we're going to leave it in X2 mode right now what this means is it's going to essentially two times your frame rate it's going to put in a new frame in between each frame that the GPU produces and then also you can set it to Performance and what this will do is it'll help to lower the latency problems by essentially processing the frame generation a
little bit quicker but it as it is at the exception of quality so it will be a slightly worse quality than it would have been if you would have left it off so I'm going to go ahead and leave it off for right now and then when it comes to clip cursor all clip cursor is for is to kind of keep the cursor within the playable area of the screen cuz essentially what's happening is if you have multiple monitors or if you have a game that's playing like you see here that's just on the window
here that's borderless then there could be a chance that your C cursor could move outside of the playable area and it could kind of mess up your gameplay so by clipping the cursor it keeps the cursor within the playable area and then we scroll down here we go down to sync mode now this thing right here supports g-sync and that's essentially one of the reasons you you're going to want to use it you essentially want this program to generate enough frames to where it brings the gaml up to the refresh rate of your monitor and
in my case that's 144 Hertz it's going to try to bring the frame rate up to 144 frames a second to match my frame rate so for the sync mode I go ahead and leave that default you can do half V Sync and stuff like that but I'm going to go ahead and leave mine default and then if we scroll down on this list right here it also has draw FPS and this is what gives us that little FPS counter in the top corner like I was showing you before and you also have to make
sure to turn g-sync support on by default I think it's turned off it is an experimental feature so I think it's turned off by default so now that we have all this set up we can go ahead and push scale jump back into the game and then once the game goes full screen you'll see exactly what I'm talking about all right so there we go and as you can see it says that we're at 45 FPS is what we're generating and we're actually putting onto the screen 94 FPS now you probably noticed by now that
we did have a slight drop in our regular frame rate and that's because the GPU is what's actually generating these frames but just not in the way that you think it is it it's still using GPU power in order to do the frame generation and because of that you lose a little bit of your normal frame rate in this case it we lost about about 10 frames a second in order to get 96 frames a second but if we move around as you can see it it is relatively easy to easy to play and the
latency isn't bad at all now let me actually switch to a different gun here so with the gun right here one of the things that I wanted to point out is the reticle in the middle of the screen now keep an eye on that hopefully you can see it let me try to get somewhere where it's good or it has a good contrast so now that we are on the ground right here if you see the reticle it looks fine but if I move it back and forth do you see those little there's just these
little things that kind of show up these little like aberration that show up around it and also if I aim the gun itself or if I have the gun up you can see the tip of the gun is kind of ghosting a little bit and essentially what the purpose of that is is why it's doing that is because with the frame generation it has to kind of guess what is happening between frames so when it does that sometimes it doesn't quite guess the way that it should and and because of that you get some of
those aberration now honestly it's not that bad if you're really looking for it like if you're playing the game and you're actually looking at it then you can see it it it's really apparent however if you actually go through and play the game I noticed that I don't really see it when I play the game I went through this and played this for a couple hours with this turned on just to enjoy the improved frame rate and honestly I really didn't notice these problems while I was actually playing the game I only noticed them when
I actually sat down to look at it to do the video and to see yeah yeah you can definitely see it if you're looking for it but if you're just playing then a lot of times you don't notice that's happening now what we're going to do is we're going to go ahead and jump out and as you remember we set this thing originally to the X2 mode now we're going to go ahead and we're just going to jump all the way up into the X4 mode and jump back into the game now as you can
see we're all the way up to 142 143 44 so it did bring it all the way to the refresh rate on my monitor so gsync is working however when you move around you probably tell that I don't know if you can tell it on the screen itself but everything seems kind of Muddy everything's moving slower than it should and I'm not not sure if you'll be able to see this but let's go ahead and put my mouse right here see if you can see it on the camera right here and what I'll do is
I'm just going to hit the mouse and you'll see how long it takes to react on the screen and you know it's it's not bad but there is just a slight amount of latency that's kind of slowing it up to be honest with you it's actually working really well so right here it's running at 140 frames a second and I'm pretty happy with it and it seems pretty good at this moment however it is now dropped down to 36 frames a second at normal gameplay so that 36 frames a second is then being multiplied by
four in order to get us to our 100 42 frames a second but it has quadrupled its frame rate unfortunately to the expense of maybe a little bit of latency so this app isn't perfect unfortunately when it comes to upscaling and frame generation the app is only working with what it sees on the screen if this was programmed into the game itself it might have some help predicting how it should go about upscaling and especially in its frame generation but even though it's not perfect it's definitely worth $7 and it definitely does exactly what it
says it does if you have a lower or mid-tier gaming system and you'd like to get just a little bit more FPS out of it then this program will definitely help you out on that I mean I was able to play cyberpunk with full RTX on at 1440p and get almost 100 FPS with a 3060 that's pretty good and I SP quite a bit of time in that game and it was pretty playable in fact that may be the only way I play that game from this point forward however I also tried it out on
a few different games like Red Dead Redemption 2 and I didn't have as great a result with those games now the results weren't bad but they just weren't as good and if that makes any sense you know cyber Punk actually reacted a lot better to the program than Red Dead Redemption did you're going to have to play with this program on a game by- game basis and you can also set up custom profiles for each individual game so that you don't need to configure or change settings between games you can just set it and forget
it for that specific game either way this program is a great deal and I would highly recommend picking it up and playing around with it yourself but if you'd like to improve your gaming performance without spending any money at all then check out this video where I show you how to overclock your GPU now you're not going to double your frame rate but if used in combination with this app it could give you an even better frame rate as always you guys have a great day
Vidéos connexes
36:16
GPU BAD?? This QUADRUPLES Your FPS!!! - MO...
Vex
80,080 views
16:25
You CAN Download More FPS...But Should You?
Toasty Bros
172,478 views
34:12
Frame Gen x2 et x3 dans tous les jeux avec...
VCG
14,911 views

9:29
You're using FSR wrong (probably)
Sam.Alexander.Reviews
41,773 views
24:49
Lossless Scaling just got UPDATED!! X4 Mod...
Ancient Gameplays
89,747 views

23:54
You Need These 5 Apps For Windows 11
CyberCPU Tech
333,230 views
18:56
Downloading FPS just got EVEN BETTER! Loss...
Daniel Owen
357,001 views
15:53
Frame Generation for EVERYONE!! Lossless S...
Ancient Gameplays
128,816 views

28:18
Lossless Scaling Deep Dive!
Jagadhie
29,117 views

20:54
Are You Tired Of Windows Spying On You?
CyberCPU Tech
135,608 views
19:26
NEVER install these programs on your PC......
JayzTwoCents
4,136,999 views
23:21
The CORRECT way to gain FREE FPS with any ...
JayzTwoCents
1,190,109 views
14:37
Loseless Scaling - How I use This POWERFUL...
Tech YES City
40,071 views

21:08
The Perfect Automated Windows 11 Install USB.
CyberCPU Tech
551,273 views
10:31
MSI Claw FPS Boost: Frame Gen And Lossless...
ETA PRIME
79,116 views
10:26
Get A 4X FPS Boost with Lossless Scaling -...
ETA PRIME
149,055 views

21:49
EVERY Windows User Should Know About THIS ...
Memory
568,858 views
16:32
Lossless Scaling - Exploration Guide
ZArkadia
3,835 views

18:53
How To Fix Most GPU Problems.
CyberCPU Tech
15,685 views
19:28
AMD AM5 Runs Hot, Will This Fix It?
CyberCPU Tech
38,096 views