Generate ENTIRE 3D SETS For Your Projects FAST! [FREE Blender SDXL/FLUX Workflow]
103.23k views3244 WordsCopy TextShare
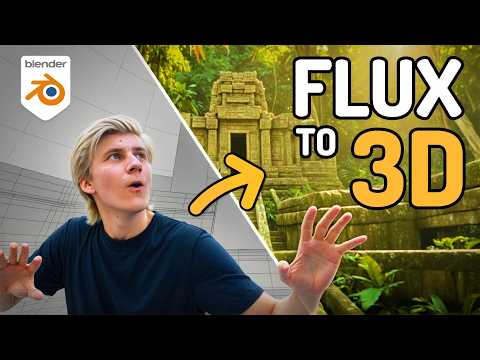
Mickmumpitz
I’ll show you how you can create a simple 360 degree layout scene in blender and turn it into entire...
Video Transcript:
I'll show you how to create a simple 360° scene in blender and turn it into this or this or this or even this this is one of my all-time favorite AI workflows because it's super easy to use and so much fun you can use it in your browser or install it locally for free and use it with your favorite stable diffusion model or even the brand new absolutely mind-blowing flux image model by black forest labs and this one is just mind-blowingly good the best image model I've seen so far I'll also show you how you
can seamlessly integrate characters or other assets into these 3D environments how to combine them with my AI compositing workflow for a full lowbudget virtual production environment and I also want to try traveling to these worlds using my VR headset to see if they hold up in person so let's not waste any time and jump straight into blender here I'm creating a simple Arena using primitive shapes I'll try to keep it as simple as possible as the AI textures will do a lot of the heavy lifting but you can be as detailed as you like here
I'm using simple box modeling but you could of course also use sculpting for Landscapes like mountains or even use this workflow to retexture photos scans make sure there's something interesting in every direction because we want to use the full 360° field of view but since we will be projecting textures onto this environment we also need geometry for the sky so I'm also creating a sphere and scale it so that my scene is inside it next we need a way to transfer the scene geometry information to the AI and if you watch my previous tutorials on
AI rendering you know that we're going to use render passes the first one will be a depth pass and it's just a representation of the distance of each pixel to the camera where white pixels are close to the camera and black pixels are further away and we can then use a depth control net with flux or stable diffusion to generate a new image based on that depth information the next pass we will create is an outline or line art pass this one will show the edges of our geometry as wide lines and it helps us
to bring the generated image even closer to the original 3D environment to set them up we must first create a camera in the center of our environment and bring it up roughly where we want our eye level to be let's call this one projection camera the direction is not too important but if you have a main El in your scene I recommend pointing it at that in the output properties change your resolution to a 2:1 aspect ratio and I'm using 248 * 1024 go to your render properties and change your render engine to cycled you
can change it back to Eevee to render your final shot for faster render times but for this next step we need to be in Cycles now we can go to the camera properties and change the type From perspective to panoramic and the panoramic type toqui equ rectangular and if you now look through the camera and change to rendered view you can see absolutely nothing because we don't have any lights in the scene you can of course create some to check if everything is still there but you can also just trust me now I want to
export the depth information of this panoramic image for this I go to view layer and activate Z let's render out an image go to the compositing tab click use notes and connect a viewer note to the depth output and you can see our depth information is here but it's not where we want it we want all the values to be between zero and one and for this we can just add a normalized Noe oh and make sure that you set the color management to standard The View transform should be standard next we need to add
an invert color Noe because we want white pixels to be close to the camera and black pixels further away and you can also add an RGB curves not and play around with the contrast of this image so that we have more detail closer to the camera finally just add a file output node and set a path for your image render out the image again and this is our final depth pass to quickly generate some outlines we used blender's Freestar tool for my AI rendering workflows but unfortunately this does not work with cycles's panoramic camera but
instead we can just create a simple outline Shader for this just select an object and add a new Shader and and let's call that outline go into the shading workspace and you can delete the principled bsdf create a bevel nodee and a geometry node and then a vector math node change that one to product and connect the normal output of the bevel and the normal output of the geometry and then you can go to the rendered view to see the effect but I want the outlines to be white on black so let's add another invert
node and then add a map range node after that by playing around with the values in the map range node and the radius and samples of the bevel node we can change the thickness of our outlines and from the camera they should look somewhat like this so now you can set a render location or Simply Save the image out of the render View and here are our two final passes before I show you how to transform these render passes into stunning textures on your own computer for free let me show you an even simpler installation
free solution that works in your browser for this I'm using Leonardo a I which is an easy to ouse web interface for stable diffusion and other AI models they offer a free plan but for this workflow we need at least The Apprentice membership starting from $10 a month 12 if you choose monthly billing in leonado go to image creation and I'm using the Cinematic Kino model with the preset style cinematic for the image Dimensions you want to go to more and switch that to 2 to one and for the number of images that generate each
time you run the prompt I will change that to two next you can put in a prompt and I'm using this format here you can add your own scene description here click on this image here to select how you want to guide the image so go to view more and let's click depth to image confirm and here we upload the image of our depth map now the problem is that Leonardo doesn't know that we are already giving it a depth map usually you would upload an image and then Leonardo will generate the depth map based
on that image so this can lead to some weird results and this is why I set the strength to a low value next we want to load in our line out pass so click on the image view more and this time choose Edge to image and let's upload our line art pass let's lower the strength a little bit to give it some more freedom and let's just run the prompt and you can see this one is broken but this one looks really good now that we have an image that we like we can also use
this one as the depth guidance so so go to the depth guidance click on the image go to your generations and now select this one instead and now you can bump up the strength and now we could change the prompt to something else and see how well this worked they both look pretty cool if you want to create an image in another style you can also add Leonardo elements so let's maybe do old school comic and now we have an image like this but before we can use these images in blender we need to do
one last step we need to up scale them Leonardo has different upscaling options but my favorite one is the universal upscaler here add an image go to your generations and let's select this one for the style I want to choose cinematic and I bump up the creativity just a little bit and here is your final upscaled image you can see this worked really well so now we can just download the image and switch back to blender here we want to Pro our image back onto the scene geometry so first we need to make sure that
all the objects have UVS but don't worry they don't need to be good so you can just use the smart UV project let's create a new Shader and let's call it projection and create an environment texture load in the upscaled image next you want to make sure that node Wrangler is enabled so go to preferences and search for node Wrangler and check if it's enabled now you can press control T and you want to connect the object output to your vector input next create an empty go back to your texture and select this empty in
the object input and when you now move it around it looks like you're traveling through hyperspace but if you line it up with your projection camera everything will fall into place and this looks really cool as long as you don't turn around unfortunately creating images with Leonardo will make them not tiled so we have this ugly seam here now we could use a website like this one to blur the Ed just a little bit and this definitely helps but it's still visible but now let's look at workflow that runs locally on your own computer and
will produce extremely high resolution seamless images for free we're going to use comi a noe-based interface for stable diffusion and other AI models and I created a free step-by-step guide that will show you how to install it and where you need to download and put all the models for this to work once you have everything set up you can just drag and drop my workflow into the com UI and interface double check if all the models are loaded I'm using Wild Card turbo this will just patch the model so it will be seamless for upscaling
I'm using clear reality version one and I'm using the sdxl prom Max model um as my control net model so now you just need to put in your depth pass here and your line art here when you now click Q prompt the workflow will automatically generate an image and upscale it for you so with this upscaled image we can now just go back into blender and change out the image in our environment texture node pretty cool right and you see how easy it is to rapidly iterate and try different environments with this workflow while I
was working on this video new amazing control net models for the new AI image model flux by black forest Labs were released and I wanted to try them out with this workflow the advantage of flux is that you can prompt with a more natural language style and that it will follow your prompt way better than any other AI model I found this simple workflow by Isa here on Reddit and installing it is very simple you just need to follow these steps and I link this post in the description once I had everything set up I
loaded in my depth map here and created this prompt feel free to use it as a template I then just clicked Q prompt and I was absolutely Blown Away by the result the details and especially the lighting everything felt so vivid and believable to improve quality even more I tried upscaling it using the ultimate stable diffusion up scale and I just connected the model and ran the prompt and to my surprise it worked so good look at this look at this detail here but unfortunately the seamless model patch that we used to create seamless images
with stable diffusion did not work for flux so instead I created this node group here this setup that will automatically blend the edges of your image to make it seamless and this usually works well because the images by flux are often very symmetrical with my prompt still you can change the size of the effect here but try to keep it as small as possible and look at these amazing results I really wanted to go to these places and experience them and that's when I remembered that I still had an old Oculus Quest lying around so
in theory I should just be able to connect my Oculus what this is so cool okay it's tiny let's let's scale it up that's amazing like it's probably really underwhelming for you because you can't see the 3d effect but it's so cool it really feels like I'm here let's load another stable diffusion XL one and wow this is amazing for sdxl this looks so good it's funny how everything is illuminated by sunlight but we don't have a sun anywhere here and yeah you can see as we leave this area in the center here everything is
falling apart and the illusion becomes obvious that we have like stretching uh textures here everywhere still looks pretty interesting and I already have some ideas how we could fix this in the future but I must say I feel quite alone in this world so let's now add characters and assets into the scene of course we can put anything we want into these scenes but I feel like this one needs some night so I just go to tripo 3D and type in the prompt night and we can now generate one but I'll just take this one
this looks pretty cool and put him into the blender scene let's go to his Shader create a principal BS F1 and let's make him a bit more metallic and play around with the roughness of the metal and you can see already integrat somewhat well into the scene because we used an emission Shader for the surrounding geometry and this actually casts light onto him but now I want him to actually cast Shadows onto the surrounding environment the easiest way to do that is just to go to our environment shad and change out the emission for a
principled bsdf one and let's also create some emission just by plugging in the color into the emission and bringing it up a little bit just because otherwise it will be really dark but now I actually want to copy this first part here of the Shader node setup and go to the world Tab and plug this all into the background color now we can increase the strength and this will act like an hdri image lighting our scene but I need to turn off Ray visibility Shadow for my sphere otherwise it would block the light now our
environment texture looks really flat so I'm just creating a bump map again plugging it into the normal and plugging in the color into the height reducing the strength and now I'm plugging in a color ramp node so that the effect only happens in the darker areas of the image so now we have our character casting soft Shadows here because we have a pretty soft lighting setup but let's enhance these contact Shadows by adding an ambient occlusion node when I like the strength of the effect I can just add a mixed color Noe plug in the
ambient occlusion effect here and the original color here set the factor to one and set the mix to multiply and this will just multiply the black values on top and you can see this enhances the effect even more I can now also add new lights into the scene and my character will react to them and cast Shadows accordingly with this Shadow setup I can basically throw any texture onto this geometry and it will always look cool oh by the way I'll be uploading the blender sample files on my patreon so you can just copy the
Shader settings if you want your support helps me a lot to create these videos as these workflows take a lot of time to develop and test as a thank you for your support you'll also get access to our community Discord where we do community projects and I try to help out everyone wherever I can if you run into any problems now of course this workflow still has some limitations for example we cannot go too far away from the original projection camera otherwise the image will fall apart but I think think it's already good enough to
create environments for fighting games to create consistent backgrounds or images for your AI movies or to create 3D backgrounds for virtual Production Studios now what if you don't have a multi-million dollar Production Studio at home well in this case you can use my compositing workflow from my last video you can just use the free app camrack AR to film your subject and the app will automatically track your phone's movements while you film and you can easily import this tracking data into your blender scene now you just need to render out your your blender background sequence
and import the original video and the rendered background into my AI compositing workflow and click Q prompt the workflow will then automatically cut out the subject match the lighting to the background and fix the edges of your subject another fun thing you can do with the blender workflow is to animate the texture I try to do this with a new image to video generators like Runway and dream machine but unfortunately it was impossible to get a static camera so I went back to come your ey and created this workflow that generates a looped animated video
based on the depth map and a prompt and especially clouds and water and smoke effects look really cool with this workflow I wouldn't recommend it for static environments it can be a bit muchier but it's a lot of fun to play around with and it's great for animated 3D backgrounds where you can hide the imperfections with depth of field for example I'll put it on my patreon so you can play around with it I bet you already have a bunch of ideas what you could do with these 3D environments if you create something with it
make sure to tag me in your work or send me a link I always love to see what you come up with thank you very much for watching and for all my patreon supporters who make these videos possible see you next time
Related Videos
![Generate STUNNING SET EXTENSIONS For Your Projects! [2D & 3D | FREE Blender + AI]](https://img.youtube.com/vi/L0mhlsg8KyY/mqdefault.jpg)
17:16
Generate STUNNING SET EXTENSIONS For Your ...
Mickmumpitz
41,958 views

21:55
Beginner Blender 4.0 Tutorial - Part 11: C...
Blender Guru
379,304 views

20:54
This free MIND BLOWING Workflow Just Chang...
Mickmumpitz
93,460 views
18:50
Generate 3D from ANY Video! │Gaussian Spla...
Black Mixture
155,739 views

16:02
10 AI Animation Tools You Won’t Believe ar...
Futurepedia
335,143 views
35:59
I created MY OWN Fortnite map, and here's ...
Frigol33t Gaming
77 views
15:52
Generate 3D Sets for your Short Films!
Mickmumpitz
179,290 views

8:21
The End of 3d Artists?
Alexey Lugovoy
96,481 views

19:42
FLUX + LORA Full Course (Uncensored Super ...
CyberJungle
298,425 views
![Render STUNNING 3D animations with this AMAZING AI tool! [Free Blender + Stable Diffusion]](https://img.youtube.com/vi/8afb3luBvD8/mqdefault.jpg)
14:40
Render STUNNING 3D animations with this AM...
Mickmumpitz
82,430 views

23:23
Create CONSISTENT CHARACTERS from an INPUT...
Mickmumpitz
51,108 views
35:45
World Building in Blender - Ian Hubert
Blender
2,146,606 views

22:26
How Ian Hubert Hacked VFX (and you can too!)
InLightVFX
324,514 views
14:16
Blender 4.3 Is Going to Be AMAZING!
Gamefromscratch
86,400 views

36:07
How to Procedurally Generate 3D Environmen...
pwnisher
70,256 views
![Create mind-blowing AI RENDERINGS of your 3D animations! [Free Blender + SDXL]](https://img.youtube.com/vi/mu3JEfx3PHM/mqdefault.jpg)
12:51
Create mind-blowing AI RENDERINGS of your ...
Mickmumpitz
148,216 views

1:18:44
Master AI image generation - ComfyUI full ...
AI Search
83,002 views

1:53:10
Blender Texturing for Beginners - Tutorial
Blender Guru
571,304 views
12:52
Create CONSISTENT CHARACTERS for your proj...
Mickmumpitz
153,991 views

8:52
Why do Studios Ignore Blender?
Film Stop
139,933 views