Microsoft Project 2021 Beginner to Advanced Training: 5-Hour Tutorial Course
68.39k views56657 WordsCopy TextShare
Simon Sez IT
✅ Download the free course exercise files to follow along ➡️https://www.simonsezit.com/project-2021-...
Video Transcript:
[Music] Simon Says subscribe and click on the Bell icon to receive [Music] notifications we've made the accompanying exercise files for this tutorial available for free just click the link below in the video details to get these Microsoft Project 2021 is the latest Standalone version of project available from Microsoft it's one of the most popular tools on the market for scheduling organizing and managing projects of all sizes from the most basic task list to highlevel complex projects my name is Deborah Ashby I'm a Microsoft trainer who's been training project for over 15 years and I'm going
to be your host for this course now let's make no mistake project 2021 is a complex application there is so much functionality that it can become overwhelming so it's important to know about those key features and how to use them effectively having a good understanding of project will help you work more efficiently and deliver better project outcomes and it's also a great thing to have on your resume in this course we're going to be using a fictitious training rollout plan to work through the different features and functionality that help us manage the entire Project Life
Cycle the files I use in the course are available to download so you can follow along with me or you can save them for later and rewatch the videos at your own pace at the end of each section we're going to work through an exercise so you can really put into practice the skills that you've learned and you can find all of these exercise files in the exercise files folder so make sure that you've downloaded those they'll also be questions as you go through the course so you can test your knowledge as you go these
questions really help identify where you have knowledge gaps and then you can go back and re-watch the relevant videos so if you're ready to supercharge your project management knowledge then grab yourselves a drink and spend the next few hours with me whipping a project into shape sometimes it can be quite complex when you're thinking about which project management solution to purchase because there are so many different versions of project these days it can be a little bit confusing so in this lesson let's just take a quick look at the different offerings to give you more
of an idea as to which one is going to suit your needs now I'm just on the Microsoft website and I'm on the compare project Management Solutions and costs page now notice currently we have two tabs at the top here cloud-based Solutions and on premises Solutions and I'm currently clicked in the cloud-based Solutions tab so now now I can see the three different project plans that are available for the cloud-based project management tools so those would be project for the web which is the latest offering and project online project is a subscription application so if
you're thinking that it's included within your Microsoft 365 subscription then unfortunately it's not you do have to purchase a separate license and you can see here those three different licenses project plan 1 Project plan 3 and project plan 5 now these have been recently renamed to bring them in line with Microsoft's Enterprise Solutions E1 E3 and E5 so project plan one is the most basic and the cheapest of the projects and you can see here how much it is per month mine's showing in pounds but this will update depending on your location and project plan
one includes project for the web which is a completely cloud-based project management tool which isn't as complex as something like project professional but still gives you all of the core functionality that that you need it's also a lot easier for you to collaborate on projects using project for the web and it has the advantage of being on the Power Platform so we can really harness the power of power apps power automate and powerbi and we can manage all of our projects through a web browser so that's project plan one project Plan Three includes project for
the web so pretty much everything that we have in Project plan one but it also includes Project online to manage more comp Lex projects now project plan 5 is really the Big Daddy of them all this includes everything in the first two project plans but it also allows us to do a lot of highlevel project portfolio management and if you want to take a deeper look at the different features so that you can compare and contrast if you come onto this page and scroll down you can see exactly what each of these plans contains so
it's definitely worth having a little look through these if you want to go for a cloud-based solution now the other options that we have when it comes to project is to choose an on premises solution so let's jump across to that tab now the first thing you'll notice immediately is that the prices are a lot higher and that's because this is a one-time purchase option it's not a subscription so we're not paying a monthly fee to access the software we're actually purchasing it and downloading it onto app PC so we pay a onetime price and
it's hours forever now of course the disadvantage of things like this is that if there are any updates to the software we might have to wait for a security patch to be released or if we want to get new features we might have to wait for the new version to be released before we can access them whereas if we're using a cloud-based Solution on a subscription package that updates automatically now when it comes to the project on premise Solutions we have project standard 2021 and project professional 2021 so project standard has all of the core
functionality but it doesn't really contain too many collaborations tools and some of the more advanced features project professional contains absolutely everything so if you're a pmo looking to do some high level project management then this is going to be the application for you and of course it includes absolutely everything that we have in Project standard and project professional 2021 is what we're going to be using in this course so we basically have access to all of the features so those are all the options you have when it comes to acquiring project so what's new in
Project 2021 when compared with project 2019 well first off remember that I'm using project professional 2021 if you're using the project Standard Version then some of these new features might not be available so just make sure that you check the version that you're using prior to commencing this lesson and if you want to check which version of project you're using just click on the file tab and jump into account so let's start out with just a generalization something that's different a lot of the icons in Project 2021 have a much more modern updated look and
feel so you might notice that when you first open up the application now if we go through each ribbon so let's now go through each ribbon and I'll highlight the minor differences and it is worth mentioning there aren't a huge amount of changes or differences between 2019 and 2021 the main overall difference is really something that's inconsequential to day-to-day project management the biggest difference in Project 2021 is that Microsoft seem to be moving towards a more cloud-based offering but with regards to the design and the functionality there are just a few little differences so let's
start out by jumping into file and if we go into new this is where we can come to create a new project so we have a blank project and then we have our templates listed underneath that we can use now one of the differences here is that we have a new template and it's the one that you can see at the top here the Sprints project so if we open up this template it gives us this Sprint planning board which looks completely different to what we're used to working in in project this is very similar
to using something like board view if you're working in Microsoft planner or project for the web so we have a brand new template in Project 2021 now if we go to the task ribbon and take a look at what's different here the only thing is if we go all the way over to the right hand side of the ribbon we have a little link to group here now this button allows us to link tasks in our project to a plan that we have in Microsoft planner so if I click on this it's going to open
up a little pan on the right hand side and it's going to allow me to link to a specific task in a plan another change we can find on the report ribbon aside from all of these reports that we can run we have a new report called task board reports so if I was to select one of these standard reports this is basically related to the board that the tasks are assigned to and boards are very similar to buckets again in an application like Microsoft planner or project for the web so just be aware that
we have access to that new report if we jump across to the project tab again in the Properties Group the only change we have here is the ability to manage as Sprints so we can do things like change the name of our Sprints add more Sprints to find the start and finish and the length and if we go across to the view tab again we have this new view task board view which allows us to view our tasks based on different buckets that they're stored in now if we go to the help tab not too
much has changed on here but one change we do have is notice at the top here it says Gant chart format so this is where I can come to start making changes to the bars that you see in the project plan now previously in Project 2019 this tab was actually just called format so there's been a little bit of a name change just there and that is pretty much it when it comes to the actual differences that are going to affect what we're doing when we're working in Project as I said a lot of the
bigger changes have come in the background and the fact that Microsoft is moving to a more cloud-based environment in this first exercise we're going to start nice and gently so I'd like you to make sure that you have downloaded and installed project hopefully you're already at that stage I don't want you to make sure that you've downloaded and saved the course and exercise files you'll find those in the relevant folders within the course just make sure that you have those saved off somewhere safe because we're going to be referring to those throughout this course and
then finally make sure that you have reviewed your settings in Project options so that if you're working working along with me everything matches and we don't get confused so that is all I need you to do for this first exercise see how you go with that and I will see you in the next one for the next section you'll want to download the course exercise files click the link below in the video description to get these you can also scroll through the details to find timestamps for each section in this course if you're enjoying this
training please leave us a comment before we get into the nuts and bolts of how project works we need to get ourselves familiar with the project interface and when I say interface I just basically mean what we're looking at on this screen so I've opened up a project and we'll just walk through the different parts of the screen so that you're familiar with where everything lives so if we start right at the top you can see we have our title bar this is where your you're going to see whatever you've saved your project as and
then underneath that we have various different ribbon tabs and if you're used to using other Microsoft applications like maybe word or Excel or PowerPoint this takes on exactly the same structure we have our different ribbons and each ribbon contains different commands which help us execute actions in project and all of the commands are grouped logically onto different ribbons and also into different groups you can see right at the bottom we have the group name so undo view clipboard font schedule so on and so forth and those groups are really just there to make it a
lot easier for us to find exactly the command that we're looking for at any given time we also have a file tab at the top which takes us into what we call the backstage area and we'll talk about this in more detail in the next lesson for the time being let's just click the back arrow to take us back to our main window now aside from backstage and the regular ribbons that we have when we open up project we also have what we call contextual ribbons and I can see one of them on the screen
right now and it's this one just here Gant chart format now what contextual ribbons are are ribbons that only appear as and when they're needed now because I'm currently in Gant chart view that's why I can see the Gant chart format ribbon and this ribbon contains all of the commands that I need to manage and format my Gant chart now if I was to click somewhere else so let's click up here in the timeline notice that I get a different contextual ribbon this time I get the timeline format ribbon so ribbons will appear and disappear
depending on what we're clicked on that's why we call them contextual so just be aware of that point now next to our ribbon tabs we have this little tell me what you want to do box so what I can do from up here is that I can use this little bar to search for different Comm commands on the ribbons if I was struggling to find something or this is where I can come to get help on something specific so maybe I want to know a little bit more about timelines I can type it in and
when I hover my mouse over the arrow I have a short list of items that I can get help on so if I select the first one it's going to open up the help Pane and then I get access to the help files which talks me through the process of creating a timeline in Project it's Al worth noting that if you quickly want to jump up to that tell me box there is a keyboard shortcut of alt Q that's going to position your cursor in the correct place and you can then type in whatever it
is you need help on now just under the ribbons we have timeline view now this is something that you don't have to have toggled on you can simply turn this off by going to the view Tab and deselecting timeline and notice if I do that it gets rid of it if I click again it brings it back but the timeline is a really nice way of just kind of getting an overview of everything that's going on on your project and if you have that turned on you're going to see it running across the top of
the primary project area and just under timeline view this is the main area that we're going to be working with this is the Gant chart that we're looking at and the Gant chart consists of two parts really we have all of our tasks listed in a grid form and then on the right hand side we have that represented with these visual bars which make it really nice and easy for us to see the duration of each task and how all of our tasks link together and in general this is going to be the view that
you work in for the majority of the time if you want to modify the size of these then you can definitely do that so if we hover our Mouse over the borderline between the table and the actual Gant chart we can drag out and we can drag back in again so we can really customize the size so that it's suits us and there's quite a lot of information lurking underneath here so you might want to widen this out quite a bit depending on what it is you're doing I think I'm going to leave mine there
for the time being you can also do the same using the horizontal splitter so once again if I hover my mouse over the boundary I can make more room for the timeline or I can drag the gantar back up again we have our scroll bars out the side so I can scroll up and down and see all of the tasks that I currently have in my project project plan and then finally at the bottom we have the status bar now if you take a look over on the left hand side you can see it's telling
me that all new tasks are Autos scheduled and if I click on this I can switch between Autos scheduled and manually scheduled tasks now we'll get on to that a little bit more later on but just be aware that this acts as a toggle down in the status far and then all the way over on the right hand side this is where we can come to switch between different views So currently we're working in ganta chart view but we have a task usage view a resource View and also a resource sheet view as well and
of course all of these we're going to discuss in more detail later in the course the final thing we have is a little Zoom slider so if we want to zoom out or zoom in then we can definitely do that as well and this is fairly standard across all of the Microsoft applications so if you've used this previously then that's probably not too much different for you now the final thing to highlight here is the quick access toolbar now the quick access toolbar you'll find underneath the ribbons just above the timeline and currently I just
have a few icons on my quick access toolbar now this is a customizable toolbar which allows us to add commands that we use frequently to it so that they're quick and easy to access and we don't have to hunt through the ribbons and we have a whole lesson dedicated to how we can customize this and set it up so it works for us but that is pretty much the project interface have a little look at it make yourself familiar with where all the commands are and which ribbons they're located on and I will see you
in the next lesson the ribbon tabs help us organize our commands logically into groups and we briefly touched on this in the last lesson but I want to explore these in a bit more detail so that you start to get familiar with where different things are located because in Project we have so many commands it can sometimes be a little bit overwhelming so if we start with the first tab just here the task tab this is where you're going to find a lot of the commonly used tasks so this is where you'll go to find
things like cut copy paste and all of your font formatting options it's also where we can go to manage everything related to our tasks we can update the progress in the schedule group we can link and unlink tasks in there as well we can switch between Auto schedule and manually scheduled tasks and we can add things like summary tasks and Milestones this is also where we can come in the Properties Group to see an overview of our project information the resource tab is where we would go for everything related to resources that we've added into
our project it's where we can go to assign resources and create resource PS and it's also where we're going to find things like our leveling options the report tab is where we come to create reports in Project once you have your project up and running you're you're probably going to want to start running some reports to analyze that data you might want to run a cost report or a report related to the progress we can even do things like create visual reports and dashboards from here as well on the project tab this is where we're
going to find lots of options for managing our overall project is where we can change the working time view our project information and also do things like set baselines and move our project as well the view tab is where we come to switch views as I mentioned at the start we're currently looking at the default view which is the Gant and timeline view but we can modify how we're viewing and what we're viewing from here this is also where we can come to do things like sort and filter our data the help tab is pretty
self-explanatory it's where we can come if we want to get help notice the first button here is the help button we have a keyboard shortcut of F1 to open those help files and what you'll see when you click on F1 is pretty much the same as when you're using that tell me box at the top it's going to open up a pane on the right hand side where you can go in and search for whatever it is you're looking for help on so really nice and useful and then of course the final ribbon that I
have here is the contextual ribbon Gant chart format and as I mentioned this is contextual so it's only appearing because I'm in Gant chart View if I click on timeline view it switches to the timeline format ribbon and these contextual ribbons contain in this example everything I need to change and format that timeline area running across the top so those are going to change depending on where you're clicked now the final tab that we haven't spoken about much yet is the file tab now notice I refer to this sort of separately to the others and
that's because it does look different when you click on file it takes you into to what we call the backstage area and this is where you're going to find sort of your more admin style tasks this is where you would come if you want to create a new project either a blank project or maybe from a template this is where we come if you want to open an existing project that maybe we have saved off to a specific folder or maybe even in the cloud if we click on info this is where we can come
to see some information about this particular project that we have open we have save and save as and we're going to get into those a little bit more later on in this section we can print from here we can share our file we can export it and we can also close and then towards the bottom we have account so this is where you can come to find out information related to your account for example we can see here exactly which version of project we're using so sometimes maybe if your it team is saying to you
what version of project are you using this is where you can come to find out that information now noce here it says Microsoft Project online desktop client this is where we also come to install any updates and we can also do things like change at theme for example if I wanted to work with a black theme I could do that if I preferred that I could go with this nice dark gray or I can stick to white or colorful which in general is what I like to set we can also change our office background so
if you cast your eyes up to the top right hand corner you can see I just have this sort of doodle pattern in the background this is where we can change that so so that might be something that you want to do and finally at the bottom here this is really important this is our project options area and we have lots of different pages of information Now options is where we come to adjust as settings and really personalize how our copy of project works for us and we're going to be dipping in and out of
here throughout the balance of this course and in fact in a lesson that we have coming up we're going to jump into here and I'm going to show you some of the settings that I recommend that you change before you get started now just before we leave here I just want to go back to the open screen now as I mentioned this is where you can come to open any existing project files you have stored off and you can see I've got some locations here where I could select my project files from so I use
one drive cloud storage so I could open up a project file that I have saved into one drive very easily from here alternatively if I just have it saved off to my PC I could choose the this PC option underneath other locations and if I click on browse that's going to open up file explorer and allow me to navigate that way if that's what you prefer if you cast your eyes over to the right hand side notice we have two folders at the top here projects and folders now I'm currently clicked on projects and it's
showing me the last projects or the most recent projects that I opened now this is a very new install of project 2021 so I don't have a great deal in here but if you've been using project for a while then this list is going to be full of your most recent files the same thing with the folders area this is going to show you the last folders that you saved files into and the idea here is it just makes it really quick for you to find things that you've worked on recently and open them and
we can simply open by double clicking on the file in the list and if you have any files that maybe you access every single day you can pin those to the top of the list so that they don't don't move around when we start opening other files for example if I want to pin marketing campaign planning project I can click on the pin icon and that's going to move it up to this pinned area just here and that's going to stay there until I choose to unpin this item and I can simply do that by
clicking on the drawing pin once again and it's going to remove it from that little area now the final thing to mention about these ribbons running across the top is that you can minimize or collapse up the ribbon and give yourself a little bit more room on the screen now the way that you do that is if you just rightclick your Mouse anywhere on the ribbon you can see in the contextual menu we have an option to collapse up the ribbon if I click on this it's going to collapse that up I can just see
those tab headings but I can't actually see the commands and it just gives me a little bit more room to work with now what happens when I want to actually access a command well I simply click on the tab and it's going to pull down tempor temporarily that ribbon when I click away again it's going to disappear if I want to bring it back permanently I just need to click on a tab right click and then uncheck collapse the ribbon so that's more of a detailed run through of the different ribbons that we have that
backstage area and what you can find in there and also how we can collapse up the ribbons something that I highly recommend that you do is customize the quick access toolbar and I mentioned the quick access toolbar in the last lesson it's this little toolbar that we can see running just above the timeline and underneath the ribbons now currently the toolbar isn't showing too much we have a few little icons on there and it's worth noting that when you're looking at your copy of project your quick access toolbar might not look exactly the same as
mine or you might not be able to see it at all so let me show you first of all how you can turn the quick access toolbar off or on now mine's currently on so I'm going to turn it off but the process is the same if you want to do the reverse so once again we just need to right click our Mouse anywhere on the ribbon and in the contextual menu you can see I have hide quick access toolbar now if you don't have yours displayed that's going to say show quick access toolbar so
if I click this notice that that toolbar now disappears if I rightclick again and click show it brings it back again so make sure that you're showing that quick access toolbar now what exactly is this quick access toolbar or qat as we refer to it well this is a customizable area where we can add commands that we use frequently to make them easy to find an action and you can see on here I have a few commands added already so I can create a new project from here I can save I can undo do and
I can redo so how do we customize this quick access toolbar and fill it full of commands that we use all the time well there are a couple of different ways that we can do this notice that right next to the quick access toolbar I have a little drop- down arrow when I hover over it says customize quick access toolbar and that's going to open up a menu which is going to allow me to add very quickly one of these 15 or so commands and you can see the ones that are currently on my quick
access toolbar already have a tick next to them so new save undo and redo so if I decide that I'm always print previewing my projects I could choose print preview and it's going to add that command to that quick access toolbar maybe I want to add email I could do that as well now notice in here we only have a few of the vast amount of commands that are available in project so what if we want to add a command to the qat that isn't in this list well well again there are a couple of
different ways that we can do this now the easiest way to add a command that you can see on one of the ribbons is simply to rightclick on it so maybe I'm always looking at the project information window so if I go across to the project tab where we have project information I'm going to right click and I'm going to say add to quick access toolbar that is the quickest way to add any command that you can see on your ribbons I'm going to right click on spelling I'm going to add that to the quick
access toolbar as well so really nice and straightforward and as you would imagine if I then decide that I want to remove something from this quick access toolbar I can rightclick on it and I have a remove from quick access toolbar option just here now it's worth noting that not every command in Project is available on a ribbon and some commands are available on contextual ribbons which means we don't actually see them until they're needed so what if I want to to add one of those commands that I can't currently see on the ribbons to
my quick access toolbar well this is where we need to click the dropdown again to go into customize and go to more commands now this is basically going to jump us across to our project options and you can see it's jumped us straight into the quick access toolbar area now what you can see in here if we start on the right hand side is I can see a preview of my quick access toolbar and I can see all the commands that I currently have on there so project information and spelling were the last two that
we added on the left hand side this is where I can see all of the commands that I can move to the quick access toolbar now they are grouped together so currently I'm only looking at popular commands if I want to see a list of all commands available in project I need to choose all commands from that dropdown and now I have all of the commands in here Unfortunately they are organized into alphabetical order to make them a little bit easier to find so we can then scroll through find exactly what we want so let's
go for something like I'm just going to go for arrange we can select it and then click the add button to move it across to the quick access toolbar so very very simple just to add things similarly if you want to remove something from the quick access toolbar you can select it and then click the remove button in the middle we can also organize our commands using the up and down arrows on the right hand side so maybe I decide that I want undo to be first in the list and redo next and the final
thing I always like to do here is I like to add some separators now separators are a very simple way just to add a little bit of structure into that quick access toolbar they allow us to visually separate commands of similar type at the top of every list in here you're going to find separator so I'm in all commands but if I was in popular commands right at the top of that list we have a separator as well so I'm going to add a couple of separators into here I'm just going to rearrange them so
let's move this one down to I think just about there so now when I click on okay take a look at how that quick access toolbar has updated so it's added the new commands and you can see that we have these faint lines those are the separate which just adds a little bit of structure in the final thing to point out here is that if you don't like or you find it difficult to identify these commands on the quick access toolbar simply by looking at the icon we can choose to have a label next to
the icon and this is a reasonably new feature in Project let's click the drop down right at the bottom here we have show command labels so if I click on this you can see it adds a piece of text next to each one making it a little little bit easier to know what that icon represents of course the downside is it does take up more room so you can't have quite as many items on your qat I'm going to switch mine back to the icons but that is pretty much all there is to know about
the very useful feature the quick access toolbar if you want to work efficiently in Microsoft Project then you're going to want to know a selection of keyboard shortcuts to help you move around your project plan quickly and the good news is if you are already a Microsoft user as in you are used to using applications like Excel PowerPoint or maybe even word many of the keyboard shortcuts that you already know and love in those applications are exactly the same in project so things like control C to copy crl V to paste crl X to cut
crl s to to save all of these are exactly the same now of course there are some differences and some that are very specific to project only and in general what you'll find is that you'll probably have 10 to 15 keyboard shortcuts memorized and you will use them all the time I'm a huge fan of keyboard shortcuts because I find they really do speed up the way that I work so where can you go to see a full list of all the keyboard shortcuts available in Project well the easiest way is to go into the
help files so we're going to go in there from The Tell Me box and I mentioned this keyboard shortcut earlier we're going to press alt Q which is going to jump our cursor up to the top there so if we type in keyboard shortcuts and hover over the arrow I want the second one keyboard shortcuts for project so this is going to open that help file and then as we scroll down the shortcuts are divided into different groups so if we jump into frequently used shortcuts we can see a big long list of all all
the different shortcuts to execute specific tasks in project and as I said you'll notice that some of these are exactly the same so saving a project file crl s creating a new project file crln that's the same as if you wanted to create a new word document in Word so have a little look through these maybe jot down a few that are going to be most useful to you and then after a while you'll find that you get these memorized now another way to find out if a command on the ribbon has a keyboard shortcut
assigned to it because not all commands do is to Simply hover your mouse over the command now notice here I'm hovered over bold on that ribbon and I can see the keyboard shortcut in Brackets in that screen tip that comes up contrl B if I hover over underline contrl U is the keyboard shortcut if I hover over copy contrl C is the keyboard shortcut and if I hover over for example in ECT it's not showing me the keyboard shortcut so does that mean that it doesn't have one well not necessarily because something else we also
have which I know a lot of people love to work with are what we call keytips now we can access our keytips by pressing the ALT key on our keyboard now as soon as I do that check out what's happened to my ribbon this is a great way to be able to navigate and select commands entirely using your keyboard so maybe I want to switch The View I can go across to the view ribbon by pressing w i then jump across to that ribbon and get a whole new set of keyboard shortcuts so let's say
I want to look at task usage I'm going to press K that's going to drop down the menu I want the first one so I need to select K again and now it's switching me across to that particular view take a look at the bottom I can see my task usage pan and I did that using entirely keyboard shortcuts so that ALT key is really useful so if you recall I mentioned that some of these commands when you hover over them don't have a keyboard shortcut showing but if we press the ALT key and make
sure that we're on the task tab press h notice that inspect actually does I could use NS and that is effectively a shortcut for this inspect command and if you want to turn these keytips off simply press the ALT key again to get rid of them when we're working in Project we have lots of different built-in views that we can display in different pains and the initial view or the default view that will load up when you first start using project is called Gant with timeline and you can see that reflected in the current project
at the top we have this timeline view giving us an overview and then underneath we have the Gant chart which shows us all of our individual tasks our task information and then a visual rep representation of those tasks now if we jump up to the view tab up here we have a split view group so this is where I can control whether or not I see that timeline view at the top so if I decide that I'm not interested in this at this stage I can simply deselect timeline and that's going to disappear put the
check back and it brings it back again something else I can do from here is I can turn on the details view and what this is going to do is it's going to split the screen and it's going to add task form View at the bottom and this task form basically gives me more information about whatever task I'm currently clicked on in my project plan so if I was to select this second task just here I can see a little bit more information about this specific task So currently I don't have any resources assigned to
this task so that is why this area is blank but I can see the duration is 2 days it's effort driven I can see the start and finish date I can see that it's fixed units and I can also see a list of any predecessors down here as well so that details pane can be pretty useful for viewing more detailed information now I'm going to turn this off and I'm going to switch my timeline back on again now let's jump back to the task tab because you can see that we have a View group just
here now if I click the dropdown this is where we can choose what we're displaying in our primary window So currently you can see that I'm displaying the gantar but I've also got a big long list of some of the most popular views that I might want to switch to for example I could switch across to the task usage View and I'm now seeing that in the primary window as opposed to the Gant chart now notice at the side here we have task usage and timeline now the one that's highlighted in green is basically where
you're currently clicked so for me that is Task usage if I was to click up in the timeline that title is going to turn to screen so just be aware that you can very simply switch between your views from this Gant chart dropdown the difference between this and jumping across to the view tab is on The View tab we just have a bit more detail about the different views that we can select and it's split down into views related to tasks and Views related to resources now the final way that we can switch views in
Project is by using the status bar and again this is very similar to other Microsoft applications if you cast your ey down to the bottom right hand corner you can see that we have our different views down here so I can switch into Gant chart view which is basically what I'm currently on I can switch across to task usage view which is what we were just looking at I can go to Team planner which is a slightly different way of viewing my project and then I also have a resource sheet so if I have any
resources I'm going to be able to see them in there and then finally I have a blank report view as well so as always with micros moft there are numerous different ways of switching views we're going to be working predominantly in the default view which is Gant chart and timeline so as you leave this lesson ensure that your project is set up in this way another piece of terminology that you need to get used to when you're working in Project is the concept of tables and a table is a little bit like a spreadsheet in
Excel for example currently I have the entry table loaded up on the screen and this is just what you can see over here a table in general is made up of columns and also rows so in this particular entry table you can see the columns that we have a task mode task name duration and then if I was to drag this out we have a lot more lurking underneath there and then we have rows that contain our task information and this has the look and feel as I said of an Excel spreadsheet now the entry
table is the main table you're going to use to enter information about each task but there are other tables that we can load up in order to see other pieces of information and also edit them directly from the table as well so if we jump up to the view tab at the top in the data group we have a table Dro down just here and you can see that currently the entry table is selected that's the one we're currently looking at but I have other tables that I can select depending on what I'm interested in
seeing at any given time so maybe I want to load up the summary table I can simply select it and it gives me an overview of the main touch points of this particular project or maybe I'm interested in the costs that are assigned to this project I could load up the cost table now we don't have any costs in this project as yet but we can see our fixed costs our total cost our Baseline the variance all things like that let's go back up to tables because we also have a more tables option right at
the bottom and this is going to open up this little window which is going to show us all of the tables that we can load up into our primary window so if you can't find what you're looking for in that tables drop down jump into more tables and you should be able to find it in here so maybe I'm interested in looking at the workt let's apply and this is going to show me information about the work hours the Baseline work hours if I've set that the variant the actual so on and so forth now
another way that you can quickly switch between tables is to hover your mouse over this little square in the corner so just above where we have row zero and to the left of where it says task name if we right click in this little area this is a quick way of switching between the most popular types of tables so I'm going to switch back to entry but that's pretty much all you need to know about tables at this stage just know that there are lots of different tables that you can load up in order to
view different types of information in exercise 2 we're going to practice some of the skills that we've learned so far in this section so the first thing I'd like you to do is just open up project and then open a new blank project I'd like you to review the ribbons and familiarize yourself with where the commands are located on each ribbon I'd then like you to practice moving between ribbons and selecting commands s using keyboard shortcuts once you feel comfortable with all that let's add some commands to our quick access toolbar so I don't mind
which ones you add I've just given you some examples here of adding the format painter the 100% complete button and copy and finally I just like you to have a little play around and switch between views and tables so that when we do that throughout the course you know exactly where you need to go so a few things to do there if you'd like to see my answer then please keep watching so the first thing I asked you to do in this exercise is open a new blank project so I'm back at the start screen
I'm in the new section we have blank project at the top doubleclick to select the next thing I asked you to do was just familiarize yourself with the different ribbons so take a good look through some of these ribbons and review some of the commands that we have on these ribbons remember if we hover our Mouse over any of these we get that little SCP it pop up which gives us more of an idea as to what this does so I just wanted you to sort of have a little look through start to get familiar
with the layout of project the next thing I asked you to do was to practice navigating quickly and opening up commands using keyboard shortcuts so remember we can press our ALT key which pulls up those little letters so for example I could go to the view tab by pressing W I could go to the Gant chart by pressing G and then I could switch to the tracking Gan by pressing n so make sure you're familiar with those ALT key shortcuts the next thing I asked you to do was to practice adding some commands to the
quick access toolbar now I already have quite a few on here and I didn't really mind which commands you added but I did give you some examples and one of those was the format painter so we can simply find it here in the clipboard group right click add to quick access toolbar another one was the 100% complete button which is just here in the schedule group rightclick add to quick access toolbar and the final thing I asked you to practice was simply switching between different views and tables so on the task ribbon we can click
the drop down underneath Gant chart and we can switch to different views from here so I can switch to the resource sheet I can switch to Resource usage so on and so forth and if I want to switch between tables I can click on The View tab click the tables drop down the default is the entry table but I can switch to any of these so I can go to the worktable the summary table so on and so forth so just make sure you're familiar with all of these different controls there's lots of options and
settings that we can change in Microsoft Project to get our copy of project working in a way that best suits us and really the options that you set are very much personal preference but there are a few that I would recommend that you either toggle on or toggle off before you get going so let's run through those and I'll show you my recommendations now to get to your project options we need to jump up to the file tab which is going to take us into that backstage area and we're going straight down to the bottom
let's open up options now project options is a huge area we have so many different things that we can change in here you can see we have these different categories running down the left hand side so let's let be logical and start at the top with the general tab I'm just going to draw your attention to some that I'd like you to check and possibly think about changing now notice here in the second section we have project View and it's telling me that the default view here is Gant with timeline and that's exactly what you
can see behind here we have the timeline at the top and the ganta underneath and in general this is the view that I would recommend you start working with there are other options in here but if you have it set to something else make sure that at least for the duration of this course you have it set to Gant with timeline we can also choose our date format from here as well now this will differ depending on where you are in the world as you can probably tell I'm in the UK and the UK has
a different date format too somewhere like the US now I have my copy of project set to us St format and you can see all of those listed down here and in general I like my dates to show in project in a very concise way so instead of this date format I'm actually going to change mine to something a little bit more concise I'm going to put it to that let's now jump across to the schedule page and take a look at what we have in here now at the top here where we have calendar
options for this project this is basically the time scale that our project is going to take on so the week starts on Monday the fiscal year starts in January and a working day is essentially 8 till 5:00 p.m. 8 hours per day 40 hours per week and 20 days per month now we're going to talk a lot more about calendars a bit later on but this is your standard calendar that project uses by default of course we can set up our own calendars and modify this default calendar so that it more accurately reflects the working
hours of our company because not everybody works Monday to Friday 8: till 5:00 p.m. for the time being we're going to leave these default calendar settings alone if we scroll down to scheduling options for this project you can see where it says new task created are Autos scheduled and there are two options in here you can have manually scheduled tasks and Autos scheduled tasks so I'd like you to make sure that you have this set to Autos schedule what that means is that project will use its own scheduling engine to calculate when the task should
occur and in general it's a lot less work for you than manually scheduling your tasks now a little bit further down we have this little check box new tasks are effort driven now I'm going to put a check in this box because what this means is that the total work or effort Remains the Same when you modify resource assignments for example if we assign two people to a task that task duration decreases because the work is split between two people and usually that's what you want it to do so make sure you have a little
tick in that box and I also want you to make sure that where it says autolink inserted or mve tasks make sure that you don't have a tick in this box because in my experience having this ticked can end up pretty messy so make sure you untick that now let's jump across to the save page and check out our save options now right at the top here this is where we can specify where our project files saved so I'm going to change the location let's go to browse and I want mine saved in my course
files folder let's click on okay and the good thing about this is that every time I now go to save a project file it's automatically going to jump me straight to this folder because it's the default file location another thing you might want to check here is autosave so how often would you like your project file to autosave now currently I have mine set to 5 minutes and that's a little bit too short so I think I'm going to change this to 20 minutes and I want it to save the active project only now another
setting that I like to have turned on is prompt before saving and what that means is that every 20 minutes I'm going to get a prompt pop up on my screen asking me if I'd like to save my project file now the reason why I like to have a prompt is that sometimes if I'm just messing around with a project file if I'm not prompted to save it means it's just going to save it automatically and it might be that I'm doing something that I don't particularly want to save to the file so I like
to have a little prompt and I can choose myself if I want to save or if I don't again this is very much personal preference but now I've set it to 20 minutes you might see it pop up occasionally as we're working through this course let's jump across to the advanced page and in this General section I'm also going to turn on this option prompt for project info for new projects so when we create a new project it's automatically going to open up the project information window so that I can enter in some useful information
about my project and this is something in general that I would do at the start anyway when I create a new project so I might might as well have it automatically prompt me to do that so let's put a tick in there and finally let's jump across to the trust Center and we're going to go into our trust Center settings now I'm going to choose Legacy formats just here because this allows me to Define how project deals with files that have been created in older versions of project because what you might find is that if
you are trying to open a file that was created in a much older version of project project professional simply will not open it and sometimes you're not really sure why so I'm going to say prompt when loading files with Legacy or non default file format so that I get a message letting me know that this file was created in an older version let's click on okay and okay again to save those settings so those are some of the settings that I recommend you change before you start working with project in this lesson we're going to
explore the basics of creating saving and closing a project file and up until this point we've been working with just a very basic file that I've created from a template in Project now the first thing I'm going to do here is I'm going to close this file down so a couple of points about closing project files there are a few different ways that you can do this we can jump across to the file Tab and we have a close option in here we could also use the keyboard shortcut control W notice that it's prompting me
to save my changes so I'm going to say yes I do want to save those changes and it's now closed down that file a mistake that a lot of people often make is they immediately go up to the top right hand corner of the screen and click on the cross in the corner now the difference here is that if you click on that cross it's going to close down all of project so you're going to need to restart the application again in order to open another file so if you just want to close down the
file but leave project open go to file and close or use the keyboard shortcut control W so now we've closed that file it's jumped us directly to the back stage area and to the new section so this is where we can come to create a new project file and you can see we have lots and lots of different templates sometimes it's quite good to start from a template because it means you're not having to start completely from scratch and you can see that we have lots of templates in here organized by category that we can
have a little search through so maybe I just want a simple project plan I could select this template from here click on Create and it's going to load that up into the main window and these are great because we can just go in and edit the tasks but we already have the bare bones of a project plan in place so they're a great starting block if you're new to project and even if you're not new to project they can be invaluable now we're not going to work from a template in this case so control W
to close down and this time I'm not going to save the changes because what we want to do is we want want to create a blank project so you can see the first option we have here the first thumbnail is blank project or we can use the keyboard shortcut contrl n which is also going to create us a new blank project now notice what's happening here if you remember one of the options that we set in the last lesson was that as soon as we create a new project it's going to pop open the project
information window and that's exactly what it's doing just here so now I can Define the start date of my project the calendar I want to use where I want to start scheduling from all of that helpful stuff so I'm going to set my project start date to quite a way in the future so let's do it for the 1st of March next year now when you schedule a project start dat that's basically where any tasks you add are going to start from but also if you add tasks and you don't assign a date to them
which is something which happens frequently in Project sometimes you're not really sure when exactly a task is going to start right at the beginning of the project if you add a task with no start date it's going to give it the default of whatever we have for the start date of the project so in this case March the 1st 2023 now notice that the Finish dat is grade out and that's because project calculates the Finish date for us automatically based on the tasks in our schedule so the Finish day is constantly moving depending on the
duration of each task that's why we can't edit it from here another thing to note is that the calendar that this project is is going to use is the standard calendar and I briefly mentioned this again in the last lesson the standard calendar or the default calendar in Project is Monday to Friday 8: to 5:00 p.m. with an hour for lunch now there are a couple of other calendars in here there's a 24-hour calendar and there's also a night shift calendar but for now we're going to keep this on the standard calendar so that's all
the information I want to add about this project at this stage let's click on okay and the first thing I'm going to do is I'm going to save this project if you take a look up in the title bar you'll see that before you save it for the first time it's going to be given the very generic name of project one project 2 project 3 so on and so forth so let's save again we can go into file or we can press crl s and it's going to jump us across to the save as section
now if this is the first time that you're saving a file it doesn't matter if you choose save or save as it's going to take take you to save as because we need to give it a name now I'm going to go straight down to browse and notice what happens again this is another setting that we changed it takes me directly to my default project file location which for me was the course files folder so I'm just going to give this a name my first project and click on Save notice that the name has now
changed up in the title bar so now that we've saved this for the first time as we work through we can now just save normally so when we press contrl s it's just going to save all the changes that we've made now I'm quickly going to close this file again I'm going to use the keyboard shortcut control W and let's just briefly take a look at how we can reopen files let's go to the open page and if you cast your eyes over to the right hand side of the screen notice that the file that
we last accessed is at the top of the list and I'm going to click on the drawing pin to pin that to the top so all I really need to do here is double click to reopen and if we control W to close down again the other way that I could open the file is to go to browse and it's going to jump me back to that folder where I have all of my files saved I can simply select it click on open and it's going to open the file so really simple and straightforward to
create new project files save them and close and open a project I've mentioned calendars a few times already in this course so let's delve into this subject in a little bit more detail and I'll show you how you can set up your project calendar now as I've mentioned calendars in Project Define the working and non-working time for your project and the default calendar in Project is Monday to Friday 8: to 5:00 p.m. with 1 hour for lunch now not everybody works in this way for example some people might work part-time others might work at night
some might have certain days of the week off so we have the ability to create additional calendars in project so let's go up to the project Tab and in the Properties Group we want to go to change working time this is where we can come to take a look at our different calendars and Define the working hours for that calendar it's also where we can create new calendars from as well now notice at the top we have loaded up our standard project calendar this is the default we have a little Legend which tells us what
this shading means in this calendar so you can see here anything that's white is working time so that's Monday to Friday anything that's shaded in Gray is non-working time so in this calendar that is Saturday and Sunday and that's all we have in this particular standard calendar notice that if I click on a day in the calendar it shows me over on the right hand side that this particular day that I'm clicked on is a working day and these are the hours so 8:00 a.m. to 12:00 p.m. we then have a 1 hour break for
lunch and then the afternoon is 1:00 p.m. to 5:00 p.m. and then underneath we have a little exceptions table and a work weeks table now if we go back up to the top and click the drop down notice we have two other calendars in here so let's take a look at the night shift calendar so this is defined by different working time so you can see here every day is a working day apart from Sunday and if I click on one of the working days we can see the working times for this particular night shift
calendar so 12:00 a.m. to 3:00 a.m. then 4:00 a.m. to 8:00 a.m. 11:00 p.m. to 12: a.m. now if we take a look at the work weeks tab underneath this tab basically represents the days and times when people work now because this says default in here the default calendar applies to all dates so let's switch back to our standard project calendar because what we're going to do here is we're going to make some modifications so I'm going to make sure I've clicked on work weeks where we have default and let's click on details now I've
got Sunday selected currently and Sunday is a non-working day in this standard calendar but let's go to Monday you can see in here it's showing us the times that apply for this working day now maybe I decide that Monday to Friday the Working Day at my organization doesn't start until 9:00 a.m. so the morning is basically 9:00 a.m. to 12: we then have an hour for lunch and then the afternoon is 1:00 p.m. to 6:00 p.m. instead so I'm going to change these working times now A simple way to do this is I can select
all of the days that I want to change the times for simply by holding down my mouse button and dragging down so I've got Monday to Friday selected I'm going to say set days to these specific working times which allows me to edit these fields so I can simply come in here and I'm going to make the change so let's say we want this to be 9:00 a.m. to 6:00 p.m. and click on okay and you can now see that that's been reflected up here where it says working times for October the 5th 9:00 a.m.
to 12 1:00 p.m. to 6:00 p.m. and you'll find that is the same for all of the working days so very simple and straightforward to modify the standard calendar now it might be that some weeks we have different working hours so for example that kind of middle week between Christmas and New Year where a lot of people still work the company might decide that we have reduced hours because it's Christmas so if we want to add in a schedule that accommodates that we can simply add in another work week in this little area at the
bottom so we could give it a name let's say I'm just going to call it Christmas week I can choose when that's going to start so let's move across to December and it's going to be let's say this week just here it starts on the 26th and ends on the 30th I can then go into details and I can set up the hours for that particular week so again it's Monday to Friday I'm going to set the working hours and maybe everyone's doing a half day so let's say 12 to 6: p.m. and I can
just delete out what we have here click on okay and check out the calendar above it's now updated to reflect that change and notice in the calendar these are now highlighted in yellow and if we look at the legend it's telling me that this is a non default work week because it's a little bit of an anomaly and of course from here we can also create additional calendars so maybe I want to create a calendar for all the members of Staff who work part-time we have a create new calendar button in the top right hand
corner let's click it and I'm going to call this part-time calendar and in general I like to base the part-time calendar off of the standard calendar and simply modify it so I'm going to say make a copy of standard let's click on okay I want to save the changes I've made to the standard calendar and now I'm in the part-time calendar so I can now go through and Define the working times so let's go into details again I'm going to say that part-time workers they work Monday Wednesday and Friday and they do 900 a.m. to
12:00 p.m. and let's get rid of that underneath click on okay and now I have my parttime calendar which I can select from the four calendar drop-down at the top using project calendars we can Define exceptions for regular work weeks such as public holidays so in this lesson I'm going to show you how you can set those up so the first thing we're going to do is we're going to jump across to the project Tab and we're going to go back into change working time and we're going to add our exceptions to the standard project
calendar so let's make sure that we've got that selected at the top there which we have and at the bottom we want to make sure we're clicked on the exceptions tab now exceptions are primarily for nonworking time for example I might want to set up an exception for the first bank holiday in May next year now for those of you outside of the UK a bank holiday is basically just a public holiday and for us we have a bank holiday on the first of May it's our Spring Bank holiday so I'm going to set up
an exception in this calendar because it's non-w working time so let's first type in the name I'm going to double click so I can edit this cell and I'm going to say Spring Bank holiday now when I press the Tab Key it puts in some default start and finish dates but we're going to jump straight in here and we're going to change this so the Spring Bank holiday occurs on the 1st of May every year so let's select that and it's just one day so you can see the f time has automatically updated to reflect
a one-day holiday maybe I want to add in another exception so this time we're going to say that the office is being renovated so none of us are working now that probably wouldn't happen in a real world scenario we'd probably be asked to work from home but just for this example let's add in 5 days of nonworking time for office Renovations and this is going to occur in the summer so let's go and say that this is going to start on the 12th of June and it's going to end on the 16th of June so
we have a 5-day duration now because this is non-working time I don't really need to jump into details and specify anything else other than the name and the start and finish dates and you can see that when I click on exception number two office Renovations at the top here it says June the 12th 2023 is nonworking and if we now take a look in the little calendar preview for June just above you can see that those have been shaded out according inly in the calendar and if we look at the legend it's telling me that
this relates to exception days for this calendar so so far everything is working correctly now another thing you can add in are recurring exceptions for example maybe our team has a monthly all day meeting now technically these might be considered as working days but we're going to block them out in our calendar as nonworking days and this is a meeting that occurs every month so we want to make sure that we set this exception to recur month monthly so let's type in the name we're going to say monthly meeting now for this I don't necessarily
need to specify the start and finish dates just here if we jump into details to open up this pane this is where we can set our recurrence pattern and one thing to note here is that when you're adding in this type of recurring exception all of the recurrences need to be the same so we're going to set this to nonworking time and then we're going to choose our recurrence pattern so this is a monthly me meeting and I'm going to say that this meeting occurs on the first Monday of every month and then we need
to choose the range of recurrence so when is the first meeting going to be when's it going to start so I'm going to say that this first meeting is going to be towards the start of the project so our project begins on the 1st of March so let's say that the first meeting is going to be the Monday after the 6th of March and then we can choose a specific date that we want this to end by or we can choose to end end after a specific number of occurrences so I'm going to schedule this
for an entire year so I'm going to say end after 12 occurrences because it's a monthly meeting let's click on okay and now we should see this also shaded out in our calendar as an exception day so we're on June 2023 but remember I scheduled it for all of next year and the first Monday of the month the 5th of June is in fact shaded out if we go to May you can see yes it's there as well so one and so forth and now you can also see in the exceptions table at the bottom
the start and finish dates have now updated to reflect the information that we've added into details let's click on okay and we now have those exceptions added to our standard calendar in order for everything to work correctly in Project there's some information that project needs to know for example project needs to know how many work hours there are in a day day and a week along with how many days there are in a month so that it can convert durations between time units it also needs to know the default start and finish times for tasks
when they don't have dependencies to calculate them so let's just confirm what our calendar hours actually are first of all so we're going to go up to the project Tab and we're going to go into change working time now we're in the standard project calendar and you can see in the preview window underneath it's currently got today's date highlighted October the 4th 2022 and then we have our working times defined 9:00 a.m. to 12: p.m. we have a 1H hour break for lunch and then we work 1:00 p.m. to 6:00 p.m. so this works out
to an 8 hour day which is 40 hours a week so these are the working times that we've defined for our standard project calendar and if you recall we did make a slight amendment to these earlier on in this course so now that we have just reviewed our actual working times let's click on okay and we're going to jump into project options so let's go up to the file tab all the way down into options and we're going to go to the schedule tab now we did briefly look in here a bit earlier on because
at the top here this is where we can Define our calendar options for this project so what we're basically trying to do here is we want to make sure that our calendar options in here match our actual project calendar now notice here default start time is 8:00 a.m. now note at the top here default start time and default end time are currently set to 8 till 5: so we need to change this because our project calendar is 9 to 6 so we're going to reselect 9:00 a.m. and we're going to finish at where are we
all the way down here 6:00 p.m. and this still works out at a standard 8 hours per day 40 hours per week and 20 days days per month if you're wondering how it calculates this 20 days per month project basically says there's roughly four weeks in a month and there are five working days per week so 4 * 5 is effectively 20 days per month now the final thing you want to check in here is right at the top where it says calendar options for this project and we have the project that we've got open
right now listed now if we click the drop down we want to make sure we change this to all new projects because if we leave it on just the project that we have open these timings are only going to be used for that particular project and I want to use these timings for all new projects that I create so let's make sure we select all new projects and click on okay so now our project options are synchronized with what we have defined in our project calendar in this exercise we're going to practice some of the
skills that we've learned in this section of the course so I'd like you first to open the file new product launch. MPP from the exercise files folder once you've got that file open I'd like you to go in and change the working time of the standard calendar to 9:00 a.m. to 1: p.m. and 2: p.m. to 6:00 p.m. I'd then like you to add another calendar a part-time calendar for staff that work Monday to Friday 9:00 a.m. to 1:00 p.m. I'd like you to sync the project calendar options with the project calendar and once you've
done all of that I'd like you to close the project file so a few different things to do there if you'd like to see my answer then please keep watching so the first part of this task was to open the file new product launch. MPP from the exercise files folder so this is that file you can see it's already populated with tasks durations start and finish dates now the next part of the task was to change the working time so for this we need to go to the project Tab and in the Properties Group Change
working time now I asked you to change the working time for the calendar standard project calendar which is the one that we currently have selected and if I click on one of the working days so Monday to Friday you can see that the current working times are 8:00 a.m. to 12:00 p.m. and 1:00 p.m. to 5 p.m. so let's go across to work weeks and click on the details button and from here we can Define our working times so I'm going to select Monday to Friday and we do that by holding down the shift key
and I'm going to say set days to these specific times and then we're going to modify this 9:00 a.m. to 1 p.m. and 2: p.m. to 6:00 p.m. and click on okay so now all of our working days should be set to those times I then asked you to create a new new calendar for part-time workers so let's click on create new calendar I'm going to call this half time and I'm going to make a copy of the standard calendar to do this I'm going to say yes I want to save changes to the standard
calendar and now I can Define my working hours so once again I'm going to select a working day let's click on the details button but this time we're going to select Monday to Friday we're going to set to these specific working times but the smart time people only work 9 to 1 so let's add that in and we can delete out the other times click on okay and now we can switch between these two calendars we have our standard project calendar with our new times and then we have our halftime calendar where we have 9:00
a.m. to 1: p.m. the next thing I asked you to do was to synchronize your times with the actual project options calendar so for this we can jump straight into options by clicking the options button at the bottom we're going to say that our week starts on a Monday and I want to Define my default start and end times so we want these to match the times we've just set so 900 a.m. and the default end time is 6:00 p.m. and click on okay let's click okay again I'm going to give my file a quick
save and then we're going to close it's time now to talk about something that is really important in project and that is the difference between automatic and manually scheduled tasks now before we get into the details we need to make a quick change in Project options and as I've just been talking you can see the project has popped up a prompt for me to save this project if you recall in a previous lesson I also set this in options as well so I'm going to say yes I do want to save and let's jump into
ad project options now if we go to the schedule page I want to draw your attention to this little section down here scheduling options for this project now notice it says any new tasks that are created are going to be manually scheduled and this applies to this project only so just this file that I have open and if you take a look just behind this window in the status bar you can see right at the bottom it says new tasks m manually scheduled now I want to change this so that every task I schedule is
Autos scheduled across all of the projects that I create so I'm going to go in and I'm going to change this because what I want to happen here is that for all new projects I want them to be Autos scheduled by default so I'm going to change it in my options click on okay and it's not going to switch this project to automatically schedule new task by default I need to manually change that at the bottom so where we have new task manually scheduled I'm going to click just here and make sure that I have
Autos scheduled selected going forward if I create new projects it's going to default to Autos scheduled now what is the difference between manually scheduled tasks and Autos schedule tasks well let's start out with Autos scheduled tasks first of all Autos scheduled tasks mean that project is automatically going to calculate task dates and durations which is extremely helpful particularly for large complex projects with manually scheduled tasks we're in control of the task dates and durations so let's take a deeper dive into this because it's a really important concept to get your head around so let's start
with Autos scheduled if we take a look at the project plan that I have open notice that the second column here is called task mode so this is where we have our indicator as to whether a particular task is manually or automatically scheduled and you can see here that for all of these tasks in this project plan I have this icon and this icon tells me that this particular task is automatically scheduled that is the task mode so let's pick a task in this list I'm going to go for task number 12 just here you
can see that the duration of this task is 3 days the start date is October the 7th and the Finish date is October the 11th so when I added this task in and I set the duration to 3 days and I also set the start date project or automatically calculated what that finish date is going to be based on the duration and the start date and of course it's going to take into account things like weekends and nonworking days so project effectively defines for me when this task is going to finish now the benefits of
automatically scheduled tasks really present themselves when we're looking at linked tasks so for example we're still looking at task 12 and if we take a look at the bars on the right hand side we can see this blue bar here represents the length of this particular task but notice at the end we have an arrow because it's linked to task number 13 so task number 12 needs to finish before task number 13 can begin so what happens if I was to change the duration of one of these tasks so I'm going to go to task
number 12 and instead of 3 days let's change this to 7 days now notice what happens the start and finish times update and again if we take a look at the bar that's also updated it's now longer than it was and task number 13 which relies on task number 12 completing has also had its start and finish dates adjusted because of the change that we've made so this is why automatically scheduling tasks is my preferred option because it means that I don't then have to go in and start moving around task number 13 to reflect
the new start and finish time now manually scheduled tasks are basically do-it-yourself scheduling we set the dates and the durations so just to show you how this works let's add a brand new task into our schedule so I'm going to click task number 15 and I'm going to insert a new task above this task now there are a few different ways you can insert tasks I'm going to rightclick and then from the contextual menu I'm going to choose insert task so now we have this new task up here notice that it's by default on the
same indentation level as the ones above and we're going to talk more about that in a later lesson and it's automatically inserted it as an automatically scheduled task take a look at the icon in the task mode column now I'm going to change this to a manually scheduled task so to change individual tasks we don't want to change them all we can click in the task mode click the drop-down and switch it from Auto to manually scheduled now notice the different icon that we get just there we get this little drawing pin or push pin
icon so that is how you can tell which tasks are manually scheduled and which ones are automatically scheduled also notice in the duration we have one day question mark and that's because we haven't defined start and finish dates for this task as yet so project doesn't really know so it's put in the default of one day and it's presenting a question mark because there's unknown information so let's rename this task I'm going to call this I'm going to say finalize market research results press the Tab Key and I'm going to set a duration so I'm
going to set this to 2 days now notice the start date just here it's showing as September the 30th 2022 and that is in fact the start date of this project so when we don't Define a start date for a task the default is to start based on that project start date now also notice what's going on with the bar over here notice that the bar is showing in this teal color now maybe at this stage I'm not sure about the start date for this particular task so what I could do in here is add
in some placeholder text as opposed to having start and finish dates so in the Finish field I'm going to click and I'm going to say confirm with team now notice that it's been shaded out the bar is now also a lot shorter because we don't have a finish date we only have a start date and check out what's happened to the icon in the task mode column we now have a question mark in there because the Finish date is effectively unknown at this stage and this is a really good reminder for me when I'm looking
through my project plan I can see these highlighted areas these placeholders so that I know that I have some action to take I need to confirm the market research results with the manager and together we can work out how long this task might possibly take once we have that information we can just go back into the schedule and add it in so I'm going to say that that it's been confirmed with the manager that this task needs to start on October the 20th 2022 the duration is 2 days so the Finish date is going to
be December the 21st notice the bar now has these dark green caps on either end so that just means that we have a defined start and finish date for this manually scheduled task also notice that the question mark has disappeared from the push pin icon because we've entered in the duration the start and the Finish date so now that we've established the difference between Autos scheduled and manually scheduled tasks let's create an Autos scheduled task so you can see how this works so to add a task into the entry table it's a simple case of
clicking in the first row in the task name column and typing the task name so my first task is conduct course research if I press the tab key it's going to take me across to the duration field and notice again by default it's put in start and finish dates based off of the start date of this project also notice in the task mode column this is an automatically scheduled task so all we need to do here is basically fill in the duration and project is going to take care of everything else so let's say that
course research is going to take me 10 days now I can use these little up and down arrows to scroll through the number of days alternatively I can click in the cell and I can simply type in 10 Now the default is days so I don't need to specify anything other than 10 on a side note if you wanted to maybe use weeks instead what you could do here is Type in let's say one W and that's going to give you one week now I'm going to switch this back to 10 days now if I
just put in 10 because I just changed it to weeks it's it's going to give me 10 weeks instead so now I do need to add something in other than 10 I need to add D after it so project knows its days and not weeks and now based off of this duration and my start date project has automatically calculated what that finish date is going to be for this specific task and we can see the bar updated in at timeline on the right hand side so really nice and straightforward let's add in another task and
we're going to say that this task is going to take 3 days now once again check out the bar because I haven't specified a start date it's starting at the same time as conduct course research which is based off the start dat of the entire project now maybe I can't draft the course outline until I've conducted the course research so I really want this task to begin when the one before it finishes so I'm going to change the start date just here to the let's say the 16th of March now check this out I'm getting
the planning wizard pop up now the planning wizard is an option that you can turn off or on but by default this is turned on so it's telling me you entered a start date for draft course outline that is close to the Finish date of conduct course research so he's asking me if I'd like to link these so the draft course outline will always follow conduct course research or I just want to move the start date of this task without adding a link to the previous task now in this case I do want to link
these together because conduct course research is effectively a predecessor of of draft course outline now we are kind of getting a bit ahead of ourselves here because we haven't really discussed predecessors but for the time being just to really illustrate the benefits of Autos scheduling tasks I'm going to say that I want to link them now as soon as I click on okay check out what happens to task number two it's now moved to its new start date and it's linked to the previous task so what we're basically saying here is that task number one
conduct course research needs to end before I can draft the course outline also notice in the entry table just here we have a predecessors column and we have a number one next to task number two so this is telling me that task number one is a predecessor of task number two so basic basically when you automatically schedule tasks and particularly when you're linking them together the Finish date of this first task really controls the other task so now we understand how an automatically scheduled task Works let's turn our attention to manually scheduled tasks and to
really illustrate the difference I'm going to add one more automatically scheduled task into the schedule so let's click in task name and add a third task so send outline to training manager for review is Task number three once again notice the duration is set to one day with a question mark so that means currently this is estimated the start and finish dates are set to the start dat of the project simply because we haven't linked this task to any predecessors so for example I kind of want all of these tasks to start after each other
so I can't send the outline to the training manager for review until I've dro Ed the course outline so effectively task number two is a predecessor of task number three so what I could do here to get all of my dates to update and reflect accurately is go to the predecessors column click the drop- down and select task number two as the predecessor notice on the timeline it automatically links those tasks together and it moves task number three into the correct position because it starts directly after the task before it I still need to add
the duration so I need to come in here and I'm going to say that this is going to take one day so my automatic tasks start and finish date has basically been determined by its predecessor and whatever duration I've entered now what about if this task doesn't have a predecessor so if I remove the predecessor from this box by selecting it and pressing the delete key notice what happens to this task it moves back to the start date of the project and if I try and change the start date to let's say the 21st of
March I'm going to get this little error message just here and this is where we start to get into things like constraints now I'm not going to get into that at this moment in time I just really want to illustrate the difference between manual and automatic tasks so when we have a task set to automatic and the start date isn't defined by a predecessor if we try and go in and manually change that start date we're going to get all kinds of error messages and constraints pop up so this is where we would want to
use a manually scheduled task Instead This is going to allow us to go in we don't necessarily have to have a predecessor we can just select the exact dates that we want from the calendar drop down so I want this to start on the 21st which it does the duration is one day so it's going to end on the 21st as well and if we take a look in the schedule you can see that manually schedule tasks show in a teal color we have darker caps on the end and the beginning to show we have
start and finish times in there that are fixed and also notice we have this little push pin icon in the task mode drop down so automatic tasks are great for tasks that are linked together because it will automatically work out the start and finish times but in some cases that can be a little bit restrictive and you might find switching it to a manually scheduled task a little bit easier to work with another type of tasks we can add into our project plan are Milestone tasks and Milestones really show key points in a project they
might be there to show progress completed deliverables or decisions or triggers and Milestone tasks don't have any duration so we can add as many as we need into our project so let's add a couple in because these are very simple and straightforward now notice that I've made a couple of changes to this project since the last lesson I've added in a few more tasks and the majority of these have predecessors and are automatically scheduled tasks the final one at the bottom where we finalize the course outline you can see I have a little note in
there it's a manually scheduled task and I don't really know the duration or the Finish dates yet because I'm waiting on approval from the training manager so I'm going to add in a milestone task for when this course outline line is approved by the training manager so I'm going to select task number six and another little side note here when you're selecting tasks click on the task number all the way over on the left hand side that's going to select the whole task as opposed to the individual Fields if you were to click in any
of these so we're going to click on task number six let's go up to the task Tab and all the way over in the insert group we have a milestone option so let's click to add a milestone task now notice that's inserted above where I was clicked and we just have the default text of new Milestone now notice that the duration is zero days as I said Milestone tasks don't have any duration so it's always going to default to zero days and now we can rename this Milestone so I'm going to click in the field
and this is going to be outline approved now this Milestone task relies on task number five the task before being completed so let's add in a predecessor once again we can click the drop down and I'm going to choose task number five click on okay and now check out the timeline Milestones are represented with this little Diamond icon so let's zoom in so you can see that a little bit clearer we scroll across we have a little Diamond icon there and it's showing me the date of this key milestone and this Milestone task doesn't change
at all unless you manually move it and Milestone tasks don't increase the project duration in any way or reflect on the work or resource time so now that I have that Milestone I can update the information for task number seven so the duration is going to be one day but I now know the date that this task can start so we're going to change this to the day after the outline has been approved so that is going going to be March the 25th but check it out the 25th is a Saturday so we want to
set this to the next working day which is going to be the 27th and if we take a look at the Timeline we can see that change has now been reflected and it's also worth noting that you can create predecessors for Milestone tasks as well so I'm going to make the Milestone task a predecessor of finalized course outline so if we click the drop down there it is Task number six outline approved let's click and that's now updated in the schedule summary tasks help us organize our project and they also give our project structure summary
tasks can represent different phases of a project or even different groups of tasks and by Design when we create a summary task we can have subtasks of that overall summary task so let's start out in this example by inserting some new summary tasks for existing tasks in our project so I've added a few more tasks in here I've set the duration start and finish times and if they have predecessors you'll also see that we have a bit of a mixture of automatically scheduled and manually scheduled tasks so if I take a look at the different
tasks that I have in this project I might want to divide these up into more manageable sections as I said creating summary tasks allows us to focus on just what we're interested in at any given time and it also makes our project easier to read easier to understand and it gives it structure so we're going to split this project up into a few different sections so what I'm going to do first here is I'm going to select all of the tasks that belong to the first section and our first section is going to be called
preparation phase so let's hover our Mouse over where we have task one until we can see that little black Arrow I'm going to click and then I'm going to drag down to select all of the tasks that belong to this first phase so that is basically going to be tasks 1 to 7 let's go up to the task Tab and then in the insert group we have a summary option and this is going to allow us to insert a summary task now check out what's happened to our table just here we now have new summary
task at the top and the other tasks are now effectively subtasks of this summary task so let's give our summary task a name we can click in the field and this is going to be called preparation phase you don't have to put it in caps that's just how I've chosen to lay these summary tasks out now notice that as soon as I do that I get this little black triangle next to the summary task so this is a collapsible and expandable group now I can click on the little arrow and it's going to collapse up
all of the subtasks click again and it's going to expand them all out also notice with this summary task if we check out the timeline summary tasks are represented by a black bar now the duration of the summary task is very much defined by the durations of the subtask below it so the summary task is basically going to show us the duration when we add up all of these subtasks below and the start and finish dates for the summary task again is going to be determined by the subtask below so the start date that you
see up here for this summary task is going to be the start date of the earliest task in this group and the Finish date is going to be the Finish date of the latest task in this group so we don't really have to go in and edit anything for summary tasks because it's all determined by the subtasks below and the reason why these summary tasks are quite nice is because at a glance you you can see exactly how long this preparation phase is going to take I can see it's going to take 18 days I
can see we're starting on March the 1st and the preparation phase is going to come to an end on March the 27th so it gives you a really nice high level overview let's add in some more summary tasks so this time I'm going to select tasks nine to task 17 let's click on summary once again this is going to be the recording phase and this time you can see the duration for this entire phase is 69 days and we can see the start and end dates and check out how that reflects in the timeline let's
select tasks 19 to 24 click on summary this is the documentation phase and then finally we have the go live phase so all of the subtasks are indented under their relevant summary tasks and we can collapse up any that we're not interested in which helps us remove the noise and really just focus in on the tasks that of interest to us now notice that when we've added in these summary tasks by default they are automatically scheduled summary tasks but we can also have manually scheduled summary tasks as well and manually scheduled summary tasks are sometimes
quite good for showing this if we have enough time to get subtasks done so I'm going to add in another summary task and this is really just for demonstration purposes I'm going to delete it straight away afterwards but let's say I want to insert another summary task just here so I'm going to highlight task 15 let's go up to summary and I'm just going to add in here editing phase and I'm going to switch this to a manually scheduled summary task now currently the editing phase summary task only has one subtask which is make video
amendments and the make video Amendment M task ends on June the 29th so the summary task above reflects that as well now check out what happens if I go into this summary task and modify the duration I'm going to take this down to two days now notice what happens here I've got a red squiggly line underneath the finish and if we check out the timeline notice that it's showing in red and that's basically telling me that the summary task is set to end before its subtask in this case completes and this is probably something that
I'm going to need to look at now this doesn't generally tend to happen with automatically scheduled tasks but sometimes when you're working with manually scheduled summary tasks this problem might pop up so it's good to know what it means and how to fix it so now I can see that this is in red I can see okay I've set 2 days for the editing phase but we only have one subtask here and that is 4 days long so it's going to finish after the end of the summary task now I'm just going to take this
back up to four which is an easy fix as soon as I do that you can see that it changes back to how it was previously a teal bar with the summary task showing just above so in the last lesson we saw how we can add a bit of structure into our project by adding summary and subtasks and I just want to focus a little bit more on that at the beginning of this lesson and then I'm going to show you how you can import tasks from other Microsoft applications now when we look at our
tasks in our task entry view we can see that the summary tasks are currently showing in bold with these little triangles next to them and then all of the subtasks of these summary tasks are slightly indented from the left hand side now this is effectively a first level indent and if we click on the little triangle as we've seen that's going going to collapse up that particular group of tasks click again to expand them out now it is worth noting that we can have subtasks of subtasks for example if I wanted to make let's say
task number three draft course outline a subtask of of conduct course research task number two I can simply select task number three and then up on the task ribbon in the schedule group I have this little button here that will allow me to indent that task notice that the one next to it will outdent the task so it's going to do the opposite so if I click indent task notice what happens in the Grid it's now indented task number three and made it a subtask of task number two and in turn because task number two
is now effectively a summary task even though it's not a top level summary task it's highlighted in bold and again we have the same collapsible and expandable menu so if I coll collapse this up it's just going to collapse up that one subtask click again to expand it out now if I want to do the reverse of that this can sometimes throw people off a little bit because most people think okay well I'm going to select task number two and I'm going to use the outdent button now if we do that we get something a
little bit strange outting makes task number two a top level task and it removes the top level task from preparation phase now I'm going to control Zed just to undo that because effectively what we want to do here is Select task number three and then click on the outdent button and that's going to put everything back to how it was previously so don't forget about these two little buttons up here to indent and outdent your different tasks another thing that's worth noting is that if we jump up to the Gant chart format ribbon remember this
is one of those contextual ribbons that you only see when you need it and because we're working in Gant chart view that's why I can see this ribbon now all the way over on the right hand side we have a little show hide group here which is going to allow us to view as sub our summary and subtasks in different ways So currently you can see that I'm showing summary tasks if I was to Des select this it's going to remove those and I just get a big long list of all of the tasks in
my project click again to add those back in now something else I can add is a project summary task now when I click on this check out what happened we now get a new task at the top and this is always task number zero and this project summary task shows us information for the entire project so I always like to have this in my project so I've got a good at a glance overview of the exact duration and the start and finish dates of the entire project the task name is always going to be the
name of the project plan that you're working on so for me this particular plan is called import task information and that's why I have that in the task name just there but of course we can go in and change that to something a little bit more meaningful so I'm going to say let's just call this training roll out project so I highly recommend you turn on that project summary task and then finally at the top we can show or hide outline numbers so this shows our summary tasks and subtasks with a different numbering system so
we have 1 1.1 1.2 so on and so forth if I was to make for example this task if I was to indent this a little bit further so let's indent it it then goes to 1.2 and 1.2.1 before going back to 1.3 so that can sometimes be a really nice way of structuring your project now something else we can do when it comes to adding tasks into our project is we can import them from other Microsoft applications for example I've got some tasks that I want to add to this project and I've got them
in a Word document now notice the way that I've structured this word document I have the summary task at the top this is the live training phase then I have my top level task here I've got some subtasks so on and so forth throughout this document and notice that some of these I have highlighted in yellow and these are basically my Milestone tasks now if I want to quickly get all of these into my project plan I don't have to manually type them in I can simply copy and paste so what I'm going to do
here is I'm going to select everything in this document and a quick way of doing that is to press the keyboard short cut crl a I'm going to press crl C to copy let's go back to our project scroll all the way down to the bottom and I'm going to click in the task name and then I just need to paste contrl V and take a look at that it pastes everything in with the correct summary and subheadings now we say it doesn't always get this completely right so I would definitely go through and check
that everything is as it should be but in general this is a much quicker way than going through and typing it all in yourself obviously we still need to go in and update ad duration start and finish information and check out those Milestone tasks that were highlighted in yellow in the word document you can see that it brings across that formatting it doesn't make these Milestone tasks automatically in project but it is a good way to REM remind us that these ones need to be changed to Milestone tasks and a quick way of changing these
to Milestone tasks is to Simply set the duration to zero so I'm going to do that for all three of these and they are now effectively milestones in this project once I've set these as Milestones I can select all three of these and in the font group I'm going to say no color just to remove that yellow background fill so I'm going to go through and I'm going to add some durations and some start and finish dates for these tasks that we've just added I'll see you in the next lesson so let's take a look
at some of the things we can do to reorganize the structure of our projects now as we've already seen we can use our indent and outdent buttons on the task ribon in order to indent or outdent various different tasks in our schedule for example if I scroll down my list of tasks maybe I decide that task number 37 get budget approval is indented too much we can simply select it go up to the schedule group and I'm going to choose to outdent this task which now puts it on the same level as book venue and
create venue short list so very easy to rearrange the structure in that way effectively creating summary tasks and subtasks now what about when it comes to moving tasks around now you can move tasks around by dragging and dropping them but in my experience particularly if you have a long list of tasks it can be a little bit fiddly trying to move tasks around in that way because the page tends to scroll really really quickly so a much easier way to move your tasks around is simply to use cut and paste for example maybe I decide
that this section just here the travel and accommodation section and when I say section I mean the summary task and all of its subtasks maybe I want to move that so that it all happens before we sort out the venues so what I can do here is select the summary task and all of its subtask which is all of these I can then press crl X or alternatively if we go up to the task ribbon in the clipboard group we have a cut option just here so let's click on Cut and notice that that planning
wizard pops up again so it's telling me that I've got multiple summary tasks selected and it says deleting them will delete all their subtasks as well now this is because project has recognized that I've cut them so I'm essentially removing them from their current place in the schedule so it sort of thinks that I'm deleting them now I'm not deleting these tasks I'm simply moving them so I'm going to choose cancel just here and click on okay and then I'm simply going to move to where I want to paste them which is up here and
once again I can press the contrl V key to paste or alternatively I can jump up to the clipboard group and click the top half of the paste button and like magic that moves them all into place so that is by far the easiest way to move individual or groups of tasks now one thing you might notice is that when you start to make changes in your schedule some of these fields or some of the cells are going to be shaded in blue now what these indicate are basically just changes that we've made so if
you take a look at this you can see that all of the fields for the travel and accommodation section are currently shaded out in this light blue color and that's because we've just made a change to these we've just moved them so if you are curious as to what that blue shading means it's really there just to be helpful to show you the last tasks that you've made changes to it's time now to talk about deleting tasks because once this is a fairly straightforward process says there are a couple of little quirks that you need
to be aware of so let's start out nice and easy deleting a single task for example if I go all the way down to the bottom of my schedule where I have print out expense forms if I want to delete this task all I need to do is select the task and I can simply press the delete key on my keyboard or alternatively I can rightclick on the task and I have a delete task option in the contextual menu so if we delete this nice and straightforward it's gone from the schedule now I actually don't
want to delete that so let's do a control Zed to undo and restore that task now this works slightly different if you're deleting a summary task and its subtasks so let's select the summary task and all of its subtasks and if I press the delete key on my keyboard that planning wizard is going to pop up again so it's telling me that expenses is a summary task and deleting it will delete all of its subtasks as well now that makes sense in this instance because we have the summary task and all of the subtasks selected
so you would imagine that if we are pressing delete we want to delete everything that we've selected so here I get a choice I can continue and delete expenses and its subtasks or I can cancel and not delete anything so I'm going to say continue click on okay and it's it's going to delete that entire group now I'm going to contrl zed to undo again because if we were just to select the summary task at the top and press delete again it's going to ask me the same question so I have a choice of deleting
the summary task and all of its subtasks or I can cancel and not delete anything so the point I'm trying to make here is don't think that just because you haven't selected the subtasks if you try and delete the summary task that is the only option you're going to get now let's take a look at a slightly different scenario maybe we want to delete a summary task but not any of the subtasks so we need to go about this in a slightly different way now notice that I've added just some example tasks into the schedule
so task number 60 is the summary task and then tasks 61 to 63 are the subtasks so if I want to delete the summary tasks but keep the subtask I first need to select the subtasks and put them on the same level as the summary task so for this we're going to go up to the schedule group on the task ribbon and use our outdent button that effectively makes the summary task and it subtask the same outline level I can then simply go in and delete the summary task as normal by pressing the delete key
I can then reselect these three tasks and change their indentation level if I need to so I'm going to outd all of these and the final Point worth mentioning here about deleting is that if you want to delete an entire task you need to make sure that you have the entire task selected by clicking on that task ID if you're clicked in let's say the task name and you press delete it's simply going to delete just the information from that particular field but notice as soon as I do that I now get this little cross
icon pop up where I get an opportunity to delete the entire task so if if I click that cross it's going to say delete the task name or delete the task so I'm going to say delete the task to get rid of the whole thing so just be aware of that when you're making your deletions now I actually don't want these two tasks in here so I'm going to select them press the delete key and we're now back to how we were originally one thing that can be really useful in Project is to create WBS
codes and WBS stands for work breakdown structure and what a WBS code is is a unique code that helps us identify each task in our project now why on Earth would you need a WBS code to identify your tasks well it might be that in some projects you have tasks with the same name for example if we look at this project on the screen you can see task number 46 is get budget approval and this is related to approving the budget for the venues and then a bit further down we also have another task task
number 55 which is also get budget approval but this time it's related to travel and accommodation for the trainers so effectively these tasks have the same name so adding a unique identifier is going to be helpful to us further down the track so let's take a look at how we can create WBS codes and apply them to our schedule now the first thing we want to do here is we want to add a column into our project plan to show our WBS codes so don't make the mistake of thinking that the task ID is the
unique identifier this is effectively just the row number or the task number so let's insert a WBS column so I'm going to write click on task mode and we're going to go to insert column and this is where we can choose the type of column that we're inserting so I'm going to scroll all the way down because these are in alphabetical order and we should have one for WBS and there it is now notice as soon as I add this column it's giving me its default WBS numbering now we can create our own custom numbering
to make this a little bit more relevant to the project that we're working on so let's take a look at how we would do that so to create our own WBS codes we need to jump up to the project ribbon and in the Properties Group we have a WBS option if we click the drop down we can go to Define code and this is where we can create our own work breakdown structure codes now the first thing we can do here is we can add in a project code prefix so in order to uniquely identify
this project I could give it a prefix of let's say trp for training rollout project and I'm going to put a dash there because I want a dash to separate that project code prefix and any numbering that I go with after this so now in this code mask area we can Define the number in sequence that we want to use for our unique codes and this first one is the top level so if we click the drop- down just here we can choose what we want it to display so I'm going to say numbers and
you'll see as I select these we get a code preview at the top so if I was to click on okay just here my tasks are going to be numbered trp1 trp2 trp3 so on and so forth in the length column I can place a limit on the number of characters so if I was to select two just here it means the numbers are going to run from 0 to 99 and I'm going to leave my separator as a period now I'm going to add another level and this time I'm going to choose lower case
letters and once again I'm going to select two characters and again you can see in the code preview exactly what this is going to look like so this part of the code is going to run through from a a to zed z let's add another level so I'm going to say uppercase this time I'm going to make the length three our fourth level is going to be numbers and I'm going to set this to two and let's add a fifth level as well that's also going to be numbers and I'm going to leave that on
any length so now we've defined what our code is going to look like we want to make sure that we keep these two checkboxes underneath selected because means it's going to generate a new unique WBS code for any new tasks that I add into the project and it's also going to keep checking that the WBS codes that are being added are unique so let's keep those checked click on okay and now you can see if we widen out this WBS column exactly what our numbering structure looks like so let's take a look at our summary
tasks that we have here those have trp 01 trp 02 trp 03 so on and so forth the next level down is 01 a a 01 a b 01 a c so on and so forth and that pattern continues throughout our project plan notice as we get a bit further down in this project plan where we have more outline levels we can see our WBS code is using more of the code that we specified so for example task number 31 is trp 05 AA and then we have Triple A the next one goes to Able
a AAC so on and so forth so WBS codes are a great way to create a custom code that helps you uniquely identify tasks in your project plan in this exercise we're going to practice some of the skills that we've learned in this section of the course so the first thing I'd like you to do is to open the file newor buor plan. exelsa from the exercise files folder and this is an Excel file and we're going to use this file as the basis for the project that we're going to create throughout the balance of
these exercises once you have that open I'd then like you to go back to project and create a new blank project and save it as your initials business plan. MPP and I'd like you to set the start date of the project to the 7th of November 2024 or if you're using your own project whatever the start date of your project is once you've done that I'd like you to add the first four tasks in the spreadsheet the ones that aren't in bold because those are summary tasks into the project as automatically scheduled tasks now you
don't necessarily have to add them all there is a lot of them in the spreadsheet but add a good 10 15 to 20 i' then like you to Mark some of the tasks as Milestone tasks in the schedule now again I have a few tasks in the spreadsheet marked as Milestones but if you you haven't added that many tasks you can set any of the tasks to Milestones and then once you've done that I'd like you to go through and create summary and subtasks again using the spreadsheet as a guide and if you'd like to
see my answer then please keep watching so I've opened up the new business plan Excel file and I've got it positioned on the right hand side of my screen and in the left hand side I just have project open so the first thing we need to do here is open up a new blank project and we need to save this so let's go up to five down to save as I'm going to browse and select a location and we're going to call this our initials new business plan and click on Save the next thing I
asked you to do was to change the project start date so if we look at the details in the spreadsheet the first task basically starts on November the 7th 2024 so I'm going to use that as my project start date so so I'm going to jump into project information and I'm going to set the start date from here now because this is quite far in the future and I don't want to have to scroll through a calendar I'm just simply going to type this in so November the 7th 2024 and click on okay and you
can see it jumps to that part of the schedule so now that we have everything set up we can start to add in the tasks and I'm just going to add the first one I asked you to add the first four for a little bit of practice so the first one we want to add which isn't a summary task is self assessment so let's move across to task name now notice here it's put it in as a manually scheduled task so I'm going to go down to the bottom and make sure that I have Autos
scheduled selected and then we're going to change this to Autos scheduled now the start date of this task is in fact November the 7th which is when the project starts the duration according to the spreadsheet is 3 days and there we go we have our first task scheduled and we can see the blue bar update let's add the next one Define business Vision this is a one-day task and again this starts on November the 7th so we simply carry on going through adding in these different tasks and this is really all the information that I
want you to add at this stage so I've added in a few more of those tasks and the next thing I asked you to do was to Mark some milestones in the schedule so if we take a look at the spreadsheet in column A we have mileston so I can see the first Milestone is this one down here confirm decision to proceed which in the spreadsheet is in row 27 so if we scroll down to task 27 this is going to be a little bit out because we don't have the summary tasks in here but
it should give us the rough area where this is so there it is just there confirmed decision to proceed I'm going to Mark the this as a milestone let's double click to open it up and I'm going to select Mark task as Milestone and click on okay and I would go through this spreadsheet marking the other tasks that we can see in here are milestones in the schedule the final thing I asked you to do in this exercise was to create this summary and the subtasks so again I'm just going to do the first one
because once you've done one you can pretty much do them all so the first one at the top here in rot of the spreadsheet new business this this is our top level task so what I'm going to do here is I'm going to right click and I'm going to insert a task at the top there let's double click to open it up and we're going to call this new business and click on okay and this is basically going to be our top level summary task so we need to select everything else in the spreadsheet so
from task 2 control shift down arrow all the way down to task 101 and I'm going to have to maximize my window so I can see this properly if we go to task in the schedule group I'm going to indent these tasks which effectively makes that top task the top level summary task and then going to right click and insert a another task and this one is going to be phase one strategic plan and click on okay now this is going to be a summary task as well because if we refer back to our spreadsheet
you can see Define the opportunity is also a summary task so I just want to include these tasks within the phase one strategic plan summary task so let's select those tasks and once again we're going to click indent task and now you can see our structure beginning to take shape so what I would like you to do is just go through the rest of your tasks adding in this structure and use the spreadsheet as your guide in order for a project to work and flow correctly project tasks need to be performed in the right sequence
and when it comes to a project plan task dependencies or links basically Define the sequence of the tasks and it's worth noting that most links have a link type of finish to start so what exactly does that mean this finished to start well let's take a look at our current schedule so if we scroll to let's say these tasks just here and I'm going to zoom out a little bit because that is a little bit too wide now if we take a look at these tasks so task 11 down to about task 15 notice that
we have little arrows linking these tasks together so effectively what these links denote is that task number 12 isn't going to start until task number 11 has finished so that is what we call a finish to start link and you'll find that the majority of links that you come across in Project are going to be finished to start one task finishes before the next task can begin so effectively what we have here is Task number 11 is a predecessor of task number 12 so how do we create links between two tasks well let's scroll down
a bit further in the schedule and I'm going to say here that task number 32 assigned teams to Regions can't be completed until we've assigned trainers to teams because each trainer has a specific preference as to which region they'd like to travel to so we need to establish that first before we assign the teams to the regions now I have task number 32 highlighted and if you take a look at the timeline view or where we normally have our bars I've got nothing on the screen I'm not in the correct position in the schedule now
a quick way to jump to the part of the bars that relates to the task that you're currently C clicked on is to Simply go up to the task Tab and all the way over in the editing group we have a scroll to task button now if I click this it's going to move me to the place in the schedule relevant to where I'm clicked in the task entry table now you'll find yourself using this scroll to task button all the time so while I'm here I'm going to right click and I'm going to add
it to my quick access Toolbar to make it super easy for me to access so I can see here that task number 32 is a manually ual task and I need to link it to task number 31 so for this we need to select the task we want to link to first and then the other task so I'm going to hold down control and select both of these then up on the task ribbon in the schedule group I'm going to click this little link chain icon and notice here that there is a keyboard shortcut to
quickly link tasks of contrl F2 now when I click this notice what happens to the BS it inserts a link so now we have this little arrow that links these two tasks but if we also check out what we have in the predecessors column in the entry table you can see that it's automatically added that task number 31 is a predecessor of task number 32 now when we're working through our schedule and we're creating lots of different links and dependencies it can sometimes be quite useful to see a little bit more information about those links
so what we can do is go up to the view ribbon and in split view I'm going to select details and this opens up another window at the bottom called the task form and what this is going to show me is additional information about whatever task I'm currently clicked on in the task entry view so if we take this linked task for example if I click on task number 32 I can see some further information I can see the name of the task the duration the fact that it's manually scheduled the percentage complete and if
I take a look over on the right hand side I can see see the task that it's linked to so it's linked to task ID 31 assign trainers to teams and it's telling me that the task type is FS which basically means finish to start now it's also worth noting when you're working with links that you don't necessarily just have to link each task to the previous task individually you can do them all in one go for example I could select um these three tasks just here go up to the task ribbon and click on
create link and it's automatically going to create finish to start links for all of these tasks so that can be really helpful if you have tasks in your project that can only start when the previous task finishes now aside from clicking on the little chain link icon in the schedule group to link tasks together you can also Link in a couple of other ways for example if I wanted to link tasks 2 and three together I can simply come over to the predecessors column and and I can either type the task number in this case
number two or alternatively if I delete that out I can click the drop-down Arrow it's going to pull up a big long list of all of the tasks and I can select the task that I want to link to from here so again that would be number two so three different methods you can use in order to link your tasks now I'm going to remove that because I don't want to link those two notice as I did that as I added that link check out the cells that are showing as being changed the dates for
all of the tasks below changed because of that link I just created and that is why these are showing as changed cells now we do have other task types that we can add in as I said by far finish to start is the most common but we also have finish to finish links that we can add where the finish of One controls the finish of another and then we have the two rarest task types start to start and start to finish and those really aren't used very often and I will say that something like start
to start can be quite problematic if the predecessor task starts and then is delayed it could finish after the successor and start to finish means that the start of one task triggers the finish of the other as I said both of those are extremely rare now if you want to change the type of link that a task has again we need to make sure that we have our details pane open and if we select let's say this task on the right hand side in the task form where we can see the predecessor we can also
see the type so this is a finish to start but we can come in here and change this to a finish to finish we can change it to a start to finish or we can change it to a start to start and this subject is definitely something I recommend reading the help files on so you get a really good idea as to the types of scenarios the types of tasks where you might have to use a different link type and if we take a quick look in the help files you can see here underneath types
of tasks we have those different link types and a full description and in this description it gives you different scenarios where these might come up so I definitely recommend having a read through so that you know if and when you need to apply those to your project plan I'm going to switch off the details Pane and we are about ready to move on to the next lesson sometimes when we're working with our project there is a delay or an overlap between tasks and this is where we can add in lag or lead time so let's
take a look at a quick example now currently in this schedule we take a look at task number five and I'm going to make sure that I'm on the correct part of the timeline and we can see that task number five is basically to update the course outline now in order to update the course outline I need to receive feedback from the training team and the task before that is to send the outline to the training team for review now currently I've assigned a one-day duration to that now it might be that the training team
are assigned to another project for the next 4 days and can't actually look at this outline so what I could do is I could add in some lag time and reflect that in the timeline so if you take a look at the bars currently we can see that update course outline is linked to the task before and currently update course outline is set to start as soon as the previous task finishes so as soon as the training team have reviewed the outline I can then update the course outline based off of their feedback but now
they're not available for the next 4 days so nothing's going to happen for 4 days and I need to reflect that in my project plan so what I can can do here is once again let's jump up to view and open up the details pane because in here this is where we can apply lag time if you take a look at the right hand side we can see the predecessor of this particular task is Task number four the type is finished to start and currently the lag time is zero dates but check out what happens
if I change this to four so I'm going to use the little arrows just to move up to four and when I click away the schedule is going to update now you might need to scroll a little bit just to see that but check out what we have now if we click on task number four we can see the duration where it's supposed to start but then we have 4 days of lack time before the next task starts and if you check out what we now have in the predecessor column we can see that for
task number five update course outline I can see that this is linked to task number four with a finish to start link type and it has plus 4 days left lag that's what this little code means just here so this is particularly useful because it enables you to see at a glance so much information so wherever you have a delay in your schedule you can reflect that accurately by simply adding in lag time to your tasks now what about if we want to do the complete opposite of that maybe we want to add overlap time
to As schedule now what do I mean by overlap time well it might be that we have two tasks that can overlap each other for example if we take a look at the recording phase in my project plan maybe I don't need to finish writing all of my training notes before I start recording the training videos so what I could do here is I could add in overlap time now the way that we do this is pretty much exactly the same as when we add in lack time but we just use minus values instead so
I'm going to select record training videos task number 11 we can see that in our timeline if I scroll over a little bit and if we take a look in the task form we can see that this is linked to task number 10 write training notes it has a finish to start link type and currently there is no lag or overlap now we're going to change that we're going to click in this cell and instead of using the up Arrow to make it a positive value we're going to say that there is a 5day overlap
just here so it goes to minus5 when I click check out how that updates in the schedule if we take a look at our bars we can see that task number 11 record training videos can start whilst WR training notes is still going on and we have the arrow here linking these tasks but we clearly have an overlap once again if we take a look in the predecessors column we can see exactly what's Happening Here we can see that task number 11 is linked to task number 10 with a finish to start link type and
we have an overlap of minus5 days so that is the difference between lag and lead time use them accordingly wherever you feel they're necessary in your schedule sometimes tasks in our project need to occur on specific dates or have restrictions and constraints are one way to specify when a task starts and finishes and it's worth noting that every task has a constraint so what do I mean by that well let's switch into a different view so you understand what I'm talking about now currently I have task form open at the bottom but we're going to
jump up to the view Tab and over in split view we're going to click the drop down and go straight into more views because what I want to bring up here is the task details form let's click on apply and I can now see that showing in the pane at the bottom now this is going to show me what constraints are applied to any particular task I have selected in the task entry table so let's just pick a random task here task number six we can see a lot of information about this task but we
can see that there is a constraint on this task now I haven't set any constraints manually myself on any tasks that we've added into this schedule I've just typed them in we've done a couple of other things but we haven't specified specifically constraints for any of the tasks but there is a default constraint that's applied to all tasks and you can see here that that constraint is that the task starts as soon as possible and that's kind of really what you want when project is trying to work out your durations and your timings it works
off of the principle that you really want this project to be finished as soon as it's possible and that is why we have that constraint type applied to every single task now of course if we click the drop down here we have other constraints types that we can use so things like as late as possible finish no earlier than finish no later than must finish on must start on so on and so forth and there might be scenarios where you need to add one of these constraints depending on what's going on in your project so
let's take a look at a quick example if we take a look at this task task number 58 I can see that this is due to start on September the 12th 2023 and maybe I know that at the end of September every single year there is a sale on flights so I don't want anybody to start booking flights for the trainers until those flights go on sale because we're going to save the company quite a bit of money so what I can do here is I can change the constraint from start as soon as possible
to start no earlier than and then I can select a date so I'm going to go across to September 2023 and I don't want anyone to start booking flights until the last week of September so let's change that to the 25th and you can see automatically these schedule updates and everything below that relies on this particular task has also updated hence why we have those blue cells now I'm going to scroll to task by using the icon on the quick access toolbar so I can see what we have going on here now notice something else
about this task now that we've added that constraint you can see that in the information column on the left hand side we now have this little calendar icon and if I hover my mouse over it I get a little screen tip popup that says this task has a start no earlier than constraint on September the 25th 2023 so whenever you see that calendar in that column it means that There's a constraint applied to that particular task now I'm going to leave it to you to explore some of these other constraint types I think most of
them are pretty self-explanatory now a lot of these are what we would consider to be flexible constraint types but some of them are a little bit more fixed so for example must start on for example if I select task number 47 book venue maybe that's a very fixed item and it must start on a specific date in order for anything that comes after it to flow correctly through the project so maybe we have to book a venue on August the 25th so I could select a constraint in here to make that more fixed in the
schedule so I'm going to select it it is a milestone task we can still apply constraints to Milestones but I'm going to change the constraint to must start on and then I can choose the date so it's going to be August the 25th so let's jump across to August and select the 25th click on okay and once again we get that little calendar icon which says that this task has a must start on constraint and then we have the date so some of these are a little bit more flexible some of them are very fixed
but something that's worth bearing in mind is that you want to really limit the number of date constraints that you have in your project and the reason why you want to limit it is because it reduces projects ability to schedule things in the best way if we're constantly adding constraints into the project muster on this day can't start before that date project is going to find it harder to create a project plan that flows nicely through now obviously in some circumstances you're going to need to add constraints but all I'm saying is be mindful of
how many you have in your project and try and limit them the best that you can another thing that's worth noting about task constraints is that you don't necessarily have to apply these from the task details form so if you don't have this details pane open and your project looks something like this what you can do is select your task and then on the task ribbon all the way over in the Properties Group we have an information button and that's going to pull up loads of information about the task that you've selected so in this
case I've selected a summary task now if we jump across to the advanced tab we can also set our constraint type in here so this one currently is as soon as possible but if we click the dropdown we have some other options and we can choose a constraint date now notice here that when I click the dropdown I only have three options to choose from now that's because I'm clicked on a summary task if I just click on a regular work task go up to information and to the advaned tab when I click the drop
down I now have all of those constraint types so if you see a shorter list in here it's going to be because you're clicked on a summary task as opposed to a work task and this information box is a really good place to come because this is where you're going to find lots and lots of information about the tasks that you currently have selected in the schedule and of course you can modify task information from here as well as well as from the task form details paint when we start linking tasks together in Project it
can start to become a little bit cluttered so we need to know the best ways that we can view our tasks and view predecessors and links now one way we've already seen we have the predecessors column in our task entry table which gives us a nice overview we can see immediately which tasks are linked to other tasks and also the type of task link that we have in place and if there's any lead or lag time so if you don't have this predecessors column showing I highly recommend that you right click go to insert column
and choose predecessors from here and remember this long list is in alphabetical order so it's very simple to find the one that you need now I already have my predecessors column so I'm just going to escape out of that now another way that we can view our tasks and any links is by looking at the bars on the right hand side now currently I'm not seeing a great deal on this page because I have my bars set to display every single day so my tasks are very stretched out across the entire timeline of the project
which in some cases is a good thing if you want to see in more detail but I actually want to condense this up a little bit so I can actually see more of the task in this area so what we can do here is we can jump across to the view ribbon and then notice in the zoom group we have a time scale option and currently mine is set to days which is why I have such a broad time scale up here so what I'm going to do is I'm going to click the drop down
and I'm going to change this to display in weeks and now I can see a lot more information because it's a little bit more condensed another thing that we can do is we can select a task in our task entry table so I'm just going to go for task number three and we can see it's driving predecessors now if we jump up to the Gant chart format tab in bar Styles and click task path let's take a look at the screen tip just here it says that this is going to highlight the predecessors that directly
affect the selected task so let's click on this now notice when I click away These Bars change to this orange color and depending on which task I select in the task entry table the predecessors that are driving this particular task are going to highlight in Orange if I was to click somewhere down here you can see more and more things get highlighted in Orange so this is a quick way of seeing all of the tasks prior to the one that you have selected that are really driving the completion of the task you currently have highlighted
and that can sometimes be really useful now if you want to turn that off just go back up to task paath and deselect driving predecessor and one final thing that you can do from this Gant chart format tab is you can control the layout of these tasks and how they're linked together so if we go to the format group right at the beginning here we have a layout option and it says format various aspects of the current view so if we click on this and take a look at the link section we have three choices
here so I can choose to display my links like that so I have no arrows in between each of the bars so it gives it a less cluttered look and feel but for me personally I don't find this particularly helpful I like to have a visual representation of which tasks are linked together as opposed to just having the numbers in the predecessors column in the task entry table but that option is there if you like that look if I select the second one it links them through like that and the third one we get something
slightly different so really it's just the format the layout of these links so choose whichever one you prefer and another thing that you could turn on to make the readability of your bars a little bit easier is you could turn on grid lines so again in this format tab if we click the drop down next to grid lines and select grid lines again I'm going to choose to add lines to my Gant rows I can then choose the type of lines let's go for a dotted line and I can also choose the color so let's
go for a green color and I can then choose the interval now I'm going to set that to none and click on okay and you can see what that looks like so sometimes that can really Aid your readability because it makes it a little bit easier to see which bar relates to which entry in the task entry table so if you like that then turn that on I'm going to turn this off and try and keep this as clean as possible by setting this back to none in this exercise exercise 5 I'd like you to
create task dependencies as per the information in the spreadsheet so you'll see that there is a predecessors column that tells you which tasks need to be linked together and then I'd like you to just have a play around adding lag and lead time into certain tasks and I don't really mind which tasks you use for this once you've done that I just like you to practice filtering your task list so a good one to show would be all of the tasks Tas s in your project that are Milestone tasks so a reasonably straightforward exercise if
you'd like to see my answer then please keep watching so let's take a look at the spreadsheet and you can see that we have a predecessors column just here so once again I'm just going to do the first couple so you can see how this works but I can see that identify available skills information and support is dependent on the task before so if we go to this task in the schedule which is Task id5 and expand the column we can choose our predecessor so this is going to be task number four which we can
simply select just here and click away and the next task so this one is going to be linked to task number five and that is how simple it is to add predecessors into our schedule notice the arrows connecting the bars in the Gant chart remember you can add more than one predecessor to a task so go through that spreadsheet adding in your predecessors and creating those links the next thing I asked you to do was to add in some lag or lead time so let's choose this task task number six I'm going to double click
to open it up we're going to jump to the predecessors Tab and I can see here that we have a finish to start link type currently with zero days lag so what I'm going to do is I'm going to add in five days lag remember if you want to add in lead time this is going to be a minus figure in here let's click on okay and now you can see how that's affected the schedule task number six has now been pushed by 5 days into the future because we've added in that lag time if
we select the previous task and for this one let's add in 3 days of lead time and the final thing I asked you to do here was just to practice playing around with some of the filters so we can find those up on The View tab in the filters group and one example I gave you was to filter and show all of the Milestone tasks so you can see here I've got four of them in my schedule we've made the files the instructor uses in this tutorial available for free just click the link below in
the video details to get these hello everyone and welcome to this course on Project professional 2021 Advanced my name is Deborah Ashby and I'm a Microsoft instructor and subject matter expert and I'm going to be your host for this course now I've been using project for over 20 years now so I am very aware of what a fantastic tool is for project managers or pmos but I'm also aware of some of the challenges of using what is effectively a powerful but complex application now this is the advanced project course so I will be assuming that
you've worked through the beginner course already or you come to this course with a good knowledge of project we won't be covering many of the basics of project instead focusing on more advanced topics like reporting macros consolidation and sharing custom fields and so much more project 2021 is the latest Standalone releas of project from Microsoft so if you have that version then this course is going to be absolutely perfect however if you are using project 2019 or 2016 then you'll still be able to work through the majority of this course because there aren't too many
changes between the different versions now this course is divided down into logical sections and lessons there are 39 video Leed lessons and 10 exercises to work through and the exercises are there so that you can practice the skills that you've learned in each section you also have access to all of the course files that I use in the videos so you can follow along with me if you choose to once again welcome to this course it's time to get started before we dive into the lessons I just wanted to spend a few minutes ensuring that
you are set up for Success so the first thing to do here is to make sure that you've downloaded the course and exercise files and you've stored them off somewhere that's easily accessible on your PC now each lesson will have two main course files so the one that has start in the title is the starting point for each lesson if you're following along with me the complete file is how the file looks at the end of the lesson so this just provides a good reference point for you some lessons also require the use of multiple
files but you should find everything that you need in that course files folder now the excise files are simply named exercise 1 2 3 4 Etc and for the majority of them there is also an answer file for each one too so you should have everything that you need to work through this course in those folders now when it comes to working inside project 2021 if you do want to follow along with me it's probably going to be helpful for you to have some settings set the same as mine so let's take a quick look
at those so open up project we want to go into file and down into project options now on the general tab a couple of things I would make sure that you have set here so that it mirrors mine is the default view make sure that that is Gant with timeline also notice the date format that I'm using I'm using the month then the day then the year then the time there are lots of different formats you can choose from in here but again if you want to match mine as closely as possible make sure you
have your date format set to that now if we jump across to the schedule page I would also recommend you review these calendar options as well so these are the settings that I currently have my week starts on a Sunday the fiscal year starts in January and my default St end times for a day are 8:00 a.m. to 5:00 p.m. which works out at 8 hours a day 40 hours per week 20 days per month so once again I would recommend that you change your settings to mirror mine now one final thing to note here
that's really important this course was recorded in March and April of 20123 so all of the dates that you see in the videos and in the course files are very much in relation to the dates when this project was recorded now I'm very well aware that you might come to this course in 6 months time a year's time where these dates might not make too much sense so you have a couple of different options here you could adjust the start and end date of your project so it's more accurate for you but just be aware
that if you do do that you're going to need to change those dates in every single course file that you work through alternatively you can just use my dates but just be aware that the results that you get in some lessons might not exactly match mine because we're working up to different current dates so those are the main things to be aware of make sure you've got those course and exercise files downloaded because it's now time to dive in to our first lesson it's time now to complete exercise one now this exercise differs from the
rest of the exercises in this course in that we haven't really covered a great deal in project to facilitate a meaningful exercise however I just wanted to reiterate a couple of points here to make sure that you're set up correctly to complete this course now the first thing you'll notice in the exercise files folder is that there is no folder for exercise one and that's because we aren't using any project files in this particular exercise so if you're curious as to where that fold is it's not supposed to be there all I really need you
to do for this exercise is once again make sure that you've downloaded and save those course and exercise files I want you to review the dates and decide if you want to use my dates or use your own dates and make sure that you have reviewed your settings in Project options so that is it I promise you that the exercises will be a lot more meaningful than this as you work through the course so let's dive into the first lesson for the next section you'll want to download the course exercise files click the link below
in the video description to get these you can also scroll through the details to find timestamps for each section in this course if you're enjoying this training please leave us a comment in this first lesson of this project professional 20121 Advanced course we're going to take a look at consolidation and resource sharing and we're going to look at these topics together as you often need to use them on a large project at the same time now generally what happens when you're working on a project is that that project gets larger and larger over time and
sometimes it can turn into a set of projects as opposed to just one project or perhaps we're working on a project that needs to be split into a set of projects and not only do we need to split up the work the tasks but different people are going to manage different parts and what usually happens is that even if projects are being managed by different people they often share the same resources so in this lesson we're going to look at combining multiple projects into one or splitting a large project into separate projects and sharing resources
between projects now to demo this we're going to use an example of an event and this event really has three key parts we have a Gala dinner and this is where invitees will pay an admission fee they'll get a nice dinner maybe there'll be some entertainment some dancing afterwards the next part of the event is a fashion show so maybe we've invited local fashion houses to display their clothes at this fashion show and they also get a buffet lunch whilst they're there and the last part is the sports day so this is more of a
family friendly event where people compete in different sports just for fun and there's also a barbecue so we have have three very distinct parts of this one event now we're going to assume that we've done some early planning and you can see here at the top I have a planning section if we expand this we can see the tasks beneath that so we have 20 or so tasks which we've already scheduled in relation to the planning of this big event now this event is quite a large undertaking so what we want to do is we
want to split this event into separate parts with different people managing those different parts so we might have someone managing the overall project plan we might have somebody else managing the gala dinner someone else managing the fashion show and somebody else managing the sports day now the individual projects are not that complicated and we need a project manager to be able to manage their part independently and separately so why do we need to be able to do this well as you'll know from your current knowledge of project when you're dealing with editing a single MPP
file if our project managers each want to work on it at the same time that can become complicated particularly if they want to work on it from home or they don't have any shared access now splitting up the actual project file into effectively four separate files is pretty straightforward the problem starts to occur when it comes to resources now if we jump across to the resource sheet for this project you can see that we have eight or so resources assigned now also notice that I don't have any costs assigned to these resources at the moment
we are going to talk about that a bit more later but for the time being just note that we have eight or so resources now resources such as volunteers the event director publicity officers they might need to be able to work across all four of the projects so we need to set them up as effectively shared resources what you'll also notice if we switch back to the Gant chart view is that many of these tasks across all of the different parts of this project have dependencies and links to other tasks in other parts of the
project so when we split this project and we set this up to share resources we also want to make sure that we're maintaining the Integrity of those links and everything links through correctly now a good proportion of the work here relates to the relationships between the tasks so let's start out first of all by just separating off the sports day section of this project so if we scroll down you can see here is the sports day section so from task 46 to 56 and we're just going to select all of these tasks now what I'm
going to do is press contrl C to copy those tasks to the clipboard and then we're going to open up a brand new blank project file you can go up to the file tab to do this I'm going to use the keyboard shortcut crln just to quickly open that up and then I'm going to press contrl + V just to paste those tasks in so now we have just the sports day tasks in this new project now once you've copied these tasks across it's worth noting that those dependencies still exist within this summary task but
remember in the original version of the project plan this sports day section also had dependencies in other parts of the project and those haven't come across when we've copied these tasks also if we jump across to the resource sheet for this file notice that we now only have two resources because it's only bringing across the resources that are included in this part of the project plan and you can see that the volunteer is now showing as overallocated because we've split this section out now the way that project looks at these resources is that these are
completely independent of the original resources in the other project plan so these aren't the same resources they're two brand new resources as far as project is concerned so in the next lesson what we're going to look at is how we can to share these resources across our project plans now before we leave this lesson the final thing I'm going to do here is I'm just going to save off this file so let's jump up to file down into save as and I'm going to save this into the course files folder and we're going to save
this as Charity eventcore sports day and click on Save in the previous lesson we discuss the reasons that you might want to split up a project or join together a project and we recognize that it's important to deal with resources and the key issue here is that when we split a project we need to make sure that those projects are using the same resources and the way that we do that is to set up what we call a resource pool once we've set up a resource pool we can then share that resource pool amongst several
projects So currently we have our two files and you can see that I've got them both open on the screen just here now just a quick side note about project and opening multiple files what you'll find is that if you try and double click in file explorer to open two separate project files they open in the same project window because we only have one project license it's not like an application like Excel where you can have multiple Excel windows open to view different files now the way to get around that and to arrange files like
I have them here you can see I have both of my files open in the same project window is simply to jump up to the view tab go over to the window group and you can see we have an arrange all button just here and that's all I've done I've clicked arrange all and arranged my windows so they take up half of the screen equally so that's just a side note if you're wondering how I got to this point so now we have both of these files open one thing to note is that the original
charity event file which we have on the right hand side here still contains all of the sports day tasks remember we copied and pasted those into the sports day file that you can see on the left hand side now we will need to remove those from the original file eventually but before we do that we're going to set up a resource pool now the key aspects here when it comes to setting up a resource pull is that we basically set up a brand new project with resources but no tasks and really if this is something
that you want to do you want to try and do this at the outset of the project so what many people will do is they'll start off with an empty MPP file they'll enter the resources make up the resource poll and save the project but with no tasks so I've closed down the smaller sports day file so we're just back at our original charity event file and if we switch across to the resource sheet sheet we can see that we have a pretty good base for our resource pull because we have all of our resources
listed in here so what we're basically going to do is we're going to make a copy of this file by saving it as a different name and then we're just simply going to remove all of the tasks so let's jump up to file and down to save as I'm going to save mine into the course files folder and I'm just going to call this charity eventcore resources MPP and let's click on save so we're now working in that file so let's jump back to the Gant chart View and what we're going to do is we're
simply going to remove all of the tasks so if we click on the Square in the top leftand corner just here it's going to select everything and we can simply press the delete key on our keyboard I'm getting a little warning from the planning wizard do I want to delete multiple selected summary tasks and their subtasks yes I do let's click on okay and all of those tasks are gone but we still have our resources listed out on the resource sheet so this is now effectively my resource pool so let's give this a quick save
and I'm going to reopen the other file the sport day file so what we need to do here is we need to specify that this project uses the resource pool that we just created so from here we're going to switch across to the resource sheet and remember you can switch across using the icons in the bottom right hand corner in the status bar or you can jump up to view and resource sheet is just here so let's click on resource sheet you can see the current resources that we have that limited list but if we
jump across to Resource and into assignments we have a resource pull option so let's Click Share resources and this is where we get to select the resource pool so from here if we choose the second option use resources we can then choose where our resource pool is located and the important thing to note here is that you need to have that file open in order for the dropdown to recognize it so I still have my resource pool open There It Is Charity eventor resources this is the file we're going to be using and then we
have options for on conflict with calendar or resource information the pool takes presidence or the sharer takes presidence now we're going to look at this in a bit more detail a bit later on but what can sometimes happen is that there may be a conflict between the resource poll and any calendars applying to the resources in the resource poll and calendars in the sharing project so we need to specify which takes presidence the pool or the sharer now before we do this I'm actually going to click on cancel here because I want to demonstrate what
happens to overallocated tasks when we assign a resource pool so let's jump back to Gant chart view for one moment if you take a look in our task you can see that task 10 is currently showing as overallocated that's a little red icon we can see in that First Column so now if we go back to Resource pool and share resources we going to make sure we're using resources from our charity event resources file we're going to say the pool takes presidence when I click okay watch what happens to task 10 you can see that
that over allocation is resolved and that's because if we now go to our resource sheet this project is using the resource poll and not just the two resources that were included when we copied the tasks across so what we now have is a resource poll and a project that is using that resource pool now the other thing that we need to do is we need to get the original file the charity event project to use the resource pool as well so let's open it up so we're going to do exactly the same thing we're going
to jump up to Resource pool share resources use resources from the charity event resources file and once again the pool takes presidence let's click on okay now notice that as soon as I did this we we now have over allocations for the sports day pm and the volunteer and that's really related to the fact that we have the sports day event in two different files if you recall when we copied the task across we didn't delete them from the charity event file which is why we've got these over allocations and we are going to deal
with those in a moment so just put that to the back of your mind now what we're going to be doing over the next couple of sections is that we are going to split this charity event project up because at the moment we've only sectioned off the sports day part of this event but before we get on to that just one or two important points about resource sharing as I mentioned if we go back to our resource sheet we now have these over allocations and something that can be really helpful is being able to view
which resources are assigned to which projects that can be very helpful when it comes to dealing with over allocations so for this we're going to switch to Resource usage view let's widen out this column and we're going to add a new column so that we can see the project that each resource is assigned to so if we widen this out we can see at the top we have some unassigned resources but we can also see the projects in this column where those resources exist and if we scroll down to the sports day section I can
see that the sports day PM the sports day project manager that resource is being used in both the sports day project file and also the original charity event file so adding this project column into your resource usage sheet can be super helpful particularly when you're trying to deal with over allocations and see which resources you have allocated to which projects now one final point before we finish this lesson it's not necessarily the case that all projects that share a resource poll are always Consolidated into one project you might find you have a situation where another
project project that is completely unrelated to this event is also using the same shared resource pole so what I'm trying to say is when you're working with a resource pool it might have a whole mixture of different projects that are using its resources so just bear that in mind as we work through the balance of this section so now it's time to move on to the next lesson when we're going to start to split off other parts of this charity event into its constituent projects in this lesson we're going to set up a master project
for our charity event and we're going to start with our original project and the sports day project and if you recall these two share a resource poll now when it comes to splitting a large project up the key area where there is usually the most effort required is in restoring the links that existed in the original project and as I've mentioned a couple of times previously it's a good idea to make this decision very early on so make sure that you decide if this is going to be a project that you're going to want to
split up into multiple different projects as early as you can because the later you leave it the more work you're giving yourself now I currently have the charity event project open I'm just going to close this down and reopen it because there's a little message that appears that I think it's important that you take a look at so let's close this down I'm going to say yes to save changes now I've close down the charity event file and I'm just back at the start screen for project because I want to just very quickly show you
what happens when you reopen these files if you have everything closed so if we go to open I'm going to open up my charity event file and you can see that I get this little message open resource pool information now it says this file shares resources from a resource pool what do you want to do and I can choose to open resource pool to see assignments across all shareer files or do not open other the files so it's basically recognizing that this file links to a resource pool in another file and it's asking me if
I want to open it so I'm going to say yes let's click on okay and now if we jump up to the view Tab and go over to the windows group if I click switch Windows notice that not only do I have the charity event file open I now have the resource file open as well but it's in readon mode so I have these two files open what I don't have open is the sport day file but notice in the project column in the resource usage sheet where I have these long path names where it
says C drive users Deb a so on and so forth this is actually the path where the sports day file is located so it's still recognizing that we have links to that sports day file even though I don't currently have that file open now let's jump back to Gant chart View and we're going to expand and the planning section now I'm going to collapse up some of the other sections so I'm going to collapse up fashion show so that we just have sports day expanded and planning because what you'll notice here is that many of
the tasks within the sports day section have links to tasks that are up here in the planning section and this is where the problem can lie when you're trying to split up a project because effectively what we want to do is maintain the Integrity of the links between different parts of the project now if you recall we separated off into a separate file the sports day tasks and we save those into a file called charity event sports day so what I effectively want to do here is I want to replace these tasks in this project
with the tasks from the sports day file and we do this by inserting a sub project so what I'm going to do is I'm just going to go into a blank line and we can choose this one just above and we're going to go into the project tab and notice in the insert group we have sub project now if we select this we can then go in and browse for the file that contains the information that we want and it's this one here the charity event sports day file and we can click on insert and
you can see now we get a sub project inserted into our main project and we can tell that this is slightly different from the other tasks in this project because we have the little project icon in the information column I can expand the main summary task and I get to see all of the subtasks below now just take a look at some of the differences between these two sections now if we take a look at uh let's say task number 51 just here look in the predecessors column this particular task has a predecessor of task
10 and if we take a look at the Gant chart I can see it relates to task 10 in the planning section now if I take a look at this same task in the some project perform risk assessment notice the predecessors column is empty so the link effectively hasn't been maintained so these are the links that we basically need to recreate now before we get onto that I just want to talk a little bit more about the layout up here because what we're going to do eventually is we're going to delete out the sports say
tasks in the original project so we just have the sub project but I like to leave these in there so that I can use them as a guide to recreate the existing links so for example if we take the first item here task 51 I can see that its predecessor is Task 10 and if we scroll up to the planning section task 10 is book venue so I basically want to recreate this predecessor for the corresponding task in the sports day project so you can see here we don't currently have a predecessor for perform risk
assessment now in Project 2021 normally when you're link in in tasks you can simply click in the predecessors column and click the drop- down and select your task but notice here it's only showing me tasks that are part of this sub project it's not allowing me to link to other tasks within the original project so we can't use this method we have to use the link option on the toolbar so let's select book venue we're going to go down hold down control and select perform risk assessment and then on the task RIS bur we're going
to choose link now notice a couple of things that happen here in the predecessors column it looks slightly different to what we normally have in here normally you'll just see the task number but because we're effectively linking to another project we actually get the entire path name in this predecessors column but if we now take a look at the Gant chart so I'm going to scroll across a little bit you can see that this particular task in our sub project is now linked with task 10 in the main project so we've very easily been able
to maintain the Integrity of that link now I'm pretty much going to go through and do exactly the same thing for all of these other tasks and I'm going to be using this as my guide so wherever we have a predecessor number I'm basically going to recreate it for the project using the method I just showed you so join me back here in a couple of moments once I've done that so now that I've done that my Gant chart is starting to look a lot better and one thing to remember is that you also want
to run through this same process for any successes now for most of these in our sports day subproject the successors are within the same project but if we take a look at this one just here sports day and barbecue I can see here the successor is a task that we have in the planning section now creating successors is pretty much the same as predecessors the only difference is the order in which we select the tasks so to create a successor we need to select the task we want to link to first so sports day and
barbecue and then we select the successor so we're going to scroll up and we're going to select task 15 by holding down control and then we can click on link task 15 the predecessor updates but down here the successor has updated with that task so just bear that in mind when you're linking through to your predecessors and successors now one thing you might have noticed here is that we have gaps in the numbering for example if we take a look we've got one and then it skips over two and we go to three 4 five
six is missing seven eight is missing so on and so forth now we are going to talk more about these gaps a bit later on so don't worry about it for now the final thing we're going to do in this lesson is we're going to delete out these sport State tasks so we can simply select them right click and choose delete I'm fine to delete all of the summary and subtask so let's click on okay and now we're just left with our sub project and all of the links should link through to earlier sections of
the project let's give it a save and once again we're going to get this message pop up and for this you don't really have to worry about it too much we're going to click on okay to update the resource poll to reflect our changes we're then going to Simply go to file and close this down it's time now to complete exercise two and I have to say out of all of the exercises in this course this is probably the one that's going to take you the most time now what you're going to find in the
exercise files folder is the exercise 2 MPP file and this file contains lots of different parts so much like what we were doing in the section previously so we have our planning section we have the gala dinner tasks we have the fashion show tasks and the sports day tasks and what I basically want you to do in this exercise is to practice the skills that we've learned in this section so I want you to split up this project into separate files so basically you need to create a master file and just for reference there is
mine sitting here it's called charity event all and this master file is going to contain multiple sub projects and each of the sub projects are listed below so we have fashion show dinner planning and sports day you're also going to need to create a shared resource pool that all of them share together and once again you can see here I have a file called charity eventor resources this is where you're going to find your resource poll and it's the file with no tasks so your starting file is the exercise file at the bottom and these
files here are really guides for you they are the finished result of my workings out now I don't mind what you call your files you don't have to name them exactly the same as what I've done here you can name them whatever you like but I would recommend that you save all of your files into the same folder another point to note with these exercises is don't Focus too much on getting your project to look exactly the same as mine with project you might have different project dates set you might be doing this way in
the future so the dates that you see in my project are not the same as yours you might have different options set or you might be using specific calendars so the focus doesn't need to be on getting your project plan to look exactly the same as mine you just need to practice these skills so you can apply them to your own plans so that is it give it a go and I will see you in the next lesson so we've looked at some of the basic aspects of resource sharing and consolidation and now we're going
to look at some of the more practical aspects now consolidation and resource sharing Works absolutely fine if you follow a clearly defined set of rules and protocols and in order for this to be the case your requirements must be pretty straightforward if your requirements are more complex and a good example would be if you have a number of pools of resources and sometimes you need to get resources from one place and sometimes another or maybe you have lots of projects then Microsoft Project isn't really going to cope with it without you being extremely careful because
even then we would be working in an environment where even a small slip or deviation has the potential to cause disaster so if your requirements are even just a little bit more complicated go for project server where you can use Erp now Erp stands for enterprise resource planning and it gives us the ability to deal with shared resources from multiple pools and it's supported in a more flexible and resilient way so if you're looking at this and thinking my project is more complex than this then you really need to think about if Microsoft Project is
going to be up to the job also if we have a situation where say we have four project managers sharing a Consolidated project and resource pool it's very important that they all know what they're doing because if even one of them doesn't understand how to do this then it can cause chaos for everybody else so those are just a couple of points to bear in mind now you can see on the screen I'm currently in file explorer and I have all of my files remember we created these in the exercise I have them saved off
to a shared location now in reality if you're working at a company this might be some kind of shared network drive that everybody in your company or in your team can access now I'm just simply one person I don't work at a company so I don't have a shared network drive but what I do have is one drive cloud storage which again is another area where you can share files so I've saved my files into this shared area now one of the potential problems when you have project files saved to a shared network drive is
the potential for conflicts because with a shared network drive lots of people might have access to these files and we could have multiple people opening the same file at the same time so again just bear that in mind I'm going to show you a couple of little pointers here so let's start out by opening charity event all because all I want to do right now is just see the entire project so let's double click to open so first off it recognizes that there is a shared resource pool and it's popping up this little message asking
me how I want to handle that so it says this file shares resources from a resource poll what do you want to do and then we have two options we can choose to open the resource pool to see assignments across all shareff files or do not not open other files now the reason why we might choose the second option do not open other files would be a situation where maybe we're not that interested in working with or even seeing the resources maybe we just simply want to open the project plan so we can take a
look at the schedule maybe add a couple of tasks in that kind of thing so if you aren't really interested in the resources you could select that second option now the first option will allow us to see the other resources and that's one we're going to choose in this situation so let's just click on okay so it's going to open up the charity event all file and I can see the master and all of the sub projects that we have in here now the reason why I can see these is because I have them all
stored in the same folder location if we just quickly jump back to file explorer all of the files all of the sub projects that are part of this master project are all in the same folder now let's start dive into a quick scenario maybe I'm the project manager for the gala dinner only and at any particular time I only need to see the tasks and the information related to the gala dinner so let's close down this file and just open up the Gara dinner sub project so we're going to jump back to file explorer there
is the Gara dinner project let's double click to open now note that we get exactly the same message about the resource pull also note when you look behind at the tasks some of those are ghosted or grayed out and these are the tasks within the gadner project that either have predecessors or successors so essentially tasks that have dependencies now these aren't real tasks in this project they just represent tasks in other sub projects so they're really there to give me information about external dependencies now once again we're going to select the first option let's click
on okay so there is my project and if we jump across to the resource sheet I can see my resource pull and I can use these resources in my project and remember as we saw before we could jump across to Resource usage view we could add a column for project and even though I only have the gala dinner project open I can still see where those resources are being used in relation to other projects so so this is a really important point to note here the resource pool is aware of where all of the resources
are being used even if we only have a small part of the file open so now we have a little bit of a different situation the project manager for the gala dinner has decided that he or she wants to work on their part of the project from home so we're going to say that they don't have access to the shared location remember this is all in the context of these files being stored on a network drive at at your company now as the project manager of the gala dinner I want to be able to take
all of these files home but the other project managers for each part of this project are also taking their files home so in order for the project manager of the gala dinner to be able to work successfully on this project from home would he or she need to take home the resource pool as well well in theory that is possible but in my experience that can lead to a bit of a disaster because if the project manager takes the Gad Dina file home and also the resources file and they make changes to those files from
home the next day when they come into the office and load them back onto the network server and let's say that all of the other project managers do exactly the same thing how do we manage all of those changes now of course in theory we could set this up so that everybody can work on it from home and the good example here would be to save these files into something like one drive as I do here but a lot of companies still work with files that are stored on network drives so we need to work
out a way that we can do this successfully and with ease but also make sure that everybody is aware of the implications of doing this so what we're going to do here is let's close down the gadin file we're going to reopen it but this time we're going to select the second option do not open other files and click on okay so now we have a situation where we have the garad dinner file open but we don't have but we don't have the shared resource pool so if we go across to the resource sheet notice
that we only have two resources as opposed to all of our resources and that is because we don't have the resource pole open we don't have access to it currently so it's only showing us the resources that are in use for the specific tasks in the garad dinner project only and what project is basically doing here is it creates a temporary working resource sheet and only includes the resources that it knows about so as far as project is concerned these are local resources in a local resource sheet so let's go in and let's make a
change so we're going to open up the prepare dinner venue task we're going to make sure we're on the resources Tab and where we have our volunteer resource currently that's showing us 300% so effectively we have three volunteers all working at 100% so what I'm going to do is I'm going to take this down to 200 click on okay now notice we get a little warning next to task 12 let's click the drop down we have some options I'm going to choose the second option that's absolutely fine change the amount of work but keep the
duration the same so let's choose that and it gets rid of our warning the other thing we might do is we might assign additional resources just here so maybe I want to assign the volunteer that I've just freed up to the make bar arrangements task so we're going to click in resource name we're going to choose volunteer units 100% that's fine and click on okay now what about assigning a resource that we can't currently see remember we can only see the garad project manager and the volunteer maybe we want to assign someone to help with
the training of the garad dinner volunteers so let's jump back across to the resource sheet and we're going to add a caterer resource and we're going to assign this resource to that task so let's jump in to train garad dinner volunteers we're going to go to the resources Tab and we're going to add our caterer so those are the changes that I've made at home let's give the file a quick save and close it down so let's pretend it's the next day I've come back into the office and I've uploaded the files that I worked
on at home to the shared network drive so let's now open up charity event all we're going to select the first option as we're back in the office now let's check our changes if we scroll down to the garad inner section of the project let's jump into the train garad in a volunteers task we're just going to open it up and check our resources there is the caterer that we added so that's looking good what about make bar arrangements let's double click because we made a change there yes we have our volunteer assigned and if
we jump across to our resources you can see that the caterer has now been added to the bottom of the resource pool so effectively the changes that we've made to this project without the resource P being available have come across absolutely fine in the previous lesson we looked at some of the Practical aspects of sharing and consolidation and how a project manager can work separately on a project that is part of a larger project and in this lesson we're going to start by looking at another important basic question how do you maintain a resource pool
now we're still working in the shared location and we're just going to open up the resource pool which is this file just here charity event resources. MPP so let's double click to open it up and what you'll notice is you get this little open resource P dialogue box and we have three options that we can choose so it says this file is the resource pool for many projects what do you want to do and the first option that's selected by default is is open resource pool read only allowing others to work on projects connected to
the pool now before we select our option here it's important to bear this information in mind when we're talking about making changes or updates to the resource pool we're actually talking about two different things one type of update is where we change information in the resource poll such as the pay rate someone's initials or maybe the calendar the other type of change we could make isn't really a change to the resource poll at all it's a change to an assignment and in this case it's sort of the running total that the resource pool keeps of
assignments for each of its resources so with that in mind we're going to first select the first option in this list open resource pool readon allowing others to work on projects connected to the pool now if we open the resource pool using this option we can look at the properties of the resources and maybe do things like runoff reports but we can't make changes to them so let's select the first option and click on okay now you can see automatically up in the title bar it's showing me that this file is open as read only
now what we're effectively doing here is we're looking at a snapshot of the resource poll at a moment in time and of course other project managers might be working on their projects individually and it's entirely possible that they're making changes to their project and also the resource resource pull so if at any time we want to refresh the resource pull and see the changes that other people are making we can do that so if we jump up to the resource Tab and go to Resource poll notice we have a refresh resource poll option just here
so if we click this it's going to refresh it and pull through any of those changes now if we ourselves are making changes to the resource pool and we want to make sure that everybody can see those we would do a similar thing we would jump up to Resource pool but we would choose the option below update resource pool now it's currently grayed out for me because I haven't made any changes or updates to the resource pool but this is the option you would choose now if we go back into resource pool and just jump
into the share resources option this is going to show us all of the files that this resource pool is linked to now this is more of an FYI it's just useful information to know now I'm going to cancel out of here I'm going to close down the resource pool and we're going to reopen because we want to take a look at the second option in that list so the second option says open resource P read write so that you can make changes to Resource information like pay rates Etc although this will lock others out of
updating the pool with new information so if what you need to do here is something like change pay rates as it says in the message or any other fundamental change to the information about one or more resources then you're going to need to open the resource pool in read write mode now when you do that you don't stop others from opening projects that share the resource pool from opening their projects but they won't be able to make changes to the resource information so it doesn't stop them changing assignments but they can't change any information that
involves actually changing resource information itself so if you do need to do maintenance on the information in the resource poll then this is the option to use now the third option option is a variation on the second option it says open the resource pool read WR and all other share of files into a new master project file you can access this new master project file from The View tab switch Windows command now so far when we've been talking about project consolidation the implication is that there is an element of permanence to this all project the
project that contains the sub projects and we've done that on the basis that this will be something that will continue throughout the life of the overall projects now in some cases either you don't need that or that creates its own problems for example it restricts how users manage their own projects so you might find it's better all around for users to keep their projects entirely separate on a day-to-day basis so they can still share the resource PLL but the projects are not Consolidated into one master project however it may be that maybe once a week
for example you need to run a report and you need to run a report on all of the projects together in a master file so these are all decisions that you need to make depending on the type of projects that you have and I'm going to leave that for you to experiment with now a final few things to cover before we leave this lesson we've taken a look at how to share resources but what about doing it the other way around what about stopping sharing resources and really the important thing to remember here is that
you need to have the pool and the file open so we're going to open the resource pool in read write and I'm also going to open the Gara dinner file now as we already know the Gara dinner file shares resources I'm on the resource sheet now and I have my resource pull so if we jump up to Resource pull and go to share resources what I could do here is Select use own resources I'm going to click on okay notice now it's effectively unlink from the resource poll and we're only seeing the resources that are
part of that Gala dinner project so so let's close the garad dinner file down I'm going to say yes to save the changes I'm now back in my resource pool file and if we go to Resource pool and share resources check out the sharing links below remember we looked in here previously this is showing us all of the files that the resource pool is linked to you can see that the Gad dinner file is now no longer in this list so it's no longer sharing the resource pool now I'm going to close down the resource
pool and we're going to open up charity event all and I'm going to say yes open the resource pool and notice in the project column where we can see our resources and where those resources are coming from we now have two separate files so the majority of these resources are using the shared pool which is this charity event resources file but the three resources that are part of the gala dinner project are now getting their resources from the gala dinner project instead now just to finish up this lesson let's jump back to an chart View
and as we know we're currently working in the charity all which is showing us the master and all of the sub projects now maybe at this stage we decide that we don't want the gala dinner sub project to be a sub project anymore maybe we just want to list out these tasks and have them part of the all project and this is a very straightforward thing to do so what we're going to do is we're going to select the sub project we're going to right click our Mouse and we're going to jump into information and
we're going to go to the advanced Tab and where we have source project if you notice underneath it says link to project so if we want to make these just regular tasks and not a sub project we just simply need to deselect this and click on okay I'm going to say yes I want to save changes and check it out we now just have those tasks listed as regular tasks within the all project it's no longer an inserted sub project now this can have implications further up up in the schedule if we scroll up to
the planning section some of the tasks that are part of the gala dinner project are now being referenced from in this case the planning sub project and what we would need to do here is to make sure that where the dependencies originally existed between the two sub projects and now exist between effectively a sub project of the all project and tasks within the all project you need to go through these dependencies and make sure they're set up correctly and one of the most important things to bear in mind here is that when you do convert
a sub project back to regular tasks that is not reversible so I always recommend it's a good idea to take a backup copy of your file in case you decide at any stage that that's not what you wanted to do in this lesson we're going to take a look at how we can set up recurring tasks as this might not be something that you've come across before and we're going to use the example of a progress meeting so in this scenario it might be that every month let's say the 29th of each month we get
the team together for a progress meeting and that meeting is going to last 3 hours and it occurs in the afternoon from 2: p.m. to 5:00 p.m. so if you were managing a project let's say which lasts roughly a year you would also be managing 12 progress meetings now we could schedule these meetings individually but it's lot more time efficient to set them up as recurring tasks we have to be aware that if you are going to set these meetings up as recurring tasks you need to be in a situation where there isn't much variance
from a pattern and what I mean by that is you know for sure that that meeting is going to occur on the 29th of every month and the duration is going to be 3 hours from 2:00 p.m. to 5:00 p.m. now of course there are natural variations for example the 29th of the month might not always be on a working day it could be at the weekend now project will deal with any situation like that so we don't really need to worry about that too much but if in fact what you find is that every
month your boss wants to move the meeting to a different date maybe the 24th or the 27th then setting up a recurring task might not be the most efficient way to do this so what I'm trying to say is that there needs to be a reasonably consistent pattern to your tasks now before we get into setting up our occurring tasks for this project meeting I just want to demonstrate something that surprisingly a large number of people don't generally get to do in project and that is to use times as well as dates for our start
and finish now what I mean by that is when you're adding tasks or maybe setting the start date of your project most of the time we're working with days we won't generally scheduled tasks between two times it will always be a task that has a duration of 3 days 2 days one day 5 days so on and so forth but for this we are going to jump into the options and we're going to add in a time element to our start and finish times so I'm currently working in the recurring task project file which you
can find in the course files folder and I'm in Gant chart View and I'm just going to widen out the duration column because we're going to add in a longer date format so let's click on file we're going to go down to options and on the general page if you take a look in the date format field you can see this is the format that I'm currently using so I'm going to change this to add in the time component as well so I think I'm just going to use this date format just here and let's
click on okay and we're going to see that reflected when our occurring tasks are added into the schedule so now it's time to add our occurring task we're going to jump to the task ribbon and then all the way over in the insert group we're going to click the drop down underneath task and choose recurring task so we need to to give our task a name so this is going to be a project meeting the duration is currently set to one day now we don't want this meeting to be a one-day meeting it's going to
be a 3-hour meeting so I'm going to type 3 H in here I then get to choose the recurrence pattern so is this occurring daily weekly monthly yearly this is a monthly meeting so I'm going to choose monthly and then I can choose the detail of that recurrence so I could choose to set this to recur on a specific day of every month for example or I could choose to schedule this meeting on the second Wednesday of every month or maybe the third Monday of every month so you can really get quite granular about your
occurrence information just here now we're going to say that we want this meeting to occur every month on the 29th so let's add in 29 just there of every 1 month and then underneath we get to specify the range of recurrence now currently the default start date here is just the start date of my project and the actual date that you have in here the start date doesn't matter too much cuz project will work that out based on today's date but we do need to change the time just here otherwise it's going to schedule all
meetings at 8:00 a.m. in the morning so we can leave the start date as it is but we do need to change this information over here so I'm going to say I want this to start at 2:00 p.m. we then get to choose if we want to end after a specific number of occurrences so maybe I'm only sched in this project for the next 6 months so I could say I want to end this after six occurrences now I don't want to do that in this case I'm going to choose a specific date so let's
click on end by and I'm going to use the date picker and we're just going to schedule these until the end of the year so I'm just going to select the 31st of December and I'm going to add onto the end here five p.m. the final thing at the bottom here is to choose a calendar for scheduling this task now for the for the time being I'm just going to choose the standard calendar and click on okay now notice I've got this little popup warning message that tells me two of the seven project meeting tasks
will occur during non-working times so that means that the 29th of the month has fallen on a non-working Day so a Saturday or a Sunday based off of my standard calendar twice so I now need to tell project how I want to deal with that so I have a few different options it says project can reschedule the task to occur at the first available working time to reschedule the two task occurrence click yes so if I was to click yes here then project is going to reschedule both of those tasks that fall on a non-working
day to the next available time on the next working day so we can safely say that if my tasks fall on a weekend if I was to choose yes here then project is going to schedule them for the next working day which is going to be Monday now if I was to choose no down here it's not going to to create the two task occurrences so it's not going to create them at all so maybe we decide that for those meetings that do fall on a weekend we're just not going to have a meeting I
could choose no the final option cancel is if I just decide that I want to cancel out of what I'm doing and not create any tasks I can just choose cancel now in this instance I'm going to get project to reschedule the two task occurrence so let's click on yes and see what we get now if we take a look at the start column just here we can see that most of these project meetings have scheduled on the 29th but we can see our two exceptions we have one here which has been rescheduled to July
the 31st at 8:00 a.m. in the morning and then we have this one down here which has been rescheduled to October the 30th so the majority of my tasks have been rescheduled correctly but I will now have to go in and deal with these two exceptions so that they reflect accurately because we don't want these occurring at 8:00 a.m. in the morning so let's click on the first task that needs to be rescheduled which is this one just here here we can right click and go into information and now we can just adjust the time
so I'm going to change this again to 2 p.m. and the end time to 5 p.m. and click on okay so that one now looks a lot better I'm going to do exactly the same for this task just here so let's rightclick information and make our changes so there we go pretty simple and straightforward but again it is worth noting that if each meeting that you want to schedule has significant differences maybe completely different times of the day then creating these individually as opposed to setting them up as recurring tasks is probably going to be
more efficient for you now another thing to know if we decide at some stage that maybe this meeting is going to last 2 hours as opposed to three and we right click and go into the information for the first task just here if we were to change the duration up here to 2 hours just know that it's going to BAS basically recreate every single task in this list so if you did make any changes to exceptions like we just did you're going to have to go back in and redo those so that's just really a
point to note and another little thing to note here before we finish this lesson is that if you do go in and create recurring tasks you don't necessarily have to create them just the end of your project you can extend them further than the project end date just bear in mind that if you do this it is going to extend the overall duration of your entire project so just be aware of that as well now when we do have our meeting scheduled as we do here you can see we have a project at the top
which has a little arrow next to it which means it is collapsable and expandable and project has helpfully named all of these individual projects with a number so 1 2 3 4 to make them easy to identify now the very final thing to note here is that we can also assign resources to our meetings so what I could do here is click the project meeting at the top right click and choose assign resources and I have three resources already included in my resource sheet and I want to assign all three of these resources to the
meetings so what I can do is I can hold down control to select multiple resources so let's click the first one hold down control select the second one and the third click on assign and now when I click on close I can see in the resource names column I now have all of those resources assigned to every single recurring meeting in this lesson we're going to take a look at how we can create custom fields and it's probably the case that you have seen and used many of the fields associated with tasks and resources before
so Fields associated with tasks would be things like its duration its start and finish times and you can see those them fields on the screen right now for this new project that we're going to be working on so fields in Project are essentially columns now in some cases it might be that you'll specify values yourself and sometimes project does it for us for example if we set up a task starting on a particular date and then we create another task with a dependency on the first say it's going to start 20 days after the first
task project will calculate the start date for us it will also calculate things like the amount of work involved in a task based on the duration number of resources and so on so the number of fields that we already have within project is pretty large but in any particular situation there might be other information that you want to store or see in your project so we do this using custom Fields And there are so many different things that we can do with custom Fields now as you'll see in a moment when we dive into this
project provides a set of dummy fields that we can use as the basis of our own custom Fields so we're going to look at a very simple example of how to create a custom field and it will really give you an idea as to the type of things that you can do with them so we're going to set up a very common scenario many project managers these days keep information about the tasks in a project and they call it rag status now what rag stands for is effectively red Amber and green and it's a really
simple indicator of how a task is going in a project so the way that this works is that for each task in a project it's given a rag status so something is going well and it's on track we might give it a rag status of G for green if something's got issues it might get a status of a for Amber and if we have a task where things are going horribly wrong we're over budget we're behind schedule then we might decide to give that task a status of R for red now the way that people
assign these statuses can vary some people do it manually and do it on a task toask basis but in other cases these values will be calculated based on the current performance of the project maybe how far overtime is this project or how far out of budget have the costs gotten now for this particular lesson I'm going to demonstrate setting up a rag status for use manually and we're going to set up this new rag status custom field and then we're going to assign values for the Project based on my own assessment of the state of
each task so the project that we're going to be working on is a new website for a company called National Farm Foods now the details of this project don't really matter in this example but it is just a simple representation of the building of a website so let's set up our custom field so for this we need to jump up to the project Tab and in the Properties Group we have a custom Fields button so let's click on this and see what we get now it's worth noting right at at the top here we can
create a custom field for a task a resource or a project now we're creating a custom field for tasks so we're just going to select this first option and then we can choose the type of custom field that we're creating and you can see that we have a number of different options in the dropdown just here now we're creating a rag status task which means I want to see either R A or G in the column so that is text so our type is going to be text and then just below that in the fields
area we have all of our dummy custom fields and you can see that we have 30 of them that we can modify and use So currently they just have the generic name text one text 2 text three so on and so forth and to be honest with you it doesn't really matter which one of these you choose but let's keep things logical we're going to select text one at the top now the first thing I'm going to do here is I'm going to rename this field now we can double click to re name it or
we can just select the rename button underneath so I'm going to give this a more meaningful name so I can identify it a bit better and we're just going to call it rag let's click on okay you can see it now renames it but we still have text one in Brackets so that just lets him know the type of field we're using when we're working with our custom field also note below we have some other buttons so we can delete fields from here if you want to get rid of one you can do that we
can even import fields from other applications the next set of options that we have are custom attributes and you can see we have a choice of none lookup or formula now if we were to choose none it basically means that we're allowing the users to type whatever they like in the field so instead of just typing R A or G they could type anything they wanted into that field now that's not what I want I want to lock this down a little bit so that they can only type R A or G and that is
where we would use the second option the lookup option because with this option we can provide a list and the only thing users are going to be able to do in that field is Select an option from that list the final option is formulas so if we wanted to add a formula which does a calculation in this field we could do that from here also now we're going to choose lookup and this is where we get to Define what we want to see in that dropdown now the order in which you type these is entirely
up to you but in general I tend to like to have the one that's probably going to be the most commonly used at the top so for me I think that's probably going to be green so I'm going to type G in here and then we can give it a description and the description is going to be progress good the next one is going to be a for Amber and we're going to say that this is a warning so maybe something we need to check on and the final one is going to be R and
we'll just say that there are issues with this task now note that if you do want to rearrange these you can simply select them and you have little move buttons at the top so I could move that up to reorder it or move it back down we also have some buttons just above which will allow us to copy and paste if you want to make copies of these we can insert rows things like that and then underneath this little table notice we have a little check box that says user value from the table as the
default entry for the field so once again if you think that one of these is going to be way more common than the others then you might want to select it so for example G for Progress good and click on set default and you can see that that Chang color which means that this is the default option we can also change the way that we're displaying the order in this lookup table so currently I'm displaying these by row number so they're going to show 1 2 3 in the dropdown or I could chose to sort
these ascending or sort descending alphabetically and then the final option that we have down here are our data entry options and it says allow additional items to be entered into the fields and those values will be added to the lookup so again if we want to allow our users to be able to effectively modify what they're seeing in the dropdown and just type something in and have it become part of this list then we could choose this option now I don't want to do that in this case so we're just simply going to click on
close the next little group of options that we have calculation for task and group summary rows so these options here relate to calculations so if we take a look at our project let's take a look at the development task and it subtasks in the project so task 13 14 15 and 16 so the development summary task has three subtasks so what this basically relates to is if I give all three of these subtasks a rag status of G for green do I want the summary task the development task to get a status of G as
well or what about if I have a different status applied to each of the subtasks how do I want that to reflect in the summary task do I want it to average out to work out the status for the summary task so that is what these options relate to just here now in this case we're just going to leave as on none the next option calculation for assignment rows now once again we're just going to leave this on none and then the final group here values to display now currently I have this set to data
which means it's going to display an R an A or a g but if I wanted to make this more graphical I could add graphical indicator to represent those values and I could choose if I want to add them for non- summary rows summary rows and if I do select this option I can also select that summary rows inherit the criteria from non summary rows so this is where we could come in and we could add an image just here so for example I could click the drop down in test for Rag and I could
say that if it equals let's say G for green I could assign an image so let's choose a green circle if it equals an a for Amber then we want to have let's say an orange circle and if it equals R for red then we're going to have a red circle now you don't have to do this I'm just showing you this as an example let's click on okay so now let's click on okay to create our cust field and to get that fied display we just need to add a new column so I want
my rag status column to appear somewhere around here so let's select the duration column go up to Gant chart format and we're going to insert a column and then we can go through and if we scroll down to R we should find our rag custom field there it is just there let's select it and check out what we get because we set the green one as the default that's why we're seeing Green in here here but I could change this by clicking the drop down and maybe I want to change this to a for warning
and we get our orange graphical representation now remember if you just wanted R A and G in here you didn't have to set up these graphical indicators so I'm going to set this to progress good let's say that this one has some issues or warning and we'll just carry on adding a rag status for each of these tasks and it's entirely up to you if you want to manually add a status for the summary task as well I'm just going to add them for the subtasks all the way down to the bottom and we're going
to do most of these as progress good so that is how you can set up a custom field and use it in your project in the previous lesson we saw how we can add a custom field into our project that shows the rag R status of each task and the way that we did that was that we entered our rag status manually if you recall after we added the column I then went through and selected the rag status manually from the drop-down for each of the tasks but as I mentioned in the previous lesson aside
from doing that manually we might decide that we want to automate the calculation of values for a custom field and that's exactly what we're going to do in this particular lesson and we're going to stick with our rag status field but this time the values are going to be calculated and there are many ways that people calculate rag status this can be based on numerous different things it might be based on Time Performance or maybe cost performance and we're going to create a calculation based on cost performance now you can see here that I have
version two of this project on the screen and version two differs from version one very slightly so we're going to set up this scenario that the project isn't going particularly well everything in the the original project plan was behind schedule and going well but now some things have happened and we've had to update our project to reflect the new status of each task and version two reflects the new status of the project now the first thing I'm going to do here before we get on to the calculations part of this lesson is I'm going to
change the rag status column to use text as opposed to these graphical indicators so this is just a good opportunity for you to see how you can switch between these two representations of the rag status so I'm going to select the rag status column let's go up to Gant chart format and custom Fields now if I don't want to show these graphical indicators I just want to see the r a or G all I need to do is come down to where it says values to display and change this from graphical indicators to data so
let's select that option click on okay and we now get our text as opposed to those Graphics now now as I mentioned we're going to calculate our rag status based on cost so the first thing we need to do here is we want to make sure that we're displaying the cost table now I have the cost table displayed if you're not sure how to do this and you're in a different view if you jump up to the view tab go to the data group we have a tables drop down just here so you just want
to make sure that you're clicked on cost you might find that you're clicked on Entry instead if you can see all of your tasks so we want to display the cost table now now one thing I want you to take a look at here if we extend this out is the variance column we can see that quite a few tasks have a positive variance I.E they're currently running over budget and that really does make sense because in this project plan in this version two I've actually extended the duration of some of the tasks in this
project and with an extended duration it means that we require resources for a longer period of time to work on that particular task and that in turn pushes the costs up so it's not really a surprise to see that we have quite a few positive variances in here and that quite a few tasks are running over budget if you look at task five for example requirements definition we can see that the variance is just over $22,000 task 10 analysis and design that's just under $11,000 and there are a couple of other tasks in here as
well that are also running over budget for example ask 14 graphical resources and branding that's slightly over budget at $90 so we're going to calculate the rag status based off of the variance and the rule that I'm going to apply is that anything that has a cost variance of zero or less I.E the currently planned cost doesn't exceed the Baseline cost any of those tasks the rag status will be G or green for any task whose cost variance is positive but doesn't exceed $11,000 the status is going to be a or Amber and for all
of the other tasks where the cost variance exceeds $11,000 the status will be r or red so let's set up a second custom field so let's go to the project tab custom fields and this time we're still working with tasks we're going to choose the next one in the list text two and we're going to rename this to rag Auto so we can differentiate it from the original now when it comes to the custom attributes this time we're going to use a formula to calculate the rag status so let's click on the formula button now
this little formula dialog box that pops up is very similar to the Expression Builder in Excel if you've ever used that you can see we have our mathematical symbols underneath so plus minus multiply divide we have our operators we have a little drop down this where we can choose different fields to work with and we also have a list of functions and these are categorized by type now the formula that we're going to set up here we're going to do it in two parts and the first part of this formula is going to allow me
to identify all of the G's in the rag status column so any task that's flagged with a G for green now we know that a status of G can be identified by anything that has a c variance of zero or negative so let's click the functions dropdown and the function that we're going to use is the IF function so again if anybody out there is an Excel user this might be a function that you're already familiar with and the IF function is a logical function it allows us to perform a test and then it outputs
a value of true or false and we can add meaning to that true or false output now that's all a bit complicated at this stage so let's work through it slowly I'm going to go into General because this is where we have our if expression and notice here it does look a little bit different to if you're using it in Excel but the formula is basically the same so let's select if from the list and notice in this formula we have expression true part false part so the expression part is where you're performing your test
and then we choose what we want to Output if that test is true and what we want to Output if that test is false so what is our expression going to be what is our logical test well for this first part what I want to say is if the cost variance is greater than zero so I'm going to select where it says expression we're going to delete that out and we're going to replace it with a field so let's click the drop down we're going to go to cost and we're looking for cost variance and
what we're saying is if the cost variance is greater then zero and then we can Define what we want it to do now for this first part here this true part I'm just going to put a little placeholder in here because we're actually going to work through this in the second part of this formula so for the time being I'm just going to put in quote marks X and for the false part we're going to put G so let's work through this because if you've never seen this before this can look pretty complicated so what
we're basically saying here is if the cost variance is greater than zero if that is true output an X if it's false output a g for green so if I was to click okay on this formula what I'm basically going to see in the rag Auto column is an X for positive values and a g for negative values so let's try it out let's click on okay now you might see this little warning message pop up it basically tells you that anything that's currently in the rag auto field field is going to be overwritten by
this formula now in this case that is totally fine so let's click on okay and okay again so let's go up to Gant chart format and we're going to say insert column and this time we're looking for rag Auto and there it is just there so notice what we get if we take a look at this first one requirements definition I have an X in the rag auto field and if I take a look at the variance I can see that this is a positive variance so this is over budget the next one for example
is showing G in the rag Auto status column and that's because the variance is zero remember anything that's greater than zero is going to show an X and everything else will show a g the same thing down here analysis and design we have an X and that's because we are over budget on that one design sign off has a variance of zero so that is effectively on budget we have a g so so far this formula is working correctly but I need to take it a stage further because I don't want to have X in
the rag Auto column I want it to display g a or R so we need to modify our formula and add in another condition so let's jump up to custom Fields select rag Auto and we're going to click on formula we're going to go back in and simply edit our formula now what we effectively need to do here is turn this into a nested if statement and again if you are an Excel user this might be something that you're already familiar with so we want to replace this X part with another if formula so we're
going to delete it out we're going to go to function into General and we're going to select if to add another one in now our expression this time let's delete that out is going to be if the cost variance is greater than $1,000 if that's true we want to Output r or red status if it's false we want to Output an a for Amber status so working through this formula the formula is first going to check if the cost variance is greater than zero if that's false it's going to Output a g if it's true
it's then going to move on to the next and check if it's greater than a th and it's going to assign r or a based on that calculation anything else it's going to assign a g so let's click on okay and okay again and we can now see that our values have been updated so this one just here has a automatic rag status of R because the variance is greater than a th if we take a look at something with a rag status of a we can see that it's greater than zero but not greater
than a th000 so that is how that formula calculates now the final thing I'm I'm going to do here because I don't want to have both of these columns in my table is I'm going to Simply hide the original rag column so let's right click and choose hide column and then I'm just going to switch back to my entry table View and I'm going to quickly add another new column to display my rag Auto status in this view as well so let's scroll down rag Auto and there we go in the previous lesson we set
up a rag Auto Custom field and the value for the custom field for each task was calculated using a formula and as I pointed out in that lesson the formula that you can create can be pretty sophisticated there are lots of different options if you have a little look around and in setting up that formula we used nested if statements now there is a very good alter alternative to using nested if statements which can make things simpler and also allows us to deal with situations where we have more than three values so that's what we're
going to take a look at in this lesson we're going to edit the rag Auto Custom field and we're going to use a different formula so let's click on the project Tab and we're going to jump into custom fields and make sure that we have rag Auto selected and we're going to click on the formula button and in there we we still have a nested if formula now we're going to replace this formula with a more flexible formula called switch and again if you are an Excel user then you might be familiar with this function
so let's delete out everything that we currently have in there now you can simply type the formula in but if you prefer to get those little prompts for the arguments then jump into function go down to General and there is the function that we're going to use switch now the switch fun function allows us to create multiple Expressions so more than the three that we did using the nested if statements and you can see that these arguments kind of come in pairs we have expression one and then value one expression two value two and we
could carry on going expression three value three so on and so forth so we're going to double click to select expression one and we're still working with the cost variance field so we're going to insert our cost variance field field and we're going to say if this is less than or equal to zero the value we want to Output is going to be G or green so basically anything with a negative cost variance is going to have a rag status of G we can then complete this for expression two so once again we're working with
cost variance if this is less than or equal to $11,000 the value is going to be a and then finally we're going to add another one if the cost variance is greater than $11,000 then we're going to Output an r and of course if we had more options we could simply carry on going setting up these different pairs logical test and then the output now we're going to stop there it's all we need for our example click on okay and what you should notice is that when I click on okay again there should be absolutely
no change in the rag auto field because we effectively doing the same calculation we're just using a different formula to do it so let's click on okay and like magic nothing changes so our formula is working it's also worth bearing in mind that when you do click on okay project does do a syntax check of your formula so if you've typed something in incorrectly you are going to get a warning message come up if you don't see anything then you can safely ass assume that your formula is good now because there are so many different
types of formulas that you can do in project and you want to learn a little bit more about this we definitely don't have time to cover all of them in this course but something that can be really helpful is to jump into the help files and just search for Project functions for custom fields and the top link here if we open this up it's going to give us a whole heap of information about the different functions for custom fields and it's going to go through them all with an explanation so it's definitely worth having a
little read through these help files if this is something that you think you're going to be using all the time in Project now the final thing we're going to do here is we are going to read add some graphical indicators but we're going to make them slightly different to before so let's go to the project Tab and custom Fields we're going to make sure that we have our rag auto field selected we're going to change this to graphical indicators and we're going to click on the button and then we're going to jump in here here
and we're going to add some squares this time so let's choose equals if the value equals g the image we're going to use is this green square we're going to say equals again if it's a we're going to have an AM square and then finally if it's equal to R we're going to have a red square also now underneath we have this little option selected show data values in tool tip now I do recommend that you keep this selected let's click on okay and okay again and we can see that those have now applied they're
looking lovely but what exactly is that tool tips option well if I hover my mouse over any of these indicators it will show you the underlying value so if I hover over one of these let's go for this one just here I don't know if you can see it's sort of very briefly flashed now that's got something to do with the fact that I'm recording the screen for you when you hover your mouse over this and you're not recording you'll be able to actually see the value that sits underneath the graphic so I do recommend
having those turned on can be super useful so that's it for this section on custom field we've seen a couple of different examples there but of course there are so many different formulas left for you to explore it's time now to complete exercise three and in this exercise we're going to create a custom field for a project that you haven't seen yet and this is a reasonably basic building project the schedule isn't quite finished and we haven't assigned any resources as yet but we are almost at the end of the planning stage and we've saved
a baseline but we've had to change some of the estimates so now that we've changed some estimates we get a finish variance for some of the tasks in the project and you can see those in the Finish variance column in the exercise file now this is your starting point for this exercise if you take a look in that column you'll see that many of the tasks don't have a variance for some of them it might just be 2 or 3 days and for a few it's 5 days or more so what I'd like you to
do in this exercise is I want you to flag the tasks that have a variance of 5 days or more so that we can address that before we go on to the next stage of planning now the way that I would like you to do this is to create a custom field of type flag so if you check each of the types you'll see that a flag field is a data type of yes no and I'd like you to make sure that the value of yes is set for any task where the finished variance is
5 days or more and I'd also like you to set this for the appropriate summary task as well so if a summary task has a finished variance of 5 days or more I'd like to have the value of yes also the next thing I'd like you to do in this exercise is I would like you to indicate graphically each of the tasks and summary tasks with a finished variance of 5 days or more in the Gant chart using an icon so a couple of things for you to practice in this exercise now before you dive
straight in there's just a couple of really important things that I want to mention here which are really going to help you when you're completing this exercise in Project 2021 durations are stored in minutes so if you want to check the value of finish variance you need to do that in the terms of minutes so when I say 5 days that's five working days so in a project where the defaults are still in Force 5 days is 40 hours which is 2,400 minutes now this is going to be important when you're completing this exercise and
I'm not going to give you too many clues or hints because I really want you to have a think about this yourself but just bear in mind that when you're dealing with durations be aware that they're stored in minutes if you'd like to see my answer then please keep watching so here is my answer you can see that I've moved the columns around a little bit so that we have finish variance at the start here and we have a new colum called week late and notice in this column Whenever there is a finished variance of
5 days or more we have this little red diamond icon so that just lets me know which tasks I need to focus on so you should have ended up with something that looks like this remember your dates might be different so you might have a slightly different result but if you can see the week L column and the graphical indicators are appearing where they're supposed to appear you can safely assume that you've completed this exercise correctly and of course if you're unsure then you'll find this file in the exercise files folder take a look at
the field and see what I did to achieve this result that's it for now I will see you next time in this lesson we're going to start to take a look at outline numbering and WBS codes because these might be things that you're not familiar with so let's start out with outline numbering now in this lesson we're going to use the example of a houseb bu project now this project isn't complete but there is enough information in it for the purpose of this lesson and the thing about house build projects is that they're normally very
structured and they're also normally very similar so most housef projects will have tasks included similar to the ones that you can see here now something that's not particularly obvious when you're just looking at this project is that behind the scenes project 2021 is keeping a list of outline numbers for us so let's take a look at them for this project now what I'm going to do is I'm going to insert a column just here and we're looking four outline numbers so let's scroll down there it is and now we can see our different outline number
levels now this is very simple number formatting but let's just walk through it so you understand so you can see here the task number one our top level summary task site has been given an outline number of one the next task task two which currently says clear site has been given an outline number of 1.1 and that's because task number two is effectively a subtask of task number one we can see that it's been indented which gives us our outline number of 1.1 the next task task number three set out that's on the same indentation
level as clear site so the numbering is going to follow on from that point so set out is now 1.2 and you can see that this numbering structure continues throughout this project plan and currently pretty much all of the tasks that we have in this plan are either level one the summary task or level two so we're not really going Beyond 8.1 8.2 8.3 now let's see what happens when we introduce another task into the middle of the schedule so I'm going to select where we have task three and we're going to insert a task
and this task is going to be called trim now this task needs to be a subtask of clear site so let's jump up to the task ribbon and we're just going to indent this task so check out what happens to our outline numbering now that we've introduced a third level trim has been given an outline number of 1.1.1 and then the numbering for task 4 goes back to 1.2 because this is out dented compared to trim if I was to insert another task directly under trim and indent it to the same level that task would
be given an outline number of 1.1.2 so this is fairly standard outline numbering that I'm sure you've come across at some point in your career now the good news about this outline numbering is that project 2021 does all of the maintenance for us so as we make changes to the schedule add tasks delete tasks it's going to automatically update the outline numbering to reflect the new structure so what exactly is the point of having outline numbers well we can use them to uniquely identify a task in a project for example if you wanted to relate
materials to a particular task maybe we're ordering steel for the steel frame you can see down here task number 21 when we order that steel maybe we want to make sure people know which particular project and task the steel was meant for so to do that we could provide them with the name of the project and also the outline number so outline numbers can be useful in that respect but they also give your project structure now this in theory all sounds good but in practice the use of outline numbers can have problems now if you
have a very fixed structure on your projects and you're reusing the same structure and there is rarely a need to change it or vary it then this can work however if you need something that can deal with variations with the addition of new tasks then it doesn't work too well so when we started this project if we just scroll back up to the top site had an outline number of one clear site had an outline number of 1.1 Etc and they still have those outline numbers and if you recall we inserted the trim task into
the schedule and everything numbered correctly but supposing that trim had to go into the schedule but it wasn't a subtask of Clear Sight instead it was a subtask of site so let's give that a go and see what happens so I'm going to select the trim task and what we're going to do is we're going to outdent it so it's on the same level as clear site so now that we've done that and all subtasks underneath the site summary task are on the same level and all the numbering looks as if it's working and flowing
through correctly one thing that has happened is that the numbering Has Changed For example for task number four set out when we modified the indentation level of trim just above it changed the set out task number from 1.2 to 1.3 so the addition of new tasks and the changing of the indentation will renumber other tasks in your project to accommodate those changes now this might be absolutely fine for the project that you're working on but in some cases having volatile numbers that can change depending on the changes that you're making to the schedule is not
really what you want sometimes you want to assign a unique number to a task and have that number follow that task no matter what else is going on in the schedule and that is where WBS codes come in so let's take a look at the default WBS codes for this particular project so let's insert another column and we're going to choose WBS from this list so this will be near the bottom there we go and we can see the default WBS codes now WBS codes are the same really as outline numbering by default but we
can customize the WBS codes to make them more relevant to the project that we're working on and if you're wondering where WBS codes originated from they originally came from government work work and US military work and the idea was not only to be able to identify the tasks in a project using a code in system but also to do things like relate WBS codes in one project to WBS codes in another project so a lot of the time if you were a project manager you'd be given a set of standard WBS codes to use and
you need to set them up in your project to conform not only to government requirements but often to International standards and WBS code codes are still used and they're very common in the public sector now one key aspect of WBS codes is that they don't often look as simple as this the coding system is more complex and it's more specific to the project so if you were given a set of WBS codes to use in a project you'd need to know how to customize them and that's what I'm going to show you next now also
another thing to note before we begin with these standard WBS codes that you can see in this new column that we've added check out what happens here so the first one the summary task for site is 001 clear side 01 SLA now you'd think that the next one would be 001 SLB but it's not it's e now this has something to do with what I was talking about earlier in the fact that WBS codes are more fixed and travel with their task as opposed to project changing the outline numbering when we start moving and deleting
tasks so this is why we're seeing e just here and I'll talk about this more a little bit later on now let's take a look at how we would customize these WBS codes to make them a little bit more meaningful to this particular project what we're going to do is jump up to the project Tab and in the Properties Group we have WBS Define code so this is where we can set up exactly how we want our WPS codes to look now the first field we need to complete is the project code prefix now this
will in general help us identify which project these WBS codes belong to so this is a house build project and we're working in the 01 file so I'm going to say that the prefix for all of these codes is going to be hb01 Dash and then we're going to have our numbering system now we Define our different numbering levels in the code mask area below and we're going to create three different number numbering levels so our first numbering level let's click the drop down we're going to say that we won numbers the length well let's
go for three digits and the separator is going to be let's say a forward slash so that is my first level of numbering and you can see in the code preview at the top what that's going to look like so it's going to say hb01 d111 because I've chosen numbers it's going to start at one the length is three and when we move on to the next level the separator is going to be a forward slash our next level of numbering let's do these in uppercase the length this time is going to be one character
and the separator is going to be a DOT and then our third level is going to be ordered numbers again and this time we're going to have two characters and we're not going to have a separator on the end now before we click on okay let's just take a look at these two little checkbox options that we have at the bottom we have generate WBS code for new task selected so when we add new tasks into the schedule it's going to generate a brand new WBS code for that task and then the second option verify
the uniqueness of the new WBS code so basically project is going to check against the list to make sure that the WBS code we're using is a unique code so I'm happy with this let's click on okay and check out our schedule so now we have our WBS style number applied once again if you take a look at this trim task you can see that it seems to be out of order because it's not really flowing through with its numbering system now we're going to talk about why that is in the next lesson so I'm
going to hop over there now and I look forward to you joining me previously we looked at outline numbers and WBS codes and we pointed out some problems in terms of producing a consistent and reliable way of identifying the tasks in a project and the structure of those tasks then we created custom WBS codes so in this lesson we're going to take a look at some of the problems that we might encounter with outline numbers and WBS codes because there are issues with both of them just different issues now it's important to remember that there
is a fundamental difference between a situation where you are given codes to use and they need to be assigned to the Tas in a project in such a way that those codes never change and the procedure whereby the tasks in a project are outline numbered in some way and that numbering is updated when you update the structure or the contents of the project so do you want your codes to be fixed or flexible and adaptable as the project changes so let's take a look at this in a bit more detail so let's take a look
at task number 11 lockup and also task number 18 frame now now lockup has a WBS code of 003 we're just going to look at the last three numbers on the end here and frame has a WBS code of 004 so what I'm going to do here is I'm going to drag frame above lockup so let's grab the task let's drag it up and drop it in there now a couple of things to notice here the first thing is the indentation notice that frame has effectively taken on the indentation of the summary task above and
the outline numbering reflects that as well now the first thing I'm going to do here is just outdent frame to give it its correct outline level now notice here that when we've done this rearranging and made changes to this structure the outline number has recovered well we can see that everything still flows through so frame is now outline number three 3.1 3.2 all the way down to 3.4 and lock up has now changed to outline number four and all of its subtasks have the appropriate numbering level but check out the WBS codes this is an
entirely different story effectively the WBS codes have acted in the opposite way so the lockup task and all of its subtasks have retained the original formatting so it's still showing us 003 003a so on and so forth in the WBS code field but the outline numbering is all related to the number four so the WBS code hasn't changed whereas the outline numbering has now if we take a look at the frame summary task and all of its subtasks remember this is the one we moved above lockup we now have some very strange numbering in here
we have hb01 013 and that follows down throughout all of the subtasks so why do we have 13 in here well it's because project views these as inserted tasks into the schedule and effectively treats them as if they are brand new tasks and assigns the next lot of WBS codes to them in the list so if we scroll down to the bottom of this schedule you can see that the last WBS code here for sign off task number 47 is HB 01012 so 12 now because project is treating these tasks as brand new tasks it's
assigned them the next set of WBS codes in the list which is 13 and you'll also see if you look down that WBS column that we now no longer have any WBS codes that relate to 004 we have ones for 003 just here and then our ones for 005 and that's because in here is where we had that frame summary task with its subtasks that was the one that we moved further up the schedule so outline numbers and WBS codes behave in very different ways when you change the structure of your project so let's grab
the frame summary task again and let's move it back to where it was and see what happens to the schedule so let's grab it and move it all the way down to to here and once again I'm just going to need to outd the summary task so it doesn't take on the indentation of the tasks Above So once again you can see that the outline number has updated but the WBS code has remained static now let's say that when we've done this we don't particularly like the way that these WBS codes have been handled well
fortunately there is a way that we can get around this all we need to do is right click on the summary task and jump into information and we're going to jump across to the custom field Tab and you can see here is our WBS code so what I could do is simply manually change this from here if I didn't like the WBS code that had been assigned so I'm going to change this to the value let's put it back to 004 click on okay and if you now take a look at the schedule where we
have frame we now have those codes looking as we need them to look now it might be that we get into a situation where we're renumbering different WBS codes and maybe we get ourselves into a bit of a mixup we just want to reset everything back to how it was fortunately we have a button which will help us with this so if we go up to project and into WBS we have a reum option just here and that will reset all of your numbering back to how it was originally in this lesson we're going to
learn at outline codes so far we've been talking about the structure of a project and we've looked at outline numbering and the WBS codes that reflect the structure now there are many other ways that you can add structure to projects and we're going to proceed in this lesson by going back to the nff website project if you recall this is the project for Farm Foods where we've basically outline the structure for building a website now this time we're going to do something a little bit different because what we want to do is to reflect the
requirements of an accountant now the accountant wants to be able to identify cost centers and cost center structures for the resources assigned to this project so we need to set up a structure which reflects how we charge for the use of these resources so in this example we aren't looking at a task structure we're looking at a resource structure instead now the project accountant has told us that we need to be able to identif ify which of the internal resources are chargeable and which are non-chargeable so we just need to create a simple structure that
clarifies the charging within the project now if you take a look at the first resource in the resource sheet it says Northern Farm Foods now Northern Farm Foods is essentially the client and as the client we don't have to pay them to do what they're doing so let's take a quick look at the types of tasks that the northern Farm Foods client Cent is performing within this project so we're going to jump up to Resource usage and there is Northern Farm Foods and we can see here that they are involved in the requirements definition the
analysis and design and also the testing now as the client we don't have to pay them to do what they're doing their contribution to this project is part of the commercial Arrangement that we have with the client now if we take a look at Mark Raven's word I can see that he's in charge of of the coding side of things so he's going to be writing all of the HTML now Mark Ravensword is an internal salaried member of staff so the department won't be charging for his time the same thing applies to Sally danvas she's
an internal member of Staff as well and her time is not chargeable because this is effectively part of her job she's been assigned to this project to carry out these specific tasks and for Sally that is the analysis and design now Lorraine Reese is is a slightly different scenario Lorraine again is an internal member of Staff she's been brought in to help with the testing of the scripts but her time is chargeable so we're going to set up an outline code structure to reflect all of these different scenarios so let's jump up to the project
tab we're going to go into custom Fields so we're going to make sure that we select resource at the top here and the type we're going to change to outline code so this little custom Fields window should look reasonably familiar to you now because we have used it a couple of times throughout the balance of this course so let's rename our field and this time we're going to call it charge code and click on okay now take a look down in the custom attributes section you can see that Nan and formula are both grade out
so they're inaccessible to me at the moment the only option we have in here is look up which is fortunate because that's the option we need so the first thing we're going to do here is we're going to Define our code mask so this is really the structure that the charge code is going to take on so if we click on edit mask this is where we can Define our charge code structure so we're going to say that there are going to be two levels to our charge code the first level is going to be
characters the length is going to be three and we're going to have a DOT separator the second level is also going to be characters and the length is also going to be three and you can see just above in the code preview what that's going to look like so let's click on okay now that we have our code mask our structure we can start to add our values in so our first value which is going to be three characters is in NT and the description internal resource our second value is going to be chg for
chargeable and then our third value is going to be for nonch chargeable now we're going to do exactly the same but for external resources as well so we're going to have EXT we're going to have chg again now notice as soon as I type that it appears in red because project is recognizing that we already have chg as a value now we're not going to worry about that too much right now because this will change when we adjust the indentation so let's just finish off what we're doing here and the final one again for external
resources is non-chargeable so now what we can do is we can use our indentations at the top here to give this a little bit of structure so I basically want this one to be indented so it's under internal along with this one as well and we want to do the same for the other two notice how that now we've added that indentation project is recognizing that these are not actually duplicates now if we take a look at some of the other options underneath we're pretty much going to leave everything on the default settings here so
we want to display the indenting in the lookup table so I always like to have this turned on because it just makes it easier to see what you're selecting user value from the table as the default entry for the field now I'm not going to set a default so I'm going to leave that blank display order for the lookup table well I'm happy displaying it by row number and when it comes to our data entry options I don't want to select either of these because I don't want to allow additional items to be entered into
the fields and I don't want to allow only codes that have no subordinate values so we're basically going to leave these as default click on close and okay so now what we're going to do here is we're going to insert a column and we're going to display our custom field there it is just there charge code outline level one and now we can go through and assign different charge codes to different resources so if we go for the client first of all and click the little drop-down there is our little table and you can see
some of those options that we selected coming into play we can see that we've got our indentation in place so it's easier to identify what we're selecting so Northern Farm Foods is external non-chargeable Mark Ravensword well as we mentioned he is internal and non-chargeable as is Sally danas Lorraine Reese she's internal but she is chargeable and I'm basically going to go through the rest of these resources just assigning a charge code for each so let's say that Adrien is internal non-chargeable Bakersfield Associates well they are external and chargeable People for People they are also external
and chargeable Deborah Ashby well she is internal and non-chargeable and that is all I'm going to fill in there so now if we jump back to the resource sheet we can add a column into here as well so we can see those different charge codes and that can be a really useful column to add to this resource sheet so let's click add new column once again we're going to find our charge code column and there we have all of those charge codes listed out now the very final thing that I want to show you in
this particular lesson is how the new charge code will enable the accountant to analyze the resource costs on this project so for this we're going to jump up to the view tab we're going to go into the data group and where we have group by we're going to create a new group and in the field name we're going to say that we want to group by and then we're going to choose the new field that we created so this one here Group by charge code now you could modify the formatting that you're applying down here
for this example I'm just going to leave it on the defaults and click on apply now check out what happens you can see that our resources have been grouped by charge code so at the top we have all of the resources that currently don't have a value but we can also see all of the external resources grouped together together and all of the internal Resources Group together and they are separated into groups depending on if they are chargeable or nonch chargeable so this can be really helpful to accountants when they're trying to analyze the costs
of a project it's time now for us to complete exercise four and in this exercise we are back to working on our web development project and I've updated it a little bit and the starting point you're going to find in the exercise files folder the file name is exercise 4. MPP if you take a look at this file and jump across to Resource usage view you can see that the charge code custom field that we created in the previous lesson is still there if you recall this is the one that we set up to assist
the accountant now in this exercise we're going to practice custom Fields but we're going to shift our Focus back to custom fields for task so we're going to use a custom field of the type outline code to reflect the structure of the project and remember that the difference when using outline codes is that project doesn't maintain the values for us we must enter the values into the custom field so we want to put in a structure into this project that is fixed and under control so let me just show you my answer and then I'll
explain some of the specific requirements for this exercise so this is my answer you can see here that we have a custom column called web dev project code and then underneath we have a code for each of the different tasks and summary tasks in the project now if we click notice that we have a drop down just here where we can see a list of all of those values now notice that we only have five levels but the third level design and development is split into two parts we have 001 and 00 2 and hopefully
you should recall from the previous lessons how we actually set up this drop-down list and how we can create these Su levels so in this exercise I'd like you to create a custom field called webdev project code I'd like you to set it up as I've got it set up here and then I'd like you to go through make sure that you can see the webdev project code field in the Gant chart View and assign the relevant project code to each summary task and task within the project so that is your exercise give it a
go and I will see you in the next lesson in this and the next sections we're going to take a look at costs and I'm going to assume that you have a basic knowledge of using costs in a project but we are going to look at some of the aspects that you might not have come across before and in this first section we're going to take a look at fixed task costs now for many of the projects that you manage a large proportion of the costs will be related to the costs of resources and materials
but sometimes you're going to have fixed costs for specific tasks so we're going to start with the example of our building project now if we scroll down to the services section you can see that task number 32 is the connect to services task and for this particular type of task there might be a fixed cost aspect for example there might be a cost in connecting the house supplies to the services so things like electricity and water so in this case we're going to assume that the fixed cost is $295 now this isn't a cost of
a specific resource or material it's a cost associated with the specific task of connecting to services so when we're entering the fixed cost we need to enter it via the cost t table so let's jump up to the view tab over in the data group we're going to click tables and we're going to make sure that we select the cost table and you can see here is the task in question task number 32 now if you just take a look at the different column headings within the cost table the First Column is the fixed cost
column we then have fixed cost acral which is related to when this cost is implemented and I'm going to talk a bit more about that later on we have total cost base line and then we have variance so what I'm going to do here is in the fixed cost column we're simply going to enter in 295 we then need to complete the fixed cost acral method and we have three options in here start pro rated and end now as I mentioned we are going to talk a bit more about this later on so for the
time being we're just going to set this to start which basically means that the cost is going to be acred at the start of the task so now we've entered this information information you can see that the total cost has updated to 295 you can also see that's rolled up to the summary task of services we have nothing for Baseline which is fine because we haven't set a baseline as yet and the variance is $295 as well now if you have assigned a fixed cost to a task you can still assign other costs to the
same task for example if a member of my team had to spend time getting involved in this task that can still be added to the cost of this task so I've switched across to the website project and you'll notice that one of the tasks in this project has a fixed cost of $2,000 task number two tendering process now one really important Point that's worth bearing in mind is that it's only possible to record one fixed cost against a task if you have more than one to apply you would add the cost together to get a
total and add it into the fixed cost column and if you are going to do something like that it's always good to add a note so that everybody knows what's going on with these fixed costs so what we could do here for example is we could select the task let's right click and go into information and then if we click across to the notes tab this is where we could add some notes just letting everybody know what each of the fixed costs are for so there's my description for the $2,000 fixed costs if I had
added multiple fixed costs together into one total I could carry on listing them out here so everybody is aware now there is another case that can sometimes occur let's suppose you are getting external consultancy from an expert and in the case of this tendering process task we need to appoint a consultant now the consultant doesn't charge on an hourly basis he charges a fixed cost so what we can do is we can set up the work resource for the consultant on the basis that there isn't an hourly charge or cost but there is a fixed
cost charge for their services so we can set this consultant up on the basis that their standard rate is zero but there is a cost per use so let's take a look at that we're going to jump across to the resource sheet and we're going to add in a new resource so this is going to be our contract consultant now we're going to say that his standard rate is $0 an hour so I'm not going to change anything just there but the cost per use is $400 an hour so now let's go back to the
Gan chart we're going to select this task and we're going to assign a resource to this task and the resource that we're going to assign is the one that we've just added which is the contract consultant let's select them and click on assign so now you can see the total cost for this project is $3,200 now if we jump into the information for this task and take a look at the resources you can see there are two resources now assigned to this task Deborah Ashby and the contract consultant the former has a cost of $800
and the latter has a cost of $400 so if we add these together that's $1,200 don't forget we already have a fixed cost of 2,000 assigned to this project so the total cost is 3,200 so that's how the breakdown of these costs work for this specific task in this lesson we're going to talk about cost AC CW and Costa CW might be something you're familiar with it might not be and for some people who aren't familiar with accounting it can all seem like a little bit of a mystery now we're going to work in this
dummy project and you can see the file there cost ACR demo. MPP you can find this in the course files folder if you'd like to follow along with me now in this dummy project we simply have five tasks task a to task e we also have five dummy resources in the resource sheet as well so resource one through to five and one thing to not about these resources is the ACR at column you can see that a couple of them have an acral method of prated two of them ACR at the start and one of
them acrs at the end and when a cost acrs it's basically the point in time in which the accounting function associated with the project recognizes that the cost has been incurred for example if we have a resource ACR using the pro-rated method it means that the cost of that resource is spread across the duration of the project if the cost incurs at the start it means as soon as the task gets an actual start date that's when the cost will ACR and if a cost acrs at the end then it means that cost will be
incurred once the task has finished so it's important to to understand the difference between these acral methods now generally people recognize how cost acral Works in terms of labor costs we would normally prate the labor costs over the course of a task on which the labor is employed but there are some exceptions now if you take a look at this dummy project currently we don't have any costs associated with any of these tasks now we're going to go in and change that for task a we're going to add a fixed cost of $100 and we're
going to say that this cost is incurred at the start now one thing to notice here you can see that we now have a total cost of 100 a variance of 100 but the actual is still at zero for task B let's also give this a fixed cost of 100 but we're going to leave this one on pro rated and then what I'm going to do is on the project tab I'm going to set a status date so I want to set the status date of today which is March the 22nd let's click on okay
and I'm going to choose update project underneath let's update the entire project click on okay and check out what's happened here if we take a look at task a we still have our fixed cost of 100 but the actual is now also showing us 100 and that's because the cost acrise at the start of the task if you take a look at the Timeline this task starts on March the 20th which was actually 2 days ago so as soon as I set the project Date Update to today's dat it recognizes that this task has started
and so that cost is incurred and that's why we're seeing the full amount the full $100 in the actual column let's take a look at task B remember we set this one to PR rated so this cost is going to be spread out over the lifetime of the task so we have something slightly different in here our total cost is still $100 the variance is 100 but the actual is only $30 and if we double click to open up task B we can see that this task is 30% complete and that is effectively the charge
that we've incurred so far for 30% of the project now currently we don't have any resources assigned to these tasks and I have five tasks and I also have five resources so what I'm going to do is I'm basically going to go through and assign Resource One to task a resource 2 to task B so on and so forth so let's right click go to assign resources and for task a we're going to assign Resource One let's click on assign now remember you can leave this little window open when you're assigning these which makes things
a lot more efficient so let's select resource 2 and assign going to go for task C is going to be resource 3 task D we're going to assign resource 4 and task e we're going to assign resource 5 so now that we've assigned resources you can see how that affects the cost that we have in our cost table for task a the total cost is now 2,100 we have a variance of 2,100 and an actual of 1,300 and if we double click to open up this task we can see that the cost for resource one
is $2,000 now remember if we go across to the resource sheet Resource One is set to acrw using the pro-rated method so the resource is pro-rated but the fixed cost is incurred at the start so for task a we've incurred the whole of the fixed cost for task a but now we have 8 hours of work at $50 an hour for Resource One whose cost is accured prata throughout the project for task B we've accured a third of the fix cost because it's pro-rated but we've incurred all of the costs for resource 2 because if
we check this out you can see that that's set to acrw at the start and resource 2 is working on a standard rate of $60 an hour so you can see how these changes are affecting the actual costs we see on the schedule and that is why it's so important to understand if costs are acur at the start at the Finish or if they're prated across the span of the project and the final thing I really want to point out here is something within the options so if we go to file and down to options
let's go across to the schedule page right at the bottom you'll see it says default fixed cost acral and it's set to prated so this is the default if you won't change this to anything else now of course you can click the drop down and you can choose start or end if that is your preferred method in general I leave mine on pro rated and then if I need to change anything I can just manually change it in the cost table in this lesson we're going to take a look at budget costs and I'm going
to explain to you why people use budget costs why you may want to use budget costs and how you can compare progress on a project with a project budget with specific reference to costs now it's probably a good stage to point out that you can do exactly the same thing with budget work the approach is very similar so we're back working in a house build project if you'd like to follow along with me we're working in house build 4 and currently we're looking at tasks for Burlington house a and I simply have all of the
tasks collapsed up so we can just see there summary tasks at the top also notice that currently we we don't have any costs associated with project if we jump across to the resource sheet we also don't have any resources listed currently now we might need to prepare a budget and this in general wouldn't relate to any particularly accurate estimates of costs but I might say for example that I think the labor costs on this project are going to be $40,000 possibly the material costs are going to be $30,000 and the legal costs are going to
be $10,000 and so on so so these are just very rough estimates now I also might come up with some budget figures and then during the course of the project I'm going to want to see how the costs are progressing in terms of budget now rather than do all of those things I'm going to take one element and show you how to deal with it and the final thing to point out here is that you shouldn't confuse budget costs with Baseline costs a Bas line is a saved copy of a schedule at a specific point
in time and that will include everything that's been added budget costs are assigned at the project level and although we can compare the budget cost with our actual costs it's not the same as comparing actuals with a baseline now we're going to use the example of setting up a budget cost for connecting to the services so maybe this particular task involves connecting the house up to the relevant services but also getting a building inspector to come around and inspect the building now what I'm going to do here is I'm going to to set up a
resource and that resource name is going to be service costs we're going to give it a type of cost let's give it some initials I'm just going to call this serve costs but what I'm going to do is I'm going to create a little group so we're going to call this service costs group now what I'm going to do here is I'm going to double click to open up this resource and on the general tab notice over on the right hand side we have a little budget checkbox so we're going to select this and click
on okay and now I'm basically going to assign this resource to the entire project now when you're trying to assign resources to an entire project you need to make sure that you have the top level summary task showing at the top here so you can see that I do have mine Burlington house a but if you can't see this for whatever reason you can simply jump into file go down to options and on the advance tab if you scroll down this is what you're looking to select show project summary task so select that and it
should reveal that top level summary task which controls the entire project and will always have a task number of zero so let's rightclick and go to assign resources and we can see our service cost resource that we just set up sitting right there now because we also set this to budget it means that we can't enter in any units and we can't enter in any cost if I try and type it just doesn't type anything so the only thing we can really do here is click on the assign button to assign it to the summary
task and it's worth noting that you can only assign it to the summary task as well now once we have assigned it we can then specify the cost in a number of different ways we could jump across to task usage View and you can see in here we have a budget cost column and we could type in the service cost into here so let's say that our estimate for this is going to be $500 and if we switch back to Gant chart view remember we're currently displaying the cost table we can now see that budget
cost listed in the budget cost column remember if you can't see that column you just need to insert a column and choose budget cost so now what we're going to do is we're going to create two more resources that are going to be in the same category as that budget cost if you recall we created a group called service cost group so we're going to assign both of those resources to that same group now we could do this using a code or a custom field which we have seen earlier on in this course but we're
going to use the group that we created so let's jump back across to our resource sheet and I'm going to add in two more resources so there are my two resources we have the local inspector so he's the one who's going to be carrying out the building inspection and we also have the Service Company who are responsible for connecting up the services to the house and you can see that both of those are of type cost we have their initials and we've assigned them to the same group as the service cost that is the service
cost group also note the acral method at the end the first one is prated the second one AC cruise at the start and the last one AC cruise at the end so let's jump back to our Gant chart View and we're going to assign one of the resources to the connect to services task so let's rightclick and go to assign resources and we're going to assign the Service Company resource because these are the people who are in charge of connecting the services up to the house and maybe we've determined that the cost for this is
going to be $295 so let's enter that in click on assign and you can now see that that cost is updated in the cost table now let's assign our second resource so if we expand completion you can see we have a task here called final inspection so this is when we're going to need the building inspector so let's rightclick and go to assign resources is we're going to select local inspector and we're going to say that this cost is $265 let's click on assign so against a budget of $500 you can now see that we
have those two costs and you can see right at the top where we have the summary task Burlington house a our budget cost is $500 but our total costs are currently coming in at 560 so how could we possibly start reporting on this typ type of information well we could report on this using the group that we created the service cost group because all of these resources are now part of this same group so if we jump up to Resource usage View and go up to the data group you can see we have a little
group by field just here so we're going to click the drop- down and I'm going to say new group bu so what we effectively want to do here is we want to group by the group that we created now you can give your group a name at the top here I'm just going to leave it on the default but where we have group by we can Group by a specific field so there's lots of different fields that we could group this by but if you want to group it by the group that you've created in
this case the service cost group we just simply need to type group in here you can see at the top we have group no value and these are all the ones that we haven't assigned to a group but we also have a little bit further down group service cost group and that's going to include all of those resources that we assigned to that specific group so now we can see very clearly our budget cost and our actual cost just here and we can see that there is a difference there of $60 so that is a
way that you can very easily report on the difference between your budget and your actual costs in this lesson we're going to take a look at Cost rates and changes in cost rates and you're already familiar with assigning resources and we've already looked at calculations involving the cost of resources working on a task now sometimes when you assign a resource to a task there might be the added complication that the rate that you pay for that resource will depend on the task that the resource is being assigned to now we're back in our Northern Farm
Foods website and we're going to jump across to the resource sheet now if you take a look at the First Resource just here for Northern Farm foods you can see that we have a standard rate of $35 an hour and an overtime rate of $35 an hour and we're working on the basis here that everything is chargeable and you can see here that for all of these resources we have a standard rate and we also have an overtime rate now the contract consultant at the bottom this is slightly different you can see that we have
a cost per use charge here of $400 instead now when you set these resources up those rates that you can see in these columns those are the default rates or what we call the a rates for example if we open up Mark Raven's word and take a look at the cost tab you can see here we have a number of different tabs we have a which is the default b c d and e and the a rate here we can see the standard rate and the overtime rate that is displayed in the resource table behind
but in addition Mark could have other rates assigned to him so he might have a b rate a c rate a d rate or an e- rate and we can schedule changes to any of those rates and I'm going to talk a little bit more about this a bit later on for the time being just get the concept that the default is what we call the a rate but we can have other rates for each resource so let's just click on okay to come out of there so what I'm going to do here is I'm
going to jump across to the resource usage View and if we look down our list of resources there is Mark Raven's word and I can see that he only has one task assigned to him he's in charge of all of the HTML coding whereas if we take a look at let's say Bakersfield Associates you can see that they have a range of different tasks assigned to them so analysis and design graphical resources and branding writing test scripts and then testing now if we double click on Bakersfield Associates and take a look at their cost we
can see here that their default rate their a rate they have a standard rate of $60 an hour and an overtime rate of $100 an hour so it might be that this is what they charge for standard it work but maybe when it comes to something like graphical work they could possibly charge a higher rate for that so if we go across to the B tab you can see that we have a higher rate in here so the standard rate for graphical work is $100 an hour and the overtime time rate is $1150 an hour
so we effectively have two different rates that we can possibly use when we're assigning tasks for Bakersfield Associates so let's click on okay because what we're going to do next is we're going to add a column to the table which makes it really easy for us to see which rate each resource is using for each task so we're going to add a new column and the one that we're looking for is cost rate table and you can see that currently everybody is using the default cost rate the a rate so what I'm going to want
to do here is for this task just here the 60-hour task we're going to change that to use B rate that higher rate so now that we've changed that I'm going to add another column and this time we're simply going to add the cost column so now you can see if we take a look at these two down here analysis and design is using the a rate and if you remember the a rate is $60 an hour so if you were to calculate that that works out to $6,150 whereas for graphical resources and branding we
have almost half the work but it's working out at $6,000 because we're using the B rate here that higher rate so we're basically doing $100 multiplied by 60 which gives us a cost of $6,000 so displaying both of these columns can be really helpful when you're trying to work out which rates resources are using now I'm going to briefly jump back just to gantar view because when it comes to assigning resources to tasks there isn't an option in here where we can specify the rate table that we want them to use it's always going to
use the default of the a rate but what we can do instead if we jump across to task usage View and let's just scroll down and find let's say Adrian haskill just here if we double click to open that up notice we can specify what cost rate table we're using for this particular resource so I can click the drop down and I can change it to whatever I like just remember that by default everyone is going to use cost rate table a so I'm going to change that to B and click on okay now another
situation that you'll probably encounter over the lifetime of your project is an increase in rates people's prices ordinarily increase as opposed to decrease so we need to know how to make those changes and reflect them in our project so let's look again at Bakersfield Associates and we can see that their a rate is $60 an hour and they have a b rate of $100 an hour now maybe Bakersfield Associates have let us know that as of July the 17th 2023 their rates are going to increase by5 and $10 an hour so what we can do
in here is we can add another row to this table with the increase so the effective date is going to be Monday the 17th of July the standard rate is going to increase by $5 so it's going to go up to 65 and the overtime rate is going to increase by $10 so it's going to go up to $110 let's do the same for the B rate that we have in here as well so those costs are going to increase on Monday the 17th of July the Stander rate this time is going to be 105
and the overtime rate is going to be 160 and if you take a look at this you can schedule changes to rates quite some time into the future because we have 25 different rows that we can add in here and you could set them up and schedule them all in here so that as soon as that effective date comes around the new rates come into play and of course when we click on okay this is going to have an effect on the cost for those different tasks and you can see those new costs reflected in
the schedule the final thing to point out here is let's open up Adrien hasell again and maybe we've been notified that Adrian's costs are going to increase by 5% on a particular date so let's go in and I'm going to choose let's just choose the same date so we're going to say July the 17th but this time we don't want to enter a monetary amount we're not adding $5 or $10 we want to increase them by a percentage so all we need to do here is type plus 5% and project 2021 is going to work
that out for us so you can see here it's calculated that that's going to be 5250 and this charge will kick in on the 17th of July we can do the same for the overtime rate so let's do plus 10% for the overtime rate and again project works it out for us so once we've done this these new costs are going to be reflected in the schedule going forward from whatever date we've set a big congratulations everybody for making it all the way through to the end of this project 2021 course I hope you enjoyed
running through this course as much as I've enjoyed hosting it so let's just take a moment to recap how far we've come if you remember all the way back at the beginning of the course we learned about the difference between the project plans and also the differences between project 2019 and project 2021 we then started to explore the project interface we looked at the ribbons and the commands we saw how to use the quick access toolbar and customize it and I showed you how you can quickly move around your project interface using keyboard shortcuts we
then also spent some time taking a look at the different views and tables available within project in the next section we set ourselves up for success and we ran through many of those basic but fundamental skills so things like opening closing and saving a file we also set up our project calendar options in this section as well section four was where we really started to get going by entering tasks and other information into our project plan we discussed the difference between automatic versus manually scheduled tasks we saw how to add milestones and also give our
project structure by adding summary and subtasks we then moved on to taking a look at dependencies and constraints and how adding dependencies affects your overall project schedule we also spoke quite a bit about lag and lead time and how you can add that into your schedule as well in the next section we moved on consolidating projects and resource sharing I also showed you how you can set up recurring tasks and work with custom fields and calculated custom fields we spoke about outline numbering outline codes and WBS codes and then we moved into talking about cost
so fixed costs cost acral overtime budget costs and variable material costs so if you went through this course and completed all of the exercises then a huge well done to you I hope you feel that your knowledge of project has now progressed on and you can tackle with confidence some of the more advanced functionality the final thing to do here is for me to say my goodbyes I hope you enjoyed running through this course as much as I've enjoyed hosting it for you and I very much look forward to seeing you on another course at
some point in the future but for now goodbye if you're not a subscriber click down below to subscribe so you get notified about similar videos we upload to get the course exercise files and follow along with this video click over there and click over there to watch more videos on YouTube from Simon says it
Related Videos

24:33
How to Manage Projects Like a Pro in Micro...
Bulb Digital
151,760 views

8:30:23
Microsoft Project 2019 Beginner to Advance...
Simon Sez IT
272,746 views
2:35:41
Microsoft Project 2021 Tutorial Course: 2....
Simon Sez IT
67,069 views
![How To Use Microsoft Project | Hands-On Training | Beginner to Pro Tutorial [Full Course]](https://img.youtube.com/vi/9rAW74Kg0N0/mqdefault.jpg)
1:29:16
How To Use Microsoft Project | Hands-On Tr...
Pragmatic Works
24,679 views
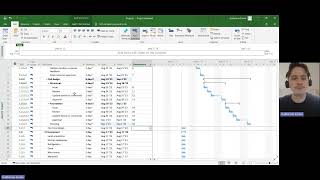
38:14
Minimum every Project Manager should know ...
Project Management Craft
23,050 views
5:46:08
Microsoft Access 2021 Beginner to Advanced...
Simon Sez IT
24,766 views

5:43:20
Project 2021 Full Course Tutorial (5+ Hours)
Learnit Training
89,491 views
3:55:02
PowerPoint 365 Training for Beginners - 4-...
Simon Sez IT
72,838 views

29:37
# 1 MS Project 2019 ● Basics in 20 Minutes...
Vision 6D : Ms Project / AI Project Management /AI
1,153,808 views
2:47:59
Ultimate Guide to Essential Excel Formulas...
Simon Sez IT
12,276 views

2:35:13
Microsoft Project for the Web Tutorial for...
Simon Sez IT
130,978 views

18:39
Master Microsoft Project in 20 MINUTES! (F...
Alvin the PM - Become a Certified Project Manager
534,263 views

3:14:39
Project 2021 Advanced Tutorial
Learnit Training
100,077 views

4:05:35
Microsoft Word 365 for Beginners: 4+ Hour ...
Simon Sez IT
57,204 views
4:00:00
Ultimate Excel Tips and Tricks - 4+ Hours ...
Simon Sez IT
13,445 views

2:03:16
Microsoft Project Tutorial for Beginners: ...
Simon Sez IT
37,705 views

2:01:33
Project Beginner Tutorial
Learnit Training
1,106,683 views

2:31:39
Microsoft Project 2021 Advanced Training C...
Simon Sez IT
11,179 views
30:31
MS PROJECT THE COURSE, SETUP AND ENTRY CLA...
Tom Stephenson
25,845 views

19:17
Getting Things Done; The Microsoft Outlook...
Jonathan Edwards
103,900 views