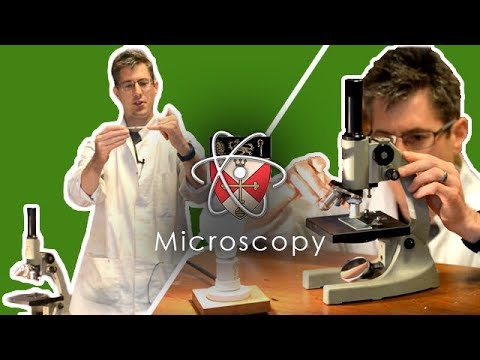
Microscopy - How to use a microscope - GCSE Science Required Practical
364.44k views2305 WordsCopy TextShare
Malmesbury Education
Dr Chipperfield shows you how to correctly use a microscope and estimate the size of cells.
Leave a ...
Video Transcript:
So today we're going to look at one of the required practicals that involves the use of a microscope a key tool in many biological experiments a piece of equipment that is really important that you know how to use so we're going to look first at some of the parts of microscope and how we use it the choir pra then asks you to look at some onion skin so some plant tissue as a sample under the microscope so we're going to look at how we're going to set that up so we're going to look at some
onion tissue under this microscope and that's part of the CH practical we're also going to try and measure or estimate the size of some of the onion cells so we'll look at how to do that as well so first off here is our microscope notice we've got a light source attached here the light from this light bulb is coming underneath here there's a mirror under this at the bottom of microscope uh below What's called the stage this PL platform here is called the stage so the light from this light bulb is reflecting up so first
thing to do when you've got your M scope and you've got your light bulb set up have adjust the mirror until lots of light it's come up here so this should be a nice white circle in here now so that means you got lots of light coming up uh which will help you see your specimen very clearly so you've got the light set up correctly and the mirror next thing to do check that the lens in use is the smallest one is the lowest magnification so it will be the shortest lens so in this case
the correct lens is in position I would raise it up out the way at the moment moment just to uh mean we can access the stage easily to get our specimen in uh so set that part of things up we've then got other parts on MOS scope we've got the handle here for carrying it whenever you carry the mic scope please make sure you you use the handle and you have another hand holding underneath the base this is the micp stage we already mentioned that this is where our sample will go our micros SCP slide
that we're going to set up in just a moment we then have the turret here containing different lenses that help magnify specimen these are called The Objective lenses we have three here we've got a times four lens a times 10 lens and a times 40 lens uh the light coming up the mirror up through our specimen here goes up into this lens up up through here to the eyepiece lens this is another 10 times magnification lens and then we can see our sample it's on the microscope what this means is * 4 * 10 gives
us 40 * magnification that's our lowest magnification all the way up to * 40 * 10 gives a magnification of 400 times so this is this is our microscope now to set up a specimen to use our microscope we need to collect a glass slide please carry them like this touching the edges only so avoid putting greasy fingerprints all over our glass surface that would make it hard to see our specimen we need to collect a bit of onion skin so get some onion uh break some bits off it and generally if you split a
small piece of onion you're looking to get a layer a thin layer of skin coming loose and then you try and peel that layer off you can use your fingers or a for set fingers work just fine though here we go pulled a very thin layer that is a single layer of cells so got a very thin layer of tissue there lay that on your slide try and spread it out out to avoid any folding or creasing of the sample again it'll make it easy to see under the microscope if there's any creases or fold
the specimen you have two layers of cells underneath the microscope that you can see which confuses what you're seeing so try and get a nice even layer out then need to add a couple of drops of iodine so just three drops here should be sufficient the iodine is is a a food test is in another one of the required practicals the Rin is going to stain the starch that's in the cells will help us visualize our onion cells under the microscope then need to add a glass cover slip again notice I'm holding it by the
edges to avoid putting greasy fingerprints on the microslip slide itself which again would obscure my vision of my specimen so lower the cover slip on try it slowly avoiding any air bubbles if it's all possible if at this point you've got excess iodine excess stain on the slide you just dab with a bit of green paper towel to draw up the excess stain you can just tap down gently on here if you feel the need to uh but it shouldn't be necessary but if it if your cover is not sitting flat you can just do
that so you should now have a very thin specimen preparation glass slide onion skin iodine and then your cover slip this goes on to the stage just place it under these clips they're used for holding the specimen in place might sound silly cover slip goes up otherwise it will not focus the mic will not focus properly so the cover slip is on the upper surface of my glass slide now so we now have light coming up through the specimen that is now on the microscope stage it's now to the point that people find most difficult
and this is where people find M it's very frustrating as they cannot focus properly on their specimen so these These are the tips you should always run through if you cannot focus on a specimen so this is what you'll always do when you first use a microscope but if at any point using a microscope you are finding it hard to see your specimen run through these stages to troubleshoot that problem step one make sure you're on the lowest magnification lens are times for objective lens step two get the stage and that lens as close together
as possible it is good practice to get low down whenever you are moving the stage and a lens so I'm going to get down nice and low then using these large dials here they are called the coar Focus dials I'm going to move in this case the lens is coming down in some microscopes you might find the stage moves it doesn't matter which way it's going so these are now as close together as possible need to look down the microscope and then Focus pull turn the knobs towards you going to raise the lens away very
slowly so I'm going to carefully use the course Focus here you might find it easy to use these smaller dials these are the fine Focus dials they they make they move this much more slowly for easy fine adjustments so I'm look down here I'm going to raise this up until I can see my cells and that is now in Focus I can see almost like a tiny Patchwork of little bricks little cells sort of oblong in shape and can see an outline around them down here now they're very small still at this low magnification but
they are now in focus it is easier to do it with this small lens now I've got them in in view I can increase my magnification all to do that all you need to do is spin the next objective in get down low make sure it's not going to touch your slide so again there's lots of SP there's lots of space there so they're not touching it's not going to damage the lens all the specimen and it should roughly still be in Focus now I need to just just adjust that quickly so just very small
adjustment in this case I was just bringing the the lens up very slightly has brought it back to focus but I have not changed it very much I think that's the problem people have is they they make big changes to their to their focus they change these DS quite a lot they move the lens a lot whenever they change the lens it's a it was a very very small adjustment so I now have the specimen in View and it is now at 10 * 10 100 * magnification if you want to go to High magnification
you can do that at this point so again getting low make sure the two the lens will not touch the slide so that is going to touch so I'm going to have to at this point remove increase the raise the lens up this is where you need to avoid damaging your specimen and your your your lens get your eye level with the stage and you need to now lower the lens very very carefully looking from the side all the time to avoid the lens touching the glass side never Focus down when you're looking down the
microscope because you will not see where your lens is you could damage it by putting it onto the glass slide so get getting right down low as possible that's almost touching there and now I focus up that very small adjustment there now has that in focus so again it wasn't much much of an adjustment there just a small adjustment small range of the lens has got the sample in Focus again so we've now seen how to change between our three lenses here to alter magnification when looking at our specimen sample the next part of the
required practical is to both draw some cells but also try and measure their size now your teacher will talk to you about how to draw uh how to make microscope drawings uh particularly you need to just draw the out of cells with a sharp pencil but your teacher will discuss that with you in lessons I wanted to show you how to measure the size of cells or to estimate the sizes of some cells probably best to do this on our middle magnification so we're going to go to the 10 times lens here get as low
as possible I'm just going to focus on my sample again so my sample is now in Focus now what I want to try and do is I'm going just move my sample and move my slide I'm going to twist it a bit and I'm going to get get it so my viewpoint is a circle I'll try to get across the diameter of the circle so the widest point of the circle and try and get a row of whole cells so I'm trying to get find a point in my specimen where I have a number of
cells end of one cell end of a final cell are just Within in view so I get a row of whole cells or or as close to that as possible so I have a row of 1 2 3 four whole cells across the middle of my microscope so I know that four cells are spanning that distance but I don't know what distance that is so you can actually just get a regular ruler now at this point and I can now remove my sample and I need to measure how wide that F that view was of
view just got a regular ruler a transparent ruler is what it needs to be and now I'm going to place that under the microscope it'll probably require some adjustments to focus because the rul is quite quite thick might need a friend to help you hold it in place so I'm just going to get that focused and I'm going to move the ruler so I can see the ends of the markings on here each each marking is a single millimeter if I look down my field of view I want to see how many millimeter markings I
can get in and I can get in one in the middle and one just on each each edge of the field of view so that is between three different markings that is 2 millimet so the field of view is two millimet wide now when we're using microscopes we don't tend to work in millimeters the units that they're too large to work in smaller units called a micron or a micrometer these uh there is a thousand micrometers to a single millimet so in this case the field of view was 2 millim wide that is 2,000 microns
2,000 micrometers wide that was spanned by four cells so you take the distance of 2,000 microns divide it by four and that gives you a result for the average size of those four cells so we've just measured the width of our cells so in this case each cell was approximately 500 microns wide so that gives us an estimate of cell size which You' then be able to record on a any drawing you made of this sample and you've made a record of cell size which is an important part of this required practical and that is
how to use a microscope
Related Videos
12:14
Osmosis - GCSE Science Required Practical
Malmesbury Education
471,362 views

9:16
Microscopes and How to Use a Light Microscope
Amoeba Sisters
2,347,207 views
16:48
Microbiology - GCSE Science Required Pract...
Malmesbury Education
144,711 views

9:53
How To Kick Off Your Microscopic Journey
Journey to the Microcosmos
82,494 views

1:00:52
Explosive Science - with Chris Bishop
The Royal Institution
2,339,596 views
12:56
How to use a Compound Microscope| Monocula...
ThomasTKtungnung
22,487 views

13:02
Food Tests - GCSE Science Required Practical
Malmesbury Education
449,339 views
16:31
Why Snatch Blocks are AWESOME (How Pulleys...
SmarterEveryDay
16,449,368 views
5:31
Enzymes - GCSE Science Required Practical
Malmesbury Education
346,643 views
26:59
Microscope Tutorial - Detailed Version
mesacc
286,194 views

32:46
Electrolysis
Tyler DeWitt
2,530,724 views

19:54
How do Electron Microscopes Work? 🔬🛠🔬 T...
Branch Education
3,508,971 views

1:25:34
Investigating the Periodic Table with Expe...
The Royal Institution
1,182,615 views
10:42
This microscope uses touch
Steve Mould
5,528,950 views

15:55
25 Chemistry Experiments in 15 Minutes | A...
TEDx Talks
5,801,575 views
8:21
Onion Peel Under the Microscope | How to P...
Manocha Academy
811,968 views

1:12:09
Math Videos: How To Learn Basic Arithmeti...
The Organic Chemistry Tutor
4,644,812 views
58:20
Think Fast, Talk Smart: Communication Tech...
Stanford Graduate School of Business
42,417,796 views
6:54
Rates Of Photosynthesis - GCSE Science Req...
Malmesbury Education
542,298 views
56:33
How did Michael Faraday invent? – with Dav...
The Royal Institution
424,893 views