so you've probably watched tons of color grading tutorials before this one but something still feels off you've learned how to get a proper node tree going or how to grade within Premiere but there's still something that's holding you back from creating that highquality cinematic image if you want your footage to look more film ready or commercial ready stick around because these tricks may just change the way you grade forever trick number one Understanding Psychology now if you've studied color theory before or you've delved deep into color grading you've probably already heard these terms and these
different theories um but hear me out it's always good to go back to the foundation the psychology of your color grade means so much more than the look most of the movies I've ever watched the ones that I actually enjoyed that are like top 10 are because I remember the story the colors they used were to the point of ing the story line so I'm going to lay these out as quick as possible I'll leave a AI prompt in the description for you to try um but very quickly red is the most eye-catching color that's
why every big name brand uses red red is invoking intense emotions like anger love violence um it also is a good signal for bad guy enemy it's usually red is used in a bad sense but it can also be used with good intense em emotions blue you have loyalty trust faithfulness but then you also have sadness and cold like cold environments orange you have warmth you have friendliness but you also have dryness and heat that's why Blade Runner that scene that everyone knows where it's just plain orange everywhere it's because the team of Blade Runner
wants you to feel that he is in a dry dirty environment that's why you have that orange look green we have nature we have organic elements but then we also start leaning into sickness eeriness green it's probably my favorite color to use but also your easiest way to give your viewer a gross feeling but I like green a lot now there are more colors that you can go ahead and look up cuz there are tons of colors out there use that prompt in the description if you don't want to use that prompt just go look
it up on the internet if you have not started working with AI yet just go on Google and look up color theory because that is going to completely change the way you color grade when you start color grading intentionally rather than saying oh blue looks good right here you can say no this is a warm happy feeling we're going to make it orange and I can give aspects of blue for some contrast which we'll go over later but you can use colors towards the psychology of what you want your viewers to feel most of these
tricks you're going to see uh I'm going to they're easily done in pre-production I'll give you some post-production uh methods for if you have a video right now that you're trying to edit and I say well it's all done in pre-production you're like well that doesn't help me um so I will give you the best way to do it and then the fix it and post way to do it for psychology have your set design and your costume design all representing the colors that you want I'm trying to give a trustworthy feeling so you can
trust me and all the blue with little as aspects of warmth and [Music] friendliness now you trust me and we're friends all because I have blue and orange so if you could pay attention to it with your lights and your set design your uh costume design your location that's going to help you a ton and make the color grading process even easier because you already have the colors that are popping the grade is just to enhance that not to attempt to make colors that aren't there another technique to being able to pull off a warmer
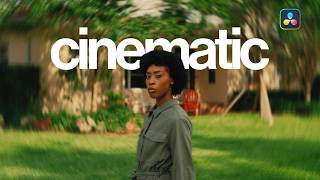
or cold tone is you can change your white balance in camera before you ever shoot how you can do this in post production is you can use log Wheels this shot right here is probably one of my favorite shots that I have gotten from most of the Productions that I've done and this is actually the easiest this was in my uh parents backyard basically um but what I was able to do this was shot a little bit later in the day but 5600 Kelvin this was actually all done afterwards so this was shot 5600 Kelvin
it was little bit later in the day so it was maybe a little warmer than daylight um but what I did is when I went into the color grid in Da Vinci and I took my white balance and made it orange brought up the warmth a ton and now it gave it this warm dry desolate feeling another way you can do this uh is on the opposite end of these scale so here is an example image of a shoot where it was Daylight it was during the day and all I did was change my white
balance to make it look a lot more blue more cold I mean the idea is one I wanted to use it creatively to make it look like night because nighttime naturally has more cooler tones to it while also this part of the music video that we were filming was more of a sad tone so making it blue made it sad and then we're going to come back to this image cuz if you see that orange dot right there there is a reason I had that so the idea of using psychology when making the decisions for
your color is going to enhance your color rating by giving reason behind the colors you're using enhancing the storyline or helping make the story line more digestible and that leads me into the next trick which is use invisible [Music] colors this is a weird one isn't it well invisible colors if you have not heard this yet I'm glad you're hearing it now the whole point of editing and color grading is to be invisible if somebody watches your video and they go wow the editing in that unless unless it's some like filmmaker who's doing this all
the time and they like to try to focus on the aspects of a film rather than falling into the story on average if you have the average person going wow that was a Cool Edit probably was very talented but I don't think it served the job properly the whole point of an editor is to bring life to the footage if you have somebody say that the video or the film they notice the actors the talent they notice the storyline you did your job if people notice the edit the edit didn't support the story The edit
supported itself and was trying to show off almost now again for music videos and stuff that's different people just want to have the where everything's just crazy everything but most of what I have learned is when people watch a video or a film and they say that was a good storyline that was the talent was amazing wow the makeup on that person looked really good that's when you win as an editor you're not supposed to shine which sucks cuz it's like I'm a great editor cool editors are supposed to be the one who are letting
other people shine if you've been editing or color grading for long enough you know well enough that color grading and editing is a very humble position to be in because you do a lot of work and ideally the end result the ideal end result is you get no recognition at least by the average viewer not by the crew so when color grading how do you use invisible colors color grading is supposed to enhance the reality that your character are in the scene my character which is cool enough happens to be Boston Rob from Survivor the
scene that he's in right here we were outside the content we were getting for him was supposed to be very natural he's in his garage it's not this big show it's supposed to be a natural could look like you took it on your phone but we used the red we used all of our lights and the purpose was to create an enhanced reality I want to to take the look of his garage the look of his house and all I wanted to do was to manipulate light so that it looked natural so people weren't questioning
it but it looked really good so people's eyes were blessed with the image but I didn't want people to notice the color Gade the greens of the grass I slightly tweaked them brought the saturation of them down just a tad I brought the warmth of the entire image up using a glow node just a little a little bit and the lighting we used was matching the light that was already outside bouncing light so using invisible colors the whole point when I say invisible colors is because it's color grading that isn't noticeable when someone notices your
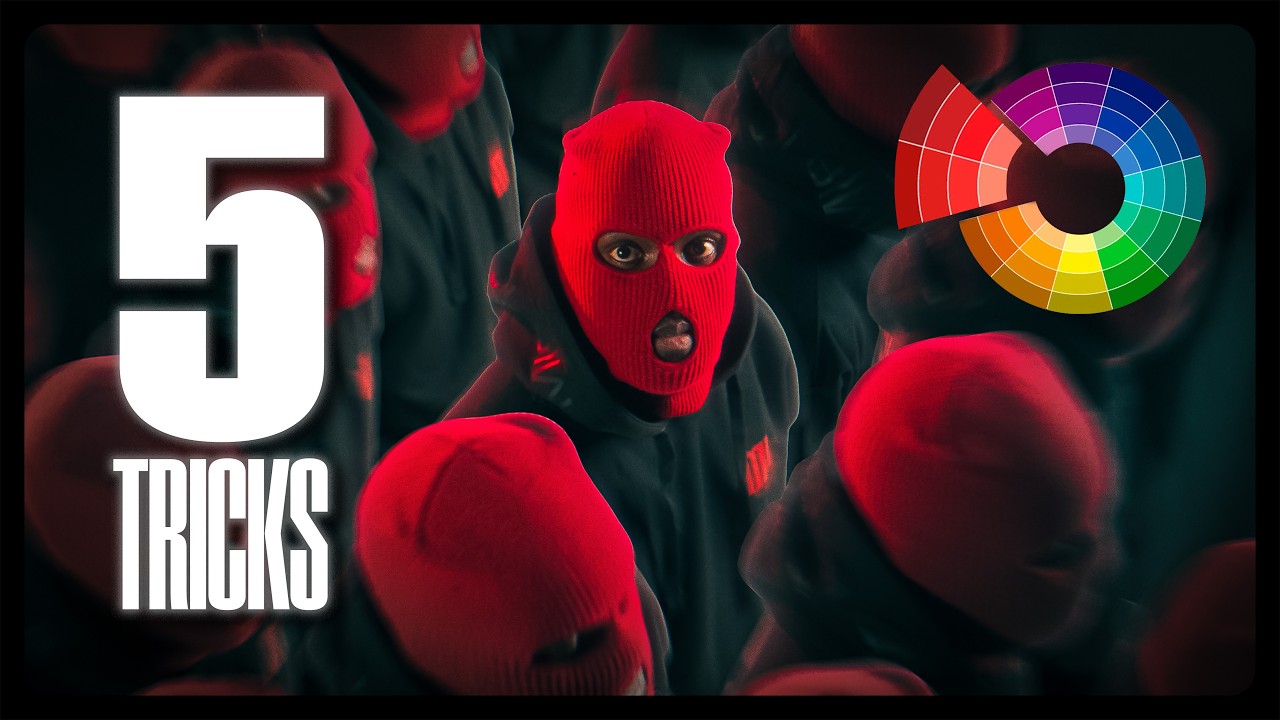
color grade like I said it wasn't realistic it wasn't believable trick number three actually has two parts grade before you grade part one I actually learned this from a YouTube video that I just watched L I'll leave the link in the description so you can watch it cuz it was really good when you're using your colors in your scene do a 60 301 split 60% of your image should be one color if you look at my image 60% of this is blue very blue then you have 30% 30% is orange we have orange orange orange
orange that's changing orange so we have a lot of orange and then 10% is just little pops of white so we have white white obviously my screen is white um headphones headphones extra points if these colors are contrasting we'll dive deeper into the contrast of colors in just a minute part two of trick number three is export your Luts before you film if you have a l that you use or a color grade that you're like kind of using that same process over and over again export that L download it onto your monitor if you're
using a monitor throw that grade on your footage as you're recording ideally it's not baking onto the footage ideally it's just for visual purposes that's why I say use a monitor that can display the L so whenever you're going to film you can already have your color grade in your monitor so that you can see what it would look like if you use that grade that you use so often bonus points if you create a couple different grades couple different LS so that you know okay this is going to be more of a somber mood
video okay I'm going to throw my overall like blue l in there um and then start selling your Luts trick number four this is probably the most important aspect to color grading which you probably already know this but I'm going to give you a small tip for how you can do it within Da Vinci and that's skin tones if you can get a skin tone looking proper that is more believable and the realism factor is there even more the reason skin tones are so important is because skin tones there is a scale there is a
spectrum of skin tones that are constant it is all falling within that desaturated orange we just all have different shades so matching skin tones are important because we already know what the skin tones look like on da Vinci resolve you want to go to I don't even know what it's called I call it the color web I know it's not called the color web but it looks like a web so I call it the color web so whenever I'm in my grade I want to go over to what is it called called color warper and
you can go and you can select which part of the image you want to start manipulating I want to manipulate skin tones and you can go ahead and see down at the bottom of the screen it shows you exactly where that color is on your web and then what point you can select that is going to manipulate it the most so what you can do is you can select that point so that point is selected and come down here to the Hue and you can change the Hue you can change the Satur ation so I'm
going to go back to normal and the reason I want to use this color web is because if you notice as I'm dragging this point it drags other points with it so rather than having a hard stop or like some uh artifacts peeking in when you're using like the skin tone selector and stuff like that this option actually makes it so that you are dragging all of the colors in a way that will smoothly transfer that color to where you want on it um so if you haven't learned this yet a good way to determine
skin tone color and where it should be is if you open up your vector scope there is a line this is like the skin tone line blood line what you can do is when you select or when you drag over this skin tone you can kind of see where we are in the arena um so something you could also do is go to the dropper tool over here select the skin tone select this uh highlight area and then now we only see the portions that are selected and then you can go to this color warp
tool and you can start to warp again here and we want to be as close as we can to that area so if we come back there's our skin tones and then obviously if you want to saturate a little bit more need to bring it back gross and then maybe if we wanted to desaturate a little bit we' need to Bring It Forward pretty good all right so trick number five and this is not going to be our last one stay till after this one for a bonus trick color contrast like I mentioned earlier whenever
I was talking about these lights in here um doing your 6031 rule look at a color wheel if the colors are opposite of each other use those bonus points use complimentary contrast colors but make sure that your story makes sense for both of those psychologically like I mentioned earlier blue is trust orange is warmth and friendliness both of them work for me last one the bonus trick color density I love this one I actually just learned this recently direct your colors or the colors that are either going to pop or the most saturation to your
subject for me most of this image is blue the brightest orange your seeing is my hat me my subject sorry my subject another way you could also do this is by Vig venting vignetting saturation instead of a normal black or white vignette you just desaturate your vignette so now you have more of a monochromatic surrounding area and you are leading with saturation another way you could use this is going back to Da Vinci going to your curves and going to the luminance versus saturation drag the shadow all the way down and the highlights all the
way down and bring your midtones back up and you are desaturate desaturating your heavy shadows and your heavy highlights cuz usually those may not be the subject of your image those will just be surrounding areas so by doing that you are desaturating some of the outside areas and bringing saturation to your subject and then obviously depending on where your subjects falling on this scale from Shadows to highlight you can bring up the saturation where your subject would follow if y'all have any questions at all on different color grading tactics you can either click this video
where I did a deep dive on how to create a moody film look um or put in the comments hey how do you do this why do you do this hey do this this is better I'll look at it I'll analyze it [Music] love y'all really do remember it only takes one to plan before you ever shoot plan your grade before you ever hit record it only takes one to go film go film something you've been waiting too long go film it only takes one to make a change and it only takes one to change
the world and that could be you see you next time [Music]


![Ultimate Guide to Camera Movement — Every Camera Movement Technique Explained [The Shot List Ep6]](https://img.youtube.com/vi/IiyBo-qLDeM/mqdefault.jpg)