How to Make 3d Floor Plan in Blender
158.77k views1965 WordsCopy TextShare

Architecture Topics
E, Shift D, Move and Bridge !
This will be a beginner's Tutorial. A step by step video to make 3D f...
Video Transcript:
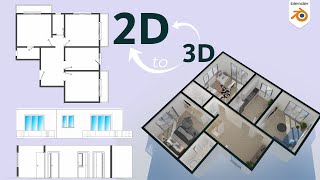
if you want to learn how to do 3D plans in blender then this is the place for you in this video I will show you how to draw floor plan from any image this will be a step-by-step tutorial so like the video subscribe get some tea and let us start in a new blender file select all objects in the scene with your mouse and hit X to delete it then you need a plan an image or a dxf file it doesn't matter the process is the same I will leave the one I use down in the description if you want to follow along you can now drag the image from the folder to blender after that we need to reset both the position and rotation in it and for that use the shortcuts alt R to reset rotation and ALT G to reset the position to World Center you can also edit the image OPAC from the settings on the right side so maybe give it a 75% value for the opacity the next thing we need to fix is the scale the numbers on the plan can go with Imperial or metric system and you can change the unit in blender for both systems I myself go with only metric numbers thus usually fix the scale depending on universal norms for example the door width is generally between 90 and 100 cm the steps width for for the staircase are 30 so you need to choose one known factor and scale accordingly so I will add a 1x one meter plane then scale the door to match its width to do that place the plane at the door Corner hold shift and with your right Mouse button move the cursor to that same Corner then switch the pivot Points transform from the top to 3D cursor this way we scale the image from that corner to match the 1 M on the plane once you're done you can delete the plane and to check even more use the measuring tool from the left bar on the door and stair area to start drawing the walls I will recommend locking the image Movement we do that from the Restriction toggle select option so add it to the layers and turn it off for the image you can start drawing dra from any area on this image top or bottom it all end up together and there's two main ways to do that either draw with surface or with lines surface is the method I go by and it's simply adding a plane and tracing it along the image walls the line method is just a Vertex traced along the same walls then at the end you add thickness to it but that can generate problems at the end so stick with the surface one unless you're that guy I want problems always let's start from this corner at the top add a plane then scale it to fit the wall you can use the measuring tool to get the width for this it's 30 and we can adjust it if we want in edit mode so once you have your plane in the corner hit tab for edit mode make sure you're on vertices selection by hitting one then adjust the plane to fit the corner if needed the two operation we need next are simple extend the wall with extrude shortcut for it is e and jump the windows and doors area with shift d to copy the selected vertices you will get it since we will repeat that a lot with those two vertices selected hit e to extrude press X or Y to choose an axis to extend along then move it with your mouse if the extrude operation stopped you can continue continue by pressing G and moving the vertices up until you're done with the wall you're drawing now that we reached a window we can hit shift d to copy the two vertices past the Windows area then continue again with Extrusion and that's the main method here you extrude along the wall if you hit a corner you change axis if you reached a door or window you jump over it with shift d a tip while moving vertices or edges you can hold shift to make the movement more slow and precise to line with the walls border I won't comment much on the repeated process unless something needs mentioning here in this wall we have an interior wall connected with it so we need to extrude accordingly say in this bottom part we went all the way down with one extrude and did not align it with the interior wall we can once we're done go back to the part we extruded and cut it with controlr then align the cuts with the G key to continue the inner wall e e e in this part we have two walls we need to connect so we need something called bridge but first the wall on the right right is an exterior wall with bigger width and a cut is needed to match it with the inner wall while keeping it editable to do that enable the snap tool on vertices Hitt controlr to add a cut then while moving it align it with the inner wall using your mouse after that we can switch to Edge selection by hitting two at the top of your keyboard then select the edges on both side and with the right Mouse button choose Bridge Edge loops e e e now that we're done with the drawing part let's copy this mesh we made to the left then in edit mode and while on vertices selection hit a to select all then hit M for the merge command and choose by distance this way you can delete any overlap vertices that you might have made while working it's just for checking and since we have zero vertices removed we are good to go after that to extrude that wall and while everything's still selected hit e and move up on the Zed AIS a height of 2. 7 M should be the norm so go with it next thing we need to do is filling the gaps and by gaps I mean the doors and windows there's an add-on in blender called archimesh which can help us doing many architecture elements with ease so go to the edit preferences then in the add-on section locate the Ary mesh add-on and enable it you will have it in the ad menu and also in the sidebar along its settings so let's do this door area first place the cursor nearby cause the elements will be added on it then hit the door button the door we added have mesh Parts an empty to move all of the parts and a wireframe cube around it the last one is to cut the walls done by the same add-on or if you want to add boole in this one can help you cutting the area around the door when once you place the door you can select the frame part in it to open the door parameters there you can change the model the side in which it opens and many other things which can take time to go through so experiment with it in your free time for us let's keep it on the default option with a bit of fix on the width numbers increase it to fit the door area and leave the height on 2. 1 m once we're done with the first door we need to cut the wall above it to close the area over the door and that apply to Windows too so we will make it on the same height 2.
1 M and I will select all the mesh to cut it on that level to cut the entire mesh I will go with the bisc tool select it from the left tools bar we also need to select all in edit mode so hit a to highlight all vertices then cut it horizontally you can cut in any direction you want cause while the cut Point still selected you can just hit s to scale them on the Z axis by zero value again hit s then Z then zero this will level any set of vertices on the same height we can after that move with the snap to the door's border to fill the gaps above the 2. 1 M height we need to choose face selection in edit mode select any two opposite faces and with the right Mouse button choose Bridge faces it's the same as the one we used in Bridge Edge loops and we need to do that above all doors and windows to copy the door around we can first put it in a new collection to keep things organized then then select the door from the layers or from the viewport directly and hit shift d to copy it keep in mind you need to select all parts in the door with the empty so you don't generate any unwanted problems we have another five doors to fill might need to fix the width and rotation in some of them you can check with the drawing image for the door opening direction again I won't be commenting on repetitive process like placing the doors cuz it's the same you need to keep getting faster in doing it by doing it a lot so have fun e e e now that we're done with the doors let's move on to the windows part select any area that need a window say this one in the front you could also add a new collection for the windows then with the ad menu go with the rail window I will align the top of the windows with the doors as in 2.
Related Videos
3:20
How To Turn 3D Model into 2D Floor Plans (...
Architecture Topics
13,882 views
![Step-by-Step Floor Plan Guide for Blender [Updated 2024]](https://img.youtube.com/vi/u2Ywe1vbl30/mqdefault.jpg)
27:06
Step-by-Step Floor Plan Guide for Blender ...
Dude Blender
49,543 views

18:39
Beginner Blender 4.0 Tutorial - Part 2: Ba...
Blender Guru
2,796,939 views

36:16
How to Model a House in SketchUp Free (10 ...
SketchUp School
844,493 views
37:47
3d modelling kichen in 3d max
ilkin jafarov
54 views
44:04
environment light box part 01 and animatio...
A1 BubbleBox
25 views
35:41
Blender Modeling Introduction: How to crea...
ExplainingComputers
417,823 views

9:44
10 Tools Every Blender Noob Should Learn
Brad Colbow
1,008,030 views
1:35:26
HOW TO MAKE A BUILDING IN 3DS MAX AND AUT...
Rohit
20 views
28:10
Modeling rumah sederhana bagian 1
Dody Priyatmono
118,890 views
19:36
Create a SIMPLE Floor Plan: AutoCAD 2025 -...
Verwey Drafting Inc.
28,138 views

8:47
How to Make an Interior in Blender (in 9 m...
Blender Guru
886,715 views

23:00
Creating Quick Animation In Blender 4.0
The Adam
469,860 views

4:51
Creating a Village House in Blender 4.0 - ...
Artvox
235,971 views
13:30
Blender beginner toturial (swe)
Troedsn
31 views
23:15
FREE Interior Design Software - Which Just...
Home Banao
979,985 views

17:57
Blender Tutorial for Complete Beginners - ...
Blender Guru
6,049,369 views

8:32
10 Essential Tips To Improve Your Workflow...
Architecture Topics
331,930 views
9:27
How to RENDER Architecture Floor Plan in 2...
ArchStylus
32,692 views
17:53
Blender Architecture Addon Tutorial, Inter...
blenderian
503,062 views