How to Sell Digital Products Online Step by Step (for beginners)
4.66k views3380 WordsCopy TextShare
Sandra Di
AI Website Builder: hostinger.com/sandradi
(Code: SANDRADI for 10% OFF)
This tutorial will walk you...
Video Transcript:
Hi guys, welcome to this free mini training on how to start selling digital products step by step, whether you're starting from scratch or already dabbling in digital products. This is designed to help you launch faster and smarter. So, let's dive right in.
Here's what we're going to walk through together. Why digital products are the perfect low-risk, high-reward business, how to figure out exactly what to sell. How to create your product using free templates to save you a ton of time.
how to set up your online store and publish your product online and how to start making sales on autopilot. So, why should you start selling digital products? Well, it's one of the easiest ways to start an online business today because there are no shipping or inventory costs.
You can create the product once and sell it over and over again with minimal extra effort. It has huge profit margins because you get to keep most of the earnings and you can start with the skills and tools you already have. I started selling digital products in 2020 when I was trying to get out of client work.
I wanted more freedom, less burnout, and income that didn't depend on me being available 24/7. I didn't have a big audience and I didn't spend thousands on tools and software. I just started small.
My first product was a simple digital planner that I made in Illustrator, which can just as easily be created in Google Docs, to be honest, and it brought in sales while I slept. That's when I knew I was on to something. And now it's your turn because anyone can do this.
So, let's talk about how to choose the right digital product for you. And so many people get stuck on this part because they either have no ideas or too many ideas that they can choose from. And here's my advice.
Do not overthink this part, especially when you're just getting started. There are so many different kinds of digital products you can sell like ebooks, planners, printables, courses, templates, PDF guides, and the list goes on. But when you're getting started, I recommend focusing on something small that you can always scale down the line.
And no matter what it is, it has to provide some sort of value to your customer. So focus on solving one specific problem for one specific person because these types of digital products are the ones that will sell over and over again. Start by asking yourself, what do people ask me for help with?
What problems have I solved in my own life? What would have saved me time or effort 6 months ago? If you love to cook, you could sell printable recipes.
If you love to travel, you could sell travel planners and packing lists. If you love journaling and meditation, you could offer a beginner's guide to meditation ebook. And in my opinion, one of the easiest and most profitable digital products to get started with for beginners is an ebook or PDF guide because they're educational resources.
And they're scalable, meaning you can go on to create digital courses and coaching programs that dive deeper into the topics you're covering in your ebooks. And you don't have to do any of this alone. You officially have a free and super smart assistant at your side throughout this entire process called AI.
You can literally use chat GBT for every single step to help you brainstorm ideas based on your interests. Check if there's actual demand for the product you want to offer and even outline the structure of your product. Start by sharing what your interests and skills are and maybe something you've achieved that others might find valuable.
Then ask it to give you five digital product ideas that you could offer to your target customer to help them solve a problem they're currently facing or reach a goal they're aiming for. And you can get more specific if you already know the type of digital product you want to offer. So replace five digital product ideas with five ebook ideas, for example.
The more details you give chatpt, the more helpful it will be as an assistant. This will at least give you a starting point to work off of rather than staring at a blank screen. It will even ask you, would you like help outlining or writing one of these ebooks or whatever type of digital product you're creating?
So, you can get help with this, too. I really liked idea number three, so I asked it to help me outline this ebook. The more back and forth conversations you have with Chat GPT, the more it gets to know you as a person and it will be able to tailor your digital product to your unique experiences and skills that will be unlike anyone else's in your niche.
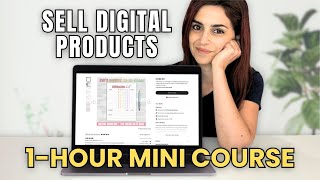
So, as you're doing this, open up a Google doc and paste all the information from Chat GBT because this is where you can start tweaking and revising the information based on your skills and unique experiences. And remember, the more specific you are with the details you give Chhat GPT, the more accurate and helpful its responses will be. Regardless of what type of digital product you're creating, I always recommend having an outline that you can work off of, similar to this ebook outline I put together in Google Docs.
I'm going to build off this information where I can then transfer over to a graphic design software afterwards. Once you're ready to create your product, you can use free tools with pre-made templates to design it from scratch, like Canva for ebooks, guides, and printables, Notion for dashboards or planners, KD if you want aesthetic layouts with zero design experience, or even Google Docs if you want to keep it super simple. So, for this example, I'll use Canva since I know many of you might already have access to it.
If not, you can simply sign up for a free account and search for the type of template you want to work off of. So, I'm going to type ebook into the search bar and browse through the templates they have. And I'll specifically choose a free template.
You can tell it's a pro template with this crown icon. So, you can only access it if you have a paid subscription. I'll go ahead and select this one that I can customize with my own text and images.
This template has nine different page layouts that I can work with, which you can see just by hovering over it, and it will show on the bottom right here. And I would go ahead and start copying and pasting the information I already put together in my Google Doc over to this template. Canva is super beginner friendly with drag and drop features with their text and elements on the left side that you can play around with.
You can also upload your own images if you want to include photos of yourself or whatever it may be. Here, I'm just swapping out the images for different ones to suit the content that I'm sharing. Moving the text around a little and changing up the colors to match my brand and aesthetic.
You can also duplicate the pages you like by selecting duplicate page if you just want to repeat a certain style. Or you can add a blank page by selecting add page if you want to start from scratch. I also have a whole Canva tutorials playlist on my channel that you can check out if you prefer to follow a step-by-step tutorial on how to use it.
But this is why I recommend a graphic design tool like Canva because it's super intuitive and beginnerfriendly, especially since you'll already have all the information laid out in your Google Doc. This step will be pretty straightforward and you really don't have to overthink the design. The actual information you're providing to your customers is way more important.
Once you're ready to download your document, you can go up to the top right and click on share. Select download and choose PDF standard under file type. And you're going to download all the pages onto your computer.
Before publishing your product, you'll need to create a mockup that showcases what it is. This is the image your customers will see before they purchase, which is super important because it's often the first impression they'll have. First, download the pages you want to include in your mockup as JPEG files.
So, in this case, I'm just going to include my cover page. So, let's go to JPEG under file type, and I'm just going to select the first page here and click download. Back on the Canva homepage, you can search mockup, or in this case, I'll type ebook mockup into the search bar to find something a little more specific and relevant to my product.
And I like this one here that just includes the cover page, but there are many options where you can show a preview of your ebook or digital product by adding more interior pages for the customer to see. And I'm going to select this default image and delete it. And you can either go to uploads on the left side and select upload file to bring in your cover page or simply drag and drop it into the artboard from your computer, which is what I'm doing here.
Customize anything else you need to on this page, like the text, colors, and even the background if you want a different aesthetic. I like it as is, so I'm going to download this as a JPEG file. I also recommend adding a few extra mockup images that showcase what's inside your product.
This gives potential customers a sneak peek and can help entice them to hit that buy button. It's time to get your product out into the world and start making those sales. And for this, I recommend building your own website, which you will have complete control over with Hostinger.
They have an AI website builder that will help you build your website from scratch in literally 10 minutes or less. Or you can use one of their pre-made templates to work off of if that's what you prefer. There's also a 0% transaction fee, unlike many other marketplaces that take a decent chunk of the profits you earn, and that can add up over time depending on the price of your product and how many you're selling every day.
It's super beginnerfriendly and fully customizable. So to follow along and upload your digital product, you can click on the link in the description box below, which will bring you to this page. Out of all the website hosting platforms for digital product, this one is super affordable, especially considering all the features you get with it.
And because I'm so impressed with their platform, I've partnered with them to give you an additional 10% off on top of their already super low fee on any plan you choose. They also have a 30-day money back guarantee, which makes this risk-free for you. So, I recommend the business plan because it includes some enhanced features that the premium one doesn't have.
Now, the longer you select your plan for, the lower the cost will be. So, if you go under period, you can select 12 months, 48 months, etc. , and you'll see the price drop.
And if you use my code Sandra D, you'll get the extra 10% off on top of the already discounted price. So once you're ready, just select continue and then follow the prompts to sign up. Once you've signed up, you'll be brought to this page where you can continue creating or migrating a website.
So let's click continue. And we're going to create a website from scratch. And as you can see with the Hostinger website builder, you can create a unique website or online store in minutes with AI.
So let's select this one and hit next. What's also great is you get one free domain with this plan. Or if you already have a domain, you can migrate it here.
So, for this one, since I want to focus on selling YouTube ebooks, I'm going to try naming it YouTube sidehustle. store and see if that's available. Okay, it is.
So, let's select that and hit next. Next, in order for AI to create a website for us, we have to enter a brand name and a brief description. So, for this one, I'm going to type in YouTube side hustler as my brand name.
And for the description, I just copied and pasted what I had already typed into another document. So, I wrote in this will be a website where I'm selling ebooks and startup guides on how to build a profitable YouTube channel and digital product business on the side while working a full-time job. And the more detailed you can get here, the better job it will do for you.
So, let's go ahead and create a website. So, it's great. It's telling me exactly what it's currently working on, which is super exciting.
And I'm not joking. In less than 1 minute, it created this whole website that I can now go in and customize myself. So, this is the fun part.
Although AI created this whole website for us, now we can customize it how we want. On the right side, you can change the color palettes at any time. And you can view your website on the desktop or on a mobile device.
You can click continue here to set up your store. Then go to edit website. You'll see the menu bar on the left side where you can customize everything you want.
So you can add in elements like text, buttons, images, etc. You can go into pages and navigation. So, for example, I could click on add page and maybe I want an about me section or a contact page.
I can just select the template that I want. Let's say it's this one here. And I can go ahead and start editing all the information and change the image how I want.
I can even go to website styles and change up the colors, the fonts, the button styles, etc. To upload our digital product, let's scroll down to the template that was created for us. And I can click on one of these to edit it.
But I'm actually just going to create one from scratch because I want to make sure that it's a digital product listing. So let's go to manage products and we're going to go to add product. Let's select digital product.
And here we're going to upload the mockup that we created in Canva. And there is the image of my product. You can add more images to showcase what your digital product is all about.
Automatically it has generated the product details already for me. So there is my title, my subtitle, and here's my description. I can even go into AI writer if I want to describe what my product is about if I want to give it even more direction.
So, here's just a brief description I've put in. Let's generate the text. And this looks pretty good.
I can always go in and tweak it a little bit here and there, but this looks amazing. Here's where we can set the price. I'm happy with $20, so let's leave it at that.
And then this is where you can upload your digital product. So, it says here, "Customers will receive an email with a link to download your files. " So, let's upload our PDF file here.
There it is right there. and everything else looks good to go. So once you're ready, you can just hit save right over here.
Next, make sure to go into settings and go into payments where you can choose how you want to get paid. I typically like to receive payments through PayPal and Stripe. Once you're happy with your website and how everything looks, you can just click on go live and you're ready to start making some sales.
Now, you could have the best digital product in the world, but if no one knows it exists, no one is going to buy it. Visibility is everything. So, here are my top proven strategies to not only get your product in front of the right people, but to start making daily sales without burning out.
One, use Instagram carousels and reels to generate awareness and traffic to your product. This is one of the fastest ways to educate, inspire, and build trust with your audience. You can use reels to share quick, valuable tips that are tied to your product and use carousels to go deeper.
Walk people through a step-by-step process or share a personal story that also relates to your product. The key is to focus on serving, not selling. Provide so much free value in your content that people want to check out what else you have to offer.
And make it really easy to find your product. Whether that's including it in your link in bio and telling people to go there, or using a tool like ManyHat, which automates DMs on Instagram. Here's an example of me using ManyHat.
I say, "Comment the word goal," and I'll send you the ultimate productivity planner. Anyone that commented this word received an automated DM from me with the link to the product. You can check out my Instagram page for some inspiration on how to do this.
And I also recommend following other creators in your niche who sell similar products. Seeing how they use social media to promote their digital products can spark content ideas and help you figure out what might resonate with your own audience. Two, create Pinterest pins.
Pinterest isn't just a social media platform. It's a search engine. That means your content has a much longer shelf life and can reach your target customers for months and even years after publishing your pins.
Especially if you're posting consistently, you can create simple graphics that link directly to your product and use keywords people are actually searching for to find your product. I have a whole video all about explaining how Pinterest works and how to create visually appealing pins, which I will link for you down below if you're interested in using it to promote your product. Three, offer a freebie, which is something you offer for free to your target customer that leads directly to your paid product.
Think of your freebie as a sample that gives people a taste of what they'll get when they buy from you. For example, if you're selling a content calendar, offer a free PDF with 15 social media prompts. If you created a productivity guide, you can give away a free daily checklist.
This grows your email list with people already interested in your topic, and they're way more likely to buy from you later down the road. And the bonus is you're building your own audience outside of social media and you can promote your products directly to them through your weekly newsletter. And you can create your freebie using the same software you used to create your digital product.
So in this case, you can go back into Canva and find another free pre-made template to work off of. Make sure to sign up for Hostinger using the link in the description box below and use code Sandra D for 10% off the already discounted rate. It is the most affordable option I have come across, especially for all the features you'll be getting with it.
And there's a 30-day money back guarantee, so it is absolutely risk-free for you. You can check out this video next if you want to know exactly how you can make $150 a day with one $12 digital product. So, I'll see you there.
Related Videos
28:32
How to Start Selling Digital Products (STE...
Baddie In Business
1,120,099 views

24:43
How to MARKET Your Digital Products
Sandra Di
14,848 views
54:08
How One Company Secretly Poisoned The Planet
Veritasium
12,656,782 views
25:58
From Zero to Your First AI Agent in 25 Min...
Futurepedia
304,898 views

11:48
I Turned a $12 Digital Product Into $150/D...
Sandra Di
15,214 views

19:29
Do THIS to Make $10,000 as a Student
Mark Tilbury
3,932,796 views

17:32
How to Sell Digital Products Online (Begin...
Alek
12,679 views

22:33
How to create and sell your first digital ...
Sandra Di
42,537 views

20:19
The 12 Digital Products That Are Making Pe...
Wholesale Ted
158,971 views

21:22
How I made $560,039 Selling Art With These...
Creative Hive
435,613 views

44:17
Salesforce to Buy Informatica, Apple’s Tar...
Bloomberg Technology
8,408 views

18:20
I Tried Making $800 in 4 Hours with Google...
SuperHumans Life
4,478,546 views

17:26
I make $176K/year from my clay hobby. Here...
Creative Hive
61,126 views

19:37
Passive Income: How I Started Dropshipping...
Mark Tilbury
6,918,888 views

10:59
5 Digital Products that DON'T SELL anymore...
Molly Keyser
43,101 views
59:43
How to Start an Etsy Shop Selling Digital ...
Sandra Di
74,163 views
17:33
How to Start a Profitable Wall Art Shop Today
Sandra Di
29,927 views

22:48
watch me create and sell a digital product...
Sandra Di
27,858 views
22:02
11 UNSATURATED Digital Products to Sell on...
Sandra Di
109,905 views

17:46
BEST Website Builder in 2025 (My TOP Recom...
Metics Media
73,313 views