Frontend Web Development: In-Depth Project Tutorial (HTML, CSS, JavaScript, TypeScript, React)
322.35k views93167 WordsCopy TextShare

freeCodeCamp.org
In this frontend web development project tutorial, you will improve your skills with HTML, CSS, Java...
Video Transcript:
Zach galwitzer created our extremely popular front-end web development boot camp course now he's back with this project-based course that will help you solidify your understanding of a variety of front-end web development Concepts you'll practice HTML CSS JavaScript typescript react and more so let's get started hey free code Camp my name is Zach and today I'm really excited to share a video I've been working on for a while where I take a tic-tac-toe game and build it in vanilla JavaScript HTML and CSS and then refactor that to go to typescript and then finally typescript plus react
this is going to be a super fun tutorial it's going to be long but I hope that you're going to learn a ton from this and get some practical Real World Experience building this with me now this is actually what I would call kind of a sequel to another video that I posted on this very Channel free code Camp a couple months ago I posted a front-end developer boot camp and since then it has gotten over a million views so thank you all for watching that I'm glad that you enjoyed it this video is meant
to be a direct follow-up to that because all the lessons that you learned throughout are going to be applied in this video we're going to take all of that stuff and put it into action and give you a project that is a little bit more real world a bit more challenging but a great learning experience as always want to give a big shout out to free code camp for allowing me to come on the channel and giving me the exposure to to teach a broader audience I have a smaller Channel myself you can check that
out got a link in the description and I will also make a note that this video is actually three videos squashed together so I originally posted these three on my channel this is just all combined so if you kind of hear me talking about the next video or the previous video that's why and finally there is a GitHub repository I'll mention this a couple times in the description that you should check out as it's got all of the source code that I will be writing in this project as well as some attribution because this was
actually originally a subscriber refactor I react I reached out to my subscribers and said hey submit your code I'll review it and redo it and show you how I would approach it so that's how this originally started so thank you Yvonne and Meg for submitting that their handles are also in that GitHub repository so without further Ado let's jump in and build this tic-tac-toe game in this video I'm going to walk you through the step-by-step process of building this tic-tac-toe game which is mobily responsive you can play it on a mobile device and it works
across browser tabs leveraging local storage so that you know you can have different players playing from different browser tabs and it also is going to have a bunch of different things such as some animations going on up here you've got some an actions menu that allows you to reset the game and then once you get through and start recording different wins so you don't really have to play on these separate tabs but you can once someone wins you'll see a modal pop up and gray out the entire background and you can click play again you'll
see that that state is tracked over time and even if we refresh the browser tab that's going to stay there you can even reset that and make it a new round all of the code that I'm writing here is going to be in this tic-tac-toe subscriber refactor repository that is on my GitHub and I'll drop that in the video description all right so this video is going to cover all sorts of Concepts um this is actually loaded with useful Concepts doing anything with vanilla JavaScript HTML and CSS really requires you to think about things because
you don't get all of the backstops that some libraries and Frameworks like react or vue.js give you so it will really require us to think a bit but it will be fun to explore some different concepts and patterns for example we're going to be looking at what is a MVC architectural pattern or model view controller we're going to be talking about what is State what does that actually represent we're going to talk a little bit about event delegation so in other words what that means is when you go to this game and you click one
of these squares it's actually registering a click listener on the parent component and then delegating that event so that we can find which Square was clicked so that will be fun to go through mobile responsiveness as I showed you some CSS animations that uh tic-tac-toe grid is actually using CSS grid and then a lot more so all of these Concepts will be fun to go through and if you are not familiar with HTML CSS in JavaScript I recommend you go through my full stack which kind of became a front-end development roadmap and it's like over
21 hours and it's all posted on my channel here and I'm probably going to put this video as the next video in that series because it is a perfect transition from all of those Concepts that we covered throughout that series and applying them in a very real world type scenario to build this game out so this is kind of doubling as a subscriber refactor and just a very useful project to build and learn a bunch of cool concepts with but you definitely have to know HTML CSS in JavaScript at least at a basic level to
get through this video and I recommend you watch the prior video where I kind of walk through the original project that this was based on and I kind of talked through what are some of the good things that they did there what were some of the things that could be improved and I'll be referencing kind of back to that to kind of show how we can improve on certain things so I recommend you at least watch the first part of that video or kind of skim through it now I will forewarn you I've put that
this is a beginner to intermediate level video um because we're going to be covering a lot of ground here this will be very challenging to you if you are just kind of starting out and I did this on purpose because I think there's not a lot of tutorials out there that really focus on the vanilla side and vanilla just means no extra Frameworks or libraries involved I don't think there's a lot tutorials out there that really show you how to take a vanilla app and actually put some design patterns behind it and do it in
a way that you could extend it into the future and you can come back to this project and understand what's going on and have a quick straightforward way to add new features to the game with all that said let's get started this is going to be a long and fun video so I'll put some time stamps in there and um probably want to grab a hot drink and get situated because this is gonna it's gonna take a while so um these brand or this uh repository is the repository that I will post in the put
in the video description it has the completed projects so you can see I have a reactory factor that'll actually be the next video where we take our build from this video and we throw that into well not throw it we rebuild it as a react application and show you kind of the progression of how do you go from vanilla to react and what are some of the commonalities and differences between the two and it will really help you understand why we use something like react and why it makes our lives easier as a developer so
that's what those are the original is the original project just as a reference um but what I'm going to do is actually create a new folder uh live vanilla build and this is where we're going to be working out of for this video I'll basically be recruit recreating everything here in the vanilla refactor and I may reference this um a little bit here and there just so that we're not getting too far off from that code so just as a forewarning the live build that we're going to do might have like some tiny little differences
between the final state that you see on GitHub but overall it will go in the same exact Direction all right so what is the first thing that we do when we start a new project well we're doing a front-end project here so the natural thing to do is create an index.html document but before that I want to do some administrative stuff um with Visual Studio code I'm going to assume that you are using visual studio code um and the reason is because it's an awesome editor and most people use it so the first thing you'll
need to do is go over to extensions and open up live server this is an extension that basically allows you to view HTML documents in your browser on Port 5500 is the default so you can see that's already running let me go ahead and click close so that'll dispose that um let me get these windows figured out here okay so if you see I reload this it won't reload let's go ahead and close that and then if you go down get rid of my bar down there if you click go live once this live server
is installed with Visual Studio it will open up Port 5500 so let's go to this and it'll show you just the directories you're working with so it's just replicating this right here and what we're going to do is click on the live vanilla build right now it's empty so it's not going to show anything but what we're going to do is create an index.html file so we'll say index.html and then we'll use vs code's built-in emit Snippets to type HTML and then we'll click HTML5 to get some boilerplate built out for us now the second
thing that I'm going to show you is format on Save and this should be really part of your Dev workflow no matter where you go because it's just useful so as you can see this boilerplate is not indented correctly and when I click command s on my Mac to save you can see that it formats this document so the way that I got that working is through another extension called prettier and prettier is a code formatter used by pretty much everyone at this point or at least it feels like so it's a very industry standard
and what you can do is hit command P hit the little bracket or not bracket whatever that carrot and type open user settings and it's right here because I've used it recently don't worry about all this stuff these are the only lines that really matter so you'll add these two configuration lines this is also documented uh in the extension it'll show you right here that you need to add those and once you've added the added those it's going to detect every time you save and reformat the file all right so that is kind of the
administrative stuff that we're dealing with um I don't think I missed anything so make sure that you you get set up with both of those things so now that I have saved this we can go back to our live server and we should have an empty HTML document so if you inspect you can see that here the elements and let's just go ahead and change this to vanilla Js T3 for Tic-tac-toe and then we'll go ahead and just put a placeholder P tag in there so you can see something and you can see that when
we save that it auto loads um or it you know has hot reloading so that all the changes are reflected immediately in the browser alright so the very next thing that I will always do when I'm starting a project and this is really kind of the starting point for me at least for any project whether we have a back end involved if it's full stack or just like we're doing here where it's just front end I'm going to start with the UI and build the layout for the entire application and I actually have a video
on that that kind of explains that process in depth in my front end course on this channel so you can go revisit that if you need but basically the goal here is to build out the HTML structure and then build out the layout with CSS now I debated this in my head a bit of how much time I was going to spend on this portion of the video and I ultimately decided that this is going to be deprioritized a little bit so that we can focus more on the JavaScript patterns behind all this I have
plenty of previous videos where we go in depth like in excruciating detail of how to build HTML and CSS how to bring those together and design things and if you watched my front end course the last um a series of videos in that course was all about CSS grid so we're going to leverage that we're going to use that in a real world project here but I am not going to be getting into every last little detail we're going to take some Liberty and do a little bit of copy pasting from this um vanilla refactor
that I've already built um as as kind of a precursor to this video that said we're going to take it piece by piece so that you can at least see how it's coming together in the thought process behind that but I will not be typing the HTML and CSS line by line because we will be here for the next 10 years if um if if I do that my videos are already quite long and they do not need to be longer especially when this is not what we're focusing on so let's go ahead and do
some copy pasting here so if we look at this index.html this is the final HTML of this project the one that we're going for so the first thing I want to focus in on is the grid so that's the hardest thing to conceptualize with building this out and when I say that grid we're going to actually duplicate this tab so that we have a reference to look at and my vanilla refactor will give us that complete picture that we want and so what we're trying to do here is build a grid that has all of
these squares here but then as you can see there's also these uh State variables down here I shouldn't call them State variables but a little scoreboard that lines up perfectly with this grid and something a little bit less obvious up here the actions menu also lines up perfectly with the grid and this player one you're up indicator this spans kind of two sections of the grid so really what we've got here and what we need to replicate is a grid that is let's count it you've got three columns so one two three and then the
number of rows is going to be one so this this top kind of header section is going to be one section of our grid then two three four and then this five bottom one so really what we have is a how does this go which one goes first is it the five by three or three by five grid um hard hard to remember that while I'm talking here on video but that's basically what we're going to be building and if I Collapse this finished document so vs code has these code collapse things that can really
help for to see kind of how things are structured um so what we can do is collapse everything until it's a lot more clear as to what the grid items are so you can see that my container has a class of grid and that grid is going to give us the display grid so if we go to our index.css and we go to the grid class you'll see that that is initializing the grid container um and let's go back to this HTML and then as we know if you watched that previous series on grid is
that grid is going to have child Elements which are called The Grid items now these are direct descendants of its container and as you can see we have one two and then there's nine of these squares and then there's three little scoreboard squares there at the bottom so that's the basic structure but we are not going to start with all of these different styles and markup you want to start simple and the way that we're going to do that is by creating a bunch of divs and just starting with a basic grid here in order
to do that we need an index.css file so if you see in the vanilla refactor we've got some folders for the different types of files you don't really need that that was just an organization thing for this rebuild I'm just going to try to mirror that so we'll create a CSS folder and then a new file in there called index.css and then let's go ahead this is something that I always do let's just throw uh an all selector and then color red and that means every text everything is going to be or all the text
is going to be red and the reason I do that is just to make sure we're hooked up correctly so let me close all these files out out this index.html is our starter you can see I have a placeholder here and what I need to do is right above the title we're going to add a link and we're going to go down and hit enter on the link CSS and you can see it already knows to go grab the style.css but that's not what we want because we have a custom directory so let's go to
CSS and select index save that and now if this is hooked up correctly this should be red so let's go right here and you can see that it is red and it is connected up so the very first thing that we need to do is put in a main HTML tag and the reason that we put the main tag in there is because this should represent the dominant content of the document now if you wanted to figure that out on your own you can just type in mdn main so mdn Main and it'll be the
first result and it says it represents the dominant content if you scroll down here on the usage notes it says it should be unique for the document content that is repeated such as sidebars nav links copyright should not be within main so in our case this tic-tac-toe board is the dominant content of this index.html document so we want it inside Main furthermore we'll need a div container which will be the grid container itself and we want to give that a class of grid which we will style within index.css but if you remember let me hit
command B on my Mac to close out that sidebar if you remember on this original we had the grid class and then we had all these grid items so we had one two um nine more right here so 11 12 13 14. if I can count basic math right but basically we just need a bunch of divs within here so we can make one command C copy that all the way down and how many is that three six nine eleven okay we'll we'll come back to this if we didn't get that right but anyways we've
got the skeleton of our grid and now if we come into index.css we can make that grid class and say display grid another thing that we'll want to do just to start us out is the CSS reset this was in the original project already and we can just copy it over so the CSS reset is just gonna reset everything so that we don't have any weird padding going on and anything like that so let's go ahead and put that at the top and then we can also initialize our fonts and colors like I said I'm
not going to spend a ton of time on this portion of the video um I've got prior videos that go into more depth here but basically we're importing uh a Google font right here and then we are initializing our set of colors as CSS variables on the root selector so we'll be able to use that with the VAR and then dash dash whatever variable it is within our CSS so we'll save this we'll come back to our document here and you'll see that it's completely empty which is kind of what we're looking for now if
you looked at the vanilla refactor here got it zoomed in way too much it has this darker background so the first thing that we can do is actually actually get that in there and that would be I believe the dark gray right here so let's just copy that over we're going to select the HTML in the body and give it that background color now the reason that we have a hundred percent height this is something that's useful for mobile devices because there's another strategy of 100 of the screen height but that screen height is different
on a mobile device versus a desktop and you'll actually get some little padding at the bottom so I prefer to do height of a hundred percent but anyways the main point here is we're giving it that background color and this is actually kind of a mistake from the original we should be just putting in a CSS variable there all right so we'll come back and it looks like we've got our background matching that looks good and now we can start to initialize this grid so at the moment you should be able to find in the
main that we have all of these grid items they're just not showing up at all so we need to give them some space within the document so that we can start to work with them so if we wanted to do that the quickest way to come in here and do that is to go right below the grid and then just select any div that's within the grid class and let's just give it a height of 20 pixels and a width of 20 pixels we'll get rid of this in just a moment but oh and then
we also need to give it a background color of let's just say red something annoying and you can see there's our grid items we could also give it you know a margin of 10 pixels you can start to see that separation so right there there are our grid items and they obviously don't look near what we want them to so what we need to do is set the boundaries of this grid rather than doing this height and width we can actually dictate how large these items are using the grid container so if you look in
our original CSS that was built out you'll see that the grid container has template columns and template rows and then a grid Gap so let's start with the columns we will copy that over and what this is going to do when we say repeat three times 80 pixels that means that each column is going to be 80 pixels wide so let's save that and you can start to see that we've got some columns going here and immediately you can see that I've added one too many div elements so we can come over to the index.html
and delete those so now we have this perfect grid right here and then we can come back to the CSS and then add our template rows now our template rows are going to be a little bit different so I'll explain this in a second but we'll copy that in and what we're saying is that the first row is going to be 50 pixels tall then we're going to have three rows so we're repeating three times the next three rows are going to be 80 pixels tall so that will correspond with our columns so we'll have
those perfect squares and then the final row which is kind of like that scoreboard at the bottom will be 60 pixels high so that once we save it you'll see that expressed within the grid here and I believe we actually need more grid items here I'm sorry I'm it's hard to count while I'm teaching here but let's make three more and now I think we're getting what we're looking for so we can now get rid of the um explicit height and width of these items because the grid will take care of that so now you
can see that we've got the skeleton of this grid but let's go ahead and start isolating things so we want to maybe style the top row as a different color than the main grid and the scoreboard at the bottom so this will evolve and change but just to kind of demonstrate the concepts I'm going to quickly put something in there so for the top three we're going to hit option in click in vs code and that should allow us to click three things at once we'll give these first ones a class of turn and then
we'll come down and give these divs here a class of square how many is that three six and then nine so class equals Square and then finally at the bottom we're going to give these a class oops clicking too many things at once we'll give these a class of the score okay so now we'll come back and instead of grid selecting all the divs all the grid items we'll select them based on what they are so let's get rid of this margin also because we will have a gap we'll go ahead and add a gap
of five pixels to every grid item so that everything's spaced evenly and then instead of this we're going to say um uh what was it turn was the top row Square was the middle one and then score was the bottom so we'll give these different background colors the squares will stay red we'll make these turn ones green and then the score will be blue at the bottom so we'll save that and then if we come back now we've got all of these highlighted a little bit differently and if you look at the final you can
see that this matches almost perfectly but this little turn indicator seems to take up two full columns and in order to get that working we can actually do this within the child the grid item itself we can tell it how many columns to to span at once so we actually have to go to the HTML and um highlight we we can remove one of these div items and keep that as turn and then this will be actions so this will be the little drop down and then this will be the turn indicator so let's save
that and it should be all kind of messed up now at this point but here in red that should be our actions menu and if we go to the CSS let's go actions what do we call that actions yep and then this will be a background color of I don't know um let's go purple like that and then finally the turn is going to stay green but we're going to say grid column start and that's going to be one so we're going to start the first column and then grid column end is going to be
three so it spans two columns wide so once we do that we should be able to go back and now you see this green is taking up two full columns we've got the actions in the top right scoreboard at the bottom and Grid in the middle so if you compare this right here to our final that's pretty much what's happening we have two spaces here actions full grid and then scoreboard at the bottom so this is the hardest and First Step that you'll do when building any sort of project like this you have to nail
the layout and then we can start you know making it look a little bit better arranging it on the screen so I'm going to keep it looking just like this and we're going to continue this process and get it centered within the document and then also make sure that as we resize things you know as you see when we resize it down to this small device it just kind of breaks out we're going to make sure that it resizes appropriately now if you just take a look at the underlying HTML that we've got going on
here let's make this a little bit larger you can see that we've got the main container sitting here and then the body container so if we wanted to Center this main container really all we would have to do is go to the body element itself and I believe we can just display flex and then justify content Center and then align items Center and you can see how that brings everything to the middle of the screen so that's generally what we're going to be doing here so if we come back to our project and then if
you look at this original so this is the completed version and if we go to the CSS you'll see that on the body element what we've done is we've displayed Flex we've set the flex Direction column so that it's going up and down rather than left to right and then basically aligning everything to the to the center so what I'll do is I'll just copy this snippet here from our completed CSS and we'll bring this to the top or right under HTML and body and then save that and now when we refresh you should see
that it looks very similar the last thing that we need to do as you can see we don't have a footer at the bottom so I've added this little attribution at the bottom which provides some spacing so that it pushes this grid up a little bit so we can quickly go add that so if we come to the final uh the final project here I'm just going to copy this footer markup because it's relatively simple doesn't really add a whole lot to this so I'm just going to copy that verbatim and we will put that
under the main tag so remember footer is repeated content that if we added Pages we would probably have that on every page so it doesn't belong in the main content of that page so if we save that let's see what we are looking like you can see that the footer has been added down there and that's because it doesn't look good because we haven't added those Styles yet so let's go back to our completed one and I have a section at the bottom that has the Styles just for the footer so let's see they're all
right here so I will copy those styles um to our current working CSS so let's go ahead and say footer styles copy those in and then hopefully this will start to look a little bit better so now we've got the workings of our project this is pretty much the skeleton of things and the last thing we need to do is make sure that it resizes appropriately when we're on a mobile device versus a larger desktop device so to do that we will also go to the to the final project here and I'll point you to
where this is happening you can see right here I have a media selector and so this we've talked about in the responsive web design uh video that I've done in the past of the front end series and basically what we're doing is we're saying that we want the grid container itself to resize a little bit differently based on what screen we're on so what this rule is saying is any screen that is 768 pixels or higher so basically like a tablet or desktop device we want the grid to have a width an explicit width of
490 pixels because we know we have enough space for that and then we want to explicitly set the columns and rows to be a different size than these Originals so right now if you were to select one of these squares it's 80 by 80. so you can see as we hover over that it's 80 by 80. now on a desktop device we've got some more space so we would want that to be 150 by 150. so let's go ahead and copy that and paste it right under the main grid selector so essentially this will be
the mobile Styles and this will be the desktop styles so once we refresh here we're still on a mobile device in this scenario and it looks a lot smaller and then yes it will cut off eventually but really no mobile devices this small so this is about what it would look like and then as we resize you'll see it jump up so let me go into responsive mode so that we can see this a little bit better and watch this up here you'll see as we hit 768 right here it resizes so we have a
much bigger game to work with on these desktop devices all right at this point we have the bulk of the um HTML and CSS the structure of our project in the rest of the work that we need to do here is primarily going to be just details of just finessing the look and feel of this until it matches our final product here where you can see we've got this drop down menu that's going to be controlled with some JavaScript you can see when I hover over each Square it kind of uh gets a little bit
darker we've got a pointer cursor you can see the mouse is a little different depending if we're on a clickable element or not and then of course as we take a turn watch this up here it will do this little animation in where it kind of Zooms in and then slides out so these are all just little details that we need to add and like I said we've done a lot of in a lot of HTML and CSS work in Prior videos and the main focus of this one is going to be kind of the
JavaScript side so I will walk through over the next several minutes of how we take this right here and turn it into this but I will intentionally be moving a bit quicker than normal so be sure to just pause the video If you see something that you know doesn't make sense and just kind of walk through it on your own to understand you know what's happening here I'm just going to be basically referencing the original CSS document in HTML and I'm going to be progressively building this out I'll try to walk you through the thought
process as we go but just a heads up it's going to be a bit quicker than usual the first thing that I want to tackle is this green area which is the animated turn indicator now this is obviously going to be controlled by JavaScript at some point but we just want to get the animation right so in order to do that let me close things out this is our working CSS document and working HTML document from here on out I think what I'm going to do is keep the completed CSS here on the right as
well as the completed HTML on the right and then we'll close that out so on the left is our working project on the right is the reference to the final one um and I'll I'll try to just kind of hide this a little bit only for reference okay so what we're working on is this div right here so let's go ahead and put some placeholder content in there just so that you see what's going on so there's our placeholder I'm going to go back into a larger mode here so the first thing that we need
to do is get this all centered get the text in there looking good so if we come to our final project you'll see that we have this turn class right here so within the turn class we're going to have some font awesome icons and then a turn indicator so we'll copy that in there and if you notice we have these classes fa solid and fax these are being provided by something that we have not added to the head of the document yet so we will need to do that this was taken originally from the uh
the Yvonne who submitted this project had put this font awesome uh kit in here so if you just copy this script over right under the style sheet that will add these classes so that they actually show up within the document and give you an icon to work with so once we've added that script these should show up and you can see there's the little X right there so we know that our our icons are working and then finally we need to just style this so as you can see in the original we've got the turn
class on there so we need to go down and Ctrl F to find uh let's see where's the turn class here it is okay so we will copy these styles on over we've got some of them already looks like we've got the um so the background color we're going to keep we want to actually display this as a flex container um with a center alignment of the items and a gap of 20. so that's the only thing that we need to add and then we need to align self-center so that's going to tell um the
grid where to align things so really what we have here is just some development only background colors this tells it how to align itself when within the grid and then this is the specification for how the content within this container is going to be aligned so if we come back over you can see that it's now looking a little bit better and if we were to remove this background color now you can see that things are looking great this is exactly the alignment and positioning of the final one now obviously there are different colors going
on here but we're going to be controlling a lot of that with JavaScript so we can move on from here at this point just for the moment I'm going to turn this to uh let's make it that yellow text so we can give it a color and then use one of our variables and you remember we had defined a variable of yellow here at the top under our root so we should be able to throw that in there and get that yellow color right here and then we need to animate this so in order to
do that this is a little bit more intermediate level CSS stuff but in order to do that we need to add some keyframes um in an animation to animate both the icon and the text first though you can see that we have some selectors for the icon in selectors for the text so I'm going to copy those over right under turn so we've got the paragraph text and then the icon text I'm going to get rid of this animation stuff for just a second and save that so now you can see that we've got this
looking a lot closer to what's going on here and now we need to do the animation itself so when we do an animation you have to first specify the animation's name on the animation property the CSS property and you'll give it a duration and then some behavior that you want it to have and then of course the reference so for the icon itself that's what we'll start with this is going to um be the animation that makes it kind of pop in and out get a little bit bigger and then smaller so you can see
that we have referenced turn icon animation now this is an arbitrary value that we have actually defined as some keyframes so this uh selector right here matches this the need to match because right here you were referencing to these keyframes and what it's saying is that at zero percent of the duration it's going to scale to a hundred percent and then 25 percent into the animation it will scale to 140 percent and then once it's finally done it will scale back down to a hundred percent so it kind of pops in and then comes out
and when we save this you should be able to see that so every time we refresh you can see that this little icon is just popping in and out in and out every time it reloads so that icon is going to be complete now the same thing applies for the text we want that text right now all it's doing is popping in and out and then this right here is staying in one place but in the final you can see what happens is that text kind of Fades from the left and animates out so to
get that to work um once again we need to copy in the animation so we find our paragraph of the turn selector and copy that in and right now it's going to be the same animation time as the icon just so that they match up same type of behavior and then turn text animation that doesn't exist yet we need to copy that keyframe right here so now that we've defined our keyframes of keyframes in the turn text animation you can see that we're transforming it at zero percent to negative 20 pixels so it will kind
of pull it to the left 20 pixels and then as the animation animates it will translate it to go back to its original positioning which is where the final position we want is so once again turn text to animation references this key right here so when we save it now every time we refresh you'll see that animation is happening really nicely so we've got this indicator done now obviously we've gotten X it should be an O so on and so forth but that's going to be controlled with JavaScript and we are not quite there yet
now the next thing that we'll do is we'll build this actions menu now once again this is has to be controlled with JavaScript to toggle the open and close Behavior but what we can do for now is just put a placeholder in here that is styled like this and when you click it it won't do anything so in order to get that we'll come back to our original so let's come back to our original index.html document once again this is the completed one and you can see that we've called this menu and we've got some
markup within here we've got a button this is going to actually be what is shown and then down here this is going to be the popover that is initial initially hidden and then as you click the button this is going to show and then hide every time you click so what we can do is just copy this markup and I think I've named it something differently so yeah I gave it a name of actions right here but we'll update that in our CSS so let's see this is the drop down menu turn that into a
comment this is the turn indicator and then this oops deleted that this is going to be the game board and then finally this will be the scoreboard just a little bit of organization so what I'm going to do is actually comment out the popover just for a minute and work on this button so if we save this right now it's not going to show up very well it's just showing up just like this and when you click it nothing happens we have the correct icon in here and then the correct text but now we need
to actually Center this and style it so you can see that I've given this a menu class which in the original index.css we'll go find this um I've just given the menu class a position of relative the reason for that is because um we need that popover that opens to have a relative reference so that it knows where to open relative to in the Dom because it's going to have absolute positioning so we will put this where should we put this here so we've got our turn stuff let's just make a different section so this
will be the menu Styles just trying to keep this straight for everyone here so give that a position of relative that's not going to do anything to it it's still going to look the same but then once we add the menu items so if we go back to our markup in HTML you can see that we should have some items those are commented out so we're not quite ready for that Let's see we just need to style the menu button right now and I'll get rid of this just for the moment that's going to come
in later as well as this data ID I just don't want to add anything earlier than it applies so the only thing we don't have styled is this menu button so let's find that here there's our completed style so let's copy that in right under menu you can see that we want it to be a hundred percent width and height of its container and if you remember from this original the container that we're working with is what's highlighted here so this is just one grid item so if we say it's a hundred percent of that
it's just gonna be 150 by 50. and then we're going to display Flex so the items within it are going to be Flex items and we're going to give them space around and justify them Center so let's go ahead and show you what that looks like for now so you can see that we've got this menu item that's looking a lot better it's got the wrong Styles but we're getting closer so let's come down uncomment these and here we're going to give it a background color I believe this was like a one-off color that didn't
fit into the color scheme so that's why I'm defining it here without a variable and then we want the text to be white we want to give it a border and then make that border rounded a little bit so we'll go ahead and save that save the HTML and now you can see that our actions menu is looking exactly the same as this one now the final thing that we have to do um we can't we don't have JavaScript functionality to this yet but we can still uh kind of mock out what this menu looks
like so as we click this and open the menu we can still build this even though we don't have JavaScript so to do that all we need to do is uncomment this div and at the moment we haven't styled these classes so it's going to look very weird you're just going to see it right below the actions menu but what we want to do is make this items class and then more importantly it's going to be hidden initially and then our JavaScript is going to be what's responsible for unhiding that so here's what I'm going
to do let's go ahead and remove well no let's keep it as is and Define the items class so where is that search for items all right so here are the menu items I've actually selected the any element with an items class that's within an uh element with a menu class you don't really have to do that we could just copy in items directly because we don't have any additional Styles going on there so we've got the menu button that's always going to show and then the items are going to be these items that you
can click once they're expanded so there's a couple really important things going on here the first thing is position absolute so because these items are within the menu class the absolute positioning is going to be relative to the nearest parent element that has a relative position on it and as you can see we've given that menu a relative position so these items are going to be positioned absolutely relative to that menu element a little bit confusing but we've gone over that in Prior videos in the series that I built out so we want to give
that absolute positioning and a z index of 10 which means that it will sit over the grid of items you don't want that to go behind so the top it'll be 60 pixels offset from the button itself so I'll show you what that looks like let's go ahead and just look at those Styles right there um actually let's let's go ahead and take out everything except for the absolute positioning okay so absolute position you can see that nothing really has happened here quite yet now once we uncomment the rest of this stuff um let's go
ahead and comment that out for a second and we're just going to give it a the actual positioning that we want and now you're going to see that things are looking a little bit better now the positioning is going to be relative to this right here so the top left corner so if you see the total height of this button is 50 pixels so that's why I gave it an offset of 60 pixels from the top so it will offset 50 pixels from this to get it to the bottom of the button and then another
10 pixels to give it this little Gap that you're seeing right here and then of course we need to give it a background color a rounded border radius and some padding within the container so you'll see now it's looking a little bit better we still haven't styled the buttons within it um but then finally We'll add the Z index we just want that there to make sure that it's O is sitting on top of these items now the last thing we need to do is style the buttons in there because they don't look very good
as you'll see here they're just they're not super well styled or anything but they look a little bit better so in the HTML you can see that we've got a reset button and a new round button these have data IDs on them I'm going to get rid of those because we don't need that quite yet we're just going to style them based on uh their parent so we're going to look for the menu and then items within the menu and then any button that is within that is going to be styled like this so we
can actually just remove the menu it'll still work if we do the buttons relative to items so if we save that now you'll see that the buttons are looking a little bit better although you can see we don't have any like hover effects we want the cursor to become a pointer so that the user knows that they can click on them and to do that we're just going to need some hover Styles so if you pop that in there we're going to underline the text and give it a cursor pointer and now you can see
that this looks a little bit better in that regard so as you'll see there's no border around this button in the final until we actually click it and once we click it it's been focused and everything's going to have a border so we'll have to wait on that until we have some JavaScript but for now you can see that everything is being aligned correctly and then the last thing we need to do is just create that hidden class because as you can see we've got the hidden class here and then a border class these were
shared styles that we would use across multiple elements so I put them in shared utility classes within the CSS file so we'll bring this to the top we'll put it right under the body as shared utility classes and I'm just going to copy these in all right now so we don't have to come back and do this in the future so we'll copy those in just a hidden class that displays none and it has important on it just to make sure that nothing conflicts with it then we have some shortcuts for yellow and turquoise you
don't have to do this it's just a little bit easier once we get into JavaScript and then just some standard borders and shadows that we'll be putting on different elements so once we add those you'll see that given these two classes we've put on this it will hide that menu so you can go ahead and remove that hidden right there and it will be showing back up with the Border but for now we just want that hidden and then JavaScript will unhide it for us once we Implement that all right at this point you can
see now we've got some conflicting Styles going on over here we'll be sure to come back to that and handle that with some JavaScript as well as our actions menu that we can't really do anything with at the moment it's not really clickable because we need some JavaScript to enable that so we're done with this first kind of row now these grid squares or game board squares these will be relatively easy to style so let's get in and do that real quick so uh here's our game board and then let's go ahead and look at
the reference um the final one you can see that I've given each of those a square class which dictates their Styles and then we've put a shadow remember we just defined those shared utility classes and I've defined a shared Shadow class that will apply to everything so that's just kind of keeping the code dry making sure we're not repeating ourselves too much so what I can do is now add those in so once again I'm going to hit hold down option and click through this within vs code to select multiple at once and we will
add that shadow class now furthermore we're going to want to give we don't need the IDS quite yet that will come when we add some JavaScript so let's save that and then finally we can get rid of our background red so wherever we put our squares we don't want that background color anymore we want a much nicer looking one so you can see here are our Square colors we wanted to span 100 the width and height of its container which as you can see um this is going to be the grid item itself so we
want that to span 100 and I don't think that is actually necessary now that I'm looking at this because the grid will control those so let's go ahead and just copy this gray background I'm going to put a little rounded border and then we're going to make sure the content within is a it's a flex container so that the content is centered within and then the font size is going to be three Rems because we want those icons that are sitting within to be extra large so we'll copy that into the square class save it
and now our board just started to look a lot better so you can see that we've got those Shadows that you see on the final the only thing that we're missing here is when we hover over them it doesn't do anything so it doesn't feel like to the user that you can click so in order to cover that we need the hover Styles so that's what this is for the hover style for a square we'll copy that in we want to give it a cursor pointer and then just a 90 opacity so now when we
hover it's going to act like it's actually clickable for now we're going to leave the icons kind of off of this at the moment because that's once again going to be controlled by JavaScript when we actually click these um so the last thing we have is the scoreboard down here at the bottom this is relatively simple markup so we'll look at the final project and you can see we've um just got some basic HTML a bunch of div containers with some paragraph text and then a little styled scoreboard where it shows how many wins they
have so I'm going to just copy all of this stuff verbatim it's not very complicated you can read through it on your own so we'll put that in the scoreboard section we've already implemented the shadow class in our shared Styles and I've added an inline style here with the color mainly because it's just easier to read it's easier to see that within the HTML what color it is rather than making a different class for each of these you could do whatever you could add this to the index.css but I just thought this was a little
more straightforward to read so once again let's get rid of the data IDs for the moment because those are more applicable when we get to the JavaScript so this is our scoreboard and the last thing we need to do is implement the score class because if we come over here you can see that nothing looks very good we've got the different colors but they're not centering the text or styling the text or anything like that so we need the score class implemented which we can go find in the final index.css um all right so here's
the score class we're going to replace the background color blue oops we need to get rid of that okay so we're just going to display Flex so that each uh each box is a flex container and we're going to give it a top to bottom Flex Direction and we're going to justify all the content and align all the content to the center of it and then we're giving it a height of 60 pixels which once again I don't think that that was probably left over stuff because the grid should be dictating that and then we're
going to give it a little border radius so that it's rounded so let's save and you can see that things show up uh okay here the last thing we need is this text it's obviously not styled very well yet compared to the final you can see that there's a little bold Style on the title and then the number of wins is going to be a little bit smaller so to do that we're going to do some sub selectors so the paragraph text within the score box is going to have a font size of 14 pixels
and a font weight of 600 if you scroll to the very top where we've imported our Google fonts you can see that we've imported a font weight of four five in six hundred so that's what allows us to use that font weight if you didn't import that then this is not going to do anything so just a note there and then the span element so this is where we actually show how many wins the person has we're going to give it a font size of 12 pixels and a little margin on top so we'll save
that and now you can see that everything is styled correctly so at this point um looking between the two we pretty much have the same exact design going here and we're uh for the most part completed with this HTML and CSS portion so let's go ahead and scroll through this final completed one and just make sure that we've got everything uh matched up so we've got the footer in here that's that's perfect uh looks like the modal we need to still do I forgot about that so we'll get to that and then in the main
content we've got the scores scoreboard right there we've got all the squares for the game board we've got the menu implemented and then the turns implemented and then I think pretty much everything else is done so HTML looks good aside from this modal and then of course we'll add the script once we get to the JavaScript section and then from a CSS standpoint let's go to the top make sure we've got everything we've got the import correct we've got our Styles the CSS reset Global HTML and body styles um uh let's see we added this
Global style that looks like it got put in the wrong place so let's go ahead and add that to our shared utility classes um that's not really supposed to be a utility class but that's Global so I forgot to add that and then the grid we've got that done this is the responsiveness we got all the utility classes we added the turn along with the animations we added the menu looks like we covered all of this we got the footer okay so really we have completed everything except for the modal and when I say modal
I'm talking about what happens here when someone wins the game so you can see it pops up this uh kind of focused element and then it puts the game in the background makes it look as if this is the only thing that you can click so in order to implement that we obviously need some JavaScript but we can implement it with just HTML and CSS and then we will come back to it once we have some JavaScript available to us so the first thing that you need to do when you're implementing a modal is give
it the HTML markup so we will copy this over and you can notice that I'm putting it at the very bottom under the footer and one could argue that this might belong in the main content but really this is going to be hidden initially and it's going to be absolutely positioned or fixed positioning I think so it doesn't really matter where in the document it goes it will show up correctly so I think one could make the argument that it goes in Maine like I said but let's go ahead just to stay consistent and put
it at the bottom and then since we've got this hidden class of the you know this will do display none let's get rid of that for the moment just because we want to see what it looks like and if we go back to our project you can see that the modal is right here it's at the very bottom it's got this P tag and then a button that says play again obviously this is nowhere near what we want we want this centered and have a little backdrop so we've got some CSS that we need to
write um and if you see in the final we've got all these modal Styles so I'm going to copy all of this over at once at the very bottom give it its own section and then what I'm going to do is just comment things out so that we can progressively see what things are doing here okay so we've got everything copied in here the first thing we need to do is Target the container so this is the div container with the class of modal so what we're doing here with this modal container is we're giving
a a display property of flex and then positioning of fixed now fixed positioning is relative to the entire document so what that or the the viewport I should probably say so if we're looking at our viewport this entire screen here is the viewport itself so this is going to be relative to to the entire viewport well something like absolute positioning is relative to the nearest relatively displayed element so in this case since it's a full screen takeover we want this to be a position of fixed we want to give it a width and height of
a hundred percent and that will work because up here at the top we have given the HTML and body a height of 100 and it's automatically going to expand the width of a hundred percent just based on how block elements are displayed so by giving it just this stuff display Flex or we don't even need that yet position fixed with 100 height 100 let's save that and now you can see up here it has moved so now this takeover the modal spans the entire screen as you can see now we want to take this content
and put it right in the middle and give it some styles so what we need to do is uncomment the justify content and align items and then also the display Flex so really we need to bring those up just so that not for functionality just so you can see it all together so display flex and now you can see it's right in the middle and then finally if we give it a background color it's really going to start to pop out so this entire modal has this dark background color now of course we need to
style the contents of the modal to also have a background color and that's where the modal contents come in so if you see in the index.html the container within it has a class of modal contents and what we want to do is just uncomment all of this stuff so I'll quickly walk you through what's going on um let's see the first thing let's get rid of that for a moment height with okay let's get rid of these last ones and start with this so the first thing we're doing is giving this container a height of
150 pixels in a width of a hundred percent and then a Max width of 300 pixels so in other words what we're saying here is that by default we want it to be 100 width but if the screen is big enough to wear 100 width is larger than 300 pixels then default to that Max width this is just a little trick that I use a lot for mobily responsive um or mobile first CSS and that way it will just look good on everything so let's go ahead and save this and then go back and you
can see our our modal content is coming together so to display or to show you what I mean here let's go down to a smaller device and you can see that that's kind of resizing as we are on the smaller device and then as it gets to a bigger one it's going to stop right now it's 238 pixels but once it reaches 300 it's going to stop getting bigger so right there it reached 300 stops getting bigger and it stays centered so that's what this little trick is doing right here now we want to display
flex and basically align everything Center so let's get rid of these comments and now this right here should basically Center everything so now you can see player one wins and play again it's all centered so that looks good and then finally we want to give it a flex gap of 20 pixels so that the content within it has some spacing we want the content to have text color of white and then we want the whole thing to have a margin of 10 pixels so let me comment that out for a second here's our spacing white
text and then you'll notice on the mobile device once it gets too small it pushes right up against the edge so if we just add a margin of 10 pixels you can see it adds that little Gap there so that's only for mobile device then the last thing we just need to style this button so you can see that I've targeted any button button within the modal contents and just giving it a padding of 10 pixels background color of turquoise text color of something a little darker than that and then some rounded borders so if
we save that you can see that the button now has these nice Styles so our modal is complete and if we just give it that hidden class back so if we put hidden on there it's going to be completely gone and then we comment that out and it's back so you can see how our JavaScript is basically going to take that hidden class and it's going to remove it add it back remove it add it back based on when someone wins the game and then the play again button will also trigger a JavaScript action all
right so I know I said that I was going to kind of gloss over a lot of the HTML and CSS which I sort of did we did a lot of copy pasting but hopefully that was a good blend of you know how did we get to this final state but not typing every last little letter so if you just toggle between the final one final game right here and our current game everything looks pretty much the same so HTML CSS that's done but obviously when you click anything on this board nothing is going to
happen because we haven't hooked up JavaScript which is going to actually control the game um so we want to be able to you know make plays and reset the game and do things like that so at this point I would recommend if you're watching this video to take a little break um because we're going to switch from uh HTML and CSS mode to JavaScript mode which requires a little bit different type of thinking so we're in the JavaScript section but something that happened to me when I was first starting out is I would always just
be asking this simple question of when we're looking at JavaScript where do you even start like what's the first thing that you think about when you're trying to connect up some JavaScript functionality to a static HTML and CSS application so looking at this we can click stuff but it's not going to do anything and so the question is where do we even start thinking about adding this these event listeners and you know all the different State Management that happens to make this game work so in asking this question I think the next question that we
need to ask is what actions can a user take in my app so we're building a game and there's really three actions that a user can take let's go back and look at the finished game this is the the refactor that I've done that's actually working and if we let's reset everything new round get everything cleared out and the first action that a user can take is they can click on one of these squares on the game board so this is just you know a Player move that is happening so that is the first thing
that we need to jot down a player can make a game move now the second thing that they can do once someone actually wins the game so player one wins we play again and you can see down here player one has one win zero ties player two has zero wins so the next action that they can do is hit new round and that's going to clear out this scoreboard down here at the bottom so we can say clear or actually new round and then finally the last thing that they can do is if they started
a game and just want to reset it you can go to the reset button and that will clear things out and it won't touch the scoreboard so we can make a new round or reset the current gain so I think with any application any you know front-end project like this that we do this is a great first question to ask yourself just so that you can get a better understanding of these requirements now of course once we have this question answered you obviously have to start writing code to make this happen within your static HTML
and CSS so there's a lot of different ways to approach that and ultimately where we're headed by the end of this video is to have some sort of model view controller pattern that's going to help us organize our code to make this stuff happen and handle these events correctly so model view controller is just a pretty common architectural pattern that's commonly used for developing user interfaces so this is actually me from the future I was editing this video and realizing that I had created I had created this diagram to kind of give an overview of
the MVC pattern and I didn't actually go through it so this is the MVC pattern model view controller and I wanted to just walk through kind of the the flow of this so as we're building our application there's three separate concerns basically we have the view which as you'll see this is um event listeners that handle either UI only events so like toggling a menu as we'll see here just toggling this actions menu or we can manipulate the Dom and respond to State changes and what happens is the store over here is kind of the
the model and this is responsible for getting State and saving State and emitting State change events and this app in the middle is the controller and this is responsible for kind of orchestrating between State and the view and making sure that you know State updates and the view updates all in one concise Consolidated place so I know this probably doesn't make a whole lot of sense so I'll stop here but just keep this in mind come back to it as we go through this build and hopefully this gives you a little visual representation of this
pattern we're using now this is going to be a very challenging pattern to implement straight off you know right off the bat and it's not going to make a whole lot of sense so what I've decided to do is almost a contrived example where we basically start with a more naive approach where everything kind of sits in one file and we don't have really any architectural patterns behind this and we're going to progressively iterate on that and get to that MVC pattern that's a little bit more stable so we'll call this the video progression we're
going to start with you know a naive approach all in one file then we're going to refactor and iterate as we go and then finally we're going to end up with MVC pattern that is and this is very important it is going to be easy or easier to debug later and it's going to be easier to extend and add features to later now these are really important parts of building software because anytime you're building software you're going to have users that expect things to be improved and fixed and extended you want to add more features
so for example in our basic tic-tac-toe game you might want to add some leaderboard over here to the left side or the right side and you might want to be able to add user logins and you know registration and whatnot and being able to do that is going to be very difficult if we haven't planned out a little bit of architecture in a little bit of software design behind what we're doing in other words everything in one file is going to quickly become unmanageable with that said I think we can go ahead and get started
now just thinking about this a little bit um let's enter this down so we got some more room what actions can a user take in my app we've defined these and what I want to kind of point out is that these pretty directly oops did not mean to do that these pretty directly map to event listeners on HTML elements so in each case when we look at this we have individual elements so reset is going to be some sort of button new round is going to be a button and then each of these squares on
the game board are going to be like a button or a div or something like that in every HTML element has event listeners that you can hook up and then when that event happens you'll put in some JavaScript logic that will maybe manipulate the Dom and update some sort of persistent state in local storage or session storage so on and so forth all right so I think that's enough planning for the moment we're going to kind of come back to this whiteboard a little bit to to plan out some more features in the as we
build this out but I want to get started just to kind of jump in so if we're looking at our HTML document we have to ask the question how are we going to add JavaScript to this well theoretically you can put Javascript pretty much anywhere in this document but you will always see a best practice of putting that JavaScript at the end of the body tag in almost all cases and the reason for that is because when we are loading an HTML document in a browser the browser has a bunch of code that's running in
the background that actually has to read through this HTML document and parse it and parse all of the elements there and all the Styles attaching those to the elements and it has to actually paint that to the screen now this is called the critical rendering path and I would say this is a more intermediate to Advanced concept that you can kind of check out on your own but the point of this is to say that when we load this HTML document in the browser it's actually going to make a network request to get the document
you can see that over in the network tab you'll see this first 200 get request let's make this a little bit larger this is the initiator is the document and it's a type HTML and when we click this it's going to render the HTML here but if we look at the raw response that we're getting this is the HTML document that has been sent over to the browser and the browser has to go through and parse that now why is this significant well the reason being is if we have JavaScript that happens or is placed
here at the top of the body what that means is that before the browser can parse any of the HTML and show that to the user they have to run all of that JavaScript that is sitting there at the top of the body and if you've got a large enough JavaScript bundle that's going to block things and the user's not going to see anything in the browser until that's done so that's just a poor user experience and that's the reason that we'll generally put a script tag at the bottom of the body so once we've
got the script tag here we can run arbitrary JavaScript in it so we can say hello world and save that and then our live server is going to reload go to the console and you'll see Hello World and just a side note you'll see this get request that's airing out on the favicon we don't even have this in our HTML document the browser just by default is going to look for this because it's kind of a standard so we can safely ignore that but anyways you can see we've got JavaScript running but obviously we don't
want to do all of our JavaScript inline here because we're going to have to write enough of it to where this will get pretty cumbersome so ideally what we need to do is make a script that has a source tag and that Source tag is going to point to a Javascript file that we're going to add to our directory so we'll come over here to the live vanilla build add a new folder called Js it could be anywhere but we can put this in and we'll call it app.js you can call it whatever you want
main.js index.js any of those work so here let's go ahead and put our console.log hello world save that and at the moment it's not going to do anything if we refresh well I guess we haven't saved the HTML yet so let's save that refresh and you're not going to see anything you'll just see the source attribute of script is empty and that's because we need to populate that with a path to our app.js Javascript file so once we save this you should see everything's hooked up we get Hello World in the browser and we have
our basic Javascript file so at this point now that we've got a basic Javascript file set up I want to go ahead and start on these user actions that can happen so remember we've got these three user actions and there's actually a fourth one that we are going to start with because it's probably the simplest implementation and that one is toggle the menu so this new round and reset current game these are part of the menu but we actually have to implement that so that this menu pops open and closes every time it's clicked and
that can't happen with just HTML and CSS at least without something crazy going on so that's the first thing that I want to do because it's rather simple to implement and then we'll start working on those user actions and how do we track the state of the game so the first thing that we're going to do is kind of scaffold out our actions and to do that we need to identify the elements that we are going to select so I'll show you a better way to do this in a couple of minutes but we're going
to start with kind of as I said the naive approach of what you might think to do first so if we're looking for that menu you're going to come to the drop down menu section of our HTML and you'll see that we've got a div with the class of menu so probably the easiest way to select this element with JavaScript is going to be let's call it menu and we're going to select the document which should be globally available to us in the browser runtime so that should be available and you can see vs code
has already kind of detected that this is available to us so it's giving us all this auto complete stuff of the browser apis so we can say document.queryselector and we can select by a class and select any element that has the menu class which we know just to be one div element now from this menu what we can do is add an event listener and we want to listen for the click event and then on that callback we're going to get an event object which has a Target which represents this element right here so if
we were to console.log event dot Target we should see when that is clicked in the user interface we're going to see the element itself printed to the console and you can see that we've got the button and if you open this up you'll see all of these different attributes and these are all the things that we can read off of this element Target now to get this to actually toggle down that menu if you remember from our HTML all we needed to do here is go down I'm sorry not there right here this is the
menu items and you can see that we've put a hidden class on there so if we were to go back to the browser and select this element and go find that div that is hidden and then we can uncheck this hidden CSS class you'll see that well this actually shows the modal because we're sharing this hidden class with that modal as well so let me refresh and just remove that class for a moment and you'll see that now by default it is showing so really all we need to do with JavaScript is toggle that class
on and off every time that button is clicked so this is the class we're targeting but in order to do that we need the ability to select this item so that we can manipulate it so there's multiple ways that we can do this but you can see we've already selected this div element that has a class of menu so we've already got that context within JavaScript in the menu variable now we can use that and select any div that has the items class within it so a simple way to do this is to say menu
items and we can say menu dot query selector and then look for the items class and from there we can then manipulate that so when we see that the button on the menu has been clicked we can come down and say menu items and we can say class list and then we have this method available called toggle and we can pass in a class of hidden and that's going to toggle the hidden class back and forth every time the button is clicked so let's see if that works we click this click it again click it
again and you can see over here on the right that hidden class is just being added and removed each time so the question is how did I know to do that that's always a good good question to ask and let's go ahead and go to mdn which is our favorite documentation for the web and what are we going to search we want to look for class let's start with element so element is a base class it's the most General base class from which all element objects in document inherit in other words what that's saying is
when we do a query selector and get an element back then all of those are going to have are going to inherit the instance properties in instance methods of the element and if you look at instance properties you'll see that we have a class list available to us and from that class list if you look at the value you can see that we have a toggle method so the toggle method of Dom token list removes an existing token from the list and returns false if the token doesn't exist it's added and the function returns true
so that's how I would go to find that this is available to us and that's how I knew that we had a class list on the menu items which basically is going to map to this right here that's what we're dealing with in JavaScript and then the toggle method is just a convenience method that allows us to add and remove this class or whatever class we pass in as an argument so just with a couple lines of code we now have some functionality in our application we can toggle this actions menu now of course we
can't click we can't click the new round to reset and expect it to do anything because we haven't set click listeners on those yet but what we do know is that we can toggle it now there's already something wrong here and there's nothing terribly wrong but I'm going to start making a list over here if we can remember where this is we'll say let's zoom in a little bit make this a better font so best practices when developing user interfaces all right so the first one that we're going to talk about here is global scope
and namespaces so if we go back to our application there's something that's a little bit wrong here and could cause you problems in the future if your app gets bigger and you start splitting this across multiple script files and using similar variables so let's say that we went ahead and added another script to our index.html so let's copy this down we'll say second app.js and over here we're going to add a new file called second app.js that will delete in just a minute and I'm going to Define a variable called menu and this is just
going to be some object some JavaScript object Okay so we've got in our second app.js a variable called menu in our in our first app.js we also have menu but they represent two different values so the question becomes which one's going to win which one's going to take precedent or precedence so let's go in here and click our button again and it seems to be working okay so let's go back here and flip the order of these scripts and save it now let's click here and this is no longer working and the reason being is
because we have a redeclaration of the menu variable and so it no longer knows what to do because we're trying to set an event listener on a constant object variable because they're conflicting so as you can see this is already a bit of a problem and the problem here is not that we're defining two variables of the same name that's totally acceptable within you know programming it's the fact that we're declaring the same name in the same scope furthermore we're putting it all in the global scope so believe it or not if we would go
to this console here and type menu you can see that that value is an empty object and then if we type menu items let's see menu items will be undefined because we're deriving That Base Time menu but let's go ahead and flip this script um oops okay so we're flipping them in the different order so now this menu will work okay and if we type menu it's now back to that element and menu items is going to be another element so you can see that these are available in the global scope which is usually not
a great idea so something that your o is going to want to do when you're developing applications is make it into a namespace so when I say namespace all I'm referring to is a one variable that a single name that we can Encompass and store basically put a closure over all of our other variables so that it's not going to expose all these different variable names in the global scope so a way that we can do that is just defining a variable called app and this will just be a basic object to start with and
within this app we're going to store some of our selected items and then we're also going to add an initialization method so the first thing we'll do let's get these the menu and menu items on this within this namespace and something that's really nice to do is put a prefix in front of that so we'll just put a dollar sign that's a pretty standard convention that people would use and so this will be a property of this namespace and this is where we're going to put all of our selected HTML elements okay so right here
we're going to call it menu and we can say document.queryselector looking for the menu class and then we will also put menu items but now we no longer can derive this based on menu because at this point in the initialization of this object we don't have menu available to us now you could try to do something like app.menu in reference or sorry app dot dollar sign dot menu and then query selector and then look for items so you could try that but if we save that and go to the document here it's going to say
unclot reference error can't access lexical declaration app before initialization so in other words we can't reference it here because it hasn't initialized yet so a quick solution to that is to just replace this instead of deriving it based on that element we'll just look for it in the document there's only one element with a class of items so that should not conflict with anything so we've got our selected elements we're looking a lot better here and now if we go back and let's go back down in our index.html and flip the order to where it
was broken before and now if we refresh um it's going to say menu is not defined where did we what are we doing here oh I'm sorry that's because the event listener is no longer going to work so let's comment that out for just a second and things should work now you're not going to get any namespace errors this menu is not going to conflict with this menu because this is uh has a closure over it with app as the namespace so let's get rid of second app that was just for demonstration we'll delete that
and then in the HTML we can delete that reference so we're back to where we started and now what you'll see is if we go to try to access the menu variable it's not going to be available so I guess there's a built-in called menu bar but menu is not available but if we go to app dot dollar sign dot menu that is how we could access that element that we've selected so now all we have is a single namespace called app and theoretically we could Define that same variable in a different file and it
would conflict but it's much less likely and much easier to track all the variables we're defining when we only have one namespace that's covering everything else that we're defining so the next thing that we'll do to make this a little bit better we could of course uncomment this down here and say app dot dollar sign dot menu dot add event listener and save that and then we come here and it's going to say menu items is not defined I'm sorry because I have to reference app.dollarsign dot menu items as well and we're going to toggle
this and it'll work just fine now there's one Improvement we can make because right here we're doing this in the global scope so a better way to do this is to make an init method within our app namespace so the init method is going to be where we're going to add event listeners to our application and just to note this is es6 syntax this is just a shorthand way to define a function property on an object that we're calling app so another way to do this would just be a property and then you could add
like an anonymous function just like that or you could do an anonymous function like that so on and so forth you could even Define a function up here and assign it there but this is just a quick way to do that shorthand and then what we're going to do is move this initialization logic into that method right here and what that does for us is now it allows us to control when our app is initialized and what we can do here is if we save this this is no longer going to work because we haven't
initialized our app but a nice way to do this is say document dot add event listener and we'll wait for the document to fully load and you can see in the documentation vs code populates um actually this is not for the load event but this is basically waiting for the entire document to load so we know things are safe to use and select and then from here we can have a callback function that we'll call app.anit so another way of doing that we could call it like this so app dot init and save it and
if we do this it's not going to work and I believe the reason is this should be window instead of document so let's try that looks like it works let's go ahead and look at the reference here so mdn document so we can look at the um document here and then let's look at the events reference so listen to these events using add event listener on the document and it looks like the load event is not available there but if we look at the window if we can find that so let's look at window and
then events here and this is where we're going to find the loaded event I believe and you can see here in the load in unload events reference here's the load event we're listening to and that's fired when the whole page has loaded including all dependent resources such as stylesheet images in other words this happens when all the HTML is in the document and we can start selecting it safely so that's why we're listening on the window here and basically we're just listening for the load and then we're initializing our application which will select these elements
and add that click listener to our menu now a shorthand way to refactor this rather than this syntax we can just remove this and remove the call and that's a more concise way to write that and we'll have the same exact functionality just like this all right so we have a basic toggle menu that's working but the next thing that we need to do is kind of start on this game and and working on the state of tracking the different moves that a player can do so let's first scaffold out kind of the events that
we're going to have to listen to and the elements that we're going to have to select and then we will come back and fill in that logic with an actual implementation so as you know init is where we're going to register all of these event listeners to handle these um user events so what we can do is first Define the elements that we are going to trigger those events on so let's go back to the game and the first two are pretty easy we need to Target the reset button in the new round button so
one way that we could do that you can see that we've got two buttons reset in new round so there's no selectors on either of these buttons so what you could do is just add a class but one thing that I'm going to show you here to refactor and we're going to do this as we go is add a data ID so this is a much more stable way to select elements when you're querying them in the Dom so if you go to mdn and type data dash star you will see this attribute which is
global attributes form a class of attributes called custom data attributes this allows you to add proprietary information to be exchanged between HTML and its Dom representation in other words we can give data ID or data whatever we want to Define and that's going to allow us to have a stable selector so let's come back first to Excalibur uh Excalibur here so we've got Global scope and namespaces and now let's talk about stable selectors data star attributes okay so what do I mean by that if we go to index.html you know we could select these buttons
indirectly by looking for the menu div and then looking for items and then getting the index of the button to select which one we want but a more stable way to do this let's start with menu up here is to just add a data ID and we're going to call this menu so let's save this document and go back to app.js and update our query selector here for menu so instead of selecting the class we're going to select something we'll put some brackets which says we're selecting an attribute called Data Dash ID and that will
be equal to menu so let's save that and see if things are working okay in our app and it looks like they are we're allowed to select that and let's break it on purpose so take out that U just to break things and now it's going to say uncaught type air app dot menu is null so you know that this is working and we could also call this whatever we wanted so data custom selector just to demonstrate and you could update this to say custom selector and that's going to work just fine we'll still have
that being selected appropriately so data ID is just a convention that Avo has used and I think it's a good succinct one that you can use as well so we're going to put a data ID on each of these elements that we want to select and the main reason for doing this is to have stability so if you changed the name of this class for menu or if you rearranged the HTML elements in the future you don't want all of your JavaScript to all of a sudden break because you changed a style element of your
document you don't want to couple those two pieces together and so this is a way to keep things a lot more stable so we'll come down here and add a data ID for this of menu items and then we'll add a data ID for this reset button same thing here oops new round button okay so now we have selectors that are a lot more stable for all those and we're going to register them here so we need two more we need a reset button in the new round button and we're going to just copy these
query selectors so we don't have to rewrite that every time and then we'll replace this with menu Dash items is what we named it this one we called it reset button and this one was new round button so if we got that right we should have all of these being selected and we should see no errors within the document and you don't see any errors other than this one we know about and this is working fine so this has been updated correctly at this point it should be relatively simple to add the rest of our
actions here so we've already got the event listener for the menu toggling now we're going to select the reset button and add an event listener we want to wait for a click on that and then open up a callback function that receives the event and we'll just say reset the game that'll be our placeholder for now we can just copy this down almost do it verbatim instead of reset button it will be new round button and we'll say add a new round so we've registered those click listeners and now if we open up the actions
it'll toggle if we hit reset it will reset the game and if we hit new round it will add a new round so we've got these hooked up okay and then the last thing that we need to do is register a click listener on each of these squares now there's a better way to do this than what I'm about to show you but the way that I'm about to show you is probably the most intuitive in the simplest way to do it so what we will do is let's look at the index.html and find these
game board squares that we're trying to select so the quickest way to do to do this is look let's go ahead and add a data ID and I believe we can duplicate these data IDs so let's just call it square and then we'll add that for all of these properties here so I'll hold down option and just click in vs code you can highlight a bunch at once and then we'll add data Dash ID equal to Square okay so now we have a stable selector on all of these and what we can do here in
our selectors is say let's say squares and we'll say document but instead of query selector we're going to do query selector all so we want all of the elements that have a data ID of the square and if we go to the init method and just console.log app dot dollar sign dot squares and look at that in the Dom you can see that we have the node a node list which has all nine of those squares represented here now the last thing we don't have a unique ID on each of these we of course have
an index to our array but it would be nice if we just had an ID so that we had kind of a coordinate to map this to so one way we can do that is to just click here and go down to each of these and give it a basic HTML ID property or attribute okay so I'll start every all of them with one and then we'll just go down and replace all these so now when we select these the node list is going to have an ID on each of them so we know when
they're clicked which ID that we're dealing with so going back we can add an event listener to all of these but since it's a node list we need to iterate through them so we can say app.dollarsine dot squares and then we'll just do a four each so for each Square this should be a node in the Dom so we should be able to say Square dot add event listener and then add a click listener and then the event that is returned from there should give us an ID so let's go ahead and console log square
with ID and then we'll interpolate event dot Target dot ID was clicked so we can remove this console log and now what we would expect is every time we click them we will get the ID back of the square that was clicked so this one should be square id1 this should be nine so we're going one two three four five six seven eight nine so let's click one and you can see square with id1 was clicked go down here square with id9 was clicked so that's a pretty simple way to register an event listener there
for each of those squares so now going back to our initial question that we had asked let's go over to what actions can the user take in the app we came up with four of them a player can make a game move new round reset current game and toggle menu and if we now look at our init method we have four events that are being listened to on different Dom elements so one organization method that we can use instead of putting this all in the init method we'll leave the init method there and Define a
new one and let's just call this register uh register events or event listeners or something like that and this is just going to be an organizational uh technique here where we can just put all of that same type of functionality within that method and then we'll keep the init method pretty clean so all we'll say is app.register event listeners so now what's happening is when the window loads the document we're going to call init and a knit is going to register all of those event listeners for us and if we go back to our app
we should be able to toggle this reset the game new round and then click any of these squares and get an ID returned from the squares so at this point we have a template for our application and we've stubbed out some methods that we're going to need to implement so as you can see here we basically we've got this one done this is toggling the menu so we'll call that done I'll just add some comments here so we can track this one is going to be a to do item because we have not implemented what
happens when we reset the game or add a new round and then this bottom one is also to do um but this is probably what we're going to work on next but speaking of what to work on next that is a really good question as you're building an app like this how do you know what comes next well in this case we can kind of go through the process of elimination with these actions reset and new round those are not going to be possible to implement until we have a functioning tic-tac-toe game that we can
actually reset so let's go back to our notes here and I want to take a minute to go off of this point here let me get my arrows worked out here not super familiar with how to use this quite yet so we're going off of this point of player can make a game move so the next question we've got to ask is what is a game move well there's a couple considerations that we'll have to think about here one being how do we determine who is up who is the player that is up next so
let me add that as a requirement here um who is currently up the next thing we want to know is did the latest move cause a tie or a game win and then we also want to know who won or was it a tie and then what else can we think about here let's go to our final refactor the one that's actually working here up here this is our question of whose turn is it we need to know that so we can display that we also need to know that so we know which icon to
display when it's clicked and then as you see we have a modal that pop up pops up when someone actually wins the game so we need to know when that happens and then at that point when we click play again we need to be able to reset all of the state to a blank fresh game so those are the main questions that we have to ask um so who is currently up this is for the turn indicator icon to play um and I think that's pretty much it so we'll take these step by step because
um it's kind of tough to think through all of this at once as you get more advanced in building these things you can probably map all this stuff out from the beginning and that's kind of my first step when I'm building this is trying to map out what does the state of this application require and what do I need to track um one thing I'll add here is also the question of what state do I need to track so we'll talk about this concept a little bit here in a minute but I'm going to kind
of organically talk about this throughout the rest of the video because it's quite challenging at times if you're not super familiar so when I say state I'm really just talking about you know what does the current state of the game look like so that might be things like um current player might be total wins by player we can also track total type here total ties and then prior game history those kind of things are the things that we'll want to track and to do that we're going to just build this you know step by step
and we'll eventually come to some sort of model that we'll use to track that state so not going to talk too much about that at the moment let's dive in and start building this out and you'll start to see how this makes more sense in a minute so the first thing that I'm going to do is try to implement a basic move so in other words I want to display an icon in these squares when they're clicked we're obviously already registering event and getting the ID of the square that was clicked so that is useful
to us but we need to change the Dom or the UI when that happens and to do that the first thing I will generally do is go to the HTML and just mock something up so just figure out how to statically display that for the first time so I believe all we're going to need to do is put in an I tag with a class and then that's going to be one of our font awesome icons so let me just check my references right here to see which icon we're dealing with okay so it really
should just be fa solid is the base class and then it's going to be fax or FAO so we'll uh simulate both of those here just to make sure that our game board is going to display things correctly so fax and FAO and you can see that we've got those displaying correctly so this is the right size obviously these are not the right colors if we were to open up our CSS if you remember from earlier in the video we had some of these shared classes here at the top somewhere and in these shared utility
classes I gave us a yellow and a turquoise class just so that things are a little bit easier to deal with and easier to remember so what we can do is just pass in yellow and then turquoise into that class list and then our X's and O's will be the right color now obviously you can see we've got mismatches just about everywhere we'll get that worked out in just a moment so if we're trying to do this with JavaScript obviously we can't just statically put in these different icons we're going to basically build these elements
and add them as children to the appropriate div that has been clicked so what I'm going to do is open up app.js again and right down here in our event listeners for each of the squares I'm going to just copy over this HTML and add it as a comment and that's just for reference so that we can look at it and translate it into JavaScript so we've got fax and then FAO these are the two that we're dealing with so we can get rid of those here in the HTML and then in app.js we know
which ID was clicked and the event itself carries a Target which represents the individual square that was clicked so what we could do just to start us out is actually derive that or not derived but create this I tag so let's call it an icon and we can say document.create element is one of the built-in browser API or Dom methods and we just need to give that a tag of I so we've created the element and then we can say icon I'm sorry not redefining it we can say icon.class list and then I believe we
can just um add an array of tokens and what that would be the classes themselves so we would want to add f a solid f a x and then let's say yellow so we're just kind of hard coding an element we'll hard code a yellow X in this case and then from here we've created the element but we need to insert it into the Target that was clicked so really what we could do is just say event.target dot replace children and then I think we can just pass in the icon so that should work let's
go ahead and click and you can see something's going on it's not working so let's inspect you can see there's some sort of content in these div elements and it looks like our icon class or icon element has been added but the class list has commas so we need to not do it that way we're not supposed to pass an array I guess maybe we're just supposed to pass um multiple arguments let's try that okay so that's working better and now you can see that the content within here or where did we go the content
within the one we clicked has the correct class list now so now anytime we click any of these we're going to get a yellow X and obviously this is not useful yet we're just filling them up with x's and if we click them twice we also can have problematic Behavior because we're not checking to see if there's an X already there we're just adding it no matter what so that is problematic but at least we've got something working here so ideally what we want to do is know whose turn it is and then depending on
that turn we'll choose either fax or FAO and then the yellow or turquoise color and at this point we've finally reached a place where we can start talking about what state is and what state management really represents here for us so to do that I'm going to pop over to the Whiteboard again and we're talking about game moves and what state do I need to track well I think the next question really is what is state well there's really two types of state that we can talk about so we have client State and then we
have server State and these are very loose terms so there's a little bit of an overlap between the two but these are the two kind of categorizations that I would be using so when we're talking about client state the way that I think about that is any sort of um uh state that we have within the Dom that does not need to change anything that is persisted long term so I guess that's a complicated way of saying something like this actions menu popping open and closed every time we open and close this the client-side state
is changing but we're not actually doing anything you know to persist that change so if we opened this actions menu up and then refreshed the page it's going to close every time because we're not tracking that state across browser refreshes it's just temporary in-memory state that we're tracking so in other words client state a good example of that let's just make an example over here let's add some code here so let's say client state equal to and make this a hopefully was going to get that a little smaller but let's open up some brackets so
client State might be something like is menu open and we'll start that with false and so as you can see when we click this menu that state variable is going to update it's going to be either open or closed true or false and that's not going to persist across browser refreshes now server State and server again is kind of a loose term here because we don't actually have a server we're going to be working with local storage to kind of emulate that but generally server state is kind of what you would think of as a
database so it's a snapshot in time it's a snapshot of what the current data looks like so this would be more conducive to something like a game move so we could copy this down foreign State could be something like a current player and let's just put an ID in there let's say player one is the current player and then we could also add things like we've got the current player how about the history of games so we might have an array filled with all the different games that we had played in the past we could
also track things like um we can also track things like the current game so this might be an array of game moves that have happened and that way we can track across browser refreshes you know who has moved in which Square so these two types of State we're going to need to track and we're going to eventually refactor this to be a little bit more stable but as I said in our kind of game plan over here in this video progression we're doing everything in one file as a naive approach and then we're going to
refactor it to be a little bit more stable so what that looks like for us in terms of state I'm just going to create a state property on the app okay and to start out state is not going to be persistent across browser refreshes because this is just a variable and every time we refresh this is going to be re-initialized and reassigned so the first piece of state that we want to track is current player and for now I'm just going to keep things very simple and we're going to say that each player is represented
by a number it's going to be either one or two so we'll say that player one is going to always start the game so we'll track the current player and that alone will allow us to decide down here in our event listener which icon that we need to put in the Square so obviously we need to update that state each time a move happens so if we were to um we'll leave this console log here but every time something is clicked what we're going to need to do is say the current player is going to
be equal to app.state.current player now you don't need to save that to a variable I'm just doing that to kind of be a little more clear here and then we're going to say if the current player equals one we're going to add a certain element to the Dom otherwise we'll just assume there's only two players here we'll add a different one so in this case let's just say that player one is going to be a yellow X so we can create the icon no matter what because it doesn't matter that's not styled at all but
the class list is what we're going to use based on the player so if it's player one we're going to have a yellow X and if it's player 2 we're going to have a turquoise o so we'll put in turquoise right there but the thing is we need to of course update that state every time this move happens so we'll go ahead and create this icon add the class list and then what we're going to do here is say app dot state DOT currentplayer is going to be set equal to whoever is not playing this
move so in other words if let's say the current player is one and has created you know this class list so we're going to say if the app dot state that current player equals one then we're going to set the current player equal to two otherwise we're going to set it equal to one so in other words it's sort of just a toggle on who's playing the game and then finally we'll take the event Target which is the square and replace the contents of that square with the appropriate icon and so next time this is
clicked we'll know which player to use so I'm going to also log this up top we'll say the current player is and then we'll say app.state.current player so we can get rid of these down here and then there's one more important thing as you saw earlier we can't play in a square twice so we need to know if the square already has some sort of element within it let's go ahead and just save this and see what we're dealing with now in our game so we'll click a square and then the next one should be
an o and it is and that's because we've updated the state every time we see a new play now I think if I'm not mistaken what's going to happen if we click this twice so let's say that we click this Square again it's going to add an X to next to the O which is obviously invalid and now it's going to think that the O's turn is up even though X should still be up because they played in the wrong spot so that's obviously a problem and the way that we fix that is basically putting
a check within this click event and we're just going to say is there something in that square and if so we're going to return early and we're not going to allow the player to actually play and this will prevent us from updating the current player in state and it will force them to replay before the next player can go so the question is how do we check that well we're going to eventually do this to be um we're going to eventually check this in a much more stable way but for now I'm just going to
keep things simple we're going to go to mdn and go back to the element reference so elements reference oops I clicked the wrong one I just want literally the element class so which one is that I think this will work so we've got element.get attribute now we can look through all of the different methods that are available on an element and there should be one to check if there are children already within that element I'm not finding it here so I'm just going to search what I know here has child nodes and we're not finding
it on element because it exists on the base class of node this is like the abstract Base Class pun which many other Dom API objects are based so basically any element as it mentions here will inherit all the methods of node so we can use this has child nodes method and this returns a Boolean value indicating whether the given node has child nodes or not in other words what we can do here is the first thing we do is say if event.target dot has child nodes so if there's any X or o in there we're
just going to return we're not going to update anything we're not going to update the state we'll just return from that function early so by adding that I believe we should get the desired Behavior here so we'll click one click two and then try to click this one again and it's not working let's see why so I had to pause the video to figure out what was going wrong here and it's a little bit tricky bad programming on my part but basically what happened here is when we clicked on the icon itself you can see
if I like specifically click on one of these icons it's going to continue adding icons now if I click somewhere else in the Square it's going to have the correct behavior and what's actually happening here is the event Target so right here is going to represent what was actually clicked so the element that was actually clicked in the Dom now the square up here is going to represent the square that we're actually looking to Target for this Behavior so if I were to console log this let's go ahead and say um console log we'll say
the square and then we'll pass in the Square itself and then we'll console log the event Target and then we'll pass in event dot Target now what you're going to see is as we click right here the square is going to represent that div and the event Target represents the div because we clicked on the same thing now if I put the mouse in the middle of that icon remember we now have a new HTML element right here if I click that it's going to register the event Target as that I tag rather than the
div so what you'll see here is that the square and the event Target will not match up when I click this and we'll have that weird Behavior so you see the square is the div and the event Target is the actual icon to make this Behavior more stable and just better programming practice in general we should be updating the square element itself and not relying on the event Target because we can't control whether the user is going to click the icon or the square we need it to work no matter what so let's remove these
console logs and then instead of checking whether the event target has child nodes we're going to check if the square has child nodes and then furthermore where we're replacing the children down here we don't want to replace the event targets children we want to replace the square so that will make all of this Behavior a lot more stable and when we save this we should be able to click in any Square as many times as we want and you can see our console log is going to say the current player is one still so if
I'm clicking any of these the turn is not changing the Turn Only changes when we the player clicks a valid square and then we're going to have a different current player so we've got this working this is kind of some boilerplate for what we're going for we will refactor this to be a little bit more stable some better practices but for now this works just fine I'm going to clean this up we don't need these console logs anymore um the next thing that we're going to need to do is if we just keep clicking these
and playing the game you can see when the O player I think that's player two when they win the game nothing happens and that's because we haven't programmed anything to happen so we need a way to detect when this game ends and there's going to be different patterns that represent a winning game and then of course we can also if we refresh reset everything we can also end up in a tie so I believe if we let's see if I can even produce a tie here um requires a little bit of thinking to do that
so in this case the game should be a tie and we should be able to recognize that now they're in the original project that I'm I was refactoring here they had a pretty nice way of handling this and they'll want to highlight that so if we open up main.js from the original project um what they were doing to check whether the game was won is they had an uh basically an array of winning patterns and they were basically just checking which squares were currently um had plays in them and did they match these winning patterns
and that's how they would determine whether the game was a winning game so I'm going to copy this array here and I'll show you how we're going to use this so let's start writing some comments here because our method is getting a little bit large so check if there is already a play if so return early because we don't want any turns to change or anything like that then we'll come down here and we'll get the current player we'll create the icon and we will add that icon to the div right down here and then
the next thing that we need to do is let's let's actually put a comment here determine which player icon to add to the square and then finally check if there is a winner or tie game once again we're going to refactor all this so I know it's getting pretty busy in this method we're going to refactor it I'll show you a better way to do this for now we're going to paste in those winning patterns and so the question becomes how do we know the current state of this game how do we know what squares
have been played in and which ones have not been and furthermore which player has played in each of the squares now we could of course do some elaborate check where we basically say you know we search the current Square we check if it has anything in it and then we could maybe check the class list and check if it's an fax or an FAO and then basically Loop through all of the squares on the board to determine what the current state of the game is but what's a lot easier to do is to just track
that and State as we go so rather than doing this sort of check we can just check the state but first we need to Define what that state is so what we'll say is that we need to track an array of game moves and those game moves are just going to be the player that has played so what it might look like is something like this where we have um I'm sorry we we need to track the square itself too so we're going to say the square ID is going to be 1 and then the
player is going to be one so that move right there would represent if player one clicks this top left Square so we basically are just tracking a square ID and a player ID in the moves array so let's empty that out that's going to be our default state is an empty game and then down here within this event listener as you can see we're updating the current player in state but what we also want to do is we want to push a move to state so app.state dot moves and then we want to push a
new move that is going to be an object with a square ID and let's just um reference the square itself or we could also say the yeah we'll just say the square dot ID and this needs to be a number so we'll add a little coercion there to make that a number type and then the player we'll just call it the player ID just for consistency that's going to be equal to the current player of the game so we've already updated the current player right here to be the next player so we need to actually
put this state update right above that so that the current player is right so we'll say um I don't know why we're checking this right here we've already extracted that there so let me refactor that real quick and then we can put current player right there and then just for us to see what's going on here I'm going to console log app.state after those updates have happened at the moment this isn't going to change any of the behavior we're just tracking another state variable so let's click something click another click another and you can start
to see we're building up State we're building up an array of moves and you can see that square id1 has a move from player id1 so the x square 2 has a player ID of 2 an O and square 3 has a player ID of 1 and an X so you can see as we add moves we are adding to that array of moves now what's interesting about this is that we can also derive some State here we can simplify things a little bit so if we go back up to our state you got to
ask yourself well who is currently up based on the number of moves that are in that array we actually don't need to track the current player because we will be able to derive that based on the moves that have been played so let's actually delete the current player from State all we really need to track is moves and I'll show you how to derive that right here so the first thing that we want to update um is let's see the current player variable right here so what we can do is we can say if app.state.moves
um that length equals zero so if there's been no plays at all then we're going to say the current player is one we'll just always say that the current player is one they start the game every time if it is not equal to zero then we're going to check for the last move of the game so the last element of that array and then grab the player who is opposite of that player so this is going to require a little bit more logic than we have right here um so I'm going to break that out
so we'll say the last move is app.state.moves and then you can use a little convenience method you could of course check it by saying app.state.moves dot length minus one that's a typical way that you could grab the last element of the array but there's a more concise way with JavaScript you can just say at negative one which will grab the last element of that array now of course we don't know if that array has anything in it so that could be I believe undefined if there's nothing in the array so now we can come down
to the current player we can say if the length of the array is zero we'll go with one otherwise we're going to grab the last move and that move has a player ID in it so it's going to not be the player ID of the last move it's actually going to be the opposite of that so what we can say is a little convenience method get opposite player and we'll just pass in a player ID and we'll say if player ID equals one then we're going to pass in player two otherwise one so we'll say
get opposite player of the last move sorry this is getting a little complicated we'll break this out into some helper methods later but basically what we're doing is we're finding the last move we've got a helper method that gets the opposite player and then we're checking to see if there's any moves if there is if there's not any moves then player one is up because it's the beginning of the game otherwise we're going to get the opposite player to the last move that was played and that will give us our current player and that way
we don't have to track any of that state and that should flow down to here where we're checking and adding moves to the game so let's save that and see if it works you can see that we're alternating and we can click on these as many times as we want and it's pretty stable now there's one more thing that we can do now that we're tracking the game moves we don't really need to check whether the square has child nodes because that's really relying on the Dom itself it would be better just to express what
we're trying to do to check the state of the game so let's say um we need a helper method called has move and what we're going to do is just Define a function that takes a square actually a square ID so it'll be a number and then we're going to just basically return or we're going to say existing move is equal to app.state.moves and then we're going to look for that square ID in that array so we're going to call find and we're going to look at the move and check if the square ID matches
the square ID that we're passing into this helper function and then we're going to return the existing move does not equal null and that's another way of saying does not equal undefined or null so we could also say does not equal double equals undefined okay and that will give us whether there's a move so now we can replace this with has move and then we can just pass in the Square dot ID and make sure that's a number so that it's comparing the same type I think if we got this right we should be able
to click squares multiple times and it will not do anything which is telling us that our check has worked okay so at this point I know that we've done a lot of refactoring and it seems like for nothing but the goal of this is whenever you're tracking state within an application you want to keep it as simple as humanly possible and the reason being is as we've seen down here where we're actually updating the state to the current player which by the way we can get rid of now because we're deriving that information but when
we update State as we're doing here in the moves pushing a move to the array every time you track something in state you also have to update it somewhere and the more things you track in state the more updates you're responsible for and therefore the more possible errors that you're going to introduce to your application so the goal with tracking state is to keep it as simple as possible so that you have the least number of variables to keep track of over the life cycle of your application in this case all we're doing is tracking
an array of moves and then from that little piece of information we're able to then derive who is the current player and from that we can then you know update state to to make another move within the game at this point we've refactored our state and we're updating it to just have an array of moves which is a lot it allows us to derive pretty much everything that we need to know about the current game now the next thing that we need to do that we can now actually do with this state is find whether
someone has won the game or if it's a tie or if it's still in progress so what we're going to do is actually make a utility function for this and I'm going to add this just at the top and this is not going to be the final destination of it um actually we could even just put it within the app but we'll probably rearrange this in the future so what we want to do is call it something like get game status and this function is going to take an argument here so what are we going
to pass in will be an array of moves and then we also probably need well I think that's pretty much all we need we just need an array of moves which is tracked in state so with that array of moves we should be able to give a couple pieces of information so we'll Define the return value of this just to start the first thing is going to be the status which this can either be um we'll call it in progress or complete so we will put a placeholder in there for right now but this will
become dynamic and then we will also give a winner which again will put a placeholder in there but this is going to either be one or two so player one or player two and then also it could be null which would represent a tie so that's kind of how we're going to um represent this and based on these two pieces of information we should be able to know whether the game you know what to show in the UI whether we show the modal that pops up and gives the result or we keep playing so to
do this the first thing we need to do is get player one moves and the moves array that we're going to be passing is the entire game so all we need to do is filter that and then check on each move whether the player ID is equal to one so that will give us player one moves and then we can copy that down and change the ID to get player 2 moves from there we should be able to bring up our winning patterns so this will now come up in that utility method we'll paste that
right there and what we want to do is Loop through each of these winning patterns and check if either of the player moves have all three of these within their array and if all three of them match then we know that one of the players has actually won the game so the way we can do that is start out by saying the winner equals null so we'll just assume to start that it's there's no winner and what we'll do is map through the winning patterns so we'll do a loop for each Loop and we'll call
each of them a pattern because this variable will represent one of these arrays and then we'll break that down into a function that will check for this condition so we'll say player one wins and that is only going to be true if every value within the pattern so we'll just say V for value we'll say player one moves includes that value so again we've got player one's moves the array of moves they've made and then we have an individual pattern and if there's a hundred percent overlap between player one's moves and a given pattern we
know that they've won so the same thing can be said about player two so we can copy that down again and just update that array and that should tell us whether each of the players have won so then we can write an if statement and we'll say if player one wins then we just update the winner to be equal to one so that's their ID um and then if player 2 wins we'll update the winner to be equal to So in theory this should only be one player that can win and if we don't hit
a true condition for either of these then the winner will stay equal to null and we'll just assume that's a tie if the game is complete so we come down here and instead of hard coding that we can just remove that and winner will be assigned to this variable right here so that's either going to be null for a tie one or two and then the status of the game is going to be in progress if there are either no winner or the game moves does not equal nine so if we look at our game
there's nine squares so if all of them have a move then we know that the game is over so that will be our first check we'll say if the moves dot length is equal to nine then we can say that is going to be a complete Game otherwise it will be in progress now we of course need one more check here so if the moves that length equals nine or the winner does not equal no yeah so we're checking whether the winner does not equal null because that would represent that someone has won before the
game reached a final state of nine plays which would be a tie so that will help us figure out what the status is so now with this utility function get game status we can come down here and where we're checking if there's a winner or a tie game let's just assign that to a variable called status so we'll say app.getgame status and then we will pass in the app.state.moves and that's going to represent the newest array of moves that has been played let's console.log that status just to see what we're dealing with and let's play
a couple moves so you can see the status is going to print every time so our game's in progress there's no winner still in progress and then this click right here should change the status and you see that it doesn't and we'll have to check out why because that should have updated to complete and populated a winner of player one so let's go ahead and check that see what is happening here just to debug this let's go ahead and just do a classic console log this will be quite a few logs because we're going to
be printing on every pattern here so let's just console log the pattern and then player one moves in player 2 moves just so we can get that in one big object and then we'll play all these moves and then right here this is where we should be getting a different result than we're getting oh and I can already see what's happening here so what we did wrong what I missed is when I was filtering the player one moves this is just going to give me the entire move so if we print that out to the
console what you'll see is in this array we're printing an object with a square ID and a player ID and when we're comparing that down here in the every utility method we're actually comparing a number which is the key of the square to that object which will never equal each other so what we really need to do is actually add a map utility at the end and we're going to map that move to be a number value that is equal to the square ID of those moves so now if we print this out into the
console player one moves this should represent an array of numbers now as you can see representing the coordinate um of this of the place so this should be one two and then one two three and now you can see that the status is complete and the winner is equal to player one so our utility method seems to be working let's reset the game and try to tie the game so let's mix this up here oops I accidentally won it's kind of hard to tie this game okay so now we've got a tie game and you
can see that the status is complete and the winner is null so that should tell us that it was a tie game so now we can Implement that logic down in our event listener so down here at the bottom where we're just console logging the status what we'll say is if the status equals complete then what I'm going to do is just make an alert in the in the browser so we'll say if the status I'm sorry this should really be status dot status so we should probably rename this variable we'll say game and this
will be game dot status and now we'll say if the game um if the game has a winner then we're going to alert player winner wins otherwise we know that it's a tie so we'll say tie let's try this out so let's go ahead and make player one a winner says Winner's not defined for some reason and that's because I'm not referencing it correctly try that one more time and there we go player one wins so kind of small but you can see now we've got the essential functionality hooked up and at this point I
think the next step is to trigger that modal to open when someone has won the game or there's a tie but before we do that let's just recap what this big long event listener is doing so first We're looping through each of the squares on the game board and we are adding a click listener to that square when that square is clicked all this code is going to run so the first thing we'll do is check if there's a move already present within that square if there is we're going to exit early and not do
anything because someone can never play twice in the same square once we get past that we know that there is a valid move so we're going to check who Moved last based on the state we're going to then get the opposite player of that last move and set the current player of the game we will then take and create an icon and based on the player who is up we'll add an X or an O as an icon and then we'll put that in the Dom and we'll add that icon to the square we'll also
push a move a new move to the state so that we're tracking the history of moves in the game we'll then check the game's status after that move has happened and if the status is complete we then know we can do something and open a modal to explain whether someone has won or if the game was a tie and now our goal is to open that modal and give the user an action to actually reset the game and start over if you remember from our index.html when we built this a couple hours ago you'll see
down here with the modal we just have that hidden class sitting on there and if we remove that and save the file you'll see that we get this dialog to open and it's going to cover the screen with a play again button so the things that we have to do is number one we have to trigger this to actually open and then close when we're done with it and number two we have to add a click listener to this button right here so that when someone clicks play again the game state has reset and you
know everything goes back to the beginning so let me add this hidden class back because that's our default state and as I said this is going to be refactored at some point we've got a lot of code all sitting in one place which is going to be hard to follow long term but at the moment we're just putting everything in one method keeping it simple so that we don't have to refactor anything quite yet so the way that we're going to do this is First add a selector to this modal so just like we've done
up here with let's see we've given data IDs to the elements that we're going to select and control with JavaScript so we'll do the same thing with this modal let's just call it modal and then the modal contents will also give it a data ID and we'll set that equal to modal contents and what we're going to do here let's see or actually we're not going to put it there because we don't really need to control that we need to control this text element so data ID equals modal text and then this will be the
data ID modal button so you don't really need to add these data IDs to all of them because really you could just select the modal and then grab those elements dynamically I'm just being pretty explicit about it just for clarity so let's go ahead and select these within our app because that's kind of what we've been doing I'm just collecting all of these elements that we've selected so let's copy this down and we'll name this one modal this data ID will be modal and then we'll say modal text and modal button and as you can
see we're doing a lot of repetitive stuff here so if you're thinking this will be refactored too to be a little bit simpler and to eliminate the need to write all of this boiler played out but I'm leaving it here now because it's it's pretty clear what's happening so now that we've got these three we can pretty much control them down here in this check on the game status so if the game status is complete and we have a winner the one thing that we know we need to do is print to the modal who
has won that game so let's just say app dot dollar sign because that's our namespace for all of those elements um actually first we need to open the modal I'm sorry so if the game's complete we know that we need to open the modal so modal and then what we're what we're going to do is look at the class list in toggle the hidden class on that but to be a little bit more explicit since we know that we're opening it here rather than toggling the hidden class which could work there what we're going to
do is actually remove what is the yeah we should be able to say classlist.remove that hidden class so let's try that first let's make sure that that's working so someone wins the game here and says modal.classlist is undefined so we mess something up here oh and that the problem is we're using query selector all because that's what we had for squares this should just be a basic query selector so now I believe this part should work so let's win the game for someone and we get the alert but we also get the modal so let's
remove this alert um for the moment because it's kind of getting in the way but now that we know there's a game winner what we can do is we can say that the text is going to be equal to player and then give the game.winner so that'll be the ID so that's the message that we want to put so let's call that message actually and here our message is going to be tie game and then all we have to do we can actually extract that to a message up here um and then assign that there
and then no matter what we're going to say app dot dollar sign dot modaltext dot inner text or is it inner HTML I can't remember uh it's not in or anything it's text content is equal to the message so let's save that and see if that works so someone's going to win the game here and it's player one now let's refresh the page and this time let's let player 2 win so player 2 wins and you can see that dynamically will populate now the last thing that we need to do is put that click listener
on the play again button we're not going to do that in this method because remember we're registering our event listeners all at the top level of this function so let's just put that right here we'll say app dot dollar sign dot modal button add event listener we're going to listen for a click event and then with that event all we're going to do is set set the state DOT moves equal to an empty array because we want to reset the game and then we also want to close the modal if it's open so the way
that we'll do that is app.d dollar sign dot modal and then classlist dot actually not remove we want to add the hidden class back so that will hide the modal so now that should be hooked up and if we go through the game someone wins and we click this button it closes it and you can see there's still game moves here because resetting the state doesn't actually change the UI quite yet we will refactor that at some point but at the moment it does not so not only do we have to reset the state but
we also have to Loop through each of those squares and empty out their contents so let's see how we would do that is we'd say app.dollarsign squares and then we'll say for each Square we're going to say Square dot replace children and just leave that empty and that's just a shortcut to clear everything out of the squares so now let's go back and try it one more time someone wins the game we click play again and everything has cleared so we now have a functioning tic-tac-toe game player one wins again see if we can get
a tie here you have to really think about this one to get a tie um let's see that should work okay there's a tie game play again clears it out the last thing that is not working here is this turn indicator you can see that no matter what we play it's just staying the same and we obviously want to update that now a great place to do that is going to be within this super long event listener for each of the square clicks where we're updating the current player so we'll actually do that in this
if else statement but first we have to grab those elements that we want to update so let's find the turn indicator and you can see right here this is where we're doing it and we've got an icon that we need to update and some text that we need to update so here what we're going to do is add a data ID and call that turn so we'll now go select that in our list of elements so we'll say turn and then just copy this down again and one thing that we need to do here that
I kind of missed is we've got the turquoise class set on the individual icon but we want these both to match so it would be a little bit easier if we just put that up here on the turn element and we also need to match things up so the first player is player one which we're just determining is going to be X and that's going to be yellow so we need to match those up let's save that and just make sure that this is matching now which it is so this is what we're looking for
as a starting point and now all we need to do is just toggle this from yellow to turquoise and back and then we'll toggle the elements within it to indicate the turn so we can do that here um one thing we'll need to check is get a little bit more clear on who's up next so the current player represents who's actually clicking right now the next player is going to be the one that we want to change the turn indicator for so you've got the current player and then we can say next player and reuse
that get opposite player I know we're a little redundant here um but we'll go ahead and use it so this should represent it in the ID of the next player now we can come down here and say the turn label is going to be a new element you could have replaced the element that's already there but I'm just going to create a p element and then that turn label dot inner text is going to be equal to player next player what we determined up there you are up and we'll copy that down um actually we
can just put that right there and then from here we can just say app.d dollar sign and select the turn element so remember we're just selecting this entire div and we want to replace the contents of it so all we need to do is say replace children and then we can pass as it shows here we can spread out parameters as individual nodes so it will replace them in order so if we want the icon to go first we just pass that there and then we'll pass the turn label when we save this let's see
if we get the correct result so I'll go here and you can see that we're getting the correct text but the color is not updating and we're not getting the icon to also be added I believe the problem here is we're actually adding this same icon to two different places so we probably need to break that out into two separate elements so we'll say turn icon and then this will be the square icon so those will be two separate elements and down here we'll pass the square icon and then here we'll pass the turn icon
and we of course want the same exact colors here I believe or actually no these need to be opposite because once again we have the next player is going to be the opposite color of the current player so we'll say the Square icon and then we'll copy this down and this will be the turn icon and this will be the exact opposite so this will be the o and it will be turquoise this will be turn icon with an X that is yellow once again we are going to refactor this it's not going to be
this confusing and verbose here in the future so hopefully this works now we're getting a lot closer we have everything correct except for it looks like this text is O is yellow and it's because we're not setting the color of that so we need to say the turn label dot class list and let's go ahead and do that down here so turn babel.class list and we'll set that equal to turquoise to match what we're making the turn icon right here and then we'll copy that down and make this one yellow if it's player two so
now it looks like we're getting everything correct so if we play in O now X player one is up if we play an X well we've got to play again but you can see that that is updating correctly now as you noticed if we end the game and player one wins you'll see up here player 2 has it is up next and that's their turn and if we click play again that's not going to reset so we need to remember to reset the turn and since we've coupled all of that turn logic within this event
listener we have no easy way to do that up here when we're resetting everything so at this point we've reached a place in our code where we've got a lot of stuff going on right in this method that we would like to be able to reuse in different places to like reset the state and whatnot but right now it's very hard to do that so the next segment of this video is going to be taking this code and refactoring it to look a little bit cleaner and be more reusable and easy to follow so we'll
go through that but as of right now we have a working game for the most part as long as we refresh things and we can determine who wins the game so once again we'll refactor things then we'll start talking about keeping this state for the scoreboard and then moving into the MVC pattern so as we talked about we've got the naive approach all in one file that's what we're still on we've been refactoring iterating as we go and then we'll end up with something pretty clean that we can reuse and extend into the future so
we've reached a point where our code is getting a bit confusing and if we continued to add this functionality so if we were trying to reset this turn indicator when the game ends remember we've got a problem here it doesn't reset and then we also have to be able to reset the whole game and reset the round track all of this state you know the history of the games there's a lot to do here and given our current code it's going to be very confusing to do because we've got all this stuff in one method
there's all sorts of stuff we're updating State we're updating the view all in one spot so this is where a pattern comes in and helps us out a bit I waited until this point um to mainly simulate a real life scenario where generally you're going to start off in one file just to understand the logic that you need within your application and then as you go you you have to refactor to keep things clear in your head and to make the code maintainable so at this point we understand what patterns we actually need here and
that makes it a lot easier to introduce something like an MVC or model view controller pattern just as a side note the MVC pattern is really relevant to something like Ruby on Rails so if you typed Ruby on Rails and you go to the documentation you'll start to see a lot of these patterns and if we were I'm introducing this not because I think you need to use Ruby on Rails but more so because it's kind of the Premier example of a framework that leverages this model view controller pattern and has gained a lot of
popularity so if we go to the docs let's see if we go to the API Maybe that's probably not where we want to go so as we're scrolling through the docs you can already see there's a header section called models then there's views and then there's controllers so they very explicitly build out this pattern so this is just a good reference you don't need to check this out I just wanted to point it out so enough Theory here let's get into this the way that we're going to build this model view controller pattern is actually
by breaking this single file out into those three different responsibilities and that kind of brings us back to our best practices so whether or not you're using a model view controller pattern there's other patterns that you could use the main point here is that we want to separate um logic by um responsibility in other words this is the separation of concerns principle that is just a good programming principle in general it's something that you would always want to try to aim for no matter what pattern you're using so let's jump back over we've obviously got
quite a bit of functionality here that we don't want to have to completely redo a lot of this is good stuff that we've worked out but we do need to refactor this into a couple files so in our JS directory I'm going to add a new file one called the view.js one is going to be called store.js and this will actually represent the model I'm just calling it store because it kind of represents the storage that we're using you could call it whatever you want um so we'll call that store and then app.js this is
really going to be our quote unquote controller it's not a super explicit um adherence to the pattern but we're getting very close and the goal of a design pattern is to make things easier for you so you don't need to follow it so rigidly that everything matches up one to one as long as it's useful it is going to be okay so as we go and build this out I'm going to be kind of looking up here um to my other screen because I've actually as you know I've already built this app out in preparation
for this video and I just want to make sure that this live build that we're doing matches up with the final code that you're going to see in the GitHub repository that is linked in the video description so that's all I'm doing I'm just making sure that I'm naming the methods the same so on and so forth so what we need to start with I think is going to be um let's go ahead and do the view because that is what most of this logic we have in our application is pertaining to at the moment
so let's open up View and we're going to be jumping into some object-oriented programming Concepts here so that's just another way of saying we're going to be working with some JavaScript classes and specifically es6 syntax 4 classes I'll try to point out some of the syntax that I'm using and what it means but if you are not at all familiar with classes and what they are and how they work I would recommend brushing up on that pausing the video and just reading a couple you know overview guides just to get yourself a little bit up
to speed that said I will try to explain things as we go and I'm not going to assume that you have any sort of advanced knowledge here so we'll we'll walk through it together so the first thing that we need to do in our view is Define that class that we're we're going to be using now we can call this a class of view and that's really all the syntax that we need we of course will use a Constructor this is kind of the initialization of the class and it belongs on it's available on any
class that you use and then furthermore we're going to start to bring over our methods so there are things um that are available on the class instances um called class properties and that's where we're going to store those elements that we had defined earlier so we'll just initialize the dollar sign to an empty object and we'll start populating that here in a second so the first thing that we want to do in our class and we'll do this in the Constructor because we want all of these elements to be selected when the class is initialized
so we'll go back to our app.js and we'll take all of these selectors that we've used and we will assign them in the Constructor so we'll have to update some of the syntax here but really we'll just click down and select a bunch at once and what we'll say is this dot dollar sign dot whatever the variable is because we are basically referencing when we say this we're referencing the class instance itself and on that class instance we have defined a property uh which is the dollar sign this could be any variable we're just using
a short name space for easy easy way to access and so what we're doing is we're saying the class instance the property that we want and then the um another nested property that will represent the element itself so now instead of colons we'll need to set those to equal signs and then we'll hit command s to format things and save it although we've got some commas here at the end that we need to get rid of first now we can save it in a prettier we'll format this for us remember as I mentioned earlier in
the video I've got format on Save setup with the prettier extension in vs code so that's why it's saving like that and formatting everything so at this point we've got our basic class and when it initializes we're going to select all the elements in the document but just having this alone it's not going to actually work quite yet we need to connect this to our app.js furthermore we're not going to really need this namespace anymore because we're going to be working with um or we we may use the namespace but we're going to be moving
pretty much all of this code out but in order to do that without completely breaking everything I'm going to leave all the code intact it's just a good way to do it when you're refactoring something you want to leave the original code intact and just build the new code side by side and then you'll replace it at the end but since we're not going to have any of this code here anymore what I'm going to do is build this side by side and we're going to just make a standalone function called init and yes this
is in the global namespace but this should could really be the only thing this and maybe one other variable that we'll put in the global scope so that should be fine and what we'll do in the init method is basically initialize the class itself so we'll say the view is going to be equal to New View so that is going to make a class instance of this class right here and then what I'm going to do just to test things is console.log view dot dollar sign and then let's just say turn because that was one
of the elements that we selected in other words we're just testing to make sure that this was initialized correctly furthermore we want to duplicate this event listener we will eventually remove this once we've refactored everything but for now we just want to use this knit method when the the window loads so let's save that and then go back to our browser let me get these tabs organized again okay so we'll go to our browser here and go to the console and it's going to say uncut reference error the view is not defined and there's a
good reason for this it's because we have not imported that script now obviously app.js has been imported right here at the bottom but we would also need to import the view.js for that to be defined and if we come back now you'll see that our console log worked because that's now defined but let's go back and flip these let's put them in a different order so we first load the view and then we load the app does it still work well the answer is yes and I believe that's because of hoisting that happens with JavaScript
um but what's confusing about this is we've got these two separate files with different variables and they kind of reference each other but that can get confusing when you have more and more files so one solution to this that will help us out quite a bit and allows us to just import one script is to use es6 modules so instead of adding this additional script import which gets messy once you have five or six Scripts we're just going to import app.js and then we're going to set a type attribute on the script and we're going
to name it module what this is going to do is it's going to tell the browser that this script is an es6 module and now in pretty much every major browser es6 syntax is supported as well as modules so this is a nice way to handle imports and exports so now in app.js rather than just referencing this view class variable we can import that so at the very top of our file what we'll do is we'll say import view from view.js now right now this is not going to work and it's not going to work
because we haven't exported anything from this module what we need to do is put an export and then we want to export this as the default export so that we can reference it in our file just like this now if we left out this keyword of default we would need to put this in Brackets in reference it just like this so if we did that this should work if we go to the browser you'll see that this is being printed out which is what we're doing here at the bottom right here that's the console log
but I think it's a little cleaner if we just export the default go back to app and then remove these brackets save it and then we'll check to make sure this console log is working and it is now another property um or feature of using modules is that by default they use strict so if you've ever seen use strict in JavaScript use strict we'll look that up strict mode is something in JavaScript that used to be really relevant as you had different files that would have different modes nowadays you'll pretty much see strict mode on
every file that you ever write but this has a lot of useful defaults to kind of protect your code from all sorts of problematic patterns so by default these es6 modules or in strict mode which means that in the view.js you might say well oh this view is in the global scope but that's not the case we haven't actually attached it to the window so if we were to go to our console and type view it's going to say view is not defined the only way that that would be possible as if we said if
we explicitly attached it to the window like this so window.view equals View and now we should be able to see the class that we've defined but this is not what we want and I just wanted to point that out as a feature of es6 modules by default they're going to behave this way and we're going to protect the global scope that way what this also means is that our init method if you remember from earlier scrolling up we had defined this app variable as the namespace around our entire app so that we didn't litter the
global scope with all of these variable declarations but now if we try to access app at all um we're not going to be able to because it's in an es6 module and by default that is not exposed to the global namespace so that's basically why I'm okay adding this init method in the global scope because I know that's not going to be exposed in the in the browser unnecessarily so that's just a little tidbit but let's keep moving here on our refactor so looking through our app let's also find other things that relate to The
View one of those things that is very relevant to just a view class is these event listeners we want the event we want the view to register event listeners initially so we can copy all of this over in my final code I want to see how I which method I put this under so in my final code each of these event listeners has its own method in the view so I'm going to open up two code Windows here and make it a little bit smaller for us hopefully you can still see that and what we'll
do is we'll basically take each of these event listeners and make it its own method within the view class so just to stay consistent with my naming we will call the first one bind game reset event so that is the game reset and this is actually a new pattern that we're introducing rather than handling the event listeners within the view we want to do that in the controller and the reason being is because the controller is going to read the current state of the application and based on that state it may have to do different
things to the view so you don't want to leave it just to the view itself to handle these events so we're going to put a Handler callback function passed as an argument to each of these event listeners so we'll use some es6 syntax to Define this function and then here we're going to actually register those event listeners so I'll type out the first one just so you can see it slowly and then we'll copy things over so for example let's look at this one um or no that's not a good example we'll use the reset
game here so all we're going to do is reference these initialized selected elements that we have so this dot dollar sign dot which one are we selecting here reset button and then just like we're doing over here we're going to add the event listener listening for a click event and then in the Callback we're going to do something but the difference here is instead of handling this in the view we're just going to pass the Handler itself so we can just pass that Handler from here down to this event listener and then all of that
is going to be handled in app.js so let me add the rest of them so bind new round event pass that Handler and then bind Player move event with a Handler and here what we can do is basically just copy this over so this is the um the move event so we'll just copy this over so this is the new round so we just add this dot dollar sign and that should work okay but of course we want to handle this elsewhere so we'll pass the Handler from the function parameters or arguments I mean and
then for the player move event this is the one where We're looping through each of the squares and adding those listeners so at this point I don't want to just copy everything over because we're going to do this a little bit differently moving forward so we're going to start to diverge from our original implementation and just start to use it as a reference only not trying to copy things verbatim so what we want to do here is Select those squares and for each of those squares similar to how we're doing it here we'll want to
bind an event listener so we'll say Square dot add event listener listening for a click and then we're passing this Handler right here now let's talk about um event listeners that are going to be view only things so you'll notice that I skipped over here on the left I skipped over this one right here where we are clicking on the button to reset the game although that should probably be added here but specifically let's look at this one where we're just toggling something in the UI so remember we just have this actions menu That's opening
and closing this is not going to affect the state of the game whatsoever it's purely a view um client only piece of state that we're tracking and therefore in terms of responsibilities The View can handle a hundred percent of that it doesn't need to change any state or anything so we can actually register that in the Constructor and keep it entirely encapsulated here so we'll call this section UI only event listeners and here what we're going to say is this dot dollar sign that menu items I'm sorry we need the modal button for menu button
menu items and then we're just going to toggle the class list so we'll say menu items that add event listener listening for a click and then we'll go back in that callback and we're handling this in the view itself so we'll say this dot dollar sign dot menu items dot class list that toggle hidden and we're going to actually improve this Handler just a little bit for some reusability but let's start with that and at this point I think it's time to kind of comment out this app that we had before so we're going to
be resetting a good amount of functionality for the time being oops so we'll just go through this whole app here the whole thing including the uh load event you can comment that out we'll keep it here for reference but it's all commented out at this point so all we have now is just the view so let me collapse all that because it's just going to be easier to see and we'll save this and now let's see what the UI looks like so right now I can't really do anything I can click stuff but nothing is
going to actually happen now the reason nothing is working is because I actually grabbed the wrong thing here on the right let's bring this over so we have a full screen um in our new view class I'm actually actually adding a click listener on menu items it should just be menu because if we go back to our index.html and look for that we want to register register The Listener on menu or probably more specifically we want to add a data ID and call this menu button so let's go back to our view we've got the
menu menu items and let's add one more menu button and then we'll add the selector here and now we're listening for a click on the menu button and then when that happens we're toggling the hidden class on many items so going back we should now be able to toggle the menu open and closed but that's just about it we can't do anything clicking the reset button new round a square it doesn't do anything anymore and we need to start wiring up those events just to show you the pattern that we'll be using you can see
that we are we have methods to bind these event listeners but remember by default when this class is initialized um are instantiated these methods are not going to run because they're just methods of the class someone needs to actually call these for these event listeners to be added so that's what we're going to do in the apps init method so right here below the class initialization we now have a class instance called View which we should be able to bind all of these events so we'll bind the game reset event and you can see that
our autocomplete tells us that we need to pass a Handler in there and that Handler is going to give us an event so we can stub it out just like this and we can consult that log the event will also console.log the name so reset event so we'll copy this down for all of them we just had three of them so let's see what we call bind new round event and then bind Player move event so now we're actually calling those methods that are registering the event listeners so now when we go back to our
UI we should be able to at least click things and see things happening so new round event or if I click the first Square it says Player move event and you'll see the click Target is um the square with the ID of one so div ID equals one or if we click down here we'll see in the ID of nine now with this pattern we want to keep our controller logic which is in this app as simple as possible we want this to really just orchestrate what happens to the state in the view but we
don't want to add a lot of logic to this file most of the logic needs to happen in view.js or store.js which we haven't created quite yet I will get to this and show you why we have this but let's continue with the view and start implementing some of these methods here I think a good place to start is to go back to our app open up our original implementation and let's let's go ahead and go down to this big event listener that we have or no we'll start with these these littler ones and just
so that we can see this better I'm going to uncomment everything and we're just not going to initialize it so I'll uncomment the whole app but because we're not initializing it here we can delete that this is just going to be a variable that's initialized it's not going to actually do anything or register any sort of event listeners so this is just for reference so if we go down and look at some of the code that we've already written we've implemented this toggle method over here in view as a UI only event that doesn't need
to happen anywhere else now these have not been implemented we have a click listener on the modal button which allows us to hide the modal once the game ends we'll get to that in a second but really what we want to start looking at is all of this logic because it's a little bit messy and we could probably create individual methods to achieve what we're doing here let's start by improving our menu toggle right now in the UI what you'll see is that it opens and closes but this little Chevron down icon it's not going
to change and generally when you have something like this the icon will rotate 180 degrees and go up when it's open and down when it's closed or vice versa I can't even remember which one is the correct design the correct way to do it from a design perspective but anyways we can improve this a little bit and we can also add like a selected state so that there's like a border when it's open so this will help us to kind of ease into this new pattern so as you can see I'm handling this UI only
event in the Constructor and directly toggling that hidden class but what we'll do is break out this view into a couple sections so this section is going to be register all the event listeners then the next section is going to be some utility methods so uh Dom helper methods and that just means we're going to have some methods to change the UI in some way in the first one we'll Define is toggle menu and that's going to be called we're going to move this logic into that method and then we will just say this dot
toggle menu and call that so we've just refactored it a little bit and we're going to add some stuff to this so let's make sure it works if we click this it toggles the menu okay and we're set but now we want to add something a little bit better to this so what I want to do is First add a border when the menu is selected so we're going to say this dot menu button because that's what we're going to put the border around and then let's toggle on the class list a border which if
you remember from our styles index.css we have the shared utility classes and we've got this border class so we can just toggle that to get a border on it so now if we click you'll see that when it's open we have a border and when it's closed there's no border so that's just kind of a nice addition you could probably achieve this with CSS but I thought it'd be um nice to just demonstrate some JavaScript um and then furthermore we want that little icon to flip up and down depending on the open or closed state
so to do that we need to actually um create a different icon based on that state and what I'll do is Define that in a variable and from here I'm going to let's see I'm going to grab from the menu button so the menu button is going to be this right here and you can see that I've got an icon down here at the bottom so basically what I'm doing is I'm selecting the button itself and then I'm grabbing any eye tag that is within it so we'll say query selector and we're going to look
for any I tag that we can find which should represent that icon and then what we're going to do is look at the class list of that and since we're using font awesome we can just toggle fa Chevron down and then also Chevron up and this should basically just flip it every time the menu is toggled so if we click here you'll see this little icon just flips every time it opens and closes so that's just a nice addition to polish that up but more importantly it demonstrates in a pretty simple way how we can
Define all of these Dom helper methods and then within our event listeners we'll just call those to basically change the Dom and change what the user is seeing from A View perspective before we uh go to the next set of event listeners I want to do one little refactor here and add a utility method for selecting elements as you can see we're using a lot of markup here just to select kind of basically using the same syntax and more importantly this is the the better reason to do this refactor we're not entirely certain whether this
is going to result in a element being selected we can put these selectors in and check them over and over again but we really have no assurances that what we have attached to this list of elements is going to actually be valid selected elements so what we can do is at the very bottom of this class we can add a few helper methods what I'm going to call this is a Qs for that's short for query selector and then you should be able to pass in a string selector to that method and all I'm going
to do is look for the element and that's going to be on the document dot query selector and then we'll pass in that selector that was in the parameters and then what we're going to do is make a check so we're going to say if there is no element that was selected so in other words we passed the wrong selector something went wrong we're going to throw a new error and the reason for that is we don't really want to continue um with our application and trying to perform all the additional logic if these selectors
don't work in the first place because that will just mess up everything so we're going to say could not find elements and this will just give us as the developer some confidence that we're passing in the right selectors and here we can just return the element which we know is defined now so there's a few improvements we'll make to this but let's go ahead and try this out so with the menu we can just say this dot Qs and then we pass in the data ID and that should select the menu so let's go back
to the UI you can see that there's no errors I'm going to get rid of this for for the moment because that was something left over from right here so let's get rid of that so we're not confused but this worked and so now what we can do is go down with the query selectors and replace these now you'll notice we've got a query selector all which will not work with our utility method so we'll leave that one alone for the time being so this dot Qs and then we'll replace all of these and save
and as you'll see it all works there's no errors let's just demonstrate in air so let's pass an invalid selector now you're going to see unclawed error could not find elements we want this error to happen so that we know that we should go back to our code and fix it now just a few improve improvements that we can make with es6 class syntax the way that you define a private class method which is something that we don't want to expose to the outside world of this class you can put a dollar sign or not
a dollar sign but a hashtag in front of the method so let me just demonstrate the difference here right now we have this as a public method on the class so if we go to app.js and we call the instance view dot Qs you're going to see in autocomplete on in vs code because it thinks that this is a public method but we really don't want to be calling this query selector from anywhere outside of The View um we don't want to be doing that from our controller so to make that private we'll put that
hashtag save it and now when we try to grab this on The View you won't see it as a possible method that we can use now you could I think you can override this I'm not sure if it's enforced at runtime but it's just a good practice to keep everything private that you don't need outside that class we can also do that for the toggle menu so we'll put a hashtag there and we need to Now update the calls to this so this dot toggle menu or actually we may not let me let me check
this let's go to the UI yep okay we need to update that so we'll say #toggle menu don't know what just happened and then query selector so this dot query selector just highlighting them all and let's grab the right one there and then the last thing we need to do is implement this query selector all as a safe method so one thing I want to do with the query selector is enable us to add like a parent element that we can pass so basically this will just give us some flexibility so we don't always have
to search on the document so we'll say if there's a parent argument we're going to search from the parent otherwise we're going to search from the document so just a quick little refactor there then we're going to copy this whole method down we probably don't need the parent for this one but we'll call this query selector all and in this one it's going to be the same thing we're passing a selector but now we're just going to use a different Dom method so if there's not an element list we're gonna throw could not find elements
otherwise we're going to return it so now we can replace that query selector all with this dot query selector all save it and make sure we don't have any errors which we don't and then finally let's just make a different name space for for um squares because it represents a node list well these just represent individual elements so we'll just make another namespace a double dollar sign which will represent the ones that we're picking as a node list so we'll assign the squares to that one just so that we have some separation a little bit
of organization there all right let's continue our refactor looking at our app.js in the original implementation here the next thing that I want to cover and break out into a more concise method is some of this stuff right here so if you remember what we're doing here is we are adding an icon with a certain color to the square that was clicked and we're also updating this turn indicator up here in the top left so I think what we can do looks like we actually have an error here this dollar sign squares is undefined let's
fix that before we keep going and the problem is is we've reassigned the squares to that double dollar sign but we did not update that down here in our event handler so let's save that and we should have that working again all right back to it we need to update this turn indicator and then of course when we click something we need to turn that event into an element in the Dom so we can break these out into two separate functions I think the first one is going to be setting a turn indicator so down
here in our helper methods let's add a method called set turn indicator and for right now since we're not really we don't have the context of what player has actually made the move um we're just going to hard code something and then we'll fill it in later with something more dynamic so the first thing that we need to do is just look back at what what we're doing before we were basically creating a turn icon and a label and then giving some inner text to the label and setting a color on the icon so we'll
do that same logic in the set turn indicator I will put a player as an argument but we're not going to leverage that just quite yet it'll just be kind of a placeholder so what we need to do is create an icon we can say document dot create element we want an i element and then we want a label which is going to be a paragraph element for now let's just assume that player is going to be either equal to one or two and we'll style it according to that we're going to update that in
the future but just for now we'll assume that so for the icon we're going to look at the class list and we're going to add a certain color class based on the player so if player equals one we're going to call that yellow otherwise it's going to be turquoise that is similar to our logic here so if the current player is one we were calling the I'm sorry the square icon was the yellow and we're doing the opposite for the turn icon but this gets a bit simpler because right here we're tracking basically two pieces
of State we're trying to see who was the current player that made the move and then for the next turn um we're trying to decide who's the player after that so we're mixing a lot of things and it's a little confusing really over here in the view we want to be more declarative and explicit we're just saying that player one is associated with yellow in player 2 is associated with turquoise same thing goes for the label we'll add the class list player equals one that's yellow otherwise turquoise now I think in our original implementation we
weren't updating the color of the label or were we let's look at our HTML you can see we have an element called Turn which we really could just select this and add the color class to that so that's what we're already doing so let's stay consistent and do that here so instead of setting the color based on the player let's just say player one is fax and then for the message that were sent that we're adding we need to set the text content so let's delete that so if it's player one fax otherwise FAO we
need to select one more element so turn div and I think we already have this it should be at the top here so right here we've selected the turn element so we'll say this dot dollar sign dot turn dot class list and we are going to add the color based on the player now there could be an existing color so we'll have to do two calls here so add and remove so we'll say if the player equals one we're going to add a yellow color otherwise we're going to add a turquoise and then what we're
going to remove is if it's the player is one then we want to remove any turquoise class and otherwise we want to remove any yellow class so let's just make sure that we remove The Unwanted one and add The Wanted class this down here we're setting the actual icon that we're rendering and then the label we can set the inner text of that and we'll basically say if it is player one we'll say player one you're up otherwise we will say player 2. you're up now at this point this isn't going to do anything because
we just kind of created these elements in memory we actually have to commit those to the Dom so what we need to do is select the turn div that we had modified up here with the classes and we need to replace children so that will just replace the child elements with first the icon and then the label that we created right here so let's save that and right now set turn indicator is not hooked up to anything but let's put that in our controller logic so if you remember we are binding a Player move event
right here and we're just uh printing that to the console at the moment but what we can do now is reference The View and grab that utility method that we used now it is a private method by default so let me check if we need to make that public yeah let's go ahead let's make that public for now so that we can use it here so we'll say set turn indicator and for now we're just going to hard code the player ID we're not tracking any state yet so we're going to always say that we're
going to pass in player one so let's save that and see what happens if we click a square it's not doing anything and we need to find out why so let's inspect the HTML if we click this Square just looks like it's not doing anything okay so now every time we click one of the squares we'd expect this to update to player one now it's already player one so you won't see a change so let's go back and instead of setting it to player one we'll set it to player two and when we click it
now changes that to an O but we're not getting the right colors we're getting the right text getting the right icon but not the right Colors oh okay so our problem here is that by default our class of turn so this one right here is setting the color and then we're adding this turquoise class later which is not getting over it's not overriding that so a better way to probably approach this we'll go back to our CSS and instead of making that turn have this initial color we will handle that with the class so let
me show you what I mean so I'll remove that from turn in CSS and then if we go to the HTML you'll see I'm just passing yellow as a class to style the initial icon and message and so now we're not coupling the color to the turn class so this should work you can see player two you're up um and it's going to set that every single time let's refresh so player one you're up and now we're going to hard code that to player two one other thing that you'll notice that I think I've kind
of messed up is this icon has almost like italics to it um and that's because we're not adding the fa solid class so with font awesome you have to add fa solid and when we hit enter on that now it looks a lot better so we need to remember to add that let's go to our view and when we create this icon um let's make sure and add that class so classlist dot add f a solid and what you can actually do is pass this as two arguments so instead of doing that twice we can
just pass f a solid and then give it a comma to do another argument and then we'll give it the actual icon to render so now you see we start with that X it's yellow it's player one and when we click we are hard coding it to be player two so we click and now it's an O player two and everything is that turquoise color so we know that our set turn indicator method is working correctly the next thing that we need to do is actually populate the square so we have to put an icon
within the square and you can see in our original app logic somewhere right here we are adding the square icon and doing something pretty similar so let's go back to the view and this one is going to be called handle Player move and for this function we're going to pass the square element that was clicked so the reference to that and then the player that made the move so that we know which icon to put in there so this one will be rather simple we just need to create an icon similar to how we're doing
here so we'll copy that logic so we're creating a new icon HTML element we are then adding a class list which we are going to put the fa solid remember we did that right here and then we can use the same logic to figure out whether it's going to be an X or an O so depending on the player and then finally we're going to reference the square element so whatever Square was actually clicked and we're going to replace children with that new icon that we have just set now of course we don't have a
color specified so we can just group that here so if it's player one it's going to be an X and that's going to be yellow if it's player 2 it's going to be an O and that will be turquoise so let's save that and now we will call handle Player move in our controller so now you can start to see what the controller is supposed to be doing it's supposed to be kind of orchestrating the events that take place so we're going to set the turn indicator and then we are going to handle the player
move and let's hard code player two so those are synced up so now when I click this Square we would expect that this turn indicator will turn turquoise with an O and this Square will um or actually now that I'm thinking through this we want the player move to be player one and then the turn will be set to the next player which will be player two once again we will refactor this so it's dynamic in the future we're just trying to get our view logic to work so let's save that and we'll click here
and this should be a yellow X and then this will turn to a turquoise o and you can see it has not done anything and it says Dom token list add the token cannot contain white space so let's see what I did here okay so I cannot do this I actually messed that one up we need to duplicate this logic so that we're just doing one token per argument so just two little just a little refactor there and that should probably work so make sure we're refreshed and click Square element replace children's not a function
because I'm just getting tired here um we can't just pass in that one we need to pass in the event Target so this will represent the square that was clicked and so we want to pass that into our method and hopefully third time's a charm as you can see it did work finally and just going to put X's everywhere yellow X's because we've hard-coded that in player two Zoe is going to be up obviously we want to make this a little better experience so at this point we have reached a place where we need to
address this file store.js because we are doing some you know view logic but right now we're hard coding which player is up and if you remember from the earlier implementation we had the state variable right here where we're tracking the moves and then based on those moves we're getting a game status if there's a winner and we're also using that information to determine you know what's the current player and which you know icon and which colors am I going to add looking at our previous implementation this is kind of a critical moment in the refactor
where we start to see things separating into different concerns so separation of concerns as you can see in our event listener for the player move we're doing multiple things we are changing what the user is seeing in the Dom so we're updating classes HTML elements so on and so forth and that's happening in logic just like this where we're replacing the children with some new elements now we're also doing something completely separate and that is reading and updating the state of our game so as you can see uh sprinkled throughout this uh listener we are
doing things like checking if the square has a move and we're reading the state of the application to figure that out furthermore we're coming down here and we're actually mutating or changing the state of the application right alongside the changes to the view these two things are separate concerns and that's why we need this store.js file so similar to the view.js we're going to create a default class and Export it so we'll copy the syntax and this one's going to be called the store we of course need a Constructor and now one new thing that
I'm going to introduce we're going to set two private methods we're going to add a get State method and a Save State method and what these are going to represent for us is a way to get a read-only copy of our current game State and then save state is going to change um and basically transition to the next state of the application now there's some really good articles online about State Management one of those is the Redux documentation Redux is I guess probably better to say it was the leading State Management solution for client-side apps
for a long time now that react has kind of refactored and moved towards a functional component approach with use State and stuff like that it hasn't been used quite as much but there are some best practices that they have written over years of managing state within an application and they're very good to read through the one that I'm going to point us to is the Do Not mutate State best practice so mutating state is the most common cause of bugs in Redux applications or in applications in general including components failing to re-render properly and will
also break time travel debugging in the Redux Dev tools so that's kind of specific to Redux um but actual mutation of State value should be avoided and we're going to stick to this approach because it's generally just a good idea and reduces the surface area for bugs to occur if you see from our original implementation we are directly mutating state so we're reading it up here where we're checking for something like the last move and then we're directly updating it here there's nothing terribly wrong with this at for the size of our application but it's
just better to make sure that we're not doing that so what we're going to do here is actually add a private State variable and that's going to be equal to an array of moves so that's very similar to what we had up here right here but it's going to be private so only this class itself can read the state and write to it and we have to use an intermediate method to actually retrieve the state as I'll show in just a second so when we get the state all we're going to do is return this
Dot State now this is kind of a redundant method you'll see why this is useful for us later in this video when we refactor this to use a little bit more persistent State Storage so we'll be looking into local storage right now that's not um needed so we're going to keep it like this but the get State method will just return this private State variable or property and then the save state is going to set it so we'll say this dot hashtag State and then that's going to be equal to whatever new state is passed
in now something that's very useful when you have a Save State method is being able to reference the prior state within that method so rather than just passing a hard-coded object as new state I'm going to make a parameter called state or function and this can be passed as one of two things you can pass just a raw object or you can pass a callback function that we are going to give the previous value of state to so let me just walk through this it's a little bit confusing if you're not familiar but this will
really help us out later so we'll say the previous state is equal to this dot get state so that's the previous state we're dealing with that's reading here and then we need to check what kind of argument that we're actually dealing with so we'll say let new state that's going to be just a variable that we're going to initialize but not assign yet and now we're going to say switch on the type of state or function so we've got a switch statement and we're going to look for a function type and we'll break from that
or a object type because our state is an object and we'll break from that and then the default is going to be throw a new error invalid param or invalid argument passed to save state because we only want to handle these two cases so it's pretty simple from here if it's a function all we're going to do is say the new state is equal to the state or function which we know is a function here and then we're going to pass in the previous state so that whoever calls this has access to that now if
it's an object we're just going to set the new state is equal to the um not the previous state but the state or function so in this case we've just passed a literal object and we just want to assign that to state then from here all we're going to do is basically later we'll save this to local storage but for now it's all good we'll just say this dot state is equal to the new state that we had just assigned right here so let's save that now we've got our get State and save State functions
implemented and now we need to actually initialize this so we'll have a default value that we're passing into this store and this default value is going to we'll just call it initial value and we'll set that equal to moves and that will be an empty array so as you can see we've initialized it right there but really we can just refactor that to say initial value once again I know this is a bit contrived we're doing a little bit of indirect stuff but you'll see later why this makes sense once we start getting into local
storage at this point if you're paying attention you'll probably notice that everything that we've defined here is a private method or property and therefore this class is not very useful so what we want to do is expose a getter method that allows us to read the state and then our application can take that state that we've read and do something with it so if you'll see in app.js one of the things that we had defined was get game status and we just passed in the moves that was you know in state and that's going to
give us things like the status of the game if it's complete or in progress and then if there's a winner it will Define that so this is something that we'll need and we can Define that in the store now something I like to use when we're just reading a read-only value from a class is to add a getter method so if we add the get keyword followed by something like game and then we Define a method this is going to be evaluated at runtime and basically what we can do here where we initialize the store
which we still need to do so store equals new store and that should have Auto imported things for us so import store from store.js so when we initialize that now store.game is a property that is available so let's just console.log store.game right now and we'll just return dummy value so let's go back to our UI and you can see that it prints dummy value now just to demonstrate if we remove that getter it's going to break we're just going to get a function called game so we would need to go over here and actually call
that as a function to get the dummy value that we're looking for so that's why I like to just use a getter because you don't have to call anything you can just add that get keyword and then this acts as a property on the class instance so as you can see in our Handler for a Player move we are hard coding right now the player that is up so we obviously want to get that from the state of our game or from the store so to do that we're going to update this class property to
basically derive some state so the goal with saving State as we talked about earlier is to keep it as simple as humanly possible and then we're going to derive as much as we can at runtime from that so that just makes it so that we only have to update a small piece of state and then we can just dynamically get the rest so I'm going to basically take this method that we had defined earlier get game status and I'm going to kind of refactor this make it a little bit simpler and the first thing that
I'll do here is Define our list of players this is going to make things a lot easier for us and I'm just going to copy in from the completed app so we don't have to type things out and then I'll explain what we're doing here so down here I think at this point I'm going to collapse our app because we're once again not using this we're just using it as a reference so here we're going to define the players of the game how I've decided to represent these players is just a tuple or an array
of players and we'll just know that the zero index is player one and the one index is player two now what we're doing is basically adding some configuration here so this is a configuration array that's saying we have got two players this is the name of player one they are going to be the X icon and they're going to have a color class of turquoise likewise player 2 O in color of yellow so this is going to help us with our internal logic quite a bit and I'll show you what I mean uh here in
a second so before we even touch the store anymore let me just pass in uh players and then the first index so that would represent player two obviously this is going to break that method because we're not expecting an object so if we click stuff it's just not going to work correctly but if we go to The View and go down to that method that we had defined so set turn indicator this player now represents that object so now that we're passing an object as the player this logic here gets a bit simpler but the
problem is if you look at our index.html we're defining the color on that top level which means we have to add and remove classes so really we would need to pass in player and then opponent and then here what we would do is say player dot let's see color class and then this one would be opponent dot color class so we're adding the players the current players color class and then we're removing the opponent's color class now a bit simpler way to handle this I know I'm kind of going back and forth here um but
let's go back to index.html and remove the color property from this outer div and instead let's just initialize the color property of this each element Within so to start the game out we're going to have a yellow X for player one because that will be o is the first player so let's save that and then here in the view that means that we no longer have to remove classes and instead of looking at the turn we can just directly add these to the icon so icon.class list dot add and then we'll say player dot color
class and then label dot um class list will also be color class we can remove the opponent here and then if we come down here let's just kind of group these icon classes together this is where we're defining which icon it is and rather than doing this switch here we can just say player dot icon class so remember we defined an icon class and a color class on each player so here we're adding the color class here we're adding the icon class and since we're doing the doing this to the same icon we can actually
combine all of this so we'll say f a solid then a color class and then an icon class and we can delete this line so this will pass to all three of those then finally the label gets a color class and then we need to update the label inner text but instead of these static strings once again we've made it easy for ourselves in our configuration so we can just say player.name as you can see right here we've defined a player name so we can just add some string interpolation here and we'll say player one
you're up and then finally we're getting the container and we're replacing it with the icon in the label so now that we've done that we should be able to uh see this working so we don't need to pass that opponent anymore just the player so let's go back and click something so this should be turquoise not yellow so let's see what's happening here we're passing in players index of one so we're basically passing this object we'll bring that over to The View just so that we have a reference to see what we're passing so that's
the object that is being passed in this case and we are grabbing the color class which is defined as yellow and the icon class which is O so that's our problem our configuration object is actually different let's check the final implementation so the vanilla refactor you can see that the x is turquoise and the O is yellow so I actually had things backwards this whole time I apologize the O should be yellow and the X should be turquoise so I think this is intended Behavior let's delete that and then instead of player two we'll pass
in player one and let's see that is working a little bit better we've got a blue X and then if we load by default we need to update that as well so this should start as turquoise this should start is turquoise so player one you're up a turquoise X is that the same thing we get here let's reset yep we get a turquoise X so we're starting in the right State and then as we click something we should be getting that to change so let's click for player two and there we go we've got a
yellow o with player two text added in there and then the last thing we can kind of re-factor here is the handle Player move instead of just hard coding in one we can hard code in players at one so we'll go back to handle Player move and this player is now an object so we can replace this here with player dot icon class and then player.color class save that make sure our icons are going in correctly and it looks like they are so that is refactored that makes things a little bit easier for us to
handle and now we can go to the store and start defining this read-only game State variable right now we're just returning a dummy value which is not useful to us but the purpose of this getter method is to basically take the raw State object which is just an array of game moves and calculate all sorts of useful information from that you can already see we've done that um with our get game stats right here or get game status so the the things that we're really doing here is checking for a winner and then also at
some point we're going to have to figure out who's the current move um or who's up to play so we can Encompass all of that within a single method here and we're going to build this uh kind of piece by piece until we have something to read from so that we can determine down here in our controller method where we're setting the turn indicator and handling the player move that way we can just pass in that derived state so that these methods know what to actually do with the UI so let's start out by getting
the current player so we will First grab state which can be read with the get State method so this is just a assignment we could just read this directly but nice to have a variable to work with here so that is the first step and then we're going to derive the current player with a little trick and I believe the original creators of this game that I'm refactoring here already had this little trick and they were using it but we can use the modulus operator to basically determine the current player so what that looks like
is we'll say the current player is equal to um the list of players which we do not have access to here but really just a list of players and then we can grab the index of that based on um how many moves have been made within the game but like I said we don't have the list of players so one thing that we need to do is pass that to the store so that it has access to that so we'll pass that array of players and then we'll set a player's property on the class and
so that way we can access it right here and then grab whichever player we want so we'll put in zero for now as a hard-coded value let's go back to app and where we initialize the store since we have the list of players right here we can just pass that array down to the store via the Constructor so at this point what we can do is we can say State DOT moves dot length so that will tell us how many moves are in this current game and we can use the modulus operator and use it
modulo 2 which will basically give us either a 1 or a zero based on the the number of moves so if we just open up a terminal here and open up a little playground with node.js you can see that if we have let's say an array of moves and let's just say it's one two one two just to fill it up so we currently have a moves.length of four So based on this if player one is the starting player then we know that player one made this move player two made this move one made this
move and two made this move so who's up next well the way that we can determine that is basically just doing moves.linked modulo 2. and that will give us a zero and since our players array is just two objects the zero index is going to be player one and the one index is going to be player two so if we were to push a new move to that array so let's say player one moves now if we do moves.length modulo two we get one which is the index of player two so you can see how
based on the length of this array we can quickly determine who the current move belongs to so we'll go to the store and we will do this operation to get the current player and then from there we can also derive the next player in the game so we'll say but we actually might not need that let's hold off on that one for the moment so let's go ahead and return the current player as part of an object so we now have that as part of our game state and then we can come down here to
the set turn indicator and we're going to reverse this because first we need to actually handle the player move and I'm going to make a variable to keep things clear we will say that the clicked square is equal to the event.target because that's what that actually represents if you go back to the view where we are binding that move we're just looping through the squares and adding that event listener listener which is going to pass the individual Square to that Handler that was clicked so that's what that represents and just for clarity we can pass
it like that and then for the current player that we want to move now we have some game state so we can say store Dot Game Dot currentplayer and that should satisfy the stub of this method so we are now passing the current player in and at this point we need to update some of our state because we of course have made a move by this player and now we want to set the turn indicator but we don't want to set that for the current player because they have just moved we want to do it
for the next player so we need a way to update the state to advance it to the next play so the way we can do that is make a method in store a public method called let's see what I called it in the final project I think I just called it Player move and what we're doing here is passing a square ID so that's one through nine based on which one was clicked and to follow our Convention of not mutating State directly we first need to grab state from the getter method that we've defined right
here so we're returning that private variable then we need to make a clone of it so we're going to go ahead and call that state clone and there's a built-in method to browsers called structured clone which you can pass an array an object pretty much anything and it will give you a clone of that object so we're no longer referencing we're no longer passing a value by reference where we've got a completely different object that we're able to mutate here so from this point we can go ahead and take the state clone and push a
new move to this array um actually we don't want to push it directly there because the the state object has an array of moves but that is a property so what we're really saying is State clone dot moves dot push and then we need to pass in the Square ID right here and then also the player ID so or not the ID we'll just pass in the player that is currently up so that would be state or not state but this Dot Game remember we just derived that up here so we can actually access that
property within the class and we can pass it the current player so when we call Player move it's going to take the square ID that was clicked and the current player that was up and push that as a move to the state object so that's going to actually update our state for us um but the last step we need to call is this dot Save State in this case our state object's pretty simple so we can just pass in that literal object rather than a callback function but we'll come back and refactor this as we
develop our state handling a little bit further later on so let's save that and then back in app.js all we need to do now is call store dot Player move in here we just need to pass the click square but we need to pass an ID so really what that is is going to be dot ID and we need to cast that to a number because uh the event ID or the event targets ID will come as a string by default so we're passing in a number ID and we're updating state so at this point
we're allowed to Now set the turn indicator to the current player because that has been updated with this method so we can go back to the store.game dot currentplayer and set the turn indicator now the important thing to notice here is that this store.game.current player is a different player than this store.game.current player and that is because we have made a state change happen in between the two and every time that state changes that getter value that we've defined right here is going to automatically re-evaluate and update so if all worked when we click a square
it should update things dynamically so it says player one you're up and we click and now we've played with player one with that X and you can see player 2 is now up now we should be able to click and we get an O and now player one is up so now we have this working again but if you remember from the original implementation we had one big problem and that's if you click twice on a square so we need to make sure that we are not updating a square twice and that should be relatively
simple to handle so let me comment some things in here we will say um place an icon of the current player in a square advance to the next state by pushing a move to the moves array and then set the next players turn indicator now up here at the top this is where we need to check whether there's an existing move so you can see in our original implementation what we did here was we made a little helper method that says whether a square ID has an existing move and then we checked if that current
Target matched that and if it did we returned early so we can actually we could make a helper method to do this within the store or we could just check it inline I'm going to go ahead and just check this inline as you'll see in just a second so let's collapse the app and let's say the existing move is going to be equal to the store dot game that moves dot find and so we're looking for a specific move that has a square ID equal to the clicked Square dot ID and we need to make
sure that that is a number so we're comparing the same thing so if there's an existing move if that's not undefined basically we're going to return early and we're not going to handle that Player move save the state or set the turn indicator let's save that and now let's play and it looks like we've got a problem and you can see that we're getting an error here by reading the store.game.moves it says that it is undefined and that makes sense because we have not actually added that to our getter so let's go back to the
store and remember game is only returning the current player so it would be nice if we also just gave it uh the moves array just so we have access to that so we'll save that and now things should work a lot better so now if we click something twice it's actually still messing up and I believe this is because of the same reason we ran into earlier that I failed to recognize once again when we're binding to this Player move event if you look in the view we are basically just passing um the event uh
to the Handler and that event could have been an icon that was clicked so instead of just blindly passing the Handler right here what we really need to do is break this out into a function and pass the square itself that we are setting the event listener on rather than the event Target which was the default that was passed so let's update that go back and see if that fixed things for us Square element is undefined we just need to make one adjustment here it is no longer an event that's being passed it's a square
reference so this is actually more expressive anyways so we will check Square and then update these references and hopefully finally this will work so we're clicking clicking click it again and it does not do anything as we expected so now we've got a lot more stable behavior and we're almost back to where we started but of course we've got a tic-tac-toe in two places and the game has not recognized that yet and that's because we need to once again build up our derived state which is in this method right here the last piece of state
that we need to derive in this game property or getter is who has won the game we've already done this in our previous implementation we did this right here where we were checking the player moves the winning patterns and then checking the player moves against those winning patterns we were then deriving it as a status and a winner so I'm going to do something similar to this but we're going to simplify just a little bit in this new derived State method so the first thing we'll do is copy in those winning patterns because those are
just static and then we'll initialize the winner to be equal to null just to get a variable in place and then what we're going to say is four we're going to do a for Loop we're going to Loop through each player so for player of this dot players so remember we initialized the list of players which is just two people in the Constructor so we can Loop through each player and then within that Loop we can get the selected Square IDs of that player so we'll say this dot game dot moves and remember this is
just the current state of the game so this.game.moves or I'm sorry we should probably not do that because we're referencing this method from itself so what we need to reference is this state uh variable right here where we're getting the raw state so we'll say state DOT moves and we're going to filter those moves to only be the moves of the current player that we are looking at so just walking through this logic a little bit we've got the array of raw state of moves and we're going to filter out any player that does not
match the current player in our Loop furthermore we're going to map that resulting array and just grab the square ID off of the individual move so if you remember we're pushing a square ID and a player to that moves array so that's basically what we're reading off of this right here so we've got a list of selected Square IDs for the current user and now we're going to do an inner loop and we're going to say for pattern of winning patterns now we're going to check check if the pattern matches every one of those selected
Square IDs or actually I should probably say if the square IDs has every element of the pattern so we'll say selected Square IDs includes that value and so this will check if there is a winning pattern and if that's the case we're going to set that winner variable that we initialized up here to whatever player we're in during that Loop in other words we're going to go through this Loop and if no winning patterns are found the winner is going to be left equal to null which is going to tell us that this was a
tie game along with the status of the game so we'll come down here and add a status property and we're going to say is the game complete this is going to be true if the winner does not equal null so if the if there is a winner populated we know the game's complete or if the state.moves.length is equal to nine because we know that that's the maximum number of moves that can be be played in a given game and then finally we'll pass the winner variable right here which will either be null or set equal
to some player so now we have some derived State and I'll just remind you that we are deriving all of this information the current player the status whether it's complete whether there's a winner we're driving all that off of one simple array of game moves so that's going along with our pattern of trying to keep State as simple as possible and then deriving what we need to know from it later on dynamically now that we have this information populated we should be able to come back to our app.js or our controller and this is where
we will check whether there's a winner and if there is we're going to open up some sort of modal to show that status to the user if you remember from our first implementation we had um let me collapse some of this stuff we're not using so if you remember from here at the very bottom this is where we're checking the game status and if the game is complete we're going to remove the hidden class on that modal so that it opens up and then we're going to set a message so we can make some utility
classes or some Dom helper methods within our view class to achieve this so let's go back to the view class and hook up some of those methods we can put them pretty much anywhere I'll just put them at the top here the first one that we'll want is an open modal method and we're going to pass in a message and what we'll do with that is select the modal itself and that's going to be the one that we removed the class from so there's the modal in our index.html that is this entire div that's got
hidden on it so let's remove that real quick and you can see how it pops that up so really what we're trying to do is just toggle that class in the way we'll do that so we'll come down to our helper method and we'll look at the class list and we will remove the hidden class so very similar to what we were doing before so let's just try this little um helper out right now to make sure that it's working and then we'll come back and improve it with an actual message that we can show
so we're coming down here we've set the turn indicator for the next player and now it's probably time to check whether someone has won the game so really we need to do this before we set the turn indicator because this will update that text up here and if the game's over we don't really want that to change so here's where we check that state we're going to say if the store dot game dot status is complete this is where we're going to perform this logic and we're going to add a return statement here because if
it's complete we know we don't want to run this logic so we always want to return at this point we'll call View Dot openmodal and that should open things up for us so let's go to the game and play it and see if it recognizes this winning pattern and it does so we see player one wins if we click play again it's not going to do anything because we haven't updated that event listener so let's refresh the game start over and at this point we need to pass in some a message to say who won
the game and we can go ahead and derive that so we'll put in a variable here or actually we should probably not do that yet we want to say if the store.game dot status dot is complete or no we already know that dot winner if there is a winner then we want to say store.game.status.winner dot name because that's a player that we're referring to and then we'll say wins otherwise it's going to be Thai so that should be the correct Logic for opening the message in the modal we still don't have any listener for resetting
the game but player one wins let's reset real quick in this case let's make sure that player 2 wins and it's still saying that player one has won the game so we've got a little bit of a problem here and it's actually not a problem I'm just getting tired and forgetting things in our view when we're opening the modal we have to actually update the text within it so this dot modal text dot inner text is going to be equal to the message so let's try that again let's make sure player 2 wins so here
we go we got player two wins refresh and then if we have player one wins that'll show up there so the last thing we need to do is register an event listener on this play again button which will reset the game State since we're resetting the state we need to do this event listener outside of the view this bind game reset event is meant to be um a Handler for whenever we click this reset button but we can also overlap and use it for when the game is complete so not only do we want to
register that on the reset uh button we also want to register that on the modal button because that is going to also reset the game and do the same exact thing so we'll pass in the same event and the same Handler and make sure that's hooked up then when we go back to app and we go to the bind game reset event this is what we need to now fill in so whenever this pops up and we have an end State when we click this we want everything to close and reset so one thing we
need to implement is the close modal helper method so right next to open modal we'll make one that says close modal and this will be very simple we will just add the hidden class this time so let's go ahead and call that close modal and see if that works so we should be bound to this button here and when we click it it should now close the modal which it does but you can see the state has not reset which we want to have happen so this is a job for the store class and we
need to just Implement a method let's put it under Player move and I think I called this just reset in the final implementation so we'll say reset within this method we're basically going to read or we're going to just set the state to be empty so we can just call Save State and we'll set it to the initial value so initial value is referencing this right here so this is basically resetting the game now if you'll notice we're not saving any history of past games we'll eventually add that but for right now we just want
to get things to reset correctly so over in app.js we are closing the modal and then we're calling from the store we want to reset the game and then the one last thing we need to do just to make sure that player one is going to be up at the beginning of the next game is say view dot set turn indicator and you remember we can just pass a player there so we should be able to just pass players zero because that represents player one and we always want to reset to player one now another
way to do this is we know that the after we've reset the state we know that if we access store.game.current player that's going to also give us player one so that's probably a more semantic way to do that so let's command s to save so we're going to close the modal reset the state and set the next turn indicator so everything should be cleared out at that point the only thing that we're probably missing is we don't have a method to clear the game board so we're resetting this state itself but we're not clearing the
game board so let's go to the view and we'll say clear moves and what we're going to do is just look at these squares how did I access this hold on yep so I'm just accessing it like this so for each Square I just want to clear things out so Square dot replace children and leave that empty to basically just clear everything out so we need to clear the moves after we've reset the store so view dot clear moves and then we'll set the turn indicator and this should pretty sufficiently clear everything from the state
and The View so let's refresh and play the game player one wins and when we click play again everything clears and player one is going to be up so if we do the same thing for player two player two wins you can see player two is up but that will reset to player one you are up at the end but obviously at this point we have a working game but if we started to play then we refresh the browser it's going to reset if we play and player one wins and we click play again none
of this stuff is being tracked down here we have no history of games of the past so if we wanted to implement that that's going to basically be the next phase of this video and it's going to get into some really cool concepts with local storage and finally we will kind of refactor this to be a little bit more declarative so that we can just kind of react to all of these State changes and render whatever UI should be based on that current state one last thing I wanted to test let's make a move on
the game board and I believe we should be able to click reset and everything resets okay now this does not close which we're going to want to implement but just wanted to show you that because we actually indirectly implemented this reset method when we were working on handling a winning game and how we did that remember when we binded to the game reset event that is actually linked to both the reset button and the modal reset button so it's running the same Handler regardless now as you saw that doesn't close everything so in app.js where
we are closing the modal let's refactor this to not do closed modal but close all and we need to implement that method we'll put that right under close modal and we'll say close all and this is basically going to um call the close modal so we're going to close the modal and then we want to close the menu we currently have a toggle menu method but we also want to have a close menu method so this is going to look pretty similar to this method we're just going to say this dot dollar sign dot menu
items and then on that class list we're going to add hidden to make sure that it's closed we're going to also remove the Border so remove the border on the menu button because when that's closed we know that should not be there and then we'll reselect the icon because we always want to make sure that that is going to be the icon that points down so let's just copy these two and instead of toggle we're going to add this one and remove this one so when we call close menu it's just going to make sure
that everything is in its closed state and then we'll add that to the close all method and at this point we can make this close menu a private method because that's only being called here we can also make closed modal it's put that down here and make that a private method because it's only being called here so now we have a helper method close all that is being called when the game is reset and that should clear all the state so if we make a move open this actions and reset it's going to say closed
modal is not a function and that's because we are not referencing it from its private declaration so now that should work so make a move reset that closes this resets game board is cleared and everything is working great so as I mentioned we're not tracking down here the history of all the games that have been played and we also don't have anything happening here when we click new round so in order to track that we need to update our state object so right now this is the initial value we're just tracking an array of moves
but really what we need to be doing is tracking an array of moves and a history object that has the current round gains and that should be an array and then all games which is just basically all the history from you know all the time so with this information right here we should be able to calculate some statistics of how many wins each player has so just for clarity I'm going to also update update this to current um or current game moves so this will still represent the same thing we just need to update our
references to here so current game moves current game moves do we have it anywhere else okay I think that's it so if that worked um we should be able to see the same functionality things should still be working and it looks like it is and so now all we need to do to start tracking this is when we reset the game instead of just saving the state back to the initial value we should update the state to basically take that finished game that we just completed push that to the history and then start a new
game so what does that look like so to start tracking the history here let's just refactor a little bit right up here so we don't really need two variables let's just pass get State into structured clone and we'll just call this one state clone so that's for the player move and that should remain the same the reset method is where we're really going to do some updating in the reset method we're going to have to check for a very specific condition and that is if this dot game so we're reading that getter up here that
we've defined um dot status is complete if it's complete we want to push this game that we're resetting to the history object or the history array and if it's not complete then we just want to reset it totally because remember in the view we're adding this reset to two different places we're adding it to this drop down right here which could reset the game even if it's incomplete we're also adding it to this button right here when the game is complete so we need to make sure that we're checking that before we push an incomplete
game to the history so all we need to do is check for um the moves we can destructure that from this Dot Game really we should just destructure all of this stuff so we'll say status moves and then I think that's it so now we can reference status that is complete and we should also make a state clone because we're not going to mutate State directly so in here we'll say state clone and then remember our state now looks like this so we can grab the history and then current round games array is where we
want to Target this so State clone dot history dot current round games and we're going to push the final game here so I believe that would just look like um let's see we probably just want to push the moves in the status we don't want to just push the moves because we want a easy way to Loop through all the history of games and see the status on those which is that derived state right here so we want to kind of archive that as well now after we get past this block this is where we're
going to look at the state clone and set the current game moves equal to an empty array because we want to reset that and then instead of saving it to the initial value we're going to State save it to the state clone that we've just mutated here in these two places so at this point if we've done everything correctly here we should be able to add a new getter so we've got the current game and then let's also make a stat skidder so this will be responsible for getting us the total number of wins by
player and to start us off let's just console log this Dot um get state so we'll go back to our game let's play at least one round and reset and so right there that should have pushed um a few or it should have pushed a game to history and since we're not actually calling this anywhere it's not showing up um so we need to call that somewhere we'll just call it at the end of the game reset so console log store dot stats we'll remove that in just a second but let's play one more game
so I think player one should have two wins at this point when we reset so you can see in history we have current round games is an array of one and it shows all the moves from that game and then the status showing that the winner was player one and if we play this again I'm hoping things will update correctly yep so now in history we have two games in history so if we keep playing these that's basically what's going to happen so at this point player one has won three games and you can retrieve
all of those in history right here so now our job is to go back to the stats method on our store class and actually derive some useful state that we can use to update those that scoreboard down here at the bottom so what I want to return from this it should be pretty simple so player with stats um what I'm going to do here is map through the players array which remember we initialized the Constructor with players and then assigned that as a property of the class so we have that and we can map through
and look at each player and then all we're going to do is add whether they have a win or add how many wins they have so we'll calculate wins by looking at the current state so this Dot Game or I'm sorry not this dot game but we will look at the history so we need to grab the current state which is this Dot oops get state so we'll say state DOT history we're looking in the history of the current round games and we're going to filter that and we're going to look at the game and
check for the status of that and see if there's a winner and if there's a winner we'll use a an operator here that JavaScript has available to basically coalesce any undefined values uh when we're accessing this property so we can pass ID and check if that's equal to the current player.id so we're checking the player we're mapping through against the game status of the current game we're mapping and at the end of that we should be able to get the length of that array so that will give us the number of wins that this player
has we will then from this map function we will then spread the player object to this object and then we'll pass the number of wins so essentially this is giving us a list of players where it has this additional property called wins that will tell tell us later how many wins that player has furthermore we then have ties and that one's pretty easy we'll just look through the history again and this time we're going to filter it for games where the game.status dot winner is equal to null so that will tell us when we have
a tie if there's no winner and we'll give it the length there as well so now when we read the stats object we should be getting a much different picture so let's go ahead and play another game and now we've got the stats object we've got player with stats and you can see that's an array of two players and if we open up those players we get all of their attributes of course and then we also get how many wins that they've had so far in history we get the ties is equal to zero and
you can all already see that we can basically take this information and just update the HTML to show that in these three boxes down here so populating these will be relatively quick I think we just need to go to view and make one more helper method I'll just keep putting it here at the top let's go ahead and say update scoreboard is the method that we're going to use and I think we might need to put a data ID on some of these yep so I'm going to put a data ID and we're going to
call this one uh player one scoreboard or let's let's actually just make it shorter P1 wins so we'll copy that one down to player two so P2 wins and then we already have a data ID because I guess I forgot to pull that out during our HTML build so that's already there for ties so if we go to our view we just need to select these elements um we could just do it in this method we really could do all this in that method I just like to consolidate stuff up here so we're going to
select the player one wins and this is going to be selected P1 wins let's make sure that's right okay then let's copy that down player two wins and then ties and then now we have these three elements to work with so we can update the scoreboard by saying this dot dollar sign that player one wins and we'll set the inner text equal to and then we'll get the number there and we'll say that number of wins so that'll be this dot game I'm sorry this dot stats nope never mind we are in the view I
was gotta gotta be careful where you're putting stuff we don't have access to that information yet so we're just going to pass that information directly to the method so player one wins player two wins and ties so we'll just pass that in and then we'll take care of actually getting these values into this method later okay so that method should update the scoreboard we just need to call it from somewhere so just checking looks good so we just need to call that from somewhere and I think the best place to do that at the moment
is to do it in the game reset event because that's the only place that we are actually cataloging the end of the game so after we have set the turn indicator we're going to call from The View to update the scoreboard and at this point we're going to pass in store dot stats Dot player with stats we're going to select the first player and pass the number of wins we'll do the same thing for player two and then finally with the ties we can get rid of this console log and hopefully if that worked correctly
this will update things and our game will be sort of done we've gotten error it says it cannot find elements and that's because we did not save the index.html so now it's finding it and you can see player one has one win player two to win one there's a win and then if we can somehow get a tie going here um I guess that one's not gonna work ah I can't get a tie going so we got player two with three wins player one with one win so that is the current history now the very
last thing that we need to do um when we reset right here it's not going to clear any of this the only thing that's going to clear this scoreboard is the new round so we need to implement that method and let's go ahead and do that in the store first because that's pretty close to the reset so we'll say new round and what we want to do with the new round is basically take all of the games that are in the current round games and push them to this all games array and we're basically going
to clear out this one and clear this one so one way that we can do that since we know that a new round is going to also be a reset what we can first do is call this dot reset so that will take any completed games put them into the current round games in clear everything out and after we've reset we need a state clone because we can't update State directly just to best practice as we talked about and what we're going to do is take the state clone grab the history and we're going to
populate the all games um with the most recent current round games so one quick way that we can do this because this is going to be an array is we can spread that out to the push method so State clone dot history dot current round games so that will just push that to all games and then at last we will take that current round games and set that to an empty array and then finally we will save the state pass in that state clone that we have modified now there's one thing that's going to be
messed up and it's probably not super apparent so if we go through and play some games and then we go and reset everything let me see and at this point we really just need to hook this up to the view so we have bound the new round event and in app.js we just have a placeholder here so what we need to do is basically call the store call for a new round and then I think we'll want to clear everything so similar to the the reset we'll want to close everything we will want to clear
the moves so this is the UI not the store we'll want to set the turn indicator and then we'll want to update the scoreboard so this call actually needs to go first so that the state is updated and then all of these will read from that state to appropriately populate the um the UI so let's go try this we've got so far um let's populate some state so player one has two wins if we click something and reset it'll just clear the board but keep this if we go and hit new round you can see
that it clears everything and now the scoreboard is also cleared so at this point we have a fully functioning game and everything works everything's being updated the last thing that we're going to look at here is persisting State across refreshes as you can see if we play a game and you get player one having one win and then you refresh the page this is all cleared out and ideally we would want to be able to refresh the page and still keep a record of the games in history and the only way that we can really
do that is by using local storage now to make our game more persistent across browser refreshes and additionally to allow two users to basically play at the same time in different browser tabs we can use local storage so if we go to the documentation for local storage you can see that it is a property of the window interface allows you to access a storage object for the document's origin so it's similar to session storage except that while local storage data has no expiration session storage data gets cleared when the page session ends that is when
the page is closed local storage does not do that so you can actually close the page entirely and reopen it it will still be there so it's just a little bit more persistent and it's also available across browser tabs so if we go to the event reference let me see if I can find that let's click on storage Maybe and then look at storage event alright so this is what we're looking for in Wool eventually implement this but the storage event is implemented by or the storage event interface is implemented by the storage event which
is sent to a window when a storage area the window has access to is changed within the context of another document that is a long way of saying that basically you can add an event listener on the window for this storage event and if you have one tab sitting open with our tic-tac-toe game and a player is clicking in it then that's going to trigger this event and you can have another tab listening for this event and it will recognize when that player has played in a different tab so that will allow us to sync
the two tabs together and allow us to basically have two players in simulate a more realistic game so we're going to implement local storage but as we know with local storage you need a key so we will Implement that but first let's get rid of our previous app we can finally hit the delete button on that because everything's working in our refactor everything's a lot cleaner and now it's time to go over to the store and in the Constructor to this store rather than just passing players we're going to also pass a key and this
key is going to represent the key of local storage that we're going to actually keep the data so if we go to storage and we go to the local storage right there you'll see I've already populated this because it's happening in the the finished game over here but the key is what's going to be referenced to get it and save it and then here's all the game state that we're tracking so let's go ahead and go back to our app and we will give this a special key so in app.js where we initialize the store
right here we'll say live um tic-tac-toe so T3 storage key it could literally be anything so we're passing that key and now what we need to do is save that so we'll say this dot storage key is equal to key and then this dot players is equal to players so that should be working and then the last thing that we need to actually do is go down to our get get State and save State and now instead of saving this in memory on a property of the class instance we're going to replace this with local
storage so that's why as I was talking about earlier this seemed a little redundant why would we access this through another method well it's so that we can refactor it to this a lot easier so we'll get rid of that instance property and in the get State this is where we're going to retrieve from local storage but as we know uh if the local storage is empty it's going to give us undefined so remember at the top we have this initial value and that's go that's what will return if there's nothing found within local storage
for that key so what we'll do is we'll first try to grab an item and we'll say window dot local storage dot get item that's a built-in method and then we will pass the storage key that we initialized in the Constructor of this class so this is going to return us either undefined or the string representation of this value so basically what we're going to return here is we're going to say if we have found an item that is defined we're going to parse it because it's a string otherwise we're going to return the initial
value as a JavaScript object so in other words we're going to return the same type we're just falling back to this value so that's the get State implementation and then for the Save State we'll replace this call down here and we will say window.localstorage that's set item and this is going to um be the storage key and then we need to actually do the opposite of json.parse and we need to stringify our object so you can see here this is where we're storing the new state after we've saved it so we can just pass that
raw object right here and that should persist things to local storage just fine let's go back to our game and see if things are working better so we'll play the game player one wins you can see it's tracked down here in the scoreboard let's get player 2 to win a game that's tracked down here and now for the the big tell all let's refresh the browser when we refresh the browser it looks like there's zero wins but in reality we're actually tracking this state we just have one big problem here and that problem is that
on the initialization of the page so let's go to our app at the bottom when we were waiting for the load event we are not actually updating the Dom with the latest state so you can see in the reset we the reset and the new round we're calling all of these changes to the view well we really need to call this on the first load of the page as well and as you can see we're repeating things quite a lot so it would be best to put this in a little helper method so we'll say
init View we can put that right there and basically when we init The View let's make sure everything's closed let's clear all the moves let's set the turn indicator to whatever the current player is in state and that state value is now coming from local storage so we have we have some things that we need to update in addition to this in a second so last we'll update the scoreboard to be the current stats and now we can basically call this down here in the reset so we can get rid of all this and a
knit View after we've reset the store so that's just a little helper method for us let's check to make sure we didn't break anything so we'll play in the game someone wins and we reset so it looks like everything worked now we've got two wins for player one one win for player two and if we refresh the page still nothing is going to happen but if we go down to [Music] um basically if we call this a knit View from the scope of the init method then that's going to populate things because we're doing that
on page load so now the next time we refresh we're gonna stick with those two wins and one wins we can refresh it as many times as we want it's O is going to end up in the same thing but we have one last problem to to Really solve here and that is what happens if there's like three moves on the game board when we refresh the page it's going to clear that but you can see in state player 2 is up not player one so we need a way to actually reconstruct the moves that
have been made on the game board on the initialization of the page so if you remember from our view we had some helper methods and one of those helper methods was handle a Player move and what that does is creates an icon and it replaces the square that that belongs in and all you have to do is pass it the square element that you want to replace so one thing that we could do is we could Loop through all the squares and basically update it in state so we really need to implement this method so
initialize moves and what we're going to be doing is calling this dot squares so let's take a look at a previous implementation so we're clearing the moves here so let's let's move this up closer to that because it kind of relates so when we're clearing the moves we're just replacing children like that but when we're adding the moves we need to go through each Square and we basically need to check if there's an existing move in state so this needs to pass a moves array of the current game moves and then what we'll do is
we'll check moves dot find and we'll look on that move for a square ID that is equal to the square dot ID which is what We're looping through right here and if there is an existing move we're going to call this dot handle Player move and now we can pass in the square and then we can pass in the player that made the move which is going to be the existing move dot player so that should initialize the moves let's go back to our app and right after we init The View um we want to
call view dot initialize moves and these seem pretty similar but um when we init the view in the reset we don't want to actually it should be okay because the state would be cleared so let's go ahead and put that as as the last method here so we'll reinitialize the moves and since we've cleared the moves right here um or I'm sorry not not because of that but in the reset event we're resetting the store or new round on the store so that should clear all the current moves and this will basically be an empty
call because it's not going to find any existing elements so let's go ahead and save that and let's refresh the page looks like we've broken something moves is undefined oh because I haven't passed in the current state so we cannot just call this with an empty function call we need to pass in the store.game dot moves and now you can see that it's initialized so no matter how how many times we refresh it's always going to reconstruct the latest moves of the game let's reset that so it resets up here and now we refresh and
it's empty let's put a play down here refresh keeps that there and you can see how we can just recreate the state every single time so let's set this to a new round which clears everything including the scoreboard and just play through one more time player one wins player 2 wins got one win on each side and then Place something there refresh reset refresh everything looks like it's working great now the real test as I talked about earlier is we should be able to play this in two separate tabs so let me copy this URL
and paste it here so we are now looking at the same exact game running but if we update in this tab and put an X there and then go to this tab you will not see it update and that's going to cause all sorts of problems because when we click here it's really going to be out of sync with the other Tab and you don't really have a way to play this game we have a pretty quick way to fix this as I mentioned with this storage event we just need to go to the app.js
and in our initialization we can just listen for that event so let's go ahead let's find a good spot for that so right here this is where we're listening for The View events we're knitting initializing The View here let's put this at the very top or actually let's put it right here next to a net View so we'll say window dot add event listener and we're listening for the storage event so this is when the other tab updates it's not when the current tab updates where the other tab updates we'll put a console log in
here we'll say State changed from another tab let's just see what that looks like first okay so we click and go to the other Tab and you can see the state change from another tab we'll click here and then see that state change from another tab over here so basically every time the opposite tab changes you'll get this event fired we'll leave that there and what we basically need to do is when that happens we need to initialize the view again so we're initializing The View on the first page load and we're initializing The View
when the storage changes let's go back refresh the page and like reset everything so we'll make a move let's first look at this board this is empty this tab is empty and if we make a move in the top left corner what I would expect now is that we'll get a console log on this tab and we'll also see this x recreated and you can see when I clicked there we got it let's put an o in the bottom right and you'll see when I clicked over to this tab it showed up here and we
got that console log so that's just a cool little trick so that you can play in multiple tabs now the last thing that I want to do before we go into the optional typescript refactor that's totally optional this has been obviously a long enough video at this point but hopefully you've learned a lot and maybe give a subscribe to the channel or something um but if you're still here we're going to now kind of connect some dots if you have not used react you've probably heard of it and react is what they call a reactive
UI framework although that is only partially true if you really look under the hood but the idea the overarching idea is that in react you program declaratively I have a blog post on my website so let's go to my website and go search for some Concepts and I've written about imperative versus declarative programming and if you come down to the middle of this you'll see a section called react declarative versus jQuery imperative so far what we have done is been programming imperatively in other words what that means you can go ahead and read over these
examples but I'm about to explain it here in this video when we program imperatively that means that we are saying okay here's the outcome that I want and here are the seven different steps that you have to take to get to that outcome now declarative programming is basically saying here's the outcome I want go figure out how to make that happen and I think I have an example in this blog post about building a house imperatively versus declaratively so if you're doing this imperatively you're going to specify the steps you build the foundation you put
in the framework install the utilities add the walls finishing touches so on and so forth if you're building a house declaratively the only step is basically saying I don't care how you build it but I want a nice fireplace a Lakefront View and a big kitchen so these are the outcomes that you are declaring that you want and you let the Builder of that house determine the best way to make that happen so the same thing happens with the react Library some people would call it a framework even react is basically looking at the state
of your application and based on that state and based on The View that you have defined that links that state it's going to figure out how to render the page to the screen and if we look back at our program we have a lot of imperative stuff going on so we are binding to all of these different clicks so when when these buttons are clicked we have a lot of very explicit steps written out of how we want the UI and this state to actually update now we can do a rather small it's not going
to be huge refactor where we can basically take all of these individual steps and we can wrap them in a render method from there then the idea is that the render method is all that you need to call on The View and then you need to pass the state of the application so remember the store gives us that state of the game um the game right here and then the stats so that's basically our state and all we need to do is pass all of that information to the Views render method and then we can
basically Define all those steps to figure out how to show the page to the user so let's try to do that I think this will be um a really nice way to clean this thing up for once and for all and will kind of get us to our final state of this application finally believe it or not this init view method actually represents a lot of what we're trying to do so we will be copying a lot of this stuff so let's make this a little smaller open up the view over here to the right
actually we'll make it a little bigger that's kind of tough to see so now that I've you know talked about all this stuff in the render method basically what we can do at this point is we can put a hashtag in front of pretty much all of these methods because they're all going to be called from within the render method so these are all internal implementation details of our view class and nobody needs to know about them except for the view itself so you can think of all of these methods as basically just Dom helpers
that we're going to call from the main render method so these event listeners are going to be public methods that can be called from the app or the controller and then we will have one render method here at the top so we're going to call that render nothing significant about this name necessarily other than convention this is generally what you would call it in when react was using class-based components that was the method that you had to put all of your jsx into and whatnot so this is more of a convention naming convention than anything
so what we're going to pass into this is the store itself in that store as we know has those getter methods on it but I'm going to be more explicit actually I want to pass the game and the stats you could pass the entire store object and I think maybe in the final implementation that's what I've done but we'll be explicit with this so that we know exactly what we're dealing with so in other words the game and the stats are represented by this method stats in this method the game and based on this information
we should be able to build our UI entirely so let's start building this up the first thing that we know needs to happen no matter what no matter what the state of this application we know that we want to populate this scoreboard based on the current state of the game so that'll be the first thing we'll do we'll call this dot update scoreboard and we have to pass in player one wins player two wins and number of ties and as we know we have all of that state available to the render method so we'll come
back to app.js and you can see this is where we're extracting that stuff but we can actually do some destructuring to make this a little easier to deal with so from the stats we can grab the player with stats and the ties and then from the game what can we grab we can grab let's take a look we can grab moves the current player and the status which we can also destructure that is complete and the winner property so that's from the game so all of these this is just destructuring with es6 to get these
variable references so we don't have to Define all of them or have this you know nested object property access going on so with the update scoreboard let's go back to our app and see how we did that we basically basically just looked at the stats dot player with stats so this will be the first player and we're finding the first player's number of wins player with stats one so that would be the second player their wins and then the ties will pass straight into that so right there we are rendering rendering the scoreboard and we
can go ahead and start pulling all of this initialize functionality out of this method so we can remove this or actually we're going to replace a knit View with view.render and this is where we're going to pass the store dot game in store.stats we will also pass this right here to that storage event listener and now we can also pass it down here in these event listeners so let's save that and let's go back to our app and refresh the page and you can see that at least the scoreboard has been updated because we implemented
that one method within render so the next thing that we need to do um let's see is probably reconstruct the game board we can really just follow this init view so we're updating the scoreboard we need to close everything and clear the moves so let's let's actually put that right above this so this Dot close all this dot clear all the moves we're going to update the scoreboard then we're going to initialize the moves so that's going to cover a lot of ground just there we need to set the turn indicator I missed that one
so that one will come right here and that one takes a player so we need to pass in the current player that we're grabbing from the state so that will grab the current player and set that so now if we refresh and go back we should see a good amount of stuff being updated I don't think we'll be able to play quite yet and we've got a moves is undefined and once again I've forgotten to pass the correct data to this so we need to pass the moves from here down to the initialize method let's
make sure we're not missing anything here okay we'll save that and right now we can't click anything because we have removed all of the functionality from the main app but we can get rid of this we'll keep this event listener because that's going to listen for changes on a different tab this is our initialization where on the first page load it's going to render The View then on each of our reset and new round events we're going to update the store and then render the new view our last thing to handle is that click event
that happens on each Square so I think this logic can stay because this is just a check against the state and it's going to return early if it finds there's an existing move on the Square so that's not view related at all but right here we are handling the player move which um this should be covered every time we call render because all we have to do now is update the state and then the render method will then figure out how to recreate the moves that the next state represents so we can actually comment this
out we can also comment out the player move I believe or I'm sorry we should not do that this is where we are updating State this is very important we need to update state with that Player move so that the render method gets the latest version of the state to actually recreate the game with so we can remove this view.handle Player move this is fine then we check if the game is complete and if it is we'll open the modal but we can actually do this check within the render method so let's see where's the
best place to do that though so we've we're closing everything clear and move send the turn indicator update the scoreboard so we can really just do this at the end so we're really just checking to see if the status Let's see we can just grab that Inc is complete variable that we've destructured so if everything is complete the game's complete we will call this dot open modal and then from there we will grab the winner and check if there's a winner and if there is we will pass in this string otherwise we will pass in
a tie so this check right here basically takes care of all of this right here and then at the end we're setting the turn indicator so maybe we should bring this one down to the very end of this render method because we don't want to set the turn indicator until um we know that the game is not complete so we're going to return early if we see that the game is complete okay so I think we can remove all of this from our method so at this point the player move event is really just checking
State and updating it so we're checking for an existing move if we find it we're not going to do anything with the UI we're not going to re-render it if that doesn't if there is not an existing move that means it's a valid play and we're going to update state by making a Player move and then once we have updated State we can render The View with the new state that we have retrieved let's go back to our game it says this dot handle Player move is not a function so let's figure out where we're
trying to call that I believe that's happening in the initialize moves yep so right here we just need since we made this a private method we just need to add that hashtag so that it can handle the player move just like this let's go back see if we got any errors and it looks like things are being populated so let's try to play again all right so when it detected a win it says the store is not defined so we're referencing something here in incorrectly oh okay so over here in the render method you can
see I'm grabbing the winner name from the store except that's not available to us we really just need to grab this value right here so we can get rid of all this and just grab winner.name and so now we don't have any invalid references and it looks like player one wins so we can play again and it clears things to play through the game once more and you can see player one is racking up the wins here we can reset to a new round that works we can reset the game board that seems to work
and I think we should see everything populating across these two tabs which appears to be the case so that is also working I know it's been a complete Marathon here um but we just have two more things to improve on this application and I think they're just really cool additions to this app um the first one is somewhat easy to grasp the second one is maybe not so easy so you can feel free to kind of skip over either of these but I wanted to add them in as a supplement to this video as you
can see in our app.js we are calling view.render in a lot of different places so you can see we're calling this like what five six times five times there's probably an easier way to do this and one thing that we can do is go back to our store class and make one little update to this and it will make our lives a lot easier and automate a lot so right now this is just a plain es6 class but if we put the keyword extends we can extend an event Target so if we go and look
on mdn for event Target you can look and see that this is an interface that's implemented by objects that can receive events and may have listeners for them in other words any Target of events implements the three methods associated with this interface and if you look at the instance methods we have add event listener remove event listener and dispatch event this is basically what we've been doing with all of our elements and by default all of these Dom elements are going to inherit this class from this class so we can also create a store that
extends this in that way we can send a custom event every time that store changes so the first thing we need to do is and I'm sorry I think I extended The View which is I'm getting tired here let's remove this from The View and instead we're putting this on store so this becomes an event Target and then at the top of the Constructor we just need to call Super and super is the keyword that will basically allow us to inherit from this event Target so this is kind of some object-oriented programming Concepts but in
other words once we add super we should be able to get access to those three methods so let's comment out super and go to app.js and go to store um let's see it says that we can add event add an event listener but I think that's probably just confused let's reload oh I'm sorry that's because we we called super there but we need to remove this so if we remove this for one second and then go to store you're going to see that we these are the available properties in methods and you don't see ad
event listener anywhere because vs code has not detected that as part of the interface but the second we add this back and extend the event Target and then call Super we will now have access to an event listener and we want to listen to a specific event and this event we're going to Define as a state change so we'll say State change is the custom event we're going to be listening for and then in the Callback to that we're going to render The View so we'll render The View with the store.game and store.stats and that
will allow us to basically remove the view.render from pretty much all of these so we can remove it from here because when we call store.reset that's going to trigger this event and it's going to call view.render we can remove it from here same thing we're updating the store so it's going to trigger this event and then finally down here we are updating the store so it will trigger that event as we stand right now it's not going to do anything because we haven't actually dispatched any sort of event but since we've Consolidated everything into the
Save State method we know that this is the only place in the entire class where state is actually being updated so if we come down to the set item call for local storage all we have to do is call this which represents the store which extends an event emitter which has these properties available we can dispatch an event and what we can do is pass a new event so event right here is just let's go to the reference let me just type this in mdn event so the event interface represents an event which takes place
in the Dom an event can be triggered by the user action clicking the mouse blah blah blah and you can basically customize this with whatever method you want so let's look at the Constructor the event Constructor creates a new event object and you can pass a type to it which is a string with the name of the event so that's what we're doing and we're calling it State change so when state has changed we're going to dispatch this new event and therefore our event listener for the state change key is going to be fired and
we're going to render The View now of course we need to keep view.render in this event listener because that's not going to be fired here these are two very separate events this one is when the current tab State changes and this is when a different tab State changes and then finally this one is the first load of the document so let's save this and see if things are working correctly so we refresh it looks like we've got a problem [Music] I don't know what happened it looks like our live server timed out or something so
let's refresh that page reset the game and you can see on all of these actions that we're clicking it's re-rendering the page so clicking all these actions player one wins we play again it resets we get a scoreboard update and let's keep playing player one wins again and now we can reset the game we can reset the round and then if we click here we can see that populated in the other tab actually we cannot says must call Super Constructor before using this in the derived class Constructor let's see what that's all about okay I
think that might have just been old I just needed to refresh yeah okay that was just old that was from when live server cut out so now things are being kept in sync and we can play from multiple tabs so let's win the game from this tab player 2 wins and we should see over in this tab the same message when we reset this is reset as well so at this point everything is pretty much complete um there's just one helper method that we can refactor that will make things a little more performant and I'm
going to just plug this in and you can kind of study it on your own time so let's go ahead and look at the view so I'm going back to the view here and at the very bottom I'm going to add something called delegate now this is a pattern that I did not come up with on my own this kind of a well-known pattern when you're working with the Dom and the purpose of this helper method is so that we don't have to do what we're doing up here and that is looping through each of
the squares um not that not those specifically but right here where we're binding an event listener to every single Square element this results in a lot of event listeners and it's a little bit more performant and efficient to just register an event listener on the parent element and then we can kind of match match up which child element was clicked on that event and figure out which Square we're dealing with for this so if we look at the index.html you can see that we have this entire grid and then we have these squares so wouldn't
it be nice if we could just register an event listener on this grid and then we can basically figure out which element was clicked within it um based on that you know helper method so we can go back to view and instead of doing this dot squares for each we can just call this dot delegate and the element that we pass is going to be this dot dollar sign dot grid let's see if we've selected that it looks like we have not so we'll say this dot dollar sign dot grid and we will select the
data ID of grid let's make sure that we add that right here so now we're adding the event listener to this parent div the selector that we're looking for is going to be a class called Square or a data ID called Square so this will be a little bit more stable so we'll use that so we'll just grab an example here and then pass this as a square and then the event that we're listening to is a click event in the Handler is going to be handled by the controller so instead of looping through all
of them adding an event listener to each we're just going to do it once with the delegate method and I believe this should work for us let's go back to app.js and just get a sense of what's being passed here so console log Square and when we click it's going to give us a div with an ID equal to the square that we have clicked so as we're clicking through this everything works just the same and that little refactor just made things a little bit more performant and we're using kind of a pattern that you'll
see quite often is kind of the main reason I wanted to expose it here is you'll see this out in the wild and it's just good to know kind of what it's trying to achieve all right so there you have it we've got a tic-tac-toe game that is working and most importantly we learned a lot along the way so if you're looking for some next steps um to kind of continue Connecting the Dots here I'm going to be creating a couple more videos that kind of play along from this original build so put in the
work to get this built and now I promised what we would do at the end of this video is refactor this with typescript which is a pretty popular superset of JavaScript that a lot of employers are looking for at the moment here in early 2023 but I realized that this is kind of a diverging concept from what we've just worked on so I thought it deserved its own Standalone video so I will link in the description to that video and then after that we will actually do a refactor to react so how do we take
this vanilla game and make it into a react app and then the last video there I'm hoping to do the same thing and take the vanilla react app and make it into typescript so I made a video where I refactored subscribers code and we worked on this tic-tac-toe game and we built this in vanilla JavaScript it took us quite a while because I went through a lot of uh different concepts and patterns to build this out but now it's time to refactor this to typescript and the question is why am I doing this what is
the point of using typescript in the first place so this video is going to be a refactor where we take a vanilla JavaScript tic-tac-toe game and we refactor it to use typescript and along the way I'm going to explain and point out why typescript is so helpful and why so many employers look for this skill in developers let me start by saying that this video is specifically Geared for people who either have not used typescript and are trying to understand what the hype is about or are just a beginner developer you're looking to land a
job and you're trying to understand what that path to getting that job looks like and I can assure you there are many companies out there using typescript today I write it in my day-to-day job and it's an awesome thing if you learn how to use it correctly so with that said we're going to just jump into this video I recommend that if you want the most out of this video you should probably watch the original build so like I said we built or we refactored some subscriber code and built this tic-tac-toe game and took several
hours so I know it's it's a bit of a pain to go re-watch all of that but this is going to be a much clearer video if you have that background and you understand the steps that we took to get here at the very very least be sure to go to my GitHub repository I've linked to it in the video description um but let me just show you the one that I'm talking about here um so let's go nope that's not the right one so tic-tac-toe subscriber refactor at the very very least you need to
go through and open up this vanilla refactor and then read through all of the code here okay and we have a second branch called typescript which this is the final version of the video that I'm doing right now so we're going to head towards this right here and we're going to start with the vanilla JavaScript so without further Ado let's jump in and get this refactored to typescript all right so the first thing I'm going to do is just copy this entire folder um so let's see paste all right and then we're going to call
this a uh typescript actually let's say live TS refactor okay so here forget about this for one second we'll get to that that's very important for this refactor it was just in my git ignore so just to overview we've got an index.html file that's got some Styles and it has this script down here that connects to these the App Store and Views so the MVC pattern that we talked about in that prior video once again Linked In the video description and here's the CSS file nothing crazy going on here like I said you need to
be familiar with this application because I'm not going to explain uh it in any detail here so the question is if you want to move towards a typescript code base and you've got a vanilla JS code base to start with how do you go about migrating it if you are dealing with a very large vanilla JavaScript code base this is not the video to teach you how to migrate that this video is basically going to walk you through the the most simple steps the initial setup of a typescript app so the first thing that we
need to do and to understand is that when we're writing typescript we will now need developer dependencies so talking about like a package.json if you notice in our original build we don't have a package Json or node modules or anything like that because we don't need them we can just write uh vanilla JavaScript es6 syntax and run that directly in the browser so there's no developer dependencies there's no build steps transpiling any of that stuff so the biggest thing you need to understand to start out is that we need some dependencies and the dependency we
need is typescript um itself as well as the typescript compiler now I'll be honest I don't set up uh blank typescript projects from scratch every day it's not a very common thing because once you get your stuff set up you don't really think about it so I'm going to imagine that you know you're starting from scratch trying to figure out how to get this started and we're going to just use documentation to get ourselves there so let's go to the typescript documentation this is the first place that you would obviously go to figure this out
so there's a get started a handbook and a reference these are going to come in once you're kind of well into things the get started is where we want to start so let's go ahead and look maybe typescript Tooling in five minutes looks like a good starting place so if we look at this page it's going to tell us how to get started so we can install typescript in two main ways through npm or yarn or pnpm or whatever we're using or by installing the visual studio plugins now I believe this is talking about Visual
Studio the full on IDE not necessarily Visual Studio code I think there's a there's a big difference between those two we'll get to that though and it says you can install it just like this but what I want to find out vs code typescript let's see how it pairs with Visual Studio code which is what we are using here it says you know typescript is a superset of JavaScript blah blah and it says it comes with the language support but it does not come with the TSC or typescript compiler so just zooming out for a
second remember typescript is a superset of JavaScript it does not natively run in any browser in other words you have a build step um or not not necessarily a build step but a compile step where you have to transpile that typescript syntax to plain JavaScript and once it's compiled to plain JavaScript then it can run in a browser so that's kind of our goal here and to do that we need the typescript compiler or TSC so here it's telling us to do the same thing as over here so if we go back to visual studio
code I am using the yarn package manager you can also use npm but we'll just say yarn Global add this is the same as npm G or npm install Dash G and I'm going to add typescript and I already have it installed but it will install the latest version and there's the compiler and then the TS server as well now Visual Studio code I believe comes with this server so if you hit command p and you hit the little carrot and then type typescript let's see uh it's not going to show up quite yet because
we don't have a typescript file open so let's just try something here Okay so we've created a TS file and just I've added a basic type just to fill something up and what you'll see down here in the the bottom right is that vs code has detected that we're using typescript and it's kind of kicked off the TS server I believe that's how it works uh leave a comment if I'm wrong on that but if we hit command p and then type a little carrot you can see that we can search for typescript and restart
the TS server or reload the project so just know that in the background typescript vs code is working and actively looking through your code and recognizing the different types that are added so let's go back to the documentation it says building your first typescript file and it's giving you basic typescript and then it's saying you can compile it by passing the file name to the typescript compiler and then I think it just goes through some like basic introduction to typescript which this tutorial is not going to be necessarily an introduction to typescript but more of
a like why would I need typescript and what does it solve for me so it'll be a light introduction but we're not going to really get into the meat of of typescript so let's go back and clear the terminal here and with our index.ts let's just Define some variable equal to 20 and then um let's give it a custom object type okay so we'll we'll say that some variable is a number another variable is a string and then if we assign this type to our object now typescript is going to kick in and it's going
to start telling you um you know that you've missed certain typings so we've got these red squigglies because vs code has detected that you are typing this object as a custom object type which has these two properties so we need to actually fill these in with their matching types so if we put these in just like that and then finish off the object now this is matching the type that we've assigned it and if we tried to add an extra prop it's going to yell at us because that does not exist in the type that
we gave it so anyways the point of this is to just give a Bare Bones introduction to what typescript is doing and we'll see how this kind of plays out to benefit us in the refactor for right now I'm just going to compile this so we've got the TSC or the typescript compiler installed globally let's go ahead and check so we'll pass the version it gives us 4.9.5 and now let's go and call for help so this will basically give you all the options which is pretty overwhelming to start with but you can see that
if we just run TSC it compiles the current project so let's pass this file to it so TSC uh app or I'm sorry JS and then no we need to get into our live TS refactor first now we'll say TSC Js index.ts and you can see that we ran that command and now we have an index.js sitting over here which is the compiled version of index.ts so let's open up the two files next to each other and what you're going to see here is typescript in action over on the left is our DOT TS file
this is what we're writing our source code in and we're able to use custom typings and assigning those typings to a variable now looks like something is going wrong here and it looks like the two files are actually conflicting so let's uh name this let's put something at the end there and it will solve this error for us so just know that because they're in the same directory and vs code is pretty smart it's detecting that we have two variables that are the same name now this is not going to happen in our final code
because we're going to configure it not to but just know that that's what's happening here but anyways the point is that we've got a type here which is actually not valid JavaScript code you can't run that in a browser or node.js or any JavaScript or runtime so what the typescript compiler does is it removes this type and it removes this type annotation right here and it gets us to this just vanilla JavaScript object that can actually run in the browser so there's really two questions that come out of this number one why would we want
to do this this what is the purpose of adding these types and then number two how do we get more control over how this compiles to this because there's going to be different um options that we can use to make that transformation happen and furthermore you know we don't want them going in the same directory because obviously that screws things up with you know variable declarations happening twice and so on and so forth so there's some configuration that we can do to make this better for us so let's go back to Excalibur here and come
down here and say benefits of typescript so you could definitely go through a laundry list of things that typescript helps with and you know there's plenty of people that go and do that but I'm going to keep it simple here and just give one or two reasons why it is beneficial for your code base the first one is just um code checking in general so in other words it's going to if you're using visual studio code and you're using typescript visual studio code is basically walking through all of your code base and making sure that
everything talks to each other appropriately so we will see this in action as we start to refactor but if we go back to our original application let me delete this index.ts file um and then the index.js if we go back to our original project which once again if you haven't seen this already if you didn't watch the prior video at least make sure that you've skimmed over the code and know what's there if we go to app.js um and let's try to find a good example of this so here's a good one when we are
calling view dot render and we are passing in all of our state of the application these State objects have a certain type and as you can see Visual Studio code is giving you some you know suggestions as to what types these are already even though we're not using typescript and it's just inferring this from the function definitions over here in store so it can read through the functions and it can see you know what we are returning so the return type here and then it kind of infers okay what properties are on this object that
was returned so on and so forth but if we go back to app.js it doesn't really know what type anything really is it can figure out the Boolean type but the moves in the current player in the winner these are all any types because because it can't really figure that out with plain vanilla JavaScript and what's Difficult about this and hard to maintain as your project grows is as you're typing things um quite literally as you're like typing on the keyboard and passing variables around in your application it's very useful to know are you passing
something valid into a function and typescript allows you to do this very easily you'll really start to see this benefit as we start to refactor so the second benefit that I've personally found with typescript is refactoring so very soon you know for this video since we're refactoring stuff but if you have a big code base and you're trying to go through and refactor an entire feature it is extremely difficult to do so if you just have vanilla JavaScript and you don't have any strong typings throughout your application with typescript it's a lot easier because as
you change things you know Visual Studio code or your editor that runs the typescript server is going to be able to tell hey did you move things around correctly and are you passing you know is your refactor going to break the compilation of the code but enough talk let's get started um so the first thing that we need to do now that we've got typescript installed and we kind of understand the general concept of what's going on is get it set up for this specific application so I know we've got it installed globally if you
use TSC and you know type the version that's that binary is installed on our computer globally but it's always a good practice to install it as a developer dependency within your project and the reason being is you know the the global version is going to be different on each developer's computer so if you're collaborating on a project it's good to pin that typescript version for the application so that you have predictable builds in compiles when you when you compile that code to plain JavaScript so to do that I'm going to type yarn init and pass
the dash Y flag just to say yes to all the options and just get a package.json file created so here's our package Json and we've got live TS refactor blah blah and the first thing we'll do is um yarn add and then patch a dash dash D for developer dependency and then I want to install typescript so now you can see dev dependencies has typescript now why is this a developer dependency and not a regular dependency well this is super important and the reason being is because as we talked about typescript is only going to
happen before you deploy your application so you write all your code in typescript but obviously that's not correct or it is correct it's not valid for running in the browser or a node.js runtime so before you deploy your application you know out on some server like AWS or render or digitalocean what what have you you need to First build it to the appropriate runtime that you're using which is probably going to be common JS or es6 so the point of having this as a Dev dependency is to express the fact that you're not going to
need this to actually run the application you just need it to to build the application to the point where then it can run the next thing that we need to do is initialize a TS config so this file is going to be a special file that sits in the root directory of your project and it tells this compiler so remember TSC is the compiler we don't want to use the global version anymore so in this case we can run yarn TSC to grab it specifically from the project and then just run that and it's going
to try to compile stuff but it doesn't find any typescript files to actually compile so anyways we need to set up a TS config to tell it how to compile things so how we do that is we say yarn TSC I think init is the right thing so let's go to help and let's read through the options okay so here's the start of the options and you can see TSC dash dash init creates a tsconfig.json with the recommended settings in the working directory so that is what we want to do so we'll run yarn TSC
dash dash init and you can see that it created a nuke tsconfig.json which we can open up up here and this these are the options that it gave it by default so let's go read through this and right off the bat you can see that there's quite a lot going on so by default it's going to have everything commented out and we're going to get rid of all this these are just kind of all the different options and you can go to this link here to view the reference for this so the TS config and
it basically just takes you through all the different compiler options you can click on these links to to figure out what they do but most of these options are not going to be relevant starting out especially for a beginner these are more of just options to control you know your developer experience as you're building in a typescript code base and also of course how it actually builds and compiles the typescript to JavaScript so let's go ahead and get rid of all the comments just to see what it gave us so these are the defaults that
you're going to get and we'll go from the kind of least important to most starting from the bottom skip lib check this just tells uh typescript to ignore kind of the node modules dot d dot TS files um that's not super relevant here strict true this is always going to be a good thing to turn on because as you go through your code and write typescript the intellisense that's provided by Visual Studio code will make sure that everything checks out and all the types are consistent so this is always good to have on these two
options are just related to some maintenance of your code base so forces you know file naming consistency this allows you to um have interoperability between common JS modules and es6 modules so I actually wrote a whole post on this if you go to my site scripts versus common JS versus UMD AMD and es6 modules so this is a mouthful but this kind of explains what that is talking about and then most importantly is the Target and the module options so this is telling the typescript compiler what kind of code that needs to be output into
you know code that can actually run within a browser and that's our goal is to get our typescript files to run regular JavaScript files so that we can just write our code and typescript and then the compiler deals with getting that to a place where it can run in the browser so let's go to the reference um we'll go to the the reference guide here so we'll start with the first one which is the target now I believe this is going to be in the um let's see where is this so just to orient ourselves
it's in this is the compiler options uh field so if you you'll notice all this is defined in compiler options and here in the language and environment section you'll find Target right here let's click on that it'll scroll down and it says modern browsers support all es6 features as we've been talking about and we wrote our original project in so es6 is a good choice you might choose to set a lower Target if your code is deployed to older environments or a higher Target if your code is guaranteed to run in newer ones so in
other words what Target represents is the end state of the code that is going to be compiled so we are going to Target es6 because that is going to mirror what we did the original refactor the Vino the vanilla JS one um so you can see we've already got that es2016 um you can pass a couple different options I think it yeah it gives you all the options right here um but es6 es2015 yes 2016 um all the way up to es next so let's just grab es6 because we know that that's available in all
browsers um I'm not sure why they did es 2016 when they say es6 is a good choice kind of mismatching their defaults but anyways this is what the code compiles to the next one is module so let's go look at that we'll go back to the top and if you see modules you will find the module property this sets the module system for the program and um see the modules reference you very likely want common JS for node projects so not to backtrack at all but going back to that post that I wrote here scripts
common JS es6 modules this really talks about these different module systems but basically if we look at let me do a sample file so sample.ts basically if we look at you know this syntax import something from some uh Library this is what we would consider es6 module syntax now if we did something like this const something equals require some lib this is going to be common JS syntax so the require syntax and then also module dot exports at the bottom of your file this is all going to be common JS syntax now if we do
es6 once again it's import something from some web and then you can come down and you can export um you know some object or export default and this will export things from your file which is uh one to one with a module so that's what that is talking about and you'll see that it defaults to Common JS which again is a little bit of a mismatch it says the default is common JS if the target is ES3 or es5 es6 otherwise I'm not really sure given this documentation and the fact that we're on the latest
version of typescript why it defaulted to that but we really want to just have es6 because we want to deal with that nice module syntax um that es6 comes with and then going down the list es module interoperability as I said is the ability to basically combine the syntax that we just went through and have files from multiple module systems being able to compile together this is going to be important especially if you have certain you know libraries that still use old common JS module systems or newer ones that you know use es6 modules and
don't support common JS so having that interoperability is really nice especially in larger projects so at this point we've gone through most of this and once again you can read through the documentation if you have questions on any other properties but for now I want to build a sample project just to get our our bearings here so let's make a folder called test TS and this is just going to have a test TS file just something to work with and in this file we're going to just you know Define a sample type and the sample
type is going to have a name which is a string and an age which is a number and then we will say let's actually call this a person type and then we'll say const person is a variable and this will be of person type and then we will just give it a string so Bob and then age so something like that so this is our basic TS file let's save our TS config and now we should be able to compile some things so the first question is well how does it know where to look how
does it know that we want to compile that test.ts file well let's go ahead and try it so yarn TSC and run it and it says done in 0.73 seconds and it obviously found the correct file to compile so the question is how did it actually know that well let's go to the documentation and look outside of the compiler options at the top level options let's go to include and this is an array that specifies an array of file names or patterns to include in the program and then over here in the default the array
if files is specified all otherwise so as you can see in our code base we ran the TSC compiler and it automatically just looked for any dot TS file in the entire folder and compiled it and that's because it's got this default glob that is including everything so given that behavior I think we're fine now the um the problem with compiling your TS files in the same directory as where they're written is it just starts to get really messy and then furthermore you really want to Output them into their own build folder now there's a
lot more to this subject in general like uh creating a bundle and that involves things like webpack or parcel or whatever have you whatever now there's a lot more to this specific subject we could talk all day about you know how things are compiled where they're stored all that kind of stuff this gets into bundling and code splitting and you know build tools like webpack or roll up or parcel or whatever we're not going to get into that because we don't need it for this simple of a project our goal is to basically take all
of our TS files and put them in one spot and then that will be imported to the index.html and it will run just like our vanilla project would so to do that we have a option that we can specify and let's see where it is so looking under a mitt this is probably where we want to look and yes here's the out directory this is if it's specified dot JS files will be emitted into this directory the directory structure of the original source files is preserved see root directory if the computed root is not what
you intended so that's probably not going to apply for us um but you can see it gives an example where it outputs to a dist directory or distribution which is a very common directory to Output compiled files so that's what we're going to do we'll come back to compiler options and give it a out directory you can see vs code knows all these options gives you some autocomplete so if we specify out directory gives us the documentation which is very useful and we're going to say that we want to put this to the dist folder
so we're getting some errors here and that's because we need a comma and once we save this and we rerun the compilation now it's going to Output everything into dist and there's our test.js file so you can see use strict is put in there and we've got a person compiled you'll notice that from earlier in the video this is a different syntax than we saw earlier earlier we saw this was a VAR and there wasn't any use strict going on at the top and that's because we didn't have a TS config we didn't have all
of these targets and modules that were specifying how we wanted things to be output so anyways this is the basics of compiling a typescript project now our next order of business here is to look in our JS directory from our original refactor and convert these files to typescript so I'll leave this test TS folder for us let me get rid of the dot JS compiled file because that's now going to be over in dist um one thing that you would want to do here before we get too far is add a git ignore if you're
working with Git and put the dist directory as well as node modules because we've added both of those neither of those need to be uploaded to Source control because node modules obviously can be installed by yarn and then the dist directory is the build itself which is going to be created with yarn TSC so let's close out TS config and let's start in the app.js file so now that we're working with typescript we can just rename this to dot TS and now vs code is going to automatically recognize that this is a typescript file and
it's going to start underlining things and it's going to yell at us for all sorts of stuff because nothing is typed here now there are some strategies that you can use to migrate a JS project to typescript but in our case things are small enough that the best strategy here is to just rename all of these to TS so that we're dealing with typescript across the board now if we were to go through and just try to compile this right now it's going to throw all sorts of errors and the reason that it does that
is kind of the whole purpose of typescript and that is it's going to check the types and make sure that they're all compatible across all the files with the Imports exports you know function calls parameters all of that stuff and that's a good thing that's what you want but when we first start out and everything has these red squiggly underlines and typescript is really mad at us it's not so fun but I'm going to work through this it's not as um it's not as intimidating as you'll think um and we'll get this thing worked out
shortly so just as a reminder um the current project is no longer going to work because in index.html we are importing app.js and that does not exist any longer we have app.ts if we tried to replace this it's just not going to work because typescript is not valid in our JS runtimes so what we really need to adjust here I'm just going to do this right off the bat so that we don't forget is now that everything's being compiled to the dist directory we need to now specify instead of JS we're going to look in
the dist directory and import app.js so same thing as the original project it's just going and looking in a different directory instead of the source code that you know in our prior refactor was able to run in the browser now we have to use the compiled code and you can see in dist it's going to maintain that folder structure so we actually need to say dist slash JS slash app.js and you can see that it will you know this this has been compiled um it through a bunch of errors but it still compiled it so
we could probably get this to work actually let's just see real quick the way that we'll do this is we already have live server running just I had this before the video so it's on Port 5500 and we're looking in dist Js app.js so let's go to the vanilla refactor and instead we'll go to the live TS or let's just go to let's go to localhost localhost 5500 live TS refactor and let's see it seems to be working so even though there was all those type errors um it still compiled the JavaScript and this makes
sense because typescript is just a superset of JavaScript so while not all typescript is valid JavaScript all JavaScript is valid typescript so in other words when we went to compile these vanilla JS files just in a different form it still knew how to do it it just was complaining about all the types so in this case where we're migrating an existing vanilla JS project this behavior is actually good because we can you know gradually migrate our code over and not break everything from the start so there are some options though once we get to a
more final state if we go to the documentation let's close some things out here if we go back to this reference there should be some sort of configuration property that allows us to basically fail the build if there are any errors so we ran yarn TSC and it it's going to give us all of these errors if we just look through them um but it's going to still compile all those files to our output directory but just to demonstrate how you can change this behavior I'm going to get rid of the test TS directory now
just so that that's not clouding anything up and then I'm going to completely delete the dist directory so that's okay because remember we can just run yarn TSC and it's going to create the disk directory interestingly enough now that we deleted that other directory that had typescript this Now does not maintain the JS directory structure so before I forget I'm sure there's an option to change that but before I forget let's go and remove that path and if we go back to our browser um let me get rid of this let's refresh and we can
still play our game so this is looking at the live TS refactor so it's still working but if we go to the options reference there should be some options in the emit so if we're scrolling through there's this option called No emit on air and I think that's um what we want let's just scroll through a few more things okay so let's click on no omit on air this says do not emit compiler output files like JavaScript source code Source Maps or declarations if any errors were reported this defaults to false making it easier to
work with typescript in a watch-like environment where you may want to see results of changes to your code in another environment before making sure all errors are resolved so let's just take this property no emit on air we'll open up our TS config and we'll throw this at the end so no emit on air and this defaults to false but we're going to say true now let's once again delete the dist directory and let's try the yarn TSC to compile our typescript files and now you'll see that even though we ran this there's no dist
directory because we've said if there are errors do not emit any you know output files now once again we don't really want this because when we are converting our project over we want the ability to you know just compile the typescript files with errors so that we get a build output and then in a final State you might you know once you've converted your project over you might add that back or have other sort of build checks to make sure that you know you get a clean build before you deploy your application so now that
we have everything set up and we've got the app working with this disk directory we will just jump into this JS folder it's probably you know not the best name for it anymore JS but technically typescript is a superset of JavaScript so it's somewhat valid but what we'll do is we will start um I think rather than starting an app which kind of consumes both the store and The View let's just start with the store because um it's always good to Define the types of your state at the beginning that just kind of helps you
inform you know the rest of the files in the project design in general so this is just in general a good place to start now in this folder I'm also going to make a new file called types dot TS and this is going to be a module that exports a bunch of types that the rest of our files are going to consume and pass around to keep things more clear in our heads and to also satisfy the compiler so let me just reference um my final to make sure I'm getting the right types here okay
so let's close this out our types will go on the left and then we'll put our store on the right so the first thing that we'll see as we're going through aside from all the red squigglies is this initial state so this is the um the shape of the object that we're storing in local storage as you can see here so if we open up our app and inspect and we go over to storage and local storage you'll see that I've already played the game and you can see this updates on every move and if
we open this up you can see the parsed value so we've got the current game moves the history all games current round games and then you can go through and just see all the moves that have been made by the different players so that is the shape of that object that we're storing in state now the benefit of typescript is to just have confidence over you know the types we're passing around so it would be a great idea to Define that state so in typescript you define a typing with either the type keyword or the
interface keyword the difference between the two is a discussion for another day I generally prefer types um but you know some people will get very in you know heated with a discussion about which one is better in which situation but we'll start with just a type and I'm going to call this the game state so game state is an arbitrary name I'm giving this type similar to how we would you know Define a variable name and the type is defined using you know basic object syntax so I'm just going to match this so let me
copy this shape over and get rid of this comment so right now this is not really a valid type um it's not really complaining about anything but this is not a valid type let's go ahead and give this a type of let's see current game moves let's just say it's any for right now and it's going to be an array so it's going to be an array that has objects that are have any shape so this is just our starting point now we need to Define all of these types right here so this is kind
of our final thing that we need to get to but we need to decompose our types into you know smaller units so that we can pass them around our files a little bit easier so the first thing I want to do is Define a player so you can see that we've got squiggly lines under the players param or argument that we're passing into the class Constructor and if we were to open up the app.ts you can see the player's array that we've defined so let's give a type to these objects you can see that they
have the same exact object shape so we can give this a representation of player and a player is going to have an ID a name an icon class and a color class now these are the actual values but we want to give these a type so a 1 is going to be a number type player one is going to be a string type the icon class is also a string type and the color class is a string type so here we have defined a player type now you'll notice that all of these just have regular
you know primitive typings and they don't have anything crazy going on here now with typescript you can make a property optional by adding a little question mark after the property or I guess not sure if you'd call that a property but you put this question mark here and now the color class would be an optional property so you can hover over it and it says it's either string a string or undefined and if we remove that it is just going to be a string for our game since this is a configuration property we want this
to be all required properties so this is the correct shape so now what we can do is go back to stored.ts and move on to the next type that we'll need this does not satisfy anything that we've got going on here but it will be a building block for us to work from so the first thing I want to do is Define the current game moves so what is a move in our game if you we scroll down to Player move you can see that what we're pushing to state is a property with a square
ID and a player so we just defined the player interface or type but what is square ID well this is just going to be a number and we can Define this as a move so let's call it a move and it's going to have a square ID which is a number and then a player which will basically be this type right here so if we hover over move you can see that this is the type that we've given it we can now take this move type and replace the any type in the current game moves
with move so now the current gave game moves is an array of moves and that lines up with what we've done here where we are pushing a move to the array of current game moves which is our state now to figure out what we're going to type the history object with we need to go down into the store class and figure out what we're doing so in the reset method what we are doing is pushing games to the history object under the current round games property so this is the type that we're looking for we
are pushing an object that has a moves property and a status property now it's pretty clear what moves represents moves is going to be what we just defined an array of moves so we can start with that and we're going to call this a game so a game is going to be represented by an array of moves and then we have a status property we don't really know what that is yet so let's give it a type of any to start with and now we can kind of go look through our code base and Define
what that type is so if we track backwards and look at status it's coming from a destructured property off of this Dot Game and if we look what this dot game is that is a getter method on the class and the return type of that getter method is all of this stuff so we have a moves array we have a current player and we have a status this object right here the status is what we are trying to Define so let's make one more type called game status and that's going to be an object with
an is complete property which is going to be a Boolean value value as you can see and then the winner is going to be a player so the winner is going to be represented by a player which we defined right up here so now we can take this game status and this is going to be the representation of status within the game type so once again we're coming down here and this is where we're pushing a game to the history of current round games we've got a moves property which is now represented by an array
of moves and we have a status property which is now represented by a game status which has this type and now we're finally ready to replace some things here so we have a game and a game status let's put game right here for current round games now the last thing we have to fill in is the all games we have to figure out what type of array that is and I'll just save us some pain of looking through this and just say it's going to be the same thing so the current round games in all
games going to have the same exact type at this point we have defined all of these supporting types for our game and in this case we had just looked at our reference code our JavaScript and we're basically just looking at you know what kind of objects are we passing around what are we returning from our different functions and we're just looking and analyzing our code to see that information if you're starting this project from scratch and you intended to use typescript all the way through this is actually a great exercise to go through before you
even write any code defining the types of your game is a great way to define the functionality behind it without writing any code it's actually one of the first things that I will do when I'm building a new feature is just map out the different types that I'm going to be dealing with and then I'll figure out what functions do I need what types are going to be accepted as arguments to each of these functions what are the return types of these functions so on and so forth so as you can see typescript is already
making us think a lot more clearly about what types of objects we're passing you know objects arrays so on and so forth what types were passing through our code and it makes us a lot more explicit about that and more organized so if we go back to our Excalibur where I was briefly listing out the benefits of typescript um I think one of the other benefits is makes you think more clearly and explicitly about your code so that's what we just experienced we're we're having to explicitly type out our game now at this point we
still have squiggly lines and that is because we have not assigned these types to anything here so I will keep both of these open I'm going to just collapse this a little bit and let's just start working from the top of our file so the first thing let's look at is the Constructor with typescript we can add types to things by adding a colon and then giving it a type in in this case the key is our local storage key and that's just a primitive string type so we can just pass that in directly we
don't need to do anything over in our types file because you know we don't need to redefine a string now players is going to be an array of players so we'll give it a colon and then we will say player and then array so that is going to be the type we're dealing with now you can see that it figured out that type already even though we didn't import it now this is not always going to be the case it works works okay here but generally what you'd want to do is import that type explicitly
so with es6 modules what we can do is import a type and then that type will be called player and that type will come from the types file so types.ts is what we're looking for now you're going to see an import path cannot end with a TS extension consider importing types.js instead let's Google this it's probably some configuration property that we missed this person is just saying that we can just remove the extension let's just try that I don't think that worked now it's saying that types.ts is not a module oh I actually know what's
going on here I'm sorry I messed this up so these are all just scoped to the types.ts file and it's also not saved so that that would be a big problem that we cannot import that so the first thing we do is save this file that will help us out quite a bit it will not solve this error because we have not exported any of these from the file so to use them throughout our code we need to export them just like we would export you know if we had some variable equals 20 and then
we export some variable or export default something like that or we could just export it like this and it would do the same thing and now we can you know import some variable from the types file so that's just a regular JavaScript variable I will get rid of this and let's keep exporting all of these Okay so we've exported all of our types let's save it and now we should not get so much uh grief from the typescript server now there's no red squigglies we've got the player type and you can see we can hover
over it and you can see that type which is really nice to just be able to hover over this you can also hover over it down here and now we have a strongly typed Constructor and it knows exactly what's being passed in but at this point we get these problems storage key and players these are instance properties of the store class and since we have not explicitly typed those it's complaining now one way that we could do this is come up here at the top and say that storage key is a string and that will
satisfy it because we're passing in this key and then in the Constructor we are assigning this to a string so there's actually a shortcut to doing this a more concise way to do it and instead of calling this key and then this storage key and having that mismatch there we can short circuit this delete that rename this to storage key and so far it's not going to do anything so if we tried to assign this dot storage key equal to storage key it's not going to work we can remove that entirely now this is not
going to work but if we say this is a read-only property of the class it will Define it so that we can access it later in the class so if we go to the bottom where we are saving the state you can see we're accessing this dot storage key in these two places and if we hover over that it's going to know that it's a string now if we come to the top and we get rid of that read only and just leave it to storage key it will complain about that because it says it
does not exist on the type store so all we need to do is give it a read-only and you can also give it either a public or private just to define whether it's accessible in from outside the class or not we'll call it private because only the internal methods of this class can access this and then same goes with players so once again we can delete all of this and this can just become a private read-only array of players and so right here this is basically the shortcut for passing in these um parameters and then
assigning it to the class all in one step and you can see if we look for this dot players it knows that it's of type player all right so we're getting closer we're seeing a lot less little squiggly red lines we just have a few more things to work out in this file um let's go ahead and start here at the bottom this is pretty isolated so this state or function has an implicit any type which basically means typescript is yelling at us because we haven't defined any type one thing that we could do if
we really wanted to as we are refactoring this and migrating our code base if we change strict to false and save that and then restart the TS server you'll see that this no longer complains about this at all we can Define this as an any type and typescript's not going to be mad about it this of course comes with the detriment that now you don't have any red squiggly lines to tell you where you've messed up that is why most people would encourage you to put on strict mode restart the TS server here but I
just wanted to show you that just so you can see now let's start at the bottom Here Again State or function this is a great use case for typescript this is where your life becomes a lot easier and that is because in this case we are allowing um someone that is using this function to pass either an object that represents state or a function that we will pass the previous state to and then it returns a new state so two different types of parameters that you can expect here and so we can type this a
lot better now that we know or now that we're using typescript so saving the state we are going to be passing game state so that is the type that we're looking to pass in there so we'll say game state and it's going to complain about this because it cannot find that name let's go to the top and let's import game state from our types so we're importing that type now it's not complaining anymore but it complains right here because it thinks this function thinks that state or function is just an object that is represented by
game State and right here we are trying to call it as a function so the problem here is that we've only defined one of the possible types so here we can define a typescript union let's go to the documentation and briefly look at this so let me make a new tab and typescript docs let's start over and let's go to either the reference or the handbook I'm a little surprised that we don't see unions um starting out but let's go to the basics that's not what we're looking for let's just search the docs so Union
typescript unions uh looks like typescript for functional programmers is where we found that one um but anyways in typescript Union types are untagged in other words they're not discriminated unions like data and Haskell I I don't use Haskell so I don't know what that means um but what this is trying to basically say is that if you put this little pipe character that means that the type can be you know either this or that so it's kind of like an or um an or operator but for types so you can read more about that but
let me just show you what this looks like it's going to be game state or and then this is where we Define our function that we're looking for so the function is going to be a separate type and I'm going to actually add this to um let's add it to the top of the file so since we're in typescript we can just add types within our files so we'll say Save State CB for callback and to define a function there's a couple ways you can do it but one quick way is to basically just give
it an arrow function and tell it what it needs to return so in this case we want to return the game State and we're going to pass the previous state which is going to be a game state so basically I talked about this in the previous video when we did this build but it's always nice in your Save State function to be able to access the previous state so that you can derive that next state so that's why we're passing this but this is the type that we can Define and if we took this key
right here the type and we passed it right here Save State callback you'll see that there's no more complaints from the typescript server compiler because state or function matches the type that we gave in previous state um is not typed yet but it satisfies that constraint so I can actually take this to be a little more concise and copy that type itself and just pass it in right here and then you need to put some parentheses around it and that should work just fine now we can get rid of this I just wanted to break
it out so that it was more clear now everything's working here but if we hover over previous state that's going to have an any type which no one's complaining about this here with typescript but it would be nice to know what that is one way that we can do this and this is a little bit tricky with typescript it's um not super obvious but when we do local storage dot get item and set item it's not going to return a type so get item is going to by default return in any type um or actually
sorry a string or null and the Json parse method this is where it's going to return in any type so what we want to do if we want to actually give this a strong typing is we will cast the type so we can say json.parse item and then this is going to be as game state so now get state is going to have a return type of game State and you can actually explicitly Define that on the function itself and if we remove this now um and we say as string or something like that it's
going to yell at us because we're not returning the correct type that this function was declared as now that's for a whole nother day we're not going to be typing all of our functions explicitly with return types some programmers really like that to be explicit about typing all the functions this is just a refactor and I just want to get this working so for the moment I'm not going to worry about that but just know that you can Define the return Types on your functions so now that we have done this we can come back
here in previous state will be a type of game State and it still works to pass it into state or function the game State can go into state or function because that is what we typed it as all right let's keep scrolling up I think we have one or two more errors the square ID this should be very easy let's just give this a number that's the expected type now if we hover over current game moves we would expect that to have the um move type but it does not it has an any type and
I believe we can fix that where would we fix that one thing we can do is give this initial state a game State type so now anywhere we pass that it's going to recognize it so right here the initial state is of type game state so if we look here the structured clone method is actually similar to local storage where it's a a browser API and by default it's not going to type anything so in this case we're going to cast this to a game State object because we know that this state is going to
be represented there so now where we're pushing to all games it's going to recognize that current round games is of type game so you can start to see how this comes together and how we are starting to get stronger types across our code okay so I think the only thing we have left here is that red squiggly not saying that the red squiggles are your map necessarily you obviously need to check other things but just given the fact that we know that this code worked before and we have strict mode on we can really use
those as a guide for our refactor to to find areas that we have not strongly typed things so let's dig in into this error it says property includes does not exist on type number array do you need to change your target Library try changing the lib compiler option to es2016 or later all right so it's going to say 2016 or later so this is es7 I believe so let's target es2016 and then restart the TS server and now you can see that will go away because that built-in method on an array is available in the
ecmascript 2016 spec so we are let me be clear about this we are using es6 modules which tells us how we can export and import things from modules and then we're compiling our typescript code to this standard of JavaScript so that standard of JavaScript has this method and at this point we have completed this file we've imported our types that we need and there are no red squiggly lines so that's a good indication that we're pretty much done with this file let's save that and go to the next one so we are done with the
store let's go to The View this one will be slightly more difficult because we're going to have to deal with um Dom element types which are a little bit more confusing so we've got a bunch of red squiggly lines here but they're all coming from this query selector helper method that we defined let's go straight down to that and let's start typing it so the selector itself is just going to be a string that's like the class or you know selector that we're passing into the query selector method and then when we're typing things with
typescript something useful you can do is just hover over these methods um it's not going to work because we're using it on the parent but if we go to the document there's some built-in types for the Dom methods and Global types so document is of type document and query selector this will give you a stub giving you the types that are available here you can see the selectors are string that's how I knew to give that a string and then element is what's going to be returned from it so we're going to pass a parent
which is of type element and now we should see that's of element and then query selector is now available on that and we're passing in a string so let's let's retype this to a number real quick and you'll see that that's an invalid thing to pass to a query selector so that's how we know that string is going to be the correct thing and then furthermore we can go to query selector all and just give that a string type as well so these two methods are now strongly typed and if we come to the top
it's still going to be yelling at us just a little bit it's saying it expected two arguments but it got one so what we have to do is come down to our methods and in this case the parent element is totally optional so what we can do is pass a question mark right after that and that will now make this an element or undefined and that's okay because we are first checking with our ternary operator whether that parent argument is has a value and if it does have a value we're going to use it otherwise
we're going to fall back to the document so if we were to refactor this a little bit and intentionally break it if we just tried to access the parent element and grab a query selector off of it and then pass the selector it's going to work because Visual Studio code already knew what we were trying to do but if we remove that right there it's going to yell at us because it says parent is possibly undefined and you can't access a method like this on an undefined parameter now you'll see that vs code added this
question mark here which is the optional chaining so let's type that in optional chaining this is actually not a typescript concept this is an operator in newer versions of JavaScript which we're using that accesses an object's property or calls a function and if it cannot find what it's looking for if the if the type is undefined or null as shown here it will short circuit and evaluate to undefined so the reason that that works to do this is because we're first this operator right here is just checking hey is the parent element defined if it
is let me call this method otherwise let's turn element to undefined and then as you can see here we're checking if element is defined throwing an error and if it's not or if it is defined we're returning it so that technically does work but in this case we want to use this logic just to be explicit and say if it exists grab from the parent otherwise fall back back to the document and that gives us assurance that we're going to find that element so we've fixed all these red squiggly lines but now we have a
problem here and it says property menu does not exist on type object and you can see here we've defined this as an object what we really want to do is retype this and we're going to use a built-in typescript utility let me make sure I'm doing this the same as my example or my final so if we go to the documentation for typescript let's go back and find ourselves the utility types so in the reference there's this utility types and if you come over here to record this constructs an object type whose property keys are
keys right here in whose property values are type right here so this is actually leveraging something called generics in typescript which is kind of beyond the scope of this video you can look it up and and read about it but keys and type are going to be generics and record is going to be the type that allows us to define something so in other words this is just basically defining a basic object so right here this is where we will type this so remember dollar sign is just a property an instance property of the class
you could have named this pretty much anything um so you could have named this element object store or something like that but we're just doing this for a shortcut and if we want to type it we can type record and then this is where we pass our generic values so we want to pass a string because we're defining arbitrary strings as the properties of this object and then the value is all going to be the same it's going to be a an element type so if we pass an element now things are satisfied satisfied here
because we are passing an arbitrary string property name right here and then the value is going to return an element which as you can see down here we are returning a type of element so that is satisfied so all these are happy now but we need to type the double dollar sign which is the node list now if you come down here to query selector all let's just take a peek at what this element list is it is typed as a node list of elements so that is the native typing that the query selector all
built-in method is returning and you can see that's defined right here so let's just copy that because we'll need it come back to the top and now let's define this as a record where we can give it an arbitrary string so squares is an arbitrary string property name and then the type that we're going to give it we'll just paste that in so it's a node list of elements and we'll initialize that to an empty object and now the element list is happy because query selector all returns that node list of in squares is that
arbitrary property value so it satisfies this type so that's just a use of a built-in utility type in typescript using some generics I just want to show you another way that you could have done this so if you wanted to not use a utility type what you could do is Define a custom type so let's say um element object uh dictionary that's just our type name that we're giving it and here what we can do is pass in a key of string and this can be an element value and then we'll pass this element object
dictionary I'm sorry it should not be of it should be in string so what this is basically saying is I want an object that can have an arbitrary number of properties in the key of that property so menu menu button menu items is a string and then the value of that property is an element as assigned here so this type right here is really the equivalent to what we did earlier where we said record string element and then closed it off and if you really really wanted to get fancy you could do this with generics
so sorry I'm going on a little bit of a tangent here but this is just to give you an idea of the power of typescript so we could say custom record utility so what we're trying to produce here is the built-in utility record and just recreating that from scratch what we can do is pass in a generic so a key and a value and usually with generics you're going to put a t in front of it that's just kind of a convention that I use to kind of signify or you know Express this is a
generic and then we'll use the same syntax so the key is in t key and then the value is T value now we know in JavaScript the only valid type of property you can give an object is really a string you can't just Define an object like this and start adding numbers to it like this is I guess this might be valid is this valid JavaScript oh that's funny I I guess I don't know I don't think this is valid but let's let's just try it out because now I'm curious I wouldn't be surprised so
we'll say this is a test and it looks like it is that is interesting I didn't know that you could do that I don't know why you would ever do this other than maybe a map which is kind of similar to what that does but anyways um I guess I'll learn something new today while making a tutorial about coding that's probably not the best thing but anyways let's just be honest so anyways we want this to be a string so let's just say it extends a string type and now that's going to be fine and
then we can just replace this record with custom record utility and it's going to work fine everything's going to be happy because we've basically just implemented that built-in utility type that typescript provides so just a interesting tidbit that you can kind of roll over a little bit so let's get rid of that because that is unnecessarily complex you can see at the top here I had imported the store just for JS doc typings when we had of the vanilla JavaScript project so now that we're using typescript we really don't need to do that so we'll
get rid of that so moving down we can now implement the rest of these okay so we'll move on to the render method um the render method takes two State objects and the reason I originally passed this as two separate objects is because we were not working in typescript now that we are working in typescript I probably would just pass the entire State object as one parameter but we'll we'll stay consistent here so if we look at our types that we've defined we have a game type so that one's pretty easy we'll just type that
as a game and we need to import that but instead of going to the top of the file in doing it there I'll show you a little trick so if you hold down on a Mac or on a command or on Windows control so command and then period in vs code will give you a suggestion and usually it can find out where it's looking now it's looking for types.js um not types.ts I'm not quite sure what's going on there um why it's saying that I don't even know if there's a there isn't a types JS
I'm not sure what it did there but anyways we'll add the type uh import just so it's not importing anything but typescript types and then we can remove that extension and that should work so now that's working let's see if it works on this one so we need to do stats where we I don't know if we have typed that yet okay so I've actually um in my final copy of this that you'll see on GitHub I've used a slightly different strategy so we do not have a type already defined for stats if we go
to store.ts the object we're looking for is this one and specifically we're looking for this return type which has a player with stats which is an array of players with this wins property added and then we have ties which is just a number now if we hover over stats it will give us this inferred type which is correct and furthermore the store class is in has an inferred type that has all of the methods on it so something that we can do is derive types from other types and in this case since we don't have
a stats type what we can do is go back to the view and we can import type store from store and that will give us the store class that we had defined and then here what we can do is say store and then we can actually access properties on that so you can scroll down just like we're accessing you know properties of an array we can scroll down and see all the methods and properties that we can grab from the store and stats is one of those so now stats is defined because we derived it
from the store now someone argued that this is maybe not the best way to do this and I would probably recommend um having stronger types and actually defining a stats type but for now this does work and it's a easy way to get that type without having to define it we can also grab the game uh getter from the store which will properly type our game and that is going to give us the correct types for the render method and again I'm using this to demonstrate something in reality you'd probably want to Define these as
actual types over here and we do have that for game so we could use game ready oops scrolling around we could just use game right there but actually it will yell at us because this game is slightly different this is derived state so this game is this the state that we're storing in local storage and then the game that we're trying to represent in this method is derive state so in our store remember we have this method called game and we are reading the state the raw State and we are deriving some useful properties that
we're returning for our game to use right here at the bottom so obviously current player is not saved in local storage and not represented in this type so I guess that's another reason why just using the store game is a good way to do it but yeah basically I would say that you'd want to type this function now coming down to the the bind events all these methods the Handler is of type any right now but basically what we're passing to the Handler is the Callback of add event listener so if you look at the
stub for this add event listener you'll see it's got some overloads which is kind of an advanced typescript concept but one thing you can do to kind of zoom in on some types let's command click on add event listener and this will take us to lib.dom.d.ts these are the typings for the Dom that are basically provided already um to us and if we open up this in the file pane um I don't even think you're going to see it because this is kind of I believe this is built into vs code just to give you
these typings um I could be wrong on that but anyways at event listener it gives you a couple types that you can deal with here and then you can hit command click on this and then you just kind of go until you find the type that you're looking for so event listener and now you can see event listener is actually a type that we can use so we don't even need to define it we can just use event listener which you can see is populated and pass that right there so event listener it's always best
to use built-in types if you can if they're not defined then you obviously have to type them yourself but with something as common as an event listener Handler like this you can always expect that there's going to be a type already defined for you that you can use so those are done update scoreboard I believe these are all just numbers say number number and number here it's going to tell us something inner text does not exist on type element I might have used this wrong in my original actually I think this should be text content
yeah so that that's actually the right thing to use I don't know why I was using inner text it seemed to work though so let's update all those open modal message is just going to be a string because we're passing a string of who won and then we have the same error here that needs to be changed to text content coming down to initialize moves this one is somewhat simple we've already defined the move type over here so it's going to be a move but right now it's going to complain because it cannot find it
so hit command period and we'll update the import and you can see that that actually added the move right there and we're not using game anymore so we can get rid of that but now it's going to complain right here and that's because I've intentionally messed this type up we want an array of moves not just a move so to specify that we can either say array which is a helper utility of typescript or you can just do it shorthand and pass the brackets at the end of it which specifies that moves is now a
moves array so now this is valid and you can see everything's working just to start demonstrating the value of typescript let's say that we removed this plus sign so in the original build I remembered to do this but it's pretty easy to forget to cast the ID that you extract from the the element Target to a number so what if I got rid of that now it's going to yell at me because it's an unintentional because types number and string have no overlap and what that's saying is we are doing a triple equals equality which
types or which checks the type and the value and we're looking at a move which has a square ID of number and then the default event Target ID is going to be a string so element.id is going to type to a string so these will never evaluate to true now we can of course remove the triple equals and that would technically work because things would be cast but you always want to use triple equals if you can so here that's just a very explicit example of where typescript comes in handy is it reminds you of
these little details that you might have kind of glossed over before all right so let's keep going you can see that it's complaining here about icon possibly being null and this is just a case where we could do better so remember earlier in the prior video actually not this video we Define query selector and this is like a safe query selector where we are checking uh whether the element exists and if it doesn't we're throwing in error which is kind of the behavior that we want we don't we don't want to proceed if we can't
find the element so one solution to this problem is to put a question mark there because that will be the the optional chaining that we talked about earlier where we're saying hey let's check the icon and if it's an element grab the class list and add this to the class list if it's not an element and it's null let's just uh evaluate this to undefined and not throw any errors now that works you could add that there and it solves your problems but this is kind of an anti-pattern a little bit because you know you
throw this in here and all of a sudden you know your app is not grabbing this correctly and you're clicking your toggle menu and it's not working well how do you find that error it's better to be explicit about this kind of thing so let's leave that and take some Clues from typescript and refactor this to instead um let's comment this out and say icon is equal to this and we'll use our safe query selector method in this case we're going to look for an I tag and the parent is going to be this dot
dollar sign dot menu button and that is basically how we can safely select that and now icon is definitely an element because we're going to throw an error if it's not so these calls down here are now valid this is actually a concept called type narrowing um that you can read more about in the typescript documentation so I wonder if this is actually somewhere I can show you okay yeah so narrowing and this whole page kind of describes that process of of narrowing the types that I just explained here same thing goes right here we
can just copy this down and replace this let's get rid of this and these two functions are good now a couple more the square element you can see that we are replacing the children on it so we know that that should be an element and then the player is going to be a player and command period to update that import at the top same thing here this is going to be a player and then finally we get this fun delegate method that we really it's tough to understand in the first place and now we have
to type it but let's just walk you know parameter by parameter and get this done so element pretty self-explanatory this is going to be an element the selector is going to be a string the event key is going to be a string and then the Handler is going to be an event uh what do we call this we have an example of this right up here event listener now we've got a little bit of a tricky situation so you can see right here event Target is possibly null so okay let's put that question mark the
optional chaining but we still have this problem property matches does not exist on type event Target so we're going to use this narrowing concept again to narrow these types and get rid of these errors so this is where typescript is actually helping us in a way it's kind of making us more explicitly check things that we otherwise probably wouldn't so the first thing that I want to do let's get rid of this question mark or no we'll leave it there for now and we'll say if the event dot Target is an instance of element so
this is a way that we can check if the target is an element so if that's an instance of the element and we actually want to negate this so if it's not an instance of an element then we want to throw a new error and we say event Target not found so this is just a guard that basically says Hey the purpose of the delegate method is um to delegate an event Target and find something within it and if we can't find that in the first place and it's not an element then the rest of
this method is useless like we can't really proceed safely so we might as well throw an error exit early and then the developer is you know responsible for fixing that so that solves one of our problems the matches keyword or function Now does not complain about anything now in the Handler it says argument of type element is not assignable to parameter of type event and that is actually because I typed this incorrectly in this Handler we're actually passing the element itself so I have typed this as if we were passing the event but really what
we're passing is the element so I need to type it accordingly so we're just passing a function that is called with the element as the first argument and it doesn't return anything so now there's nothing wrong here and we're okay but let's remove this question mark and see what happens so looks like we're okay all right so we're we're good here this works it's typed okay I think this whole file is now strongly typed and we're ready to move on to the final one app.ts and we're going to tie it all together and get it
working now just as a reminder this is this app really we haven't done anything structurally to it other than a few things so it should still be working and if we open things up and ran yarn TSC let's look at the disk directory it outputs everything and then if we go to our page let's inspect the page and go to the end of the body and you can see the script is looking in dist Dash app.js and if we click things we can play the game still so there's really nothing that we've changed and it's
been working this whole time we're just trying to make our project more maintainable with typescript so that if we want to extend it in the future it's easier to do so want to debug it easier to debug all that kind of stuff okay at this point by fixing those other files we basically fixed a lot of the typings here in in these files now it's always nice to just be pretty explicit about your typings some would argue that you want to infer types as much as possible but let's just go ahead and add a player
type to this array and once again it's trying to go to typestop JS for some reason so we've got type player and this is a array of players now remember the store we've typed that so you can hover over it and you can see the storage key should be a string and the players should be a player array so this is a player array and this is a string let's say that we passed in a number it's not going to be happy with that it'll say numbers not assignable to type string so that's kind of
the assurance that we're getting here now coming down here let's see what it says property ID does not exist on type event so this is actually I think a mistyping that we had from the bind Player move event let's go back to the view and you can see this is where we're using our delegate and then our Handler we've typed that as an event listener and if you remember down here I made that same mistake um where I was incorrectly typing the Handler so let's copy this handle or type and instead of event listener for
the Handler it's just going to pass a function with the element that it's selected so now we come back and these type errors are fixed so this you know fixing type error is really about just reading the error message and being able to you know respond to it and know what it's trying to say which comes with time it's not easy to start and figure that out when you're first starting with typescript all right so at this point everything is strongly typed and our app is working so our last step here is to compile things
let's make sure that we're not getting any errors so yarn TSC and there's no errors we're done in a second and the disk directory now has our compiled code and as you'll see as you read through this none of it's really minified or anything like that um and our Target was es2016 so you'll actually see all of these methods that we are using let's see if we can find the includes method here's some interesting stuff this is uh typescript dealing with like the class syntax and private fields and properties it has like a helper method
to deal with that so that is kind of interesting so let me just show you if we downgraded this to like ES3 a prior spec of JavaScript as our Target I just want to show you how that plays out with the output it'll be tough to see so let's open up view.js and just kind of watch the code as we recompile this to a different Target you can see that all of this stuff changed and if we go back to es 2016 and then recompile and you can also see we get all these errors because
we're using things we're using language features that were not available back in that ES3 spec so the compiler is going to give errors so now let's go back to our valid syntax and you'll see like this will update so you can see the modules that we're using but anyways that's just a kind of fun little tidbit to kind of explain that TS config a little bit more but I want to wrap this up by just walking through why this was so important to refactor to typescripts and why someone would go to the effort to do
this the value in typescript does not really come as you are you know retyping things it comes when you're trying to refactor things or add new features so if we went to the JS folder and we went to let's say the store and let's say that we came down and we wanted to I don't know change the type that stats uh returned or something like that well if we went through here and let's say we updated this property wins to like win count okay so it's not going to complain at all right here but what
you'll see is that if we try to recompile this so yarn TSC it's going to give us errors that were no longer there and the reason being is in our view on line 59 so let's open The View and go to line 59 you'll see that we have this underline because we are referencing the output of this stats getter from another place in the code base and we are using the original property so we would need to update that to win count before it's going to stop complaining and what typescript has done for us there
is you know as the developer you're going through and you're changing a method and this method is dependent on by other methods in other parts of the code base and so typescript is smart enough to know like hey if you change this and it does not match up with the rest of the code base we're going to not compile this code base because it's just not going to work so otherwise if you had a vanilla JavaScript code base and you try to do something like this nothing would happen you you would just think oh I
I'm okay I changed that that's fine and then you would find out that you had errors in your project once you started playing the game and it was not working as intended so that's kind of the benefit of typescript is you get that proactive checking of your code and you find out about errors a lot sooner so rather than pushing a bunch of code up to GitHub and deploying it and finding out that something's broken in your app you just don't it it just does not get deployed correctly and it doesn't build correctly if it's
not correct code so that's kind of the the appeal of typescript I'm going to put this back to wins now now like I was saying you would probably want to type this A Little Bit Stronger so if you were going back to the stats getter what you can also do is set a return type on this so if we wanted to open up our types.ts file let's bring that over here to the right and maybe we wanted to actually annotate the expected return of this function which is usually a good idea with functions it's it's
better to be explicit and I'll show you exactly why in a second so let's say this type is called derived game state or something like that and you don't have to Define this here you could Define it in this file itself and I would actually say that that's probably the better place for it because it's specific to this file so let's actually get rid of types.ts and we'll open this same file twice just so we can edit it in different places and I'll usually throw types at the top of the file so derived game state
and that is what um or actually we don't want to call it that we'll say derived stats is what we want to call it and now I'm going to assign the return value of stats to derive stats and as we see it right now looks like nobody's complaining and that's because we've defined this as an empty object but let's say that we defined it as a string now this is going to complain because our return type does not match the explicitly annotated return type that we had assigned it so now our job is to Define
this and we can see that ties is an easy one that's going to be a number so you can see that immediately we get this feedback where this looks okay but player with stats does not so we can come up and say player with stats and you could just say any that satisfies it but what does that get you it doesn't really help you throughout your code base because now anything can be passed here you don't get that explicit type checking so what we want to do is say that this is going to be a
player array now let's see it doesn't seem to be complaining about that because this does satisfy player array it also has this wins property so we need to document that too so really what we need to do is make another type that is player with wins and that is going to be an intersection type or a union type I should say and we can actually use this and symbol to add properties so we can say wins and that will be a number so now player with wins represents what we're returning here and we can pass
that in right here now if we would call this once again um win count now it's going to be mad because we're calling this wins here but our actual type is Win count so let's match this back up and now let me show you why explicitly uh making these types is advantageous the first thing is if we go over to The View dot TS where we had originally referenced these stats you can see that we can now import the derived stats and we'll import that from the store so we no longer need this right here
we'll get rid of that entirely and then we'll add a type annotation so we're just importing the types so now stats is derived stats and then let's also say derived game this has not been defined yet but we can export that as derived game and then we'll import that from the store now it's complaining because we're trying to destructure properties off of derived game which at the moment is just an empty object now we know looking at the store that what we're returning from the game method is going to be the derived game and if
we look at the return type here it has a array of moves so we can import that here it has a current player so we can assign it a player and then a status which is an object that has we've actually already defined that too so that is the game status from our types so remember if we go to types.ts we had the move type already defined so we just use that there we had the player type right here so we defined it here and then we had the game status right here which we passed
to status so using these types we composed a derived game which is returned from this game getter method we've explicitly typed that as well and you can see winner is not correct here because I think we have a mismatch and I think I pointed this out earlier but I I don't know let's see ah so explicitly typing this actually um exposed I believe a little problem here it says player or null is not assignable to type player um so we're allowing the winner to be equal to null so if we go to our original types
and go to game status this should actually be player or null it should not just be player because if it's null that means we have a tie a tie game so that was something that we fixed by being more explicit which is a good thing and why you should always explicitly you know Define your types where where appropriate so now it's not yelling at us for this anymore uh we're looking good let's see if that broke anything elsewhere so now we have explicitly typed the render method to pass in a derived game and derived stats
and now the benefit of doing this if we come back to store and we go back to this game method or let's say stats earlier we were looking at Stats and we changed a property on stats so remember we previously had no explicit return type so we just passed win count just like that and nothing highlighted here so if I was a developer and this was a big project and someone else had written this function it's not very clear to me what the contract of this function is how it's being used outside or anything like
that so I could come in and change this name to win count and not have any clue that that affected something in another file until I compile it so if we explicitly say derived stats now when we change it it's going to complain because it the wins is declared here but we are calling that win count so if we put that back to wins now it's going to be happy and it gives us the assurance that we didn't break something elsewhere within our code base so having done these additional typings let's close things out and
run TSC and everything compiled and if we come back our game is working just fine so that's kind of the benefit um kind of bringing this full circle got the benefits of typescript I've demonstrated a lot of this but really I hope that this video has given you a brief introduction to typescript um just giving you some practical examples and kind of a code along um to to get your feet wet with this and also to kind of see how we can take a vanilla project and Port it over to typescript and get that setup
done so if you like this video give it a like subscribe to the channel and I will see you in the next video which is going to be the same project but we're going to build it in react so we're going to take that vanilla JS and make it you know into a react app and then eventually we'll actually do another typescript refactor where we'll take that react app and do this same process of typing things so I'll see you in those next couple videos in this video I'm going to be rebuilding a vanilla JavaScript
application to a react application and the purpose of this video is to show you how you transition from that vanilla to react and what problems react is basically solving for you why you would want to do this in the first place and just some basic introduction to you know building with react in general the app that we're going to be rebuilding is this tic-tac-toe game and this is actually a game that I had created in a prior video and I'd shown you how to go from complete scratch nothing on paper to a fully working vanilla
HTML CSS in JavaScript tic-tac-toe game so the first thing we're going to do is learn how to set up a react so what that means we're going to learn how to take a vanilla react app so just regular JavaScript and set it up from scratch so from scratch let me zoom out a little bit this step right here is going to take I think it's going to be like over an hour so if you want to skip that if you don't care how it's set up I would highly suggest that you learn this if you
haven't dug into it on your own but if you already know how this all works and you know what's going on under the hood to set up react app you can skip this the next chapter is going to be convert from JS to typescript so we're going to take that react app and implement it in typescript before we even write anything and the reason being is I just want to do this project in typescript because it's you know just the best best way to write a react app in my opinion just that you have strong
type safety and then finally we're going to take the vanilla Javascript app and convert it to a react typescript app so I'm going to basically show you how you take the ideas that we put together in that prior video that you should have watched or at least gone over we take that MVC model view controller pattern and we translate that to the paradigms that react actually works with so you'll get to see how that translation looks and what problems react is trying to solve for us so that'll be a really fun conversion that we'll be
doing and I will just highlight that this conversion is not me walking you through how to build step-by-step this app it's really to just recognize those patterns we're not going to be going through like okay now we're putting this element in and styling it adding this event listener we're going to be doing a lot of lifting and shifting you know copy pasting and reorganization so that's kind of what you should expect for this video let me be a abundantly clear from the beginning if you are looking for a video that is going to hold your
hand to create a react app from scratch this is not the video to watch you should not be watching this video I'll say this a couple times but if you really want the best introduction to react go to the new react docs and go to the tic-tac-toe tutorial no relation necessarily to the one that we're doing here and go through this step by step and build this react app this is going to be the best and most straightforward way to learn that there are just a couple prerequisites to this video number one and most importantly
make sure you're familiar with the code base for the tic-tac-toe game and the reason I say that is because I'm going to be glossing over a lot of the implementation details in the logic of like how the game works so if you haven't seen the prior videos which will be in the description as links or at least read through the code base to the point where you understand the control flow and understand the goals of what we're doing with this game right here so you can play the game you can reset it you can reset
the scoreboard down here with a new round it's a relatively simple game but definitely need to understand what's going on so that's the first prerequisite then HTML CSS and JavaScript you need to be at least a basic Proficiency in them I have a 21 hour course in the description that you can go through if you need to get up to speed with that so go check that out if you feel behind on those three and then finally a basic understanding of react and understanding what jsx is in the first place you know the idea of
a functional component those basic concepts and to do that I would go to the react documentation and make sure that you're on the beta react docs not the old ones because this these documentation or this documentation is way better it was completely Rewritten over the course of like two years and they did an excellent job with this so I would actually go to the tic-tac-toe tutorial this is kind of funny that this is the example that they give and this is what we're building I actually did not mean to do that but anyways go through
this tic-tac-toe tutorial and just skim through it you don't need to you know build it all from scratch but the goal here is to just get a basic understanding because I'm not going to be going through all the like really basic concepts like react props or component props and passing props down that kind of stuff we're just going to kind of jump into things so that'll be great for you if you've already kind of gone through the basics you just need to see a real life example built live and that way you know you can
just follow along and try to pick things up as we go and when I say a basic understanding of react what does that actually mean well I would expect that anyone watching this video has can at least get some sort of react App working they understand you know what jsx is all about so let's just write this down understand what jsx is you should understand what a prop is so this is just a property that you are passing to a component that that component reads as part of their render cycle so these are some pretty
basic Bare Bones concepts of react and then finally you should understand what a functional component is so just at a very basic level and in the react documentation make sure that you're on the new beta or at least at the time of this video it's in beta but make sure you're on these docs the new ones they're great they were Rewritten over the course of two years and lots of effort was put into to this and they're just awesome so you can learn a lot from this and I honestly part of the reason I'm not
making a beginner level react tutorial is because of these docs right here I think that this is the best place to go learn how to build a react application and specifically before you start in this video if you have no react experience I would go to the Quick Start and at least skim through the tutorial on building a tic-tac-toe game this is actually kind of ironic I did not mean to replicate the same thing as the react docs I actually didn't know that this was the example so that'll be good you can kind of read
through their implementation and how they approach this problem and then how I approached it in this video because I was not looking at this when I originally built it so skim through this build it if you want to can't hurt and most importantly go to thinking and react and make sure that you've understood kind of the ideas here and then finally this will just help you along the tutorial that we're doing here I would go down to managing state or actually let's see so adding interactivity and go to the article or page that's called State
a components memory and just skim through this just so that you have a basic understanding of the use State hook which is linked right here because we will be using this throughout the video and it'll be good to just have a basic understanding of it now I could sit here and say go read this go read that but ultimately we're gonna just jump into some code and the best way to learn is to just do things so I will be sure to point out different parts of this documentation as we approach those specific Concepts within
the build obviously you're welcome to read through any of this and I would recommend reading the entire react docs at some point because it's just a good learning experience but with that you don't want to waste any more time if you meet these prerequisites we will go ahead and get started okay so we're going to look at react here and specifically where do we start so as a beginner or honestly even as an intermediate level developer the question of where do you start when you're building a react application is actually more valid than you might
think seems like a silly question but there's a lot of ways that you can start building a react application you could start as simple as just including a script tag in your HTML and using react like that you could even include Babel or Babel however you say that which takes the jsx and turns it into JavaScript and you could use that all within the HTML document so if we went over to our our refactor here what I'm talking about is literally just putting scripts right here and you could serve react from a CDN and you
have react in your project so that's one option another option is you could use like a code sandbox so if we went to code sandbox and here you can go new from template and you've got these templates react typescript or react and if you click react it will just spin up react application for you it's working and you can go ahead go ahead and add additional things to it so hello again and you're already programming in react so this is probably the quickest way now you could also go to things like as which is kind
of a meta framework sitting around react you can go to create react app I'm not even going to go through all the possibilities just know that there's a lot of different options here and the one that I'm going to choose is actually not recommended by really any documentation that you would see if you go to the react quick start it's going to give you an idea of where to start so start a new react project and if you go down to this section it says if you're learning react we recommend create react app now the
unfortunate thing about create react app and you know other Alternatives that kind of just spin it up for you is that you don't get to understand what's happening behind the scenes you don't really understand what what react really is at its core so the approach that I'm going to take here is actually a lot more similar to how code sandbox sets this up so as you can see in code sandbox if you go to index.js you'll see this file right here where we're actually creating a root element in the Dom and then we're using some
react helper methods to basically render that react application in the root element that we've specified for react to use this gets us a lot closer to what react is doing at its core and so this is where I'm going to start now you might notice over here in the files pane I know this is kind of small let me make it bigger you're not going to see any sort of build tools going on so you're not going to see webpack or anything like that it just works and unfortunately this also makes an abstraction over react
that makes you not really understand what's going on so not only are we going to start right here at its most basic level we're also going to kind of spin up our own to build tools so that we understand how we're taking the jsx converting it to JavaScript bundling it into one file and then including that in our index.html again the purpose of this video is primarily to show you how you take a vanilla JavaScript application and Port that over to react and to show the problems that react is solving for you and to do
that we need to basically do everything from scratch so consider this a learning opportunity not so much hey how do I most quickly get a react application working furthermore the approach we're going to take in this video is not what I would recommend you use to create a production ready app that you're gonna you know deploy and work on with a ton of people this is kind of the most minimal setup that you could possibly have and is great for smaller projects some people would probably disagree but I think next.js is probably your best bet
in terms of a production ready react framework this is basically a react meta framework that takes a lot of the common things that you might have to do in react such as like managing images and routing and all that kind of stuff different rendering methods and it just comes out of the box ready to go so this is what I would check out if you're wanting to build something in production anyways not going to get too distracted there let's get started building our react app so the first step with any project is to set up
the initial you know index.html and get it working in development development mode so that you can basically just go over to the browser and anytime the code changes it will update the application so that is the first step and the way that we'll do that with react is let's go ahead and create a new folder called live react refactor and then our folder structure here is going to be the public folder which is going to have like public static assets that will serve and then we'll also have an SRC or Source folder this is where
our react application and components are going to go so in the public folder this is actually where the index.html file is going to go because this is a static file there's really nothing Dynamic about HTML so we can just serve that directly so let's go ahead and just copy that we'll go back to the vanilla refactor once again you should be familiar with this before watching this video so we'll copy index.html and we will paste it over to the public directory now with react we are building things with different paradigms we are not including all
of this HTML in this index file we're going to be creating components to deal with this HTML so therefore we can actually strip a lot of this stuff out so let's take pretty much all of the body content and delete it the second thing that we're going to do is change the title this is going to be the react refactor and then just for the moment we're going to comment out the script and save this we'll put a little text in here hello world so this should be a basic HTML document now you'll see in
the bottom right corner I'm using live server so I talked about this in Prior videos it's a vs code extension that you can set up it's running on Port 5500 and that's actually what we're looking at here with the vanilla refactor but if we go back to the base of this you'll see that we now can look at the live react refactor and go to the public directory and now we have a Hello World document now if we wanted to connect some styles to this you can see we have this style sheet left over from
the previous project but it is referencing the CSS directory index.css now for this react refactor I'm going to name this something a little differently we're going to put a new file in here called globals.css and the reason that I call it globals is because with react we're able to kind of scope our CSS per component rather than per the whole project and so this is just a naming convention that I'm using to make it explicit that anything that we put in global CSS is going to apply to everything that we use in every component that
we make and that's because we're putting it in the index.html to start us out I'm going to go to the vanilla refactor and just copy everything from that index.css and paste it here and we will eventually move some of this stuff out of this globals file into component specific CSS files but for now it's just going to all be there and now we have to update our path and this is going to be globals.css and if we save this and go back to the browser you can see that here's our hello world pretty small there
but then we also have the correct background color so we know that the CSS file is connected now if we're just looking at this document this is not a react application yet there's nothing here that tells us that this is react in order to actually convert this to a react application we need the JavaScript to be controlled by react and therefore we need a script tag so what we're going to do is create something called an entry point you might see this called index.js or you know entry point or it could be named pretty much
whatever but in our source folder I'm going to be very explicit and just call this entrypoint.js and in this file this is where we're going to initialize react now going back to the code sandbox that I had shown you a little bit earlier you can see this pattern right here where the code sandbox is basically importing react and importing the react Dom client and then doing something you can actually find this in the react documentation if you go to add react to a website and then I think at the bottom run the jss jsx preprocessor
let's see so somewhere right here you can see where it's you know calling create root and then root dot render it's not really called out explicitly which is a little bit unfortunate but it kind of shows you how you know you might know to do this but anyways we're going to write this out in our file so the first thing that we'll do is we will import the strict mode for react and the reason we'll do this is because it basically parses through your code and it finds all sorts of mistakes that you might make
when writing a react application it's just a good practice to get into to have that in strict mode but you might say well how are we importing from react when we don't even have that included in our index.html or node modules and the answer is we're really not if we tried this it's going to break so at this point we're going to install some dependencies for our project so let's CD into the live react refactor then I'm going to run yarn init Dash y to accept all the defaults this will save a package Json to
our our folder here now what I'm going to do is add the required react dependencies so really the only things that you need from react yarn add react and then react Dom so let's go ahead and add those you'll see those populate in our dependencies this is all we need to create a react application so now we can go back to our entry point and this should work okay now we need to import the create root method and this will be from react Dom slash client and now here is where we basically insert react into
our HTML document remember react is just a bunch of JavaScript that knows how to basically manipulate the Dom and render things it doesn't actually you know create HTML files for you you have to have an index.html to put it in so what we'll do is we will Define a root element and this is going to be a element that we select from the Dom so if you remember from our vanilla refactor if we go to the JS and go to view.js where we are selecting all of these elements via the query selector and then we're
in the query selector we're basically just looking at the document and selecting an element well we're going to do the same exact thing here we're going to say document dot get element by ID this is the same as doing query selector with a hashtag in front to select an ID it's just a little bit more specific if you have an ID assigned to an element so we're going to get an element by ID and we're going to call this the react root now where did I get this name well I made it up and we're
going to connect it here over in the body so what you need to do is make a div and then you're going to give it an ID and call it react root so what this is doing is it's saying hey here's a container div now react find this container div and put all of your application code right here inside of it so basically we're giving it a container to render into and at this point we've just selected the root element this is just going to be an element now we have to create the react root
so we'll call that root and we will call the create root function that we imported from the react Dom client and we're going to pass in that root element that we had selected so that is the react root and then finally we can now call a react Dom specific method called render and what we're going to render is a strict mode container so now we're using jsx and we're going to render strict mode and then we're going to say hello World react and this is just arbitrary jsx code now what you might notice is that
this is a DOT JS file we could call this dot jsx because we're using jsx in here and then we'll get JavaScript react down here in the vs code language mode so it will just give us some better syntax highlight highlighting in addition to that when we go to basically transpile these from jsx to JS this file extension will allow us to kind of Target this file to do that for so let's save this entry point now let's go to index.html we will for now keep this script out of here and save this at this
point you might say well okay all right we're done with the initial setup for react we've got this react root div and then we've got this entry point.jsx which is selecting it and rendering the react application within it but if we were to go to the index.html in the browser so our live refactor and let's inspect this if you inspect this it's just going to show you the react root but there's not going to be anything within it and this makes sense if you really think about it because what's happening when we re request this
right here from like some server in this case our local computer is the server that is serving that index.html file to the browser but basically what's going to happen is the browser is going to load some path and that path is going to make a get request to some server the server is going to send back an index.html document then what the browser is going to do is it's going to read through the document and it's going to parse through all of the HTML and it's going to also parse through any script tag that it
sees you can see that we've got a script tag here but that's just injected by live server that's not anything to do with the application that we've built so what's missing well as you can see in our HTML document aside from this live server script we don't have any script so this code that we wrote in the entry point.jsx this is just living in isolation right now it's not actually imported and run within our index.html document yet and so therefore it has no way to select that route and render anything so your next option your
next guess might be okay let's just uncomment this script script and then we'll go to the source slash entry point dot jsx all right so we're trying to import that script but if we go to the browser that's obviously not going to work if you go to the console you're going to get loading module from blah blah because the mime type was wrong there's just going to be all sorts of problems here and the reason is because a jsx file one that has actual jsx in it is not going to natively run inside the browser
you might get this stuff to run we could probably see if that worked so let's console log the root element looks like even that's not going to work and I don't really care to debug that because we know that this is just not a good strategy in the first place so pause the video and just ask yourself if we can't do this then what can we do how do we actually get that JavaScript to run inside the browser in a script tag and the answer is that we need to transform the code that we have
written the jsx code into vanilla JavaScript script and then put that into another file and then import that other file right here if you watch the prior video also linked in the description where we took the vanilla JavaScript build and we refactored it to typescript you might remember that we had some sort of build step where we had to take the typescript code that was not valid in the browser and we had to compile that with the typescript compiler into valid JavaScript that we could run in the browser this is no different what we have
to do here is we have to not necessarily compile I think the correct term here is to transpile so let's actually go look that up so transpile versus compile I should know this so compiling is the process of taking the source code written in one language and transforming it to another transpiling is the process of taking source code written in one language and transforming it into another language that has a similar level of abstraction so in other words it's not a real huge difference and we don't need to get hung up on the the differences
there but what I want to take you to now is a website some documentation for Babel or Babel I never know how to say this and on the home page if we just zoom in a little bit what you'll see is that it gives you an example of how you put in some Next Generation JavaScript and then you get browser compatible JavaScript out in other words Babble I'm just going to go with Babel is a tool that will take some sort of JavaScript some a flavor of it that doesn't work in a browser and make
it work in a browser one of those things that it can do is jsx so if we come down to the presets this is just the the playground you can see that it's using the react preset so it knows you know that we can write jsx code and if we were to write you know something like just a regular P tag hello world and then close that P tag off what you'll see on the right is that it's using the react library to create a new element in the Dom and then render the hello world
text within it we could also wrap this in say a div so we're just writing what looks like HTML but really this is jsx so now we're creating elements and we could probably I think in this playground even write a component so this will be a function component and instead of just this isolated jsx we will return that from the function and oops format this a little bit better so you can see that worked and it's returning a JavaScript function that returns these create element calls and then we could even render that so let's make
our app and then we want to return the component as a jsx component and now you can see that all of this is going to be valid JavaScript so this is just a DOT JS file that we could include in that index.html file so this right here is totally valid to put in this script tag this right here is not valid and it will not work now Babel under the hood is running a bunch of code against this to get it to this state and therefore we're going to need some intermediate step to get it
to this point now once again just like there's many ways to create a react application there's also many ways to transpile code and Babel is not your only option another option is you could use if you're writing this in typescript which hint we are actually going to convert this to typescript in just a few minutes you could use the typescript compiler to do this because the typescript compiler actually supports jsx you could use Babel and you could also use something like webpack which is a build tool so that's what we're going to do I know
it's not it this is not the latest and greatest tool chain this is mainly for educational purposes but if we go to some more documentation let's go to webpack docs and now we're dealing with a bundler so it does more than just bundle code but the purpose of using webpack is to take a bunch of different JavaScript files and squash them into one Javascript file that we call a bundle if you really want to understand why we need a bundler I've written a post that I've referenced a couple times at this point throughout this video
series and it's the Scripps versus common JS UMD AMD es6 modules and if you come down to the bottom let's see so the last step module bundlers this is where I go through and explain why do we need a module bundler in the first place so I'd recommend reading this short post just to get a better understanding there but our goal is to basically take this entry point jsx file and then we're going to have many many other jsx files that will have all our different components and instead of coming to index.html and copying this
down and importing every single script that's been transpiled from jsx to JS this is going to get very confusing our goal is to just do this we're going to have one file and it's going to come from the public directory and it's going to be called bundle.js and we don't need the type module anymore because we're using react code and we don't need to worry about that but this is our end State and I actually need to update this because remember index.html is actually in the public directory so we just need to reference it relatively
so the bundle.js will be output keyword output it's not created yet into this public folder and will sit next to globals.css and index.html so the question becomes how do we get it there how do we get this bundle.js to compile into the public folder the answer is webpack or something similar once again this has kind of gone a little bit out of style but that doesn't matter our purposes here are educational to understand what's going on under the hood of react when we set it up in the first place and you'll hear all sorts of
things like oh webpacks so outdated but ultimately tons of projects are still highly dependent on this and will be for many years to come so don't get spooked by you know anyone saying that this is irrelevant this is very relevant and the concepts that we'll learn through it are even more relevant so let's get started there's a lot to this documentation lots of different configuration Concepts and I'm not going to go through these because you really don't need 90 of this for our purposes so what I will do is just start writing the configuration and
we'll come back to the documentation to point out the individual options that we're using so in order to start a webpack a project we need to initialize it with a configuration file now if you go to the documentation there should be something about the configuration here so introductory configuration and you can see it's called webpack.config.js so let's just copy this let's copy that default and we will make in the base of our directory a webpack.config.js file and let's just copy that basic example in there now bear with me a little bit for the next couple
minutes this is going to get slightly confusing and you're welcome to skip over this section if you want I have time for this video so if you want to skip over these details and just get started building the react application you can do so but I would highly recommend going through this section it's really a good thing to understand what's going on here and we'll serve you for the rest of you know your developer lifetime just understanding this stuff you probably won't have to touch it again but it's good to just know what's going on
under the hood so let's take this line by line first off the mode this is in development and if you go to the concepts let's go to environment and right here it says the mode is an option that can be development production or none and this is going to enable certain optimizations that are done in production so webpack will do certain things I believe it's like like minifying the code and stuff like that depending on your environment so we are in development what we can do to make sure that this runs depending on our actual
environment let's say that we were deploying this somewhere what we know is that the process.env.node EnV is going to equal production when we deploy it on some server this is just a default that you know any deployment site or Cloud host is going to assign so if there is a process node EnV we're going to use that otherwise we're going to use development so in other words development is our fallback but we're going to look at the node EnV to determine what to use for this mode now this of course assumes that you're only allowed
to assign development or production to node EnV if you were you know had like a staging environment then this wouldn't work but most of the time it's either production or development so this should work now our entry this is a little self-explanatory so we don't need to go to the docs for this this is going to be the file that webpack will start from it will start reading that file and then it will Trace all of the Imports that have come into that file and kind of just walk down the code tree to find all
the relevant files that it needs to basically bundle up so in our case entrypoint.jsx is going to be that and we are in the root of our folder so we need to look in the source folder entry point jsx so we'll say relative to source entrypoint.jsx that's going to be our entry point and then output is also somewhat self-explanatory it's going to Output a single file we're going to call this just bundle.js and it's going to put it into the dist director now we're going to just rename this instead of dist which is stands for
distribution and it's a very common place to Output your your build output we'll just call this public and the reason being is we've got this public folder and what we want is that bundle.js file to get output to public now some would argue that you kind of want to separate these concerns and maybe you want to Output this to dist and then copy over your index.html and CSS to dist so that it's all kind of isolated into this you know build output but for our project it's pretty simple this makes sense and we can just
output this to the public directory so let's save this we will save entry point and now the question becomes well how do we actually use webpack well you could install webpack globally in your path or better than that you can install webpack pin it to a specific version for this project that's what we're going to do we're going to say yarn add then we're going to add a Dash D because this is a development dependency remember webpack is just here to look at all of our code and bundle it up into something that can actually
run in the browser we don't need it after it has done its job we can just run the code that output and not deal with anything else so what we can do is just add webpack so go ahead and do that and now what I'm going to do is go to package Json and we're going to add some Scripts not necessary but it's just convenience here and something that I want to add is a build script so this will run when we say yarn build is it's going to run this script right here and what
I want it to do is look in the development dependencies and just run webpack so we'll save that and now what's going to happen if we run yarn build so yarn build it's going to invoke the webpack binary that we just installed and webpack automatically knows to look for the webpack.config.js file in the root directory and then this config has basically told the the binary to look at this entry point read through all the code and output it to this bundle.js but if we were to run this we really haven't given it any instructions as
to like how to do this so let's just try to run yarn build and it's saying that we need to install the webpack client I guess I had forgotten to do that so we'll say yes that's going to actually update our package Json you can see that here in Dev dependencies or I'm sorry we're in the final one there live react refactor so now we have webpack and webpack client so at this point we run yarn build and you can see that we're going to get an air of some sort and it says module parse
failed unexpected token you may need an appropriate loader to handle this file type currently no loaders are configured to process this file and what it's complaining about is this jsx that we have written so if we go to entry point by default webpack does not know how to deal with jsx it doesn't know how to transpile this right here and this is where Babel will come in so going back to Babel we talked about how its job is to take this code and turn it into this code and so therefore we need to add something
called a loader to webpack so if we go to the documentation there it says loaders are transformations that are applied to the source code of a module they allow you to pre-process files as you import or load them so I'm going to save us quite a bit of pain here and I'm just going to show you how to get this working with react I'll be completely honest this is confusing stuff I would not spend a whole lot of time beating your head against the wall to try to understand it at a super deep level the
overall goal here is to just understand the process that our code is going through not necessarily all of these implementation details so what we need to do is add a module property and this module is a valid on the config and then we'll say rules and then we give it an array of rules now each of these rules is going to basically say like hey once you see this certain type of file in you know coming from the entry point here's how you actually you know look at it and transpile it and bundle it so
the first rule that we're going to do is we're going to test so this is going to be a regular expression that we're handing it and we're going to say if you see any file that has a jsx extension at the end of it then go ahead and apply this rule but if you see anything in node modules exclude it because we don't want to put that into our bundle and then finally here's where we're going to use a specific loader and that loader is going to be called the Babel loader okay so right here
we're importing something that's external so we need to install that as a Dev dependency if you go to Babel let's we're getting got a lot of tabs open here at this point let's open one more so Babble docs and then let's just go down if you go to presets you can see there's a preset for react and it gives you all this really confusing stuff okay so here we get a list of all the different loaders that we can use so let's start with the babble loader so we click on that and it says disclaimer
it's a third-party package maintained by community members so this will need to be installed and here's the install command you need to install the babble loader Babble core and preset now I also happen to know that if we go to the preset react we'll need this as well so we're going to just kind of combine all this into one command so we will clear the terminal here and then these are all going to be developer dependencies remember because we're just transpiling code so we need to grab the Babel loader so that's for webpack then we're
going to grab Babel specific packages so we need the core module we need the preset M this is basically to just kind of normalize all the different ecmascript versions and whatnot so that we can run JavaScript in all browsers and then finally Babel preset react so we'll install all of those and we go to our package Json you'll see that they're all added right there and now we can come back to our webpack config and this is going to work because we have that installed and then we'll give it some options now this I'm not
going to go into a lot of depth because it's more on the advanced side and we'll just assume that this is going to work so what we first need to give it as a preset is the Babel preset M and once again this is just to make sure that you know all the different versions of ecmascript so ES3 456 2016 blah blah all of those it kind of normalizes it so that the JS that is loaded is going to work in all browsers and then we're going to give it an array where we give it
the Babel or Babel preset react and then this is really important we need to give it a run time of automatic and the reason that we need that is because when we come to entry point over here we are going to need that so that it automatically infers that react is part of this application and we don't have to explicitly import react every time we want to use it so that's the loader that we've set up I know that this whole blob is a a bit confusing but just zooming out the point of this is
saying like hey anytime you see a jsx file that came you know as a result of looking in entry point so in other words anytime you see a jsx file in our project go ahead and use the babble loader and make sure you use the preset react which is basically what we were looking at here in this sandbox so that it takes this and creates this out of it so now we might be able to build our apps so yarn build remember that's going to run our webpack script and you can see that we got
no errors so that's a good thing now we're not 100 sure that this worked yet but you can see in the public folder we now have a bundle.js and it's a bunch of ugly code that has been you know transpiled and this is not something that you want to actually read through before we get any further let's add a DOT get ignore to our project because we've added some developer dependencies and build output and all that stuff does not belong in source code so first let's look for node modules and ignore that and then I'm
going to do this but this is probably not a best practice in any way we're going to look in the public directory and ignore anything called bundle.js and that's just because if you look at this this is a lot of gibberish that doesn't not belong in Source control this is an output of a build and that includes pretty much the whole react library in it so we do not want to put that in our GitHub repository so we'll ignore that let's make sure that that is working so we should not see any bundle.js sorry there's
actually some leftover code from my typescript refactor from the prior video but the the main point is there's no bundle.js and if you look in Visual Studio code when it's ignored it's actually grayed out a little bit compared to the other files and folders so that's just a quick trick to know whether your your file's been ignored correct so the ultimate test is if we visit this index.html which is importing the bundle.js that we just output using entry point as the source does it work so let's go to the browser we can close this out
I'll leave it open just so that we have reference to it and now you can see right here I gotta zoom in a bunch hello worldreact so something worked here because if you look at entry point you can see that that's where we're rendering the hello world react and so we know that our webpack config worked and we are able to render jsx in our browser and if we go ahead and inspect this now you can see in the react root that's where that P tag has been added but there is one problem still and
that is if we go back to our code and we say by Zach or something like that and then we save this entrypoint.jsx well let's refresh the page and uh oh it's not actually working and the reason being is because every time we want to add something we need to rebuild the application so we need to run yarn build again that's going to compile everything and bundle it up and now you'll see Hello World by Zach obviously this is a poor experience as a developer we do not want this to you know we don't want
to have to come and say yarn build every time we make a change so this is where the webpack dev server comes in and that is basically going to look at your webpack config and on any change to any file that is included there it's going to rerun this build step and output it to the bundle which is then going to be served to index.html and believe it or not this didn't used to be this easy but now you can basically just add one extra command here so instead of build we're going to give a
Dev command which is our development only command and we're going to say webpacks serve and while we're here I'm also going to add a build production script and you know how we talked about over in the config we've got this process node EnV if we want to build it to production we could just pass something like this so set the environment variable and then call webpack so if we ran yarn build prod it's going to just apply some optimizations to everything and if we look at the bundle.js you'll also see that there's a license emitted
here that would probably be good to include so let's let's go ahead and just say bundle all and that will include the license as well but if you look at this now it's optimized where like everything is minified it's all you know squashed together which makes it a smaller bundle to load over the wire over an HTTP request so yarn build is going to create something with lots of spaces and it's not optimized and then yarn build prod is going to optimize that but anyways we want to run this in development mode so let's run
yarn Dev which is going to run the webpack serve command and this is going to say for using this command we need the webpack dev server package so we'll accept that you'll see that that was added down here at the bottom and now you can see that it's a running process that is just waiting for changes so we'll go back to our our index.html you can see Hello World by Zach and then if we go to the entry point jsx let's remove that and save it you'll see that this just refreshed Reloaded and if we
refresh this page it's not doing anything ah so I am just not thinking whatsoever and totally totally messed this up so if we try to go directly to index.html in the browser and we are running this over live server so localhost 5500 we're just going to get the static contents of the public directory now if we look at the output of the webpack dev server it says that the project is running at localhost 8080. so we can kill the live server at this point so we'll close that server now if you reload this page we
got it way zoomed in but if you reload this page it's going to say unable to connect but if we go to localhost 8080 now you'll see here's our hello world react is working again and then if we go back and make a change and save that it's going to hot reload and update in the browser automatically so the mistake I made I just I was trying to look at the static contents from live server we need to go to a different port here the next step here is to replace this content with our app
so we can come over to our files and next to entry point let's call it app.jsx and this is just going to return a basic application wrapper that we're just going to consolidate all of that logic to we can go ahead and use es6 modules so we'll export a default function called app and then this will return some div and then say my app now we can import that into the entry point so import app from app and then replace this content with the jsx element just like that and we're getting an error I think
we might need to say app.jsx yep that's all we needed to do it couldn't resolve that without the extension and I believe that happens because our webpack config doesn't know how to kind of parse through and import that if we don't have the extension on it so now this entry point is basically done we don't have to look at this anymore because it's all set up and now we're going to be working from this app.jsx so let's go make sure that it works my app now let's connect some per component styles so we're going to
use just vanilla CSS and one way that we can do that is by using CSS modules so we can say app.css and let's go ahead and select everything in this app and make it the color red so this is not going to work by default if we just look at our app but all we have to do is import and then we just import the app.css now you'll see that there's some errors down here and we're not able to compile and that is because we have not specified a CSS loader right now we're in we
have an entry point of this which is going to eventually make it to app.jsx then it's going to import app.css but we don't have any rule for that right now we're only looking for jsx files so if we go back to the documentation for webpack right here and we go back to loaders you'll see that there's some different different categories and one of them is styling so we have the style loader add exports of a module as style to adopt to the Dom or css loader load CSS file with resolved Imports in return CSS code
we're going to need both of these and these are third-party packages so we'll have to install them so let's come down to our terminal open up another one actually we'll let's just cut this cut the server for now and we'll add this as a developer dependency we'll call it we got to get the style loader and the CSS loader once we've done that we can add another rule so remember rules is going to be an array and we can specify a CSS rule so here we're going to test and look for any dot CSS files
so that's what we're looking for and if we find them we're going to use the style loader and the CSS loader so let's save that that's our final rule that we'll add and let's run yarn Dev and now you'll see everything compiled successfully and if we go back to the react refactor in refresh we had to refresh that first time because we had restarted the server so it's red and now if we change this to Green it's going to hot reload and everything is going to be green so at this point we have our entire
webpack configuration done we have our entry point to the react app setup and our index.html is importing that bundle that we are you know basically compiling and bundling together with the help of webpack and Babel I know we've spent a solid amount of time just setting up this react app in the first place but I hope that it has been educational and given you a better sense of what's going on under the hood this is basically what the create react app and all of the other you know Frameworks that lets you set up a react
app they're all doing some version of this under the hood but that's abstracted away from you and so oftentimes you don't understand what react actually is at its core level so there's one more thing that we're going to do and I kind of debated this a little bit but I want to build this react app with typescript rather than you know doing a whole another additional video where we refactor it to typescript I think using typescript is really awesome especially with react apps and across the stack and it's not going to be too difficult to
translate what we have here to typescript and it will also give you a better idea of how we translate vanilla to typescript from a build step perspective if you're not interested in this and you just can't wait to get started once again timestamps are in this video skip to the build where we actually start building out this application and you know translating it from that vanilla JavaScript to react so let's cut this server and I will also add that there is a typescript branch and then a main branch for the repository in the description that
follows and basically has all the final code here this is a combined video so you can find the vanilla JavaScript react app in the main branch and then the one that we're building in this video will end up in the typescript branch so I'll leave that in the description and kind of label it so that it's clear so if you haven't watched the prior video where I converted a vanilla Javascript app to a basically vanilla typescript app go watch that because it will cover a lot of the basic concepts that I'm going to gloss over
in the next few minutes so I'll leave that in this the description but the first thing we need to do is install typescript so we'll add that as a developer dependency once we have that then we can run yarn TSC which is the compiler and we can run init this will create a TS config although I missed something here it's not a knit it is dash dash init so that creates a tsconfig DOT Json file now there's all these different options here I'm going to go ahead and just copy the final one just because it's
going to save us some time okay so this is the basics um the things that I'll point out here this is pretty much the same as that prior video that we did but just to point out we're targeting es6 so that's the version of JavaScript that the build output will be and there's one thing that I've left out on purpose here and that is a property called jsx so let's go to the typescript documentation so typescript and then docs and then go to the reference for the configuration file so I'm not really sure where this
would be typescript tooling reference let's just search it config writing a configuration file gosh this is very indirect I want to just go to the reference for this let's go typescript config reference not sure why that's not searchable easier but maybe I'm doing something wrong so anyways let's look at the let's find that jsx property that we had just talked about so that's down in language and environment so jsx and it says controls how jss jsx construct constructs are emitted in JavaScript files This only affects output of JS files that started in TSX files so
we have a couple of options here we have react react.jsx jsx Dev preserve and Native this preserve option would be good if we were wanting to basically compile our typescript to JavaScript but leave the jsx as it was and then use Babel to take jsx and convert it to JS now for this simple of a project we don't really need all that in direction we can just use react jsx and get all of that to happen for us so let's give it to the jsx pro property and we'll pass in react jsx and so now
the typescript compiler is not only going to look at our typescript and convert it to JavaScript it's also going to recognize jsx and convert that to JavaScript so it's kind of an all-in-one solution which means that we can remove all of the Babel stuff that we had just added that was good to understand you know how you would do something with a vanilla application but if you're using typescript we can remove a lot of this complexity so instead of using all of this Babble stuff we're going to use the TS loader and if we and
we're also going to need to change this to TSX so it only searches for TSX files finally we'll need to update all our file extensions to TSX so that it knows to grab those we'll come back to these errors in a second those are type errors that we're getting let's just save this for now so now we have all TSX files and let's go back to this TS loader if we find this in the loaders it's right here for transpiling it says it loads typescript 2.0 like JavaScript so this is also going to be an
external one I believe so we'll need to install it so let's open up our terminal here and look at our package Json right now we've got all these Dev dependencies we have Babel core preset M you know all of these Babel stuff and we don't really need it anymore because typescript has taken over the typescript compiler is taken over and done all of that job in addition to compiling typescript for us so we can yarn remove all of that stuff I'm just gonna take a little shortcut and just delete all that we still need the
CSS and style loader and then we of course need webpack because we're still using that so let me save that and just yarn install so that's gonna refresh everything and then let's go ahead and add a developer dependency called TS loader so now we have the CSS style in TS loaders in our project and that should work for the webpack config now if we try to build this we're going to get some errors oh okay duh I need to update this to TSX because we're not able to read the entry point all right so now
we're getting some errors but it's a much better error it's looking for type files for everything for react and all that stuff and so now we just need to install those you'll see an entry point it's going to say try npm save Dev types react so that's all we're going to do is save the react types and then I believe we also need the react Dom types and you can see this goes away root elements just complaining that it could possibly be null so one thing we could do is we could say if there's no
root element then throw new air react to app configured incorrectly and now that's going to solve that because we know that that will exist I tend to just put a exclamation at the end to say like hey we know that this root element is going to be found that's okay to do in this case I think but yeah if you wanted to be safe you'd throw an air or log something or whatever to make sure that that root element was selected correctly let's try one more time yarn build and now it's successfully built things into
the public bundle.js so that compiled typescript to JS and jsx to JS so everything can now run in the browser and let's make sure that that worked by going not to localhost 8080 but to the static app that we had so localhost 5500 we cannot connect to that because live server is not running but if we hit go live on live server and then refresh and go to live react RE Factor and then the public directory you can see that we have an app running with some styled green text so that means that our our
final build worked okay and then if we were to go to yarn Dev and run that Dev server at localhost 8080. and refresh you'll see that it refreshes and once again we can go change this to you know red again and that should hot reload and change the the CSS of this app let me close a bunch of stuff out we'll close all the save files collapse all this and I'm going to collapse this terminal it's just going to be running in the background and if we run into some errors we'll we'll pull it up
again so if you remember from the prior video that we did where we refactored everything the live TS refactor we basically took the tic-tac-toe game and we turned it to a typescript code base so we've got the app we've got the store and we've got the view and then we have our types file this is what we're going to be referencing and we're going to be just lifting it over and putting it into react code while we're doing this I'm going to run a live server and that's going to be over here on this tab
we'll just grab localhost 5500 and I'm just going to run the vanilla refactor just so that we have a working final version of the game so this is just vanilla JS nothing fancy this was from the first video this is just our reference point and we will eventually reach that same point over here in the react refactor the first thing I want to do is bring over our types file so let's copy this file of our types and put that in source and looking at the types we just have a player a move game status
game and game State the next thing that I want to do is copy over the HTML so we had index.html that had all of this structure for us and we had the main tag as well as the footer and then finally a modal that opens when the game ends I'm going to go ahead and copy all of this and just to start us out we're in the live react refactor again and we'll go to app.tsx and instead of my app we're going to return all of this HTML so all that HTML is going in there
it's going to yell at you because we need to put a fragment around this because we have no parent element to all of these and then of course we need to update all of our class attributes to be react compatible or jsx compatible attributes which will be class name so let's add that as a class name so that should fix a few things then all of our comments we'll just get rid of them right now those are not valid jsx and then finally you'll see that the style needs to be converted this one will be
will be a little bit annoying to do so let me just kind of speed through this real quick so I'm just copy pasting everything from the final version Okay so we've converted the HTML to valid jsx no errors going on here so we should remember we have this server I'm just I guess I'll keep it open here just so we can see a little bit of it so that should be reloading every time we save and now you can see in our react refactor we've got something working we have red text everywhere because I have
not removed from our globals or no not globals it was app.css where we added this let's get rid of that because that's annoying and you can see now we have all of the structure and style to our application but if we try to click anything it's not going to do much because we don't have any event listeners or anything hooked up let me go ahead and just close all these tabs we don't really need them anymore so the first thing that you'll want to do when you convert something over to a react application or you're
just building a react app from scratch is look through your structure of your HTML and find what parts of this will be best as an individual component so the first one that's pretty obvious that I'd like to kind of rebuild is the footer this could be its own component and so what I'll do is I'll just start using this convention let's add a new folder called components and then in components I will just add a footer.tsx and then the styles for that footer will be footer.css one could argue that you know this organization is not
the best but it'll work for now so the template that we're going to work with here is basically we're going to export the default function from each of these component files and I'm trying to do this in the CSS file oops okay so that looks a little bit better so we're going to export a default function and then return some jsx from that and then we're going to import the footer.css at the top so it gets all of the component specific styles and then here we can just go back to our app.tsx and let's just
copy the footer entirely and paste it right in here so this will self-contain the footer and I don't think there's anything that we need to modify here so we can just leave that as is and I don't actually think that we yes we do have some styles for that so in our globals.css where we have all of our Styles right now that applies to everything we want to come down and find the footer Styles so right here this is where all the footer styles are let's rip those out and add those to footer.css and then
save both of those and so now the Styles and the HTML should be scoped to this one component and we can finally come back to app.tsx and remove the footer and replace it with our footer component and if you hit command period it will add that import for us as you can see right here so it's added the footer and our webpack is going to hot reload and you'll see the footer right here down at the bottom it's working and if you go to your developer tools let's actually look at Firefox extensions and let's look
for react and grab some grab the react developer tools all right so now we have some react developer tools and I think if we refresh this yep we can now see the components so you can see that the footer is one of our components now so this is let's zoom in a little bit I guess I can't zoom in unfortunately I don't think I can zoom on the developer tools too much it's pretty small okay the next thing that we can do is break out the modal itself so this right here is the modal that
we will pop open when someone wins the game we can bring this over to the components and call it modal.tsx with modal.css as the styles and I'm just going to use this template again so export default function remember to import our CSS and now what we'll do is we'll grab all of this right here and return it from this component we'll go to globals.css and find all the modal Styles which we've organized is another reason to organize your CSS so that when you refactor it's pretty easy to know what goes where so we put the
modal CSS here we'll save Global Styles we'll save that component and then we will once again add the modal oops we need to import that from our components and you're going to notice that this is going to mess things up a little bit so if we come to our refactor well actually it doesn't mess anything up because we still have that hidden class so if you'll see the modal hidden class we're going to now control these sorts of things with react rather than classes so I'm going to get rid of that I'm also going to
start removing all these data IDs because we're no longer having to select the elements we can just grab them directly from react so now once we remove those classes you'll see down here at the bottom you get this weird modal happening and let me see what's going on there so if we look at these Styles I think what's happening is we are setting the position to be fixed but we're not giving it a reference point of where it should start so let's give it left to zero and top zero and now that should work okay
once again you can't click anything there's no JavaScript functionality quite yet but that should be styled correctly and then if we come to app.tsx now instead of using a hidden class that will toggle with some in you know implicit event listener we can just be more declarative about this and keep a state of whether the modal is open or not and then render it conditionally here so I'm going to just create a variable right now you'll see how this comes into play a little bit later but we'll just make a static variable called show modal
and we'll set that to false to start once again you'll see how this changes in the future so don't get caught up on how I'm not using State correctly and stuff like that so show modal we're just going to wrap it in this just like that so now we will be able to conditionally show the modal and then furthermore what we might want to do is add some props to modals so we can pass what we want to show remember we are going to control this text right here with JavaScript so it would be good
to add a message as props and then we can define a props type up here that has a message of type string so right here we're destructuring from the props object and we're typing it right here and now instead of player one wins we can say that is set to the message that we passed to the modal as props now since this is a required message if we go back it's going to complain because we haven't given it all of the props for now we're just going to say player one wins because we don't have
anything Dynamic to pass quite yet but now you can see if we were to toggle this from false to true it's going to show the modal in pass in player one wins and just to check we can look at our components again and now we have a footer and a modal in our app so let's put this back to false for now so that's not going to show and move on to the next part that we're going to refactor into components all right so looking through the rest of this we could of course make a
scoreboard component but this is not a whole lot of HTML I think we'll just leave this here that's really a style preference whether you'd split that out this right here we can simplify using some react conventions so this will be rather simple to do so we'll just open up some brackets here and I'm going to make an array that goes one through nine and you could of course create this with some JavaScript but let's just be expressive about what we're doing it's a lot easier to follow and then from here we're just going to map
and we're going to call this the square ID is what each of those numbers will represent and then for each of the square IDs we're going to one of these div elements now whenever you map across multiple you know elements in an array react needs to know the key that you're giving it and the reason is so that it has a predictable order that it can put these elements in and when it goes to re-render and figure out whether each element has changed and it needs to re-render in the Dom it will look at that
key to tell tell it that so we don't need this ID anymore we also don't need this data ID because we're not using that old vanilla syntax we do need the key here as I just described and we can pass it the square ID which is basically going to be the number on that square and then furthermore clean our vanilla application we were using JavaScript to render an i element or basically an icon in this div so if we look back when we click something or sorry this is the react app we have if we
click something in the finished app it will put one of those icons within the Box so what we can do in react is instead of implicitly doing this we can be or imperatively doing this we can be more declarative and just say let's just put an i tag in there give it a class name and we know this is going to be fa solid now we're going to have conditional classes based on which player is currently up we haven't implemented that quite yet but for now I'm just going to pass in fax and then we'll
say I think that was yellow was X or no I think it was turquoise is what we had for player one we will of course come back to this but if we render this now and then at this point we can get rid of all of these so just reducing that amount of code now you'll see there's an X rendered into each of those so we'll leave that there for now we'll come back and make that Dynamic later scrolling through we've got the menu this could actually be a good use case for another component so
we'll make it a menu component and we'll export the default menu function oops and then this menu is going to have some props so we'll initialize that and then we also want to import the menu.css which we need to add over here so there's your menu CSS let me close a bunch of these clean this up and we'll just open oops this is from the final so there's our menu and our menu CSS now the first thing we'll do is let's go over to globals and look for those menu styles so it looks like we
got them right here so let's copy all of those I think that's all that we need throw those in menu CSS save globals and then we'll go to index.html or I'm sorry not index app.tsx and at this point we can grab all that HTML whoops did that wrong so we'll cut that out of there and then in our component we'll just render that div right there let's clean all of these data IDs up because once again we don't need that since we're working in react now but pretty much anywhere that we have one of these
data IDs means that we're registering it for a click listener so we'll have to set up those click listeners here so what I'm going to do for this menu is give it an on action property which is going to have an action type which will either be a reset or it's going to be a new round you could of course do this differently however you want I'm just simplifying things so that all we have to do is check the action type and then we know which of these buttons was clicked so we'll come down to
the buttons themselves and we'll say on click and this one will be an on action oops we haven't passed the props yet so let's initialize these so there's your on action and then there's your props so that's grabbing from here and typing it out so now we can say on action and this will be a reset as you can see we get this typescript support because we have this Union type so there's your reset and then here's another click listener we'll say this one is going to be the new round so once again you could
split this into two it's just stylistic you could comment this out and say on reset void and then on new round void and then replace these with those two different ones and then come down here and instead of passing the key we'll just say on reset and on new round and that would be the same so same thing just a stylistic concern so I'm going to go back to my original I like that a little bit so now we can throw the menu here where we took that jsx out so there's your menu and then
we of course need the on action we'll fill that out in a second so let's import the menu command period to get vs code to do that for you you can see it got imported right there and then the on action for right now we're going to just put a placeholder in there and it's going to pass us an action because that's what we defined and we're just going to console log it for right now we'll eventually hook that up to something now if we go to our app when you click the actions menu you're
going to see in the console it should and let's refresh oh we're not getting anything because we set those listeners on the menu items but we also need to listen for a click to the topmost menu so what we're going to do is put a click listener on the actions button and we'll handle this internal to the menu so we'll say whether this is menu open will be a piece of state that we're going to introduce using the use State hook and then what we'll do is we will look at the let's see we've got
a function and we're going to set menu open and basically we're going to implement toggle functionality by looking at the previous state and returning the opposite of that so it's complaining about this because we haven't initialized this to anything so by giving it a false default State that's going to type our use State and this is Boolean because it's going to use type inference and it's going to initialize this to be closed but when we click that actions button it's going to basically toggle the menu open and closed we can verify this by going to
the UI and clicking this and it's not going to do anything because we're not actually reading this menu open state we want to conditionally render this piece of jsx based on whether the menu is open now we have this leftover hidden class which we need to get rid of because that will override this Behavior so now let's open this up click actions and you can see we can toggle this back and forth the last thing is we need to look at this icon and remember in the the vanilla app we had this flipping depending on
the open state so we can come down here where we're rendering that icon and basically say hey if the menu is open we're going to render something otherwise we'll render this so I'll copy this to both of them so right now it's going to be down on both but let's go ahead and put menu or Chevron up when the menu is open and Chevron down when it is closed so there you can see it flips now there's a slightly better way to do this and while we don't necessarily need this dependency it's something that I
use and it's pretty helpful so we're going to add something called class names so we'll say yarn add class names this is just a utility really just a utility function is all this represents and if we use that we can refactor this code right here and in our class name we can import class names so we'll go to the top and say import class names from class names and you can see this is just a utility a simple JavaScript utility for conditionally joining class names together pretty common that you'll see this within react so now
what we can do is we can say we always know it's going to be f a solid so that's similar across the two the two and then depending on whether the menu is open we will either use the Chevron up or the Chevron down and delete all this so now rather than conditionally rendering the entire element we're just conditionally rendering the class names which is similar to our original implementation so this is a good one for me to pause on and kind of show you what react is doing for you versus what you'd have to
do in a vanilla app so if you remember so this is just the menu and if you remember in our vanilla refactor or actually let's go to the live TS refactors the latest one we did and we go to JS and look at the view and then let's go to the event listeners where we binded the click on the menu so this first one is where we're binding The Click event on the menu button and that let me let me just do this side by side so you can see it better so here's our react
on the on the right and then vanilla is going to be on the left so vanilla react and you can see that let me zoom out just a little bit here's our actions button and here is our click listener on that button then here's the state that controls whether it's open or closed now that right there is the same as registering an event listener on the button over here in The View and then we're calling the toggle menu class which is down here somewhere in the toggle menu class is going to select the items in
the button and toggle some Styles in a border and then figure out which icon to throw on that and that is being implemented right here where we're deciding which one which icon to put and then whether to show it as open or closed then furthermore when we come down here to the menu being open or closed here we're conditionally rendering the menu items based on whether it's open and you can see we have to implement this whole toggle menu and entire close menu to do that when it's pretty easy to just say like hey if
that state is true then render it otherwise don't so that's just kind of how we can simplify our lives a little bit and then finally we have the action handlers where we register something that happens when the game resets or there's a new round and you can see that we will register that on the game reset right here so that's what we're doing with these on click listeners so just kind of a before and after look to see how We're translating things so at this point we can come back to our game and we can
open and close the menu and if we click one of these we'll get something printed to the console telling us which one was clicked now we haven't actually handled those events yet but we will do those shortly at this point our app.tsx is pretty much done you could of course refactor this even a little more and add more components to clean this up but this is pretty readable at this point and I don't really want to try to go any further because there's no reason to so now we need to add the concept of state
to our application and if you remember from the TS refactor we had this entire store class which was responsible for at the very bottom basically saving our state to local storage and then dispatching an event that said hey this state has actually changed and then the app.ts was listening for that event here and when it heard that event it would re-render The View with the new state now this whole process is totally native to react it is in if you think about it what this is really doing is the view is reacting to a state
change in re-rendering something so the pattern that we've used here is a very simplified oversimplified version of what react is doing and what the purpose of react is we just had to do it in a much more indirect imperative fashion rather than the declarative fashion that we're doing it in by just you know saying like hey if this state exists like if show modal is true render the modal we really don't need to do anything more complex than that but because we're using react now just because we're using react does not mean that our state
is going to like change its shape or anything we're still tracking the same fundamental types as defined here so all we can all we really need to do is redefine a use State hook that will keep track of that game state in the main app and then we'll read that state in our jsx to conditionally render things and make things happen and make it interactive since all of the state works together and none of it's like isolated from one another it makes sense that we would throw this in a single state variable so we're going
to call it State and then just use the convention for a use State hook and we'll import that to react and we of course need an initial state that will pass here if you remember from the original so let's go back to the store the initial state that we passed was this right here so what we can do is just copy this object and paste it into the default or basically the the function parameter is going to be the default State now because we're passing this object shape to the use State hook use state is
going to use typescript generics to infer the type of state and if you hover over State it's going to give you that object shape so we could explicitly Define that right here and put it in the generic and Define the type of state that we're dealing with but it's just easier to let it infer that and so now we have a strongly typed State object now this is where things get interesting so we have this state object and if you remember from store we are just mutating this state or changing it in a couple of
places so when a player moves we are pushing a move to the current game moves array and when we reset the game we are pushing current round games to the history and then when we do a new round we're pushing to all the all games array so those are really the only places that we're changing the state and then the rest of it is going to be something called derived State and that is basically where you are constructing a different or you're constructing a set of information that you have derived from that raw State object
and two good examples of this would be our stats getter and our game getter and in the previous refactor that's why I called that derived stats and derived game is because we're basically in both of these we're reading the current raw State and then we are calculating things and returning that to our application so that it can use that information to do things so same thing here we're grabbing the raw State and then calculating all this stuff we're calculating if there's a game winner the current player in the status of everything so this is all
derived State and we can actually you know what you might be tempted to do is put you know derived State and then set derived state in some use State call but really you don't need to do that there's no point in doing that because now you have to keep these two State variables in sync with each other if you read through the react documentation it will kind of explain to you why that's a bad idea all we really need to do since this is a pure function is come down here and Define our game object
and then we need to make a method to derive that so let's call it derive game and then we also need to derive stats not State we need stats so these are two empty functions that we've defined and here we're going to derive the game and then stats we're going to derive the stats now of course we need to pass the state object into each of these and it's going to yell at us because we haven't defined that as a argument so all we need to do here is say State and then we need to
define the state shape now this is where we need to start typing it if we go back to our types.ts that we had defined at the very beginning we have this game State key that we can use so we can pass that here as game state and then import that as a type we'll also put it right here so state is game state and now when we pass the state object into derived game and derived stats it's going to accept it and at this point it's just a copy paste exercise we'll go back to our
store which was again let me remind you this is from our prior refactor this is our vanilla application not our react one all we need to do is grab from stats we can copy the return type of stats and then in our derived stats we'll just return that and now we're no longer referencing this dot player that is going to be we need to Define that so we'll do that up here so if we go back to store I think we have a players array or no this was in our original app is where we
put that so here's our players config so let's copy that to the top of our app.tsx file so there's our players config and then now we can just grab that from that scope the global scope here and map through it and we have a derived stats object so before we get any further let's just console that log this so console log stats because we've implemented that function and if you go to the console here and refresh you'll see that we have printed this here twice and the reason that it gets printed twice is because we
are in strict mode so if you go back to entry point and see this wrapper right here when we're in strict mode react is going to re-render each component two times and that is to catch bugs that happen and I'm not going to go too far into that but that's why we're getting both of these re-renders not just one but anyways we get the player with stats and this derived object where it says player one has zero wins and player two has zero wins and there are zero ties so just with that information we can
start to populate our react application so if you go down here to the bottom you can see that we have this static numbers down here denoting who has what number of wins so what I'm going to do is grab the stats array and we know from our config that player one is the zero index and player two is the one index of that array so all I'm going to do is interpolate a variable here and we're going to grab the stats derived state and we're going to look at the players with stats and grab the
first player and then we're going to print the number of wins in that slot right there then we can also throw the number of ties so stats dot ties and then finally stats.players with stats we'll grab the first index which is player 2. and pass in wins right there so at this point our player one ties and player 2 are getting dynamically populated and that part is done so the last thing that we need to do is Implement our derived game function right here and we can do that by another copy paste so store.ts from
our original project not the react one we had this getter called game and that was basically just recalculating some things and returning some derived state so let's paste that in there we need to reference players from the global scope here and there you have it I think that should be pretty much it we're referencing state right here and that should work so now if we print the game so console log game and refresh here's the game we've got the current player which is player one there are no moves yet and the status is complete is
false there's a couple things we can do now let's get rid of this console log and let's also get rid of this show modal static variable so get rid of that we can grab that from the game derived State now so instead of show modal what we can say is hey is the game dot status complete and if the status is complete then we're going to open up the modal and instead of a static message we will say game dot status I think we're going to need to do this dynamically so if there is a
winner we're going to say game.status.winner dot name wins otherwise it's going to be a tie so you can see how we're just reading directly from the state to get what we need whether we need to render this and open it up and what the message should be when it happens but of course this isn't going to matter if we're not rendering it within the game itself so now what we can do is read the current state in the current game and figure out which squares need to be populated so right here remember this is where
we are looping through all nine of our squares on the game board and rendering an icon if there's a move in that slot so what we can do is grab an existing move so let me show you where this originated from so if we go to our original project and we go to the app.ts I believe that's here you can see that when a player moves we are checking for an existing move and if there's an existing move we are returning because a player can't click that twice and then we are calling Player move furthermore
in The View to figure out you know which squares need to have icons we have this initialize moves method and what it's doing is it's saying for each Square on the game board see if there's an existing move and if there is an existing move then we're going to basically simulate a move and populate that square so with react all of this logic is way easier to do so we can basically just copy that logic right here and we're not looking at moves we're looking at we need to look at the current game moves and
now the square ID is already a number so we can just replace this entirely with square ID So within this map function we're figuring out if there's an existing move and if there is an existing move we're going to render that icon there now also remember on each move we are we have the player object available to us so let's refactor this right here the class name on this icon rather than a Static X that is turquoise we can use class names so we'll wrap that and let's just start over here so it'll be fa
solid no matter what and then we're going to take the existing move grab the player and then give it the color class and then we'll also take the existing move dot player dot icon class and that will tell us what color and what icon to render right here if there is an existing move so now if we go back to our game the board is going to be empty and we still can't click anything because we haven't listened for that event so the last thing that we have to do to make this game interactive is
add a click listener on this div for this square that we're listening for so we will attach a callback function to this and we'll say if there's an existing move we're going to return early so we're reusing this that we established up here so if there's an existing move don't do anything otherwise we need to handle the player move and this is going to require all the logic for handling a Player move so I'm going to separate this out into a hand handle Player move function and then I'm going to pass it the square ID
of the clicked Square and then I'm going to grab the game dot current player and then we need to Define this function now so we'll come up here and we'll say function handle Player move it's going to take a square ID which is a number and then it will take the what do we say the current player so player is a player so now what happens is if there's an existing move return early otherwise handle the player move and that's going to be defined in this function right here so thinking back to our prior game
how did we handle a Player move well let's go to the view this is our original game not a react app anymore and looking at the view this is actually not what we should be looking at because this is all handled by react we already implemented that so we need to look at the store so here is the player move Handler basically what we're doing is we're getting a copy of State we are pushing a move to the current game moves and then we are saving that state so let's go ahead and just copy that
paste it here and instead of this dot get state we will just grab actually let's comment this out for just a second when a player moves we know that we need to set the state so let's call set State and to get the prior state that we need to deal with we can pass a callback and this previous will represent the prior state from the prior render snapshot so we can access that here so if we wanted to now place this logic in the set State callback and uncomment it we can do a structured clone
of the previous state right here then we can push something to the current game moves and then instead of saving State we will just return the state clone from this set State callback and then the only thing we update here is we're grabbing this from the argument so player goes directly here and then what's it complaining about this argument is not assignable to parameter of type never and it's saying that current game moves is of type never array and that's because we did not explicitly type this as a game move so now we'll come through
and actually type this out a little bit and if we wanted to what we could do is just cast this we can say as game State and game state is from our types.ts right here so we can cast that to a game State object and that's going to fix this because now it knows that the current game moves is a move array you could either do that or a better way to do it is just say use state is of type game State and now that will explicitly say like hey the object I'm assigning here
is of type game state so now if we handle the player move we should start to see some interactivity here so you can see that our app is starting to work and it detects a player win now if we click play again it's not going to do anything and that's because we haven't set an event listener on the modal so if we command click the modal to open that file you can see that we're going to need an on click Handler and that's going to happen when the user clicks play again so on click and
then we'll pass it that on click Handler which is going to be in props so this is really just a way of us to basically tell the outside world that's consuming this modal component hey there's an event and it's an on click event that means that the user wants to play again so now we'll come down here and we'll say on click and we need to do something to close the modal and update the state so in this case we need to reset the game so reset game but the problem is we don't have this
implemented yet so similar to how we implemented the handle Player move we will also say reset game oops and now this is going to be a function that we'll call when that modal is clicked so similar to how we are just calling set State and using the previous state to find our next state we can do that here in reset game so set state will grab the previous state and now we have to do something with that previous state and derive something and return the new state that we want the game to be in once
again we have already implemented implemented this in our prior refactor so let's go back to store.ts which is where we implemented this and you can see that we have a reset method and then we have a new round method we can pretty much combine these into the same method and just have like a Boolean check to see whether it's a reset or new round so let's first copy over the reset so we'll paste that in and instead of get State we're just going to pass the previous Right Here and Now what we're going to do
is we're going to read from the game which is our derived state and we're going to destructure the status in the moves from there and then finally we'll return the state clone which will set that new state for us now like I said in our original we had a reset in a new round so all we have to do is conditionally let's just add a prop or not a prop but a parameter up here and say is this a new round and have that as a Boolean so if we come down here to this reset
game we're going to say that's false it is not a new round it's just a game reset and then if you remember from our menu we have this on action so what we can say here is we want to reset the game and then to detect whether this is a new round or not we'll just say does the action equal new Round And if that evaluates to true then we have reset the game otherwise it will evaluate to false and that'll just be a plain old reset so we've hooked up this listener we just have
to implement that have to actually use this variable to figure out what to do so all we need to do is come down here after we've reset the current game moves and we'll say if this is a new round so is new round we also want to push to the history so we'll say State clone dot history and then all games and then we'll basically just push and spread the state clone dot history dot current round games and then we will set that current round games equal to an empty array so if there's a new
round we're also going to reset that so at this point we've got the reset game completed and I think this is the majority of the logic so let's go try our game out so it detects a win and if we click play again it closes things everything resets and down here player one has one win let's get player two to win one so player two wins we play again player two has one win let's click a square reset that it seems to work let's go ahead and reset the scoreboard down here and that seems to
work as well so I think we're pretty much done let me just kind of pause the video here and go through and see if there's any cleanup that we need to do and then we'll be on our way okay so there's actually one big thing that I forgot to come back to and that is local storage at the moment we're not persisting this game across browser refreshes so let me let me collapse some things we'll collapse the players derived game and derive stats we will collapse reset game and handle Player move just to hide them
from our view and you can see with our use State hook this is where we're storing the state of the game so if we were to play a couple moves and then refresh this browser it's going to basically reset everything because we're not storing this to local storage any longer and then furthermore I realized that this turn indicator is not implemented so let's go ahead and do that we'll get rid of these data IDs because we don't need those anymore and then this becomes pretty easy so we just add class names around this so fa
solid and then we will just figure out whose turn it is by saying the game dot currentplayer.color class game.currentplayer.icon class save that and so now this will be dynamic and then finally we need to just replace this right here with the game Dot currentplayer.name so this should make the color the icon and the name Dynamic let's make sure that that's correct looks like everything's working except for that part because we have this as a static style I think maybe an easier way to do this is just remove this class name altogether remove that from there
and then use the entire div to specify the color so we'll say game.currentplayer.color class is going to apply to the entire div which will style its child elements and then we're toggling on the icon so player one player two player one and seems to be working now and once again the last thing is local storage and this is something that I'm not going to spend a ton of time on the implementation to but there is a way that you can extract the local storage function to a react hook so we can basically make a replica
of use state but instead of just using state it will also keep it in sync with local storage and in that manner we can use we can basically have the same interface while getting that additional functionality so just so that we're not getting into crazy detail or anything we already did we already do that in these videos I'm going to go into source and make a hook called uselocalstorage.ts this is a react hook you can learn more about this if you are in the react Docs and go to the beta docs then the new ones
and then you can go to should be some hooks a hooks reference somewhere let's go to the reference so you've got the built-in react hooks I don't know if it does say anything about like custom Hooks and how you would do that oh here reusing logic with custom hooks this is a good place to check out what I'm about to do and understand why we would do this but I'm just going to copy paste everything in here to this file this is a use local storage hook you know basically what we're doing is we are
adopting the same interface as the use State except we are also keeping it in sync with local storage and you'll see right here this is where we're like setting a value to local storage this is where we are getting the value from local storage and then in the parameters we'll pass the key that we'll use to track that in local storage so I've documented this a little bit you can read through it on your own time it's not necessarily super important to understand all the internals here I'll also note that I've added this effect right
here that basically keeps track of other tabs that change so if you were let me close some things out and if you went back to our original implementation app.ts this is not the react app this is the prior videos you can see that we're listening for the state change this has pretty much become irrelevant now that we're using react because that is kind of built into the Paradigm of react but we also have this where we're listening to the local storage of another Tab and re-rendering the view if that changes so I've created this effect
here which does the same thing and it will update the state variable every time another tab changes its state so I will close this and you'll see how easy this is we'll go back to our app.tsx and we'll just comment out this original state and all we need to do we can name it the same thing so set state state and set State and now instead of use State we're going to use local storage and import that now it's going to ask us for a key so we'll say game State key and then it will
ask us for our initial value which is going to be this right here the same thing that we passed earlier so we'll uncomment that so you're going to see how quick and easy this is to update so remember if we go to our react game play some moves and refresh not going to work but all we have to do is replace use state with use local storage and import that from our file and then we need to give it a game State key that's just the key that will be used in local storage as that
first argument and then our default value is the second and that should do it that will keep the state in sync with local storage and we don't even have to think about it so we can play the game refresh and it will find the state that we're in after a refresh you can also duplicate the tab play something over here and then that's going to sync up over on this side and vice versa so now that we've got it synced up with a local storage I think we have replicated that original application in full so
the last part of this is just going to be some cleanup and making things easier to kind of find and read through so let's go through and look for any like data IDs we don't need any of these because that was a paradigm from the original implementation where we needed a stable way to select a Dom element so we'll get rid of all those let's go through our components should be okay there on the menu no data IDs there and we're good and then furthermore we can just extract some of these things out so let's
make a file called utils.ts this will just be some utility functions and if you remember we have this derived derived game and derived stats and then we also have the players up here outside of our component itself so we can take all of this stuff you could leave it here there's no problem with that either but I can throw all that into a utils file and then we can export them from it okay and then we just need to import a few types from the types file so we'll import the player and then the game
state and that should satisfy these functions so those are now isolated to the utils file and then we of course need to import them so command period to import from utils do that again here and you can see we've got that import and that should work okay so that kind of cleans up our app file we no longer need use State because we're doing the use local storage hook which uses State under the hood so we'll expand this out and this is pretty much the final game once again you can find all of this code
in the repository I've left in the video description be sure to look at the typescript branch to find this exact implementation I just did there's also a non-typescript version of the same app so now that we're done we can close out this develop developer server the webpack dev server and a good thing to do is always to just check to make sure that it builds correctly so we have these build scripts and let's just run yarn build and what this will do is basically check all your types type checking compile everything bundle it up and
output it to the public directory with bundle.js and we can also try the build prod to make sure that it does its optimizations okay and it doesn't complain about anything so there you go and then finally we've got live server running on Port 5500 already and since we just built this app it's totally static and you can actually view this directly from the public directory rather than using the webpack dev server so you can think of it as webpack came in did its job compiled everything transpiled everything and gave us one nice clean bundle output
and now we're just ready to go we've got what we need and the browser knows how to load the app so let's go back to the browser and we'll go to localhost 5500 close everything out and I know we've got a lot of folders here but let's go to the live react refactor and then if we click public it should give us the game and we should be able to use it just like we were with the dev server so we can reset we can get a new round going and just play the game so
just wanted to show you that's a good thing to do check your build make sure it works and then you could really just you could deploy that this game right here over any CDN because it's static assets so you could put it on cloudflare you know whatever you want and it can be served to your users thrown on GitHub Pages what have you so hopefully this was an educational video that hopefully you enjoyed seeing how we can go from a vanilla JavaScript application and Port that over to react and kind of see the benefits of
using react it makes a lot of our code a lot simpler we basically went from let's just kind of recap we went from this live TS refactor where we had an app let's just close all this out you can just scroll through this is our main app file where we're registering all the event listeners controlling everything this is our state where we have our store class and this is our view where we are handling selecting all the elements up here we are rendering here so this basically what react is doing for us and then we're
binding event listeners got all of our helper methods here and all of this stuff it's pretty verbose what we've had to write here we even have the delegate method so that we could figure out which Square was clicked and that was pretty confusing so we've gone from this over to our react application which as you can tell if we go to app.tsx it's pretty concise what we've got here we don't have any delegate methods we can just handle everything basically right here with some event handlers we've got a hook that helps us deal with local
storage and then we have our components split out by their separate concerns also with their separate CSS so that's just a much cleaner way to write an application and it's a lot easier to extend into the future let me know what you thought of this video be sure to give it a like And subscribe to the channel and I will see you next time
Related Videos

15:52
Pick these tech to make or destroy your te...
Chai aur Code
170,530 views

19:21
Web Development Roadmap 2025 with GenAI
Chai aur Code
238,553 views

4:46:25
Learn TypeScript – Full Tutorial
freeCodeCamp.org
1,230,120 views
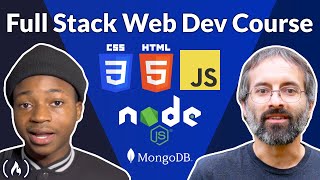
7:29:12
Full Stack Web Development for Beginners (...
freeCodeCamp.org
2,373,251 views

8:26:03
React JavaScript Framework for Beginners –...
freeCodeCamp.org
588,401 views
2:19:33
APIs for Beginners - How to use an API (Fu...
freeCodeCamp.org
4,539,930 views

5:30:50
MERN Stack for Absolute Beginners - Storie...
Muslim Helalee
815 views

12:59
8 Rules For Learning to Code in 2025...and...
Travis Media
353,892 views

2:07:19
React JS 19 Full Course 2025 | Build an Ap...
JavaScript Mastery
358,609 views
6:31:24
HTML & CSS Full Course - Beginner to Pro
SuperSimpleDev
13,793,091 views
3:07:07
APIs for Beginners - How to use an API (Fu...
freeCodeCamp.org
3,199,085 views
5:21:44
Learn HTML & CSS – Full Course for Beginners
freeCodeCamp.org
724,769 views

3:45:06
🔴 Let's build a Uber Clone with REACT NAT...
Sonny Sangha
2,783,565 views

33:08
How to Start Coding | Programming for Begi...
Intellipaat
9,584,365 views

14:11:43
Learn React 18 with Redux Toolkit – Full T...
freeCodeCamp.org
689,185 views

5:08:48
Full HTTP Networking Course – Fetch and RE...
freeCodeCamp.org
949,982 views

9:44:47
Build and Deploy 4 Modern React Apps and G...
JavaScript Mastery
1,967,384 views

3:54:02
TypeScript Full Course - From Beginner to ...
Tech With Tim
210,876 views
4:07:30
Learn HTML – Full Tutorial for Beginners
freeCodeCamp.org
3,382,636 views
22:15:57
JavaScript Tutorial Full Course - Beginner...
SuperSimpleDev
3,830,585 views