Unreal Engine 5.4.4 Beginner Tutorial - UE5 Starter Course 2024 #unrealengine5 #megascans #cgi
38.59k views7757 WordsCopy TextShare
Magnet VFX
Hello friends,
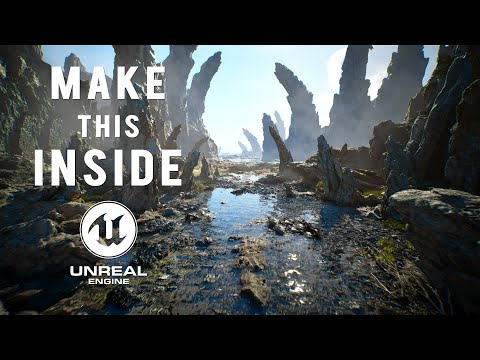
In this video, I show how I make the environment called " Land of the Arcs" inside Un...
Video Transcript:
Hello friends welcome back this is omiz from magnet and today we are going to recreate this concept environment inside unn 5. 4 so first take a look what we are going to create today [Music] so before we start if you are new to this channel I recommend you to check my videos and if you find those videos useful please do subscribe this Channel and turn the notification on and here I like to shout out for all those people who has already joined me as a member so if you really want to support me you can also join me as a member so let get started so I launch my internal engine from here then I select this games option here and also select this third person template and here I click on the starter content and name my project as tutorial and then hit create and then I dock my content drawer into my layout so I just click over here that is the content drawer and then click here which is called this dockin layout just click so here is our content drawer and now I'm going to create a new level so I go to the file then go to the new level and select this empty level here and click on this create and after that we're going to quickly set up our lighting so we go to the window then you go to the environment light mixer and click on this create Skylight create atmospheric light create Sky atmosphere create volumetric cloud and create height fog then we go down and click on this volumetric fog then we close this window and now we going to create a landscape so for this we go to the selection mode then go to the landscape and we don't need to change anything here just go to the bottom and click click on this create then we go back to our selection mode and now we're going to create the ocean and for the ocean we have to enable a plugin so we go to the edit then go to the plugins and in the search bar we type for water and here is the water plugin just click it here and also enable this water extras then click yes and we have to restart our engine so just click on this restart now and we have to save our progresses click on this save selected and we also have to name our label so we name it as tutorial and click on this save and after restart we will see this warning so I just go to the end of this warning and click over here and then you close this window and also close this plug-in bar and now we're going to reopen our level so we go to this content folder again then we going to open our label and now we're going to put the ocean over here so we go to this box option then we go to this place panel and in the search bar we type for water and here is the water Body Ocean we just bring it over here and then we close this place actor panel and then if we going to move our camera you can see this is our ocean so first we're going to bring our Island to this side so for this we're going to select this Pline points here and then we just drag it over here like this and also do the same thing to here also and then we going to move our camera over here again and now we're going to put a mannequin over here so we can understand the actual size so we go to this characters folder then we go to this mannequins then go to this mesh and then we're going to bring this mannequin over here and now we're going to change some settings for the ocean so first we select this ocean body here then we go to its details panel and then we go down and here you will find this option called this o Source just expand this one and also expand this water wave assets and then we're going to open this water wave asset and now we're going to expand all of these options from here so just click over here that is the web Source then also click over here and now we're going to change the settings from here first we go to this number of waves we're going to decrease this value to one then we go to this wavelengths option and go to this minimum wavelength and we also decrease this value to 500 and the maximum wavelength value to 5,000 and for the wavelength follow off we're going to increase this value to 50 then we go to this amplitude option first you go to this minimum amplitude we decrease this value to one then we go to this maximum amplitude we also decrease this value to two then we go to the directions option and go to this dominant wind angle we increase this value to 180° and the direction angle spread we increase this value to 2500 after that we go to the stiffness option and we increase the small web stiffness to one then we go to this large web stiffness we decrease this value all the way zero and finally go to the stiffness follow off we increase this value to 100 so this is my settings you can copy this settings and then we're going to save this and also close this window and now you can see that my oceans look something like this and now we're going to design our scene so first we're going to collect the assets so I'm going to use some epic game Marketplace assets so for the asset I'm going to use this Nordic Coast collections just click on this add to project and as you can see that this asset is not compatible with 5. 4 version so we going to click over here that is the show all projects then we click on our project which is called this tutorial here then we go to the select versions and then we go to this drop- down list and we select the highest possible version which is the 5.
3 here and then click on this add to project and once you add the asset we go to this content folder here and we will find this folder called this geometry and also we get this meas scan folder so first we going to open this geometry folder here then we go to this assembly and here you can get all these folders and under this folders We have all the assets here so first we go to this Clips folder here and then we're going to import this asset over our scene so we're going to drag this assets over here and also place this here okay and then we going to duplicate this asset and place it here so in order to duplicate we press and hold the ALT key and drag this AIS here and once you add those assets you will find this error message called your texture streaming pool is over your budget so in order to fix this we go to this edit then you go to this project settings and in the search bar we type for virtual texture and you will find this option called this virtual textures and under this you will find this enable virtual texture support just take this on then we have to restart our engine and also we have to save our progresses and once we restart we close this project settings window and also we're going to reopen our level so we go to the content then we going to open our level and you can see that the error message is gone now so we going to continue our designing so we select this clip here and we going to duplicate it again and place it here and also rotate this okay so this is how I arrange all those clips here and now I'm going to put some ground assets here so for the ground assets again we go to this geometry folder then go to this assembly and here you will find this folder called this ground so double click to open and here from we can get so many ground assets so we going to use them so first we're going to use this one so we just bring it over here then we're going to increase its scale so we press R and then we increase it scale like this and then we place it down okay just like that and now we're going to duplicate this asset multiple time to fill this area and also we have other assets here so we going to also use them so maybe use this one then we're going to increase it scale and now we're going to use other assets so we back from this folder and we go to this folder here and from this folder we're going to use some of these assets so maybe first we go to over here here and then we're going to use this asset then we're going to rotate this asset so we press e and then we rotate this asset like this and also put a little bit down and also use this assets over here so this is our basic setup and now you can see that one problem is here that if we go over here you can see that the water is casting this kind of Shadow so in order to fix this we go to open this water material so maybe we select this water body from here and then we go to its details panel then we go down and here from you can find this water material so we're going to open this water material then we go to this option call this water shedding expand this and we place this material over here and and here you will find this option called this anot trophy so we activate this option and increase the value to 0. 9 and as you can see that it fixes our issue but also change the water color so in order to change the water color we go to This Global Vector parameter values expand this then we go to this absorption tab activate this option and then we click on this color wheel here and from here we can change our desert color so I want to make this waterc color little bit of blunt color here and then hit okay and then we save this also minimize this and now you can see that our water looks something like this and one thing you have noticed that all the assets here are look very dry so we going to make the assets which is very close to the water weight looking and in order to do that we're going to change some settings to its material so for this first you go to the meas scan folder here so we go to this content then we go to this Mega scan folder and also go to this 3D assets folder and then we go to activate the static mes filter here and if you not have any static mesh filter over here go to this three line option then you can select the static mesh filter from here then we're going to open any of these assets from here just double click to open and we place it over here and also we going to open the material from here just double click to open then we go to its par material double click to open and here from you can get this node call this MF sh winess so just we have to connect this node with this material attributes so just connect it from here and then we're going to apply this and then we minimize this window and now you can see that this look weight which is very close to the water here and now we're going to put the main asset for this scene which is the arcs so for the arc asset I am going to use another asset pack from the epic game Marketplace so for the arc asset I'm going to use this value of ancient asset pack and in order to add this first you're going to create the project so we're going to click on here which is the create project and here from you can select the path where you want to download and this pack is quite large so make sure that you have enough space to download this asset and then just click on this create and once you download the asset you will find this folder called this value of ancient just double click to open and we don't need to open this project file just go to this content and then we're going to copy this folder called this ancient content just copy this one and we're going to paste this folder into our actual project file so here is our project file called this tutorial then you go to its content folder and here we're going to paste the folder and after the copy we again go to the value of ancient folder and we have to copy one more file so we go to this der data cach folder open and then we're going to copy this file then we go to our actual project file directory then we go to the derive data cache folder and here we going to paste the file and after copy we go to our project and then we have to restart our engine again so we just close this and after restart we again open our level and we will see this ancient content folder into our content drawer so double click to open and then we go to this geometry folder then we go to this folder called this spire Rock collections just double click to open so we're going to use this rock models to make the arcs okay so maybe we can place our camera over here then we're going to bring one of them so maybe use this one so we just place it over here and we're going to place it little bit higher here and then we going to bend it like this and also we're going to increase it scale okay and then we're going to use this one so just bring it over here and also decrease it scale then we place it over here and we're going to rotate this okay so as you can see that we use two assets to make this AR here and also we going to duplicate it one more time so we're going to change the coordinate World from local so just click over here and then again we duplicate it one more time and also we going to rotate this to make it look different and then we going to rotate this okay maybe we can increase its scale little bit more so we select this middle one and increase it scale and then again we select the top one and extend it to here okay so you can see that how we can make this Arc here then we going to select all of these three here and also change this coordinate to World coordinate here and then we duplicate this and then we rotate this also and we place it over here okay so now you have idea that how we can make this arcs here and also we going to rotate this to look a little bit different here okay and now we going to make the arc also over here and there but before we do that we going to make a camera for our scene so we go to this box option here then we go to the cinematics and create a c camera actor and then we go to the outliner section select our camera and right click and then we click on this snap object to view then we come to this perspective here and select our camera and also we're going to create a sequence for our scene so we go to the sequence Tab and click on this add level sequence and also we name our sequence as tutorial sequence and then we save this and after that we're going to bring our camera to our sequence so we go to this outliner section again and search for our camera and then we just drag this camera over our sequence here and now we're going to change some settings for our camera so first we go to this current focal length we're going to decrease this to maybe 15 mm and then we bring our CA Cera over here then we go to the camera details panel here go to the film option and we change this to 16 is9 DSL then we go to the search bar and type for exposure and we change the exposure metering mode to manual here and go to this exposure compensation activate this option and increase it to 9 here okay and now we're going to put some Big Arc over the distance here so so again we going to duplicate this one so we change this to World coordinate again and then we duplicate it over here and we're going to increase its scale then we duplicate this middle one here and again change the world coordinate to local and duplicate it one more time and we rotate this like this and we're going to flip this asset to look very different here okay just like that and maybe we can duplicate it one more time and this time we're going to decrease it scale okay so this is how we can create those arcs here and again we going to make some other arcs over here and there e okay so as you can see that we create so many arcs here and it look really amazing and now we're going to put some assets over here and there so again we go to this content browser and we're going to use the same Rock assets from here so maybe we can put some rock over here so we're going to use this one and then we're going to use this one and maybe we're going to make some space to this side so we going to shift all this asset little bit this side here and we're going to put some small arcs to this area so for this again we're going to make some arcs by using those assets so again we use this one over here is okay so as you can see that we put multiple arcs over here and there and you can see that this look really amazing and now if we change our light Direction so we press contrl and L and then we change our lights and you can see that this look really amazing and now we're going to change the cloud here so as you can see that we use the default volumetric Cloud but we can also change this so for this first you go to the edit then you go to the plugins and in the search bar we type for volumetrics and here is the plugin so we're going to enable this one and we have to restart our engine so just restart now and also save our progresses and after restart we close this plug-in bar and again we have to reopen our level and also open our sequence here and then we go to the perspective and select our camera and now we're going to change the cloud so for this we go to this content browser and then we go to the settings and make sure that you tick on this show engine content and the show plugin content from here then we go down here and here is the engine folder and we go to this plugins folder here just double click to open and then we go down and here you will find this folder called this volumetric content just double click to open then we go to this content folder and also go to this Sky folder here and then we go to this materials and here from you can get so many materials for our Cloud so I'm going to use this one that is the number two here so in this outliner section we search for volumetric cloud and here is the volumetric cloud selected this one and then we go to its details panel here and here is the material slot so we're going to bring this material over here and as you can see that it will change our Cloud here and maybe in your case the cloud will not appear very quickly like me because I have already compiled all the shaders so give it a time and after compile all the shaders your Cloud will be appear in your scene and now we're going to reposition our Cloud over here so as you can see that we cannot see the cloud properly but but here you can see all these clouds here but we cannot just rotate the volumic cloud over here and there so one thing we can do we go over this outliner section and then we select all of this asset from here by pressing contrl and a and then we press e to get this rotation Gizmo and then we rotate this okay so as you can see that we can rotate the clouds here okay just like that okay and now also we going to change our sun position here so we press contrl and L and as you can see that our sun size is very less so we're going to increase the sun scale also so we go to this outliner section and search for directional light and then we go to his details panel here and here you'll find this option called The Source angle so we're going to increase this value to maybe two here so our sun looks something like that and then also we go to the outliner section again and search for fog and here is the exponential height fog so first we go to the fog density and we decrease the value here and also increase the fog height follow off okay and then we place our camera over here and also change our sun position maybe here okay so this is our scene here now and now we're going to redesign our scene again so again we select this arcs here and again we duplicate it over here and also we're going to put some ground assets over here and there also so for this we again go to the geometry folder here so we go to this content then we go to the geometry folder go to this assembly and go to this ground folder here and then we're going to use some asset from here so maybe use this one and we're going to in inre it scale and then also use another one so maybe use this one okay so as you can see that when you put those assets here and there it will look really amazing and maybe we can make some room over here so we going to shift those assets to this side and also shift those asset over this side here so make some room here and one thing you have noticed that if we close to this asset here which is from the different asset pack which is the value of ancient one thing you have noticed that this asset doesn't have this gradual weakness to its material here like this asset have so for this we're going to copy the node for this weakness from this asset pack and then we paste the same node to its material so for this we go to this content folder here and then we go to this Mega scans and go to the 3D asset and open any asset from here and then open this material from here then you go to this parent material and we're going to copy this node which is the MF sh Wess just copy this and then we're going to select this asset and then open its material from here then also go to its par material and here we're going to paste the sh winess node so we Press contrl B but how we can connect it with this met attributes so we have to put an another node called the make material attributes so let right click and type for make material attributes and here is the node called this make material attributes so select this one and now we're going to hook all of this node to this make material attributes here so we press and hold the control key and we hover over this node and until we see the line getting bold then we just click and connect it here okay so we connect the base color to the base color here then we connect this metallic with the same process to the metallic node here okay and then we bring our metal attributes over here and also we're going to make a room here and then we select our metal attributes then we go to his details panel here and click on this use material attributes okay just like that then we bring this node here which is for the winess and then we connect this to this here and finally we connect this MF sh whitness node to the material attributes here and then we just click on this apply and then we minimize this window here and now you can see that these assets also have this gradual weakness here okay so now we going to put some other assets to design our level so for this we go to this content draw again and then we go to this Mega scan folder then we go to this 3D assets and also click on this static mesh filter here then we go down and we're going to use this asset here so we're going to bring it over here then we're going to increase it scale okay and then we're going to make some space over here so maybe we going to shift those assets over there and also we're going to duplicate the small AR assets and we place them over here and there okay and then also we duplicate this assets then we're going to rotate this and also increase it scale and we place it here and we going to use some of the ground assets here also so again let's see what we have here so we're going to use this one just bring it over here and also we going to increase it scale like this so there are so many assets so you can use anything you want from here and also we can duplicate this distance ground asset and we can place it over here and before we do that we going to decrease it SC [Music] scale and now we're going to put a landscape material over this landscape here so I'm going to use a meas scan landscape material so I go to the window and then we go to this quick cell bridge and I have already downloaded a material so I go to this local folder here and then I'm going to use this one so just click and add to my project here and then I minimize this and once we add the asset we uncheck the static mesh filter here then you go to this Mega scan folder and go to the surfaces then I open this folder called this Icelandic Rocky surface and I'm going to use this material to our landscape so I select my landscape from here then we go to it details panel then we go down and here is the landscape material slot so drag this material over here and as you can see that the tiling is too high so we're going to open this material instance then we go to This Global parameter and then I activate this styling option here also expand this and going to decrease the value so we put 2 here and point two here also then we save this then we minimize this window and you can see we have this kind of landscape material here and now we're going to put this same asset over here also so we going to duplicate this asset okay and also we going to put some small rock asset over here so we're going to use this one so we duplicate this asset and also we going to decrease its scale maybe we can move our light position so we can see it better then we're going to decrease it scale little bit more and place it here okay so this is how we can arrange those assets here and there and also you can take your time to design all of this area according to your need okay and now we're going to put some foliage over here and there so for the folage I'm going to download a foliage from the mega scan so for the Fage I'm going to use this ribbon grass asset from the mega scan and I'm going to use it highest quality here which is a high quality and then add this to my project then I minimize this so here is the grass asset first we going to make those asset as a nanite asset so we going to select all of these grass model then right click go to the nanite and click on this enable nanite then we go to the selection mode and go to this F section and as you can see that all these fages are automatically added over here but if not in your case then select all of these assets and just drag it over here then we select all of these grass from here and activate them then we go down here first we go to this density we're going to increase this value to maybe 200 here and also we go down and here is the option called this align to normal we're going to uncheck them then we go up and going to decrease the brush size so we set it to 5050 here and then we go over here and we're going to paint it so as you can see that the density is very less here so you can also increase it if you want so we go over here that is the paint density we're going to increase it all the way one here and then we're going to paint and maybe we can increase the grass size also so we go down here and select all of these grasses again and then we go down and here from you can get this x scale option so we're going to increase the value so minimum to two and the maximum to 2. 5 here and we're going to paint it here so in that way we can get large grasses also okay and now we're going to put some decals into our scene also so for this we go back to our selection mode then we're going to open the mega scan again and I have already downloaded a deal so I'm going to use this one and I'm going to use this deal called this St level Moss patches the click on this add button here so here this dickle so we're going to use this one over here and one thing you have noticed that all of the static mesh here is receiving the deal but if you want to make some static mesh exclude from this deckle you can also do that so maybe we can select this static mesh here and then we go to his details panel and type for deckle and here you will get this option called this Rees deals so we're going to uncheck this so in that way this stating M will not receive the deals here so we going to duplicate this assets over here and there and just place it here so we can hide the edges of the deal here okay and now we're going to put some additional assets like some date trees over here and there so for this we're going to use some meas scan assets again so for the de trees I'm going to use this asset and also this one and add them into my project and once you add we will get this asset from this Mega scan folder then you go to this 3D assets and also cck on this static mes filter and here is the asset so we're going to use them over here and there and also I'm going to use some of the small plants over here and there and I'm going to use this one so just add to my project and once we add we go to this Mega scan folder and also uncheck the static mesh filter then go to the 3D plants then also enable the static mesh filter and here is all this plants here so we're going to use them over here and there and one thing you have noticed that all those plants are very static here so in order to enable the wind for those plants we going to open the material for these plants so we uncheck the static mesh filter then we go to open the folder which hold all these plants here then we open the material for this plants and we go to this wind option here and we're going to enable the wind from here and also save this and now you can see that the wind is activated for those plants here okay and also we can do the same thing for the grass also so we minimize this window then we back from this folder and open the grass here and also open the material for the grass then you go to the wind option and enable it from here and then save this so we can get the wind effect here also okay and now we going to place the small plants over here and there also and now we're going to change our light Direction so we press contrl and L and then move our sun maybe over here okay then we go to the sequencer Tab and we go to the C camera actor and we're going to decrease our camera aperture so we going to decrease it to maybe 1.
4 here and also we can select our camera here which is the camera component then you go to his details panel and go to the search bar and type for exposure and we're going to decrease the exposure little bit down so we going to decrease it to maybe 8. 5 here okay so this is how our scene look with this exposure settings and now we're going to rearrange our scene little bit more so it will look more better e okay so as you can see that I rearranged some of the asset here and there and it look better now and one thing you have noticed that our grasses are very bright here so the the Aman tion is not that much strong so in order to fix that we go to the PO section again so we go to the selection mode then go to the F section and then we going to select all of these grasses from here so here are the grasses so we select all of them then we go down and here if we make some room you can get this option call this effect distance field lighting so we enable it from here and you can see that our grasses is look natural now okay so this is how we can fix that then again we go back to our selection mode so this is how we can design this scene here and now we're going to put some bars over here and there and for the B I'm going to download a asset from the epic game Marketplace and I'm going to use this ruler Australia pack and once we add the asset we go down here and we will find this folder called this ruler Australia so just click over here and then we go to this FX then open and then we go to the B folder here and here from we can get some of the particle system for the BS so we're going to use them here so maybe we can put our camera over here and then we going to place this particle system here and then we click on this reset here and we will get this kind of bars here so we can duplicate them over here also and also we have another one so we're going to put it over here and then also we rotate this to this angle here so as you can see that we get this kind of nice BS here so this is how we can design this kind of scene here and now finally we're going to put some local fog over here and there so for the fog again we go to this content browser then we go to this ancient content then we go to geometry folder and here you can get this folder called this F cards so we're going to open this folder and here from we can get so many fog materials and in order to put those local fog into our scene we need a plane model so we go to the box option here then we go to the shape and click on this plane here and then we going to increase the plane scale here so we press R and then we increase the scale here like this and then we going to bring this material over this plane here so we're going to use the second one which is the material instance so we just bring it over here and then we going to rotate This Plane here like this and also rotate it into this side and then we're going to increase it scale little bit more and then we place it here okay and also we're going to change some settings for this F card so we're going to open this material instance from here and we place it over here and here from you can change the color so we go to the global Vector parameter values and we're going to open the color wheel from here and then you can change the color from here also so we going to use little bit of bluish color here and hit okay and then also you can change the opacity from here so we can activate the opacity option and then we decrease the value like this and and also change the fade distance from here okay and then we're going to place it here then we save this and also minimize this and then we're going to duplicate this asset over here and there also okay so this is how you can create this kind of scene here and if you see my actual video I put so much details there and I took almost 10 to 12 days to make the the scene but in this tutorial I'm going to show you that how you can actually make this kind of scene here so I hope you get the idea and now I'm going to make a nice camera animation with this scene so we go to the sequencer here and if you want to make a 10 seconds long video then we go to this APS option here then we go to this Showtime as and we select this second option here and also we're going to change the frame rate from 30 fps to 23. 976 here and then we come over here and we type 10 here then we're going to click on this end frame here and also we extend our camera cut okay so it will be our 10 seconds long timeline here then we go to the very first frame here and we place our camera over here and we're going to make a key frame here but before we do that we go to this key frame option here and we select this linear interpolation method and also tick on this auto key frame switch here then we go to this transform and make a key frame here then we go to the very end frame here and we move our camera like this okay and now if you play you can get this kind of nice camera animation so I I hope you get the idea and now we're going to change some settings for the camera so we select our camera component from here then we go to his details panel here and then we go down and we go to this chromatic abration option here expand that and we check on this intensity and start offset and we're going to put the value to the intensity to maybe .
5 and we go to the start offset we're going to increase this also like this then we go down and go to this image effect here expand this and we going to turn on this vignette effect here and also turn on the sharpness option here and we're going to increase the sharpness to maybe 2 here then also we go down and we go to this film grain tab here expand this and we're going to put some grain here so maybe 05 will be nice okay so now if you play and now I'm going to show you that how you can render it in a high quality so in order to render it in a high quality we need to enable a plugin called the movie render queue so for this we go to the edit then you go to the plugins and in the search bar we type for movie and we going to enable this movie render que plugin and also the movie render que additional render process then we have to restart our engine and also save our progresses and once we restart we're going to close this plug-in bar here and then we're going to reopen our level so we go to the content then you open our level from here and also we going to open our sequence here then we go to the perspective and select our C camera actor and then we go to the window go to the cinematics and we have this option call this movie render queue just click on here then we go to the render Tab and we see select our actual sequence so in this case the tutoial sequence is our actual sequence then we go to the settings tab and go to this unep config and first we going to delete the jpex sequence then we go to the settings we go to the anti aling then we go to this temporal sample count and we increase this value to 32 and also we click on this override aning and also click on this use camera cut for warm up and also click on this render warmup frames then we go to the settings tab again and go to the camera and we go to the shter timing and we change this to frame close then again we go to the settings go to the console variable and in this console variables stab we click on this plus switch here and in this console variable we type r dot screen percentage screen percentage and we put the value to 100 here and also we click on this plus switch again and we put a console variable for depth of field so we Type R do depth of field and you'll find this console variable called this r. depth of field quality and we make the value to four here then again we go to the settings go to the game overrides and we don't need to change anything here then again you go to the settings go to the high resolution and we take on this override subsurface scattering here then again we go to the settings and we select the exr sequence which will be our rendering format and finally we go to the output and here from you can select the directory where you want to your render and from here you can change the resolution so the default resolution is HD but you can also change it to 4K then you can click over here and select the deser frame rate from here so in this case we going to use the 23.
Related Videos
12:46
Why Unreal Engine 5.4 is a Game Changer
Unreal Sensei
1,301,189 views
1:19:27
Unreal Engine 5 Beginner Tutorial - UE5 St...
Magnet VFX
241,806 views
1:45:45
Unreal Engine 5.4.3 Beginner Tutorial - UE...
Magnet VFX
36,341 views
1:40:02
Unreal Engine 5.3.2 Beginner Tutorial - UE...
Magnet VFX
103,938 views
51:04
PCG: First Steps to Advanced Development |...
Unreal Engine
22,032 views
1:03:18
Unreal Engine 5.4.2 Beginner Tutorial - UE...
Magnet VFX
31,015 views
1:21:28
Unreal Engine 5.4 Beginner Tutorial - UE5 ...
Magnet VFX
103,775 views

22:26
How Ian Hubert Hacked VFX (and you can too!)
InLightVFX
141,394 views
17:25
Unreal Engine 5.4: Create a Cinematic Cabi...
Reality Forge
15,691 views

34:21
Render like a professional in Blender (ACE...
Robin Squares
157,647 views
1:29:26
Unreal Engine 5.3.2 Beginner Tutorial - UE...
Magnet VFX
147,200 views

1:38:21
Unreal Engine 5.3 Beginner Tutorial - UE5 ...
Magnet VFX
402,923 views
6:58
How I Made an EPIC Bear Chase Scene in Ble...
Crnovision
69,538 views
31:18
How to Create photorealism lighting in UE5
Karim abou shousha
70,275 views
12:25
3D AI Model Generation is Getting GOOD - U...
Werewolven
237,217 views

1:14:49
Unreal Engine 5.3.2 Beginner Tutorial - UE...
Magnet VFX
264,001 views
18:50
Generate 3D from ANY Video! │Gaussian Spla...
Black Mixture
91,052 views

1:10:37
WORK MUSIC - 1 Hour of Ultimate Work Music...
Deep Chill Music
808,524 views

1:26:01
Music for Work — Deep Future Garage Mix fo...
Chill Music Lab
1,051,550 views
9:37
10 Unreal Engine 5 PLUGINS I can't live wi...
Cinecom.net
534,282 views