This AI Agent Makes Longform YouTube Videos Hourly | No Code n8n Tutorial⚙️🤖
26.27k views6931 WordsCopy TextShare
Graham Radina | AI Agent Mastery
Join for FREE Ai Agent Mastery 👉 https://www.skool.com/ai-agents-mastery-1078/about
Credit to @Rob...
Video Transcript:
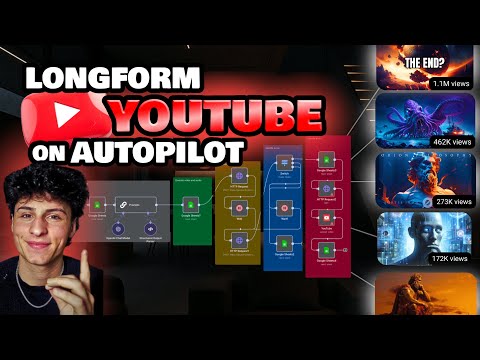
Ladies and gentlemen, the future has arrived with AI agents. Right here, this AI agent creates long- form YouTube videos every single hour of every single day on autopilot. So, I first came across one of these pages when I was going to work out and I need some motivation.
As corny as it sounded, I need to get hyped up and I just threw on something random that I saw that looked pretty enticing. As you can see, these videos look pretty enticing. Who knew that they were AI generated?
So, I checked the comments after because I subscribed and then somebody said it was 100% AI generated. I was like, are we serious? So, of course, I had to build this out myself.
And as you can see right here, this is pretty insane. 33 videos, 1. 35 million subscribers, guys.
This is this is unreal. So, the cool thing about this is you don't need to have any experience. You can be a complete beginner.
This is a no code app, so it's really all plug-andplay stuff. Um, this should only take really a max of 30 minutes, and once it's set up, you can run it forever. Okay, what's going on, guys?
My name is Graham. I just want to introduce myself real quick so we can actually get into it. So, my whole goal is really to help you guys understand AI as easy as possible.
So, what I did is I made a full guide for you guys in my community. Um, you can just go right down below to the description and you can check it out. So, this is the first video.
Obviously, I'm going to be uploading uh videos around two to three times a week. Obviously, this is the first one you can see. So, if you can scroll down, you'll see all the prompts we're going to be using, everything we're going to be using in one place.
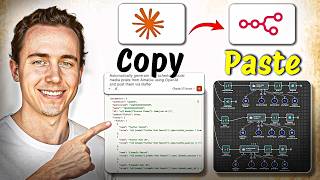
So, it's really easy to figure out. The main thing I want to bring you over to is the bottom right here. So, right here, if you download this file, you'll see right here, I'm going to press download.
And so, in NAN, so I'll show you guys how to set this up. It's super easy and it's free to use, so don't worry about it. You can drop that file in here.
So you go to these three dots right here and you'll go import from file. I'm going to press import. Import this one.
And you can see right here that the whole thing will be imported and then you can just follow along. So it's as simple as that. Go to the description, check that out.
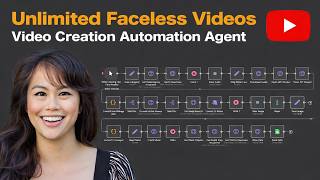
And then I just want to show you real quick the the overview of this system. Um and so basically what we're going to be doing is it's basically you right here. So this is the person that's setting it up.
You you set it up once and it can automatically run as much you guys want, right? So what we're going to do is we're going to have the idea agency. The first part we're going to get our ideas for what type of videos we want.
You can switch it up. I'm doing a motivational page. Um, motivational pages have been killing it.
Stoic systemism pages. Um, a lot of stuff like that. So, you can think about it.
Then, we're going to actually create the agent itself. You can see right here, we're going to set up the input of the page. So, this is going to be the input and then we're going to set up the creation part of it.
So, when it actually creates, the AI agent creates the stuff for us and then the output of it actually publishing to YouTube. So, basically, once you set this up once, you never have to touch it again. And it'll just keep on running automatically.
And the cool thing about this is you don't have to just make one AI agent. If you want to set up 10 different pages and just start multiplying views and send that traffic to a digital product or just get YouTube AdSense, you could literally be making money while you sleep. It's kind of funny to say that.
Um, this is the first time I've ever seen this use case of automatic content where you can actually make money from it on autopilot. I've already gained 1,000 views in around three days um on my Instagram from posting automatic content. So, it's pretty crazy what we can do.
Let's actually get into it. So, so right here is Nadn. You can go back to this community and go through this link if you want a free trial right here.
You can go through that. bring you it'll bring you to this page. You just sign in.
It's simple as that. And you can start for free. So now we're here right now.
What I'm going to do is I'm going to create a new flow. Okay. And now we have our first step right here.
So what you need to do is you want to go back to my community right now. And you want to grab this prompt. So this prompt right here.
We're going to use chatbt with this. This is where we're going to actually generate the ideas. So you can see right here, you can see right here, this is where we actually um have our input.
So right here, my page you to be on an 80-year-old wise man giving life advice. And then right here it's how to succeed. There's life lessons and analogies for life.
So, all you have to do is copy this um input right here. All you have to do is change the stuff inside the brackets right here and right here. And you can really craft up the page to anything you actually want.
So, this is mine. So, what you're going to do, what we're going to do is we go over to chatbt and copy and paste that and let it cook real quick. So, as you can see, chatbt right now just crafted up what I needed.
Um five different videos right here. And it's all categorized in this format cuz that you guys are going to need that format for when we actually set this up. So, what you want to do real right now is you want to go to the community and you want to go to um hold up.
You want to go to this prompt right the G sheet template. So this template right here will bring you to this template. This template right here.
What you're gonna want to do is press file then make a copy. And you want to make a copy of this. So I'll do edit it uh demo for you guys.
And I'll press make a copy. So right here I have a copy made. And so what we're going to do with all this stuff right here.
My stuff's already inputed in. Copy all of this from chatbt. Then you're going to want to go in here and fill out each column as it is.
So say I copy and paste this right here. All we really need is to control X and then we're going to delete that. and control V into that so it switches it up and go with from thing to thing.
So caption in there, um channel style in there, character style right there. Um and that's all you have to do. You don't have to do this.
This is already set up for you. You just really want to put all of this stuff inside of here. Okay.
And so once we have that, I'm just going to delete that because we don't need that right now. And so now we're going to actually get into the um building of this AI. Okay.
So now we're actually be setting this boy up. So what we're going to do, we're going to press add first step. This is the first trigger.
Like I said, you can either download and then literally just import all of this stuff right here. so that it'll be there for you or you can follow along with me. So, I'm going to just do it step by step for you guys.
So, right here, I'm going to press plus and I'm going to do on schedule. Okay, so on schedule basically means how often you want this triggered. Me personally, I would say I'll do it max of three to four times a day, but you could do it every hour.
Just might be um overloading the server. So, just be careful of that. But say you do every hour.
I'm going to put on every hour for this. Now, we're going to have schedule trigger. So, this is already good.
You can press test step right here. Test workflow should come out green. Next step is to go right here into um sheets.
So, search up sheets. Put this right down there. Sheets.
Google Sheets. Press get row down here. You can see get rows and sheets.
Now, we have this. Make sure that your Google Sheets is connected. Like I said, you can go down below and check out how to connect that.
Super easy to do. So, once it's connected, you're going to do sheets within document right here. So, not document, sheets within document.
Then, we're going to press get rows. It's already get rows for you. So, what we're going to do is we're going to press um choose.
What we want to do is we're going to choose the sheet that we already had. So, remember I said NA demo. That's what I'm pressing right there.
So this is the sheet right here. Make sure to look at this production status and then for production because I'm going to show you what we're going to be doing that with that in a second. So I'm going to go back into this.
I'm going to press from sheets. I'm going to choose a sheet. So sheet one, make sure to choose sheet one, not sheet two.
You'll see why later. Now next what you want to do is you want to press add filter. So once you added the filter, this is why you need to know production status and then for production.
What we're going to do is we're going to go um go down right here. Publishing status right there. Production status.
Make sure you do production status. Then for the value, press for production. Type that out.
That should be good right there. And then make sure when you do this, press add option and you return only first matching row. Make sure that you toggle that on and that should be good to go.
So what you can do right here is you can test this step. I'm going to press test. See, and see what it came out as.
Boom. So you should have this right here. You can go to table.
If you want to go to schema, you can see it like that. But table right here will show you everything. And that is good to go.
So let's go to the next thing. So next thing is press plus. It's called a basic LMM chain.
So, what we want to do right here is we want to go back into my community and we want to grab we want to grab this file right here. So, this um this text. Okay.
So, control C. Now, I'm back here. Make sure you press define below.
And actually, right now before we get into this, make sure to change this to prompts and you'll see why later, but press press prompt so that we can actually show n what we're grabbing from. So, I'm going to press rename. Then, I'm going to press expression and I'm going to control C controlV.
That that's perfect. You can see that's coming out as I'll show you right here. This is just showing the video title of what it's pulling from the sheet in the video description.
So that's perfect. And then right here, make sure that you toggle require specific output on. Press add prompt.
So now, right now, we're going to create a system prompt. So right here, system, you can go back into the community and we're going to grab this prompt. So what this does is it's showing what the role of this AI agent actually is.
So it's actually generating the ideas from this. So you need to have this in in order for this actually to work. Press Ctrl +V and then let's look at this real quick.
So, right here, as you can see, it's a little slappy. It's still going to work. Um, and honestly, what I'm going to do right now, I'm going to press that that.
So, now it looks a little nicer. So, yeah, this should all be good. There should be two greens right here.
Um, say this is not showing up. So, say this is not showing up. We're just going to go to character style.
We're going to grab that and put that right in. And that should be good to go. And it's coming out with two.
Perfect. So, that is good to go right there. Now, what we want to do is we want to add a um open AI.
So, it's really easy. I'm going to go chatbt for me. And so what you want to do if you don't know how to do this, press create new credential.
You need this API key. So what you're going to do is you're going to go back here. We're going to go to open a API key right here.
Then just go into this. Once you're in this right now, press create a new secret key and then grab your key. Then all you do is copy and paste the key right in here.
Press save and it should be good to go. So mine's already good. So I don't need to do this again.
So I'm going to get out of here. I'm put it to mine. Okay.
So this is perfect. So this is already good to go. This is good to set up.
What we want to do right now is we're going to add something called the structured output parser. So right here, we're going to go back into here. I'm going to go down to structured output parser.
It's already right there for what it's supposed to be. I'm going to control crl + v that. And then I'm going to delete this.
I'm going c on that. So let's see what it comes out as. Good.
Um I just want to check to make sure that everything's going smoothly. Bring that down there. Okay.
And so right here, basically all it is is all the prompts that we're giving to the AI for what to create for the voice text and also what to create for the image prompt. It's pretty simple. Um, and it's basically structured in different objects.
So we have voice text, image prompt for each scene that we're building up to. So now that's good to go. What we're going to do is we're going to press test step to make sure that this is going smoothly.
Okay. So right here, you can see it went smoothly. Let's make sure it did.
So go into the prompts thing right here. And I'm going to put this as schema so you guys can see it. So yeah, as you can see, each scenario got um built out for what it's going to be looking like.
As you can see, we got all of them right there. And so that's perfect to go. So if you want to, you can label it just to understand that this is the inputs.
So what I'm going to do right here. And so I'm just going to type in inputs. You guys can understand what we're doing.
You don't have to do this, but it's just easier to see visually. I'm going to put it around all of this. And so now that we got that, we're already one step closer to the end goal.
So now this is the input. And now we're going to go on to the next part. So next, we're actually going to be creating this workflow out.
So this is actually a lot easier than it looks. Um, it looks a little complicated, but it's not. So don't worry about it.
So what we're going to do is we're press. Actually, what we can do is we can just press this sheet right here. Press Ctrl + C, Crl + V.
Now, we have it right here and we're going to hook it up to this boy. There we go. Now, we're going to go in sheets and we're going to press sheet two.
So, I'm going to show you what this means, okay? So, you guys can actually create your own video. So, let's go back to the demo sheet I have, right?
Let's go back to the demo sheet I have right here. So, right here, this is what it's going to be grabbing, okay? And so, I'm going to help you guys do this by yourself if you want different stuff for your video.
So, this is the audio it's going to grab. This is the intro video. You can make different intro videos, um, multiple audio list, but I'm actually show you how you can do that.
So, we're going to go to a place called Jason to video. So, Jason to video right here. This is a basic setup of what it is.
Um, I'm going to show you how to get your own audio first. Go to this place called Zuno. Okay.
So, right here you can see I'm in zuno. com. If you guys want to make your own audio, um, this is completely free.
So, you can make any type of audio you want and actually use it in your videos because you don't want to get copyrighted by YouTube. So, what you can do is you can press create if you want to make your own stuff. Um, you can go into chat and make a prompt for what type of music you want.
So, say I want motivational motivational uh lowkey music that builds up tension over time. I'll come out and create that real quick and we'll see what it comes out as. Okay.
So, right here you can see that it came up as uh the music. So, I'm going to press it. I'm actually going to download it.
I have a different music that I use, but you can test what ones you think are going to be good. So, I'm going to download this music right here. Okay.
Okay. And so once that is downloaded, what you want to do is you want to go to you want to go to Jason2JSON uh video. Jason2video.
com. Okay. And what we can do so once you're inside of this, what you want to do is you want to go to movie templates.
I don't know why that's still um right there, but we're going to go to movie templates. And once we're in movie templates, I'm already in it right now. So I'm going to go back out and then show you.
So movie templates right here. Press add a new template. Now I'm in it.
So I'm going to press that. You can rename it if you want. You can rename it if you want, but I don't really care about that right now.
So you want to go to add a new element. Now, what we're going to do for this is we're going to go to audio, press add. So, now for this audio, I'm going to press this and then right right here it says source URL.
You're going to press that. Go to uploads and I'm going to upload that file into there. So, that's uploaded right now.
So, I'm going to press it and press upload file. That's uploaded. I'm press save.
So, now right now we have that URL for um the input that we need for JSON to video cuz remember we're using JSON code. We're not using um MP MP3 files. So, you have to you have to use this software in order to actually put this into the sheets.
So, I'm going to copy it and then I'm going to go back to the sheet. And right here, this is the sheet right here. This is the audio.
So, I'm going to delete that. Put that in there. I'm going to make sure it's a link.
And so, now you can see right there, that is a link. So, that's good to go. And we're going to do the same thing with the video.
So, say you have a certain video you want to upload. All you have to all you have to do is go back here, press add a new element, go to video, press add. So, what you can do with this um you can either download your own stuff into it.
So, I'm going to press video, press source URL. So, you can either upload your own videos into this for intro videos or you can grab stuff from Pixels. Um, so say you want I'm gonna do I'm gonna say a boxer.
See that comes up as boxer. Yeah, boxer right there. This is the one I've been using.
Say I use this one. I'll press save and I'll do scale to cover. And so for the image, it's the same thing.
You go to video or the video. And so for the video, it's the exact same thing. Like I said, you press add a new element.
You press video. I already have one right here, but I'm press video. Then I'm going to go to this source URL.
Now, this is already in there. Um, but all you have to do is you either upload a video of your liking or you go to pixels and upload those ones. So, I have mine right here.
Going to press save when the time comes. And then what we want to do right here is we want to grab this source URL. I grab it.
I'm going to go back into my sheet. Now that I'm here, this is my intro video. So, say I delete that and then put it back in there.
Now, it's in there. And we're good to go for that. So, that's JSON to video right there.
And this is Sunno. And this is suno. ai.
It's a pretty simple process of how to um get the JSON files for that. And then we're on to the next step. Now, we're back in the workflow.
What we're going to do is we're going to go to that Google Sheets right there. Remember, like I said, press uh sheet two. Now, what we're only going to change is production status.
We're going to bring that and press two use. Now, what we're going to do is press final. Now, I'm going to show you why we did that right now.
Go back to the sheet. And in this in the sheet right now, it's going to be pulling from this right here, two use, and then final. Like I said, you can have multiple different audio list if you want to switch it up.
So, you can add multiple different audios. Um, but right now, I'm only with sticking with these two. So, now what we're going to do is we're going to test the step to see if it came out good.
So, as you can see right here, it pulled everything from the sheet and that's good to go. Pulled our audio list and our randomized audio and then the intro video. So, now we're on to the next thing.
Okay. So, next we're going to be setting up this part right now, which is actually generating the full video. So, we're going to go back to the workflow.
Now, I'm in the workflow. So, what I'm going to do is I'm press. I'm going to do HTTP request.
So, HTTP. Okay. So, now once we're inside HTTP request, make sure that it's on post and it's not on get because it might be on get right now.
So, press post. Now, go back to the community. Now, I'm in the community.
You can go down here and scroll down. What we want to do is we want to copy and paste this API cuz this is JSON 2 videos API so that you can pull the video and audio from it. So copy that.
Now I'm going to paste it right in here. Okay. So once we put generate credential type, it should say generate all type.
We're going to do header authentification. Now what you want to do is you want to go back to your JSON to JSON video and I'm going to go down here. We're going to go out of that.
So now right now since we're in this should be under API keys. It should give you an API key. This is mine right here.
Um, and then I'm going to copy that. Now, right now we're going to put in the credential type. So, go right into here.
Press create new credential. Um, you can name it whatever you want. So, API key.
Then you're going to paste in your value right there. And then I'm going to press save. Now it's saved.
And that's good to go. Okay. And the last thing once it's actually confirmed.
So, you have your credentials in, press send body. So, now we're in send body. What you want to do is you have a JSON content body.
Then you're going to say using JSON. So, we're going to go back to the community real quick. And now what we want to grab is this right here.
It's name for credentials X API key. Okay. So, control C that.
Now, what I'm going to do is I'm going to put this in and I'll explain it to you guys right here in a second what this is. Make sure it's on expression and then I'm going to go into here. Okay.
So, basically what this is is this is the prompt that is coming out. So, for the voice type and the image prompt, um it's feeding the AI agent that and it's going to come out. And right here, you can see this is the voice model.
So, I'm using 11 Labs. Um you guys do not have to change the voice ID at all. So, you guys can use the same one as me.
Um and if you want to change it, you can go into 11 Labs and grab a voice ID, which is very simple to do. But um yeah, you guys can just stick with this. It's completely free, so you don't have to worry about it.
And what we're going to do, this should all be good. This is all looking good. And so that is good to go right there.
And we press test step. All right, perfect. So the output came out as true, successful, which is perfect.
The project type, this is the project type that'll be feeding the AI agent. This is the time stamp. So that's good to go.
Um and now we can go on to the next step. Okay, so now that we got that done, the next thing we're going to do is we're going to press and make a wait interval. So we can give this thing some time to cool down in case it doesn't work.
So right now we're just set up as 1 second. We'll change that in a little bit. Um, we can go right there.
Okay. So, the next thing we're going to do is we're going to grab the HTTP request and then control C controlV it. We can just copy and paste that right there.
We can connect that up. Okay. So, we're going to go into this.
Now, what we're going to do, only thing we're going to really change is instead of post, we're press get so we can actually get the video and pull it from JSON to video. Um, and then toggle off send body. And instead, we're going to do send query parameters.
So, right here, what we're going to do is we're type in project. And then I'm going to make sure that I test this step so I can actually get this um data right here. So, I'm going to go to schema table and we're going to go to project.
So, right here, this is the project URL or the um code that I was talking about. You're going to want to grab that and put it into value. So, right there it has value and that's perfect.
And then that should be good to go. And guys, if you come up with this error right here, because you should see a full URL, which I'll show you here in a second, that means that your JSON to video credits are out. So, you're going to actually have to get a subscription for that.
But, I'm pretty sure it's pretty cheap, but um that's the only way that you can actually pull the API credits from that. Okay. So, next thing you want to do is you want to connect a switch.
So, search up switch. So if you don't already have um output data, then press um execute on previous nodes. We get that data real quick.
I'll show you why here in a second. Okay. So as you can see right here in switch, what we have is values, right?
So this is the status for what is going on in our Google Sheets. I'll show you here right now. So you can see our statuses is for production of course.
You can see over here um pending and then publishing status right here. So what we want to do right now is we want to go back into NAN. So right now I'm in NAN.
What you want to do if you just pull it right from here. So it's status on the left. when you get the output, put status in the value one.
This one we're going to do is we'll do done. Then you want to do rename output and press done. So if this does finish um and it actually executes, then it'll go back into the sheet and rename it as done so it doesn't go back over that step.
So we're going to keep on doing that a few more times. So I'm going to do add routing rules. We're going to do status.
We'll do one for um running. Do rename. and we'll do running.
And then the last one we'll do is for errors. In case any errors occur on um the JSON to video part, then we can make sure that we can get back over that. And I'll show you how we're going to um bypass that.
So value, we're going to do error. Rename that. I'll just do error.
And right there, that's all you really need. And then you can go back out of this. And you'll see that there's three things that pop up right here.
So if it's still running, um that means we have to make it wait again. So that give it give the Jason to video more time. So, I'm going to search up weight right here and put another weight thing in.
This time we're to do So, for this one, I'm going to do 30 seconds. I'm going to press that. We're actually go back into the other one.
I'm going to say do this around 100 to 150 seconds. So, I put it at 120, which I think is fine. Just so it gives it time for Jason to video to actually make the videos.
Um, cuz it won't just do it in one second. It's just too fast for the program. Um, and next what we're going to do is going to handle it with errors.
So, just copy this this Google Sheets right here. So, I'm criss at the bottom right here. And I'm going to connect this error to this one right here.
Also, for this wait right now, you're going to want to connect it reack to the the HTTP request. So, if it does go through running, it's going to wait. Then, it's going to give the the request one more time, and it's going to go back to the switch to make sure that it's actually done.
So, for this, it's Google Sheets 5. Everything is really good here. You don't really have to change anything.
Okay. So, once we have this sheet right here, what we want to do is we want to go into this. And so, you can really rename it anything.
I'm going to do error log just to show you that it could be a error. Rename that. So, instead of get rows, we're going to do update.
And so make sure once you do update row, you're on sheet one because it's only going to pull from sheet one. So what we're going to do right here, it's going to fetch the columns. We're going to grab it from the ID.
And so right now we want to go back into the school, go down here and go to the bottom right here and grab the error log. You want to copy and paste that. We go back in the workflow and right here you want to do expression.
Okay. And so once we have that copy and pasted, make sure that you're on expression and not fixed. And then Ctrl +V and paste that in there.
Okay. So now it's pasted in there. And all we have to do after that is go to production status down here and and type in error.
And we're good to go. So you can type out of that. You can click out of that.
And so like I said guys and so make sure that all linked up properly. Make sure that this running is going to wait and wait is going back to the HTTP request. Make sure that this error is going to the error log.
And just like that you've completed the creation part of this process. So as you can see this is the creation part of the process. Now we're going to do the output so that you can actually actually upload these to YouTube automatically and not have to worry about it.
So let's get into it. Okay. So we're getting down to the finale of what we have to do for this.
So the next thing we're going to do is we're going to press plus right here. So actually honestly you can just copy and paste this cuz we're going to be using this again. So I'll do it right here.
I'm going to connect that to the Google Sheets right here. Now, what we want to do is go inside of this. Make sure that you have all of this rendered out.
Um, we're not going to change any of that. We're going to go to production status. Instead, we're going to say, now we're going to say done.
And then we're going to go to final output. Make sure it's expression. And then all we're going to do is we're going to grab the URL right here.
It might be null. And if it's null, it's okay because you have to redo it a few times. I've had to do this around two times in a row, which means that it's just taking longer since your video is going to take longer to process and actually make.
So, I'm going to grab it right here. Um, it still shows that the video is what it is. is you can also just type this in right here on the JSON movie.
URL and that should work perfectly fine. Just like that with this one, we are done. So, I'm going to test the workflow just to make sure everything's running smoothly real quick.
Okay guys, my video is finally created right here. This is the video and what we're going to do now for the next step. It's going to get really easy right now cuz basically on the last few steps.
So, press plus right here. Press HTTP request once again. This is a HTTP request.
Press get. Now, all you have to do is go to final output and drag that into the URL. So, you'll see right here, this is my video popping up.
Just give it a second. Press test step so it can see it actually comes out as a video. I'm going to go table JSON scheme.
All right. And that should be good to go. We'll see view text.
Perfect. So that's good to go. So the last part is pretty easy.
We're going to actually upload this to YouTube automatically. It's super easy. Um you can search up videos.
I also have a video linked in the description of my of my school channel. You can check it out right here. Tutorials on connecting YouTube to Nad.
It's really easy. Takes around a minute. Let's get back into it.
Okay guys, so the last thing, like I said, is YouTube. So we're going to go YouTube. search up YouTube for the next thing and do upload a video.
Now that we're here, we can select the credential, make your credential. So, I'm going to put in my API key. Like I said, it's super easy to set up and it'll take only a few minutes.
Okay, guys. So, once we're in this, what we're going to do for the title right here, we're going to go to expression. Then, we're going to go to here.
I'm just going to do make this easier for you. So, I'm going to put these down. Just give me a sec.
Okay. So, we're going to go to Google Sheets. Not this Google Sheets.
Keep on going down. Right here, Google Sheets. Go to idea.
This right here, the idea is going to be your title for the YouTube video. So, put that right in there. Then, that should be good.
Good to go. Now, what we're going to do, select your region, whatever it is. Now, what you want to do is you want to go to add option.
You want to do description. So, you actually have a description for this video. What we're going to do, this is the description right here.
Caption description right there. Perfect. And that looks good to go.
And perfect. Okay. So, the last thing we want to do is we want to set up a Google sheet so that when this actually goes through, then when your video is published or it's actually done, then it goes back onto the Google Sheets and shows that it's done and it can go to the next video.
Okay. So, the last part right here, we can control C, control V. This Google Sheets right here.
Copy and paste it. Connect this into that one. Let's go into the sheets.
All we need right now, we can delete this. We can delete this. All we have to do is go to publishing status and press done.
And then once that is done, I'll press test. And then if you go back into your sheets, I already ran two. Um ran one earlier, but you can see right here, this is production status done.
Then the status is done. So as you can see, it went to the next one. And since it's done now, it's going to go to this one.
Depending on what you set your time intervals to, and we'll see the finished product right here. Okay. So, as you can see, I don't like the boys that much.
I'm definitely going to change it up. But as you can see, um it did everything we needed to. It came out with voices and it actually gave captions on top of it with videos.
Like I said guys, people are hitting millions of views with this. So um depending on how you structure this, make sure that you like your voice and it matches whatever type of video it is. And so if you actually want to go viral with these type of videos and make long form videos that go viral, the best way to do this is pair it with a faceless shorts generator.
So that's my next step is making an AI shorts generator. So you can pair that up with your long form generator and you can actually go viral. So good luck guys.
Wish you the best and peace.
Related Videos
46:51
This AI System makes Monetizable Faceless ...
RoboNuggets
10,385 views

24:47
How To Build a Startup Team of AI Agents (...
Simon Høiberg
594,589 views

33:05
This AI Agent Posts POV Faceless Videos Ev...
Graham Radina | AI Agent Mastery
7,970 views

32:11
This n8n Voice AI Agent CALLS Your Custome...
AI Workshop
16,433 views
38:50
Create Viral Shorts on Auto-Pilot with Thi...
Ed Abdullayev
1,425 views

Deep & Melodic House 24/7: Relaxing Music ...
Monstercat Silk
1:20:29
I Built AI Agents That Automates VIRAL Lon...
Calvin Hia | dainami ai
1,813 views

26:46
Sell AI Systems, Not AI Agents (how I made...
JP Middleton
89,135 views

10:00
This AI Agent Makes YouTube Videos | No Co...
Adventure Awaits
3,672 views

2:32:10
AI AGENTS EMERGENCY DEBATE: These Jobs Won...
The Diary Of A CEO
971,546 views
22:50
How to INSTANTLY Generate N8N Workflows Us...
Ethan Nelson
15,354 views
13:14
Bulk Create 1000 MONETIZABLE YouTube Short...
howtoai
2,775,982 views

20:15
Build Anything with Lovable + n8n AI Agent...
Nate Herk | AI Automation
76,032 views

3:50:40
How to Build & Sell AI Agents: Ultimate Be...
Liam Ottley
608,599 views

35:50
This AI System Creates Longform YouTube Vi...
RoboNuggets
119,198 views
![This One [FREE] AI Tool Made ChatGPT 10x More Useful : Superwhisper](https://img.youtube.com/vi/z-9si5WxZNI/mqdefault.jpg)
20:23
This One [FREE] AI Tool Made ChatGPT 10x M...
Matt Maher
24,484 views
30:07
This Hybrid RAG Trick Makes Your AI Agents...
The AI Automators
7,349 views
12:35
This EASY AI Agent System Creates Faceless...
Sabrina Ramonov 🍄
10,527 views

15:56
I Copied a Viral Chinese Surreal AI Art Ch...
Saidox AI Flow
76,261 views

6:49:42
FREE n8n Course: Build & Sell AI Agents & ...
Kile Lyn
4,681 views