NEW AI Social Media Automation will save you HOURS *Fully Automated*
35.03k views2818 WordsCopy TextShare

Dan Kieft
This AI Social Media Automation will save you HOURS
Try Make Pro for Free https://www.make.com/en/re...
Video Transcript:
Imagine you can automate your entire social media. You know how much time that would save you? By clicking this button right here.
This automation is writing and posting content for me on Instagram, LinkedIn X, and it's even posting my AI clone on YouTube. With this automation, you no longer have to write or record all of the content yourself. And you don't have to post it manually.
All of it will be done for you. Now, all you have to do is set up this AI automation. And I hear you thinking, what if you don't have experience with this at all?
Don't worry. I've made it so simple that even my grandfather can do this. You'll see about that, Dan.
The last time I touched a computer, you were still in diapers. Now, all you have to do is follow this document that I've listed in the description down below, and then you can copy and paste my entire process, and I will walk you through it in this video. Now, make sure to watch the entire video because there are a few parts in there that can be quite complicated.
But don't worry, I will explain everything for you. For this automation, we are using make. com.
They are also kind enough to sponsor this video. So with that, if you want to try out make. com Pro for completely free for the first month, then click the link in description down below.
Keep in mind, you can use this automation for completely free, but if you want to get access to their AI agents and some other cool features, then use the one month free to test it out and have some fun with it. The first step you need to take is to click on file then make a copy of this. Don't ask to have access to this but make a copy.
This assures you that you can edit the document and then you have your own version of this. Now the next step is to sign up to make. com.
Next up we need to copy the automation. And here I've linked it. So all you have to do is you have to open it.
Download this right here. Then it will be downloaded to your account. Then you go over to make and then you create a new scenario.
And then within that scenario you can click on more and then you can import a blueprint. And here you select the file that you've just downloaded. So you open it right here.
Then you save it. And now you have my entire automation in your make account. But don't think this is it.
Now all you have to do is you need to copy and paste all of my prompts in there and you have to link all of your accounts. So now I will show you exactly how you can do that. The third step is to copy this spreadsheet.
So right here I've connected a spreadsheet. Don't worry if you don't have this spreadsheet because I have made this one for you. All you have to do is you need to open this and then you can create a copy again.
So here you make a copy of this spreadsheet and then you can use it for yourself. So then what you have to do is you go back to make you find it by connecting your account. So you add your account right here.
This will be your Google Drve account. Then you connect your drive. For me, it is in my drive.
And then you find the place where you have saved your file. So for me, it is like within all of my different folders. And then I have this spreadsheet right here.
Then for the sheet name, I've named it right here, new sources. So I've selected that right here. For the table contains headers, you say yes.
Then row with headers A1 to Z1. And then the limit is just one. So this is the first part of or automation and what this will do is all we have to do is we need to enter in a YouTube video.
I used YouTube videos because in my opinion that gives me the best explanation of some kind of products. In my case it is AI. So what I like to do is I like to search for good AI videos.
For example, this one by AI Andy, a good friend of mine. He made a video about Manace AI. All I have to do is I have to just copy this.
Then I paste it into the make document. And then once I start this automation, what the other tools will do is this one will get the transcript. Then these ones will write the script.
This one will create an image. And then it will directly be posted. And the other ones will actually write a script for my hijen character, which is my clone.
And then all of that will be posted directly on YouTube. Or I've set up a split right here. So you can also directly send it to your editor in case you want to have some extra editing on top of your video.
So you could set this up with an automatic RSS feed or any other automatic thing where if an article gets posted, it will be automatically added to your Google sheet. But in my opinion, I want to have the most control over my outcome. That's why I choose to mainly add a YouTube video to my Google spreadsheet so that I have more control over the outcome of the content that gets produced with this.
Keep in mind that if you put in a bad video in your Google sheet, then everything else will be dictated based on that transcript of that bad video. So that's why I choose to manually do this part and I run it like once every day. So, this makes sure everything gets fully automated and each day it will be running at like 5:00 p.
m. and then I have all of my content posted. Moving on, we need to connect our Dumpling account.
And for this, I'm using Dumpling AI for free. You can do that so by signing up to Dumpling. So, let me just do this for you.
We get started right here. I'm just signed up. And then all you have to do is you go to API keys.
And here you create a new secret API key. Now, as you can see right here, I've been using this for a while now. And I'm still using the free credits right there.
So you can use this for completely free. You probably won't run out of credits. And what you then have to do is you go back to the document.
Then you have you generated your key. And then you have to copy that key into make. com.
So here in Dumpling AI, once you add your account, you copy and paste your API key in here. You save it. And then all you have to do is in here you enter the URL which if you go right here is this one right there.
You've entered this URL and then you set this to include timestamps. No, never do that. Preferred language is English.
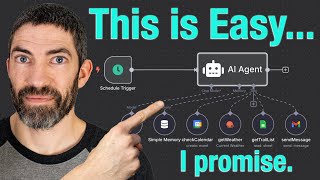
And then you save it right there. We've now established the foundation of our social media automation. Now comes the fun part because right now you can set up your Instagram, LinkedIn, Twitter, and then your YouTube account.
You can also add in Facebook, but I don't use Facebook personally, so I haven't added it in there. But here's how it works. So the first thing is you have this router right here.
So this sends the transcript to all of these different GPTs. All you have to do is you need to connect Jet GPT with your API key. So in order to do that, you click on this, then you click on add.
And here, as you can see, you need to enter your API key. Now the way you get your API key is as follows. So if you go over to the spreadsheet, you see we have the create chip integration.
We click on platform openai. Open this link right here. Then you need to log in.
After logging in, it will bring you to this page where you can create a new secret key. Here you can give it a name. Then you can assign it to a project and then you create your key.
With that key you copy that and then you bring it into your make account right here and then you save that again. Now, next up, we need to set up the first GPT bot. And with that is I'm using the model Jet GPT 40 as this is one of the latest latest versions, but you could also use a different model.
Doesn't really matter that much. After logging into this page, what you need to do is you need to add in some balance to your account. You can start off really easy by just adding $5 to your account.
It is not that expensive. Trust me, I've been using this for a while and I'm still in the same $5. Then once you've added the $5 to your account, you can create your new secret key right here.
You can give it a name and then you create your secret key. With that key, you go back to make. Then you add the key right here at this part where it says enter in your API key.
You save it and then you set up the chipt integration. Then you have to choose your model. I chose the 40 latest version.
And you could also do one of the other versions, but in my opinion, the 401 works best for this automation. Then moving on, you want to open up the messages. Then message one, the role, you want to assign this to a user.
And then for the text content, now we need to copy or prompt. So if we go back to the spreadsheet, we have completed all of these steps. We can move over to step six.
Then you can go over to this page right here. We open this. Then we have all of the different prompts that you need to use for this automation.
So the first one is this one. We copy it. Then we go back to make and then we paste it in there.
Then what you want to do at the end, you want to add in the transcript for dumpling AI. So then it will use that transcript with this prompt. And then we have the first part done.
We do the same for this one, but for LinkedIn. So we copy this one on LinkedIn. Copy this one.
And then we paste it into our chat right here that's connected to LinkedIn. Pretty much the exact same process. So here we have it for a LinkedIn post transcript.
And we do the same for X as well. A slightly different prompt for X because we need to use maximum of 200 characters. I like to keep it short.
So we just copy this, post it in here too. And then we have our first part done. Now the next part is to add in an image on Instagram.
And here it becomes quite interesting because right now I'm using Chetip for this. I'm using Delhi tree but you could also use dumpling for this. So if I show you this right now, you could add in dumpling AI.
Then within Dumpling AI, you could make an image using Recraft Flux or Flux Pro even and then you can use that instead of using Delhi 3. That might give you better results as those models in my opinion are better than Dolly 3. But for the sake of convenience, I'm using Delhi 3 right here.
And then the next part is to connect our Instagram account. For Instagram, you want to make sure that you have a Facebook business account and then you want to select your page. Now, what you next up need to do is you need to connect the data.
So, the data from here you want to add in there. You can find that by going here to data and then click on URL. So now it will take that photo that you have generated using daily and it will upload it into Instagram.
And then for the caption you want to go with the result that is right here. You can read it right here. So now the result, crazy how AI can now literally control a bun pun bun and then you can put it in there.
Save this and then your Instagram is all set up. LinkedIn pretty much the exact same process. All you have to do is you have to log in using your own LinkedIn account.
Then you put in the result right here and then you save this. Now for X or Twitter, it's actually a lot more difficult. So for Twitter, I have it written down right here in the automation.
So what you want to do for Twitter, you want to go over to this website right here. And here it's all in detailed explain how you need to use this. So they don't have a good system of integrating your Twitter account right here.
So what you want to do is you want to follow all of these steps or you want to watch this video that I've linked in here, which is a super cool video where they explain it exactly how it works. And then you can connect your Twitter account. So once you have your Twitter account connected, you all you have to do is you just need to put in the results and then you save this.
So by doing all of that, you get posts like these ones, this one, and even this one. Now the last step is to make a cool short like this one for example. This AI can run your computer and phones all by itself.
Let me show you. To create this AI clone on YouTube, we have to follow this next step right here. So for this I will link a YouTube video of my previous video on make.
com where I explained this entire automation where I go in depth in each and every step that you need to follow for this. But let me just show you a few changes that I made within this automation. So first of all I changed up the prompting style a little bit on this model.
So right here I'm using 01 mini and then I'm using a very detailed prompt. You can find the prompt again right here in the prompting guide. For this prompt, we're using it to create a script for our clone.
So after that, you want to connect your Hen account. Make sure you connect your Hen API. I explain all of that in the document and also in the video that I've mentioned.
Then you need to wait for like 8 minutes. You get the video and then you want to create a title. So this is a new part that I added in there, which is creating a title based on the transcript.
right here. All you have to do is connect your Chetch account. You copy the text that I've put into this document right there.
You copy the prompt that is in here that is looking like this. Then you connect the transcript to it and then you can upload directly on YouTube with the title of this CHP. So you see here the result is this title and then you get a video with Menaceai, the ultimate automation and moneymaking tool.
So that allows you to fully automate all of your social media accounts just by importing one YouTube video. How amazing is that? And to me, I'm quite surprised of how good this tool is.
Literally, there's so many different ways how you can animate stuff with Make. If you want me to create more videos about Make, let me know in the comments down below. Let me also know what you'd like to see next.
And if you want to try this out yourself, then use the link in the description down below to get one month of Make Pro for completely free.
Related Videos
25:58
From Zero to Your First AI Agent in 25 Min...
Futurepedia
251,129 views

24:01
AI Social Media Automation: Post Reels, Sh...
Solopreneur
46,506 views

19:52
Create Your AI Social Media Agent in MINUT...
Helena Liu
48,605 views

10:09
AI Agents, Clearly Explained
Jeff Su
1,349,451 views

11:44
7 Underrated AI Tools I Wish I Tried Soon...
Dan Kieft
17,476 views

17:36
Google DELIVERED - Everything you missed f...
Matthew Berman
122,537 views
14:32
This Social Media AI Automation Scrapes 10...
AI Andy
3,030 views
14:56
AI Social Media Automation: How to Post Da...
Solopreneur
87,200 views

26:21
1 MINUTE AGO: Jennifer Lawrence’s Courtroo...
CelestIQ
623,175 views

19:00
I Tried The Ai Agent Side Hustle & Made $_...
Wholesale Ted
109,381 views

13:52
Create Consistent Character AI Talking Vid...
Dan Kieft
36,218 views

38:54
The Master Prompt Method: Unlock AI’s Full...
Tiago Forte
278,454 views
15:53
MASTER Google AI Studio in 15 minutes
Enovair
18,818 views
13:00
I Generated 100 Monetizable YouTube Shorts...
Dan Kieft
29,971 views
12:51
✨ Automate Social Media Posts with MAKE & ...
PkSkills
1,621 views

36:15
How I Run A 0-Employee Marketing Agency Wi...
Marketing Against the Grain
119,910 views
16:49
This ChatGPT Update Changes Everything
Brendan Gillen
52,376 views
![How to Master Social Media in 2025 [COMPLETE GUIDE]](https://img.youtube.com/vi/E6ZSIZ89Ekg/mqdefault.jpg)
17:42
How to Master Social Media in 2025 [COMPLE...
Neil Patel
130,171 views

21:56
You’ve Never Seen AI Videos Like This (All...
Matt Szaton
81,894 views