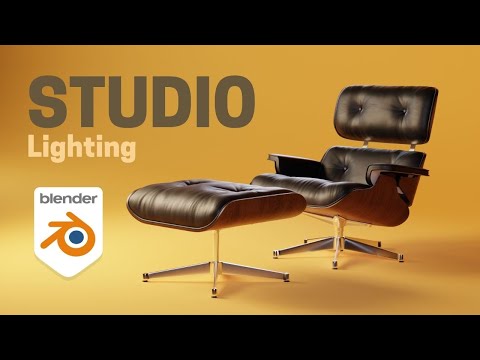
How to create a professional Studio Lighting in Blender 3.0
117.11k views1842 WordsCopy TextShare
Blender for Archviz
BLENDER FOR ARCHVIZ ACADEMY:
https://www.an-archviz.com/blender-for-archviz-academy
Come to our Ble...
Video Transcript:
so in this video i'm going to teach you how we can create a professional studio lighting inside of blender so if you are looking for a tutorial to teach you how to create a professional lighting setup for products and furniture here in the right place if you like to know more about how to use blender for a texture visualization and for realistic rendering you are in the right place so clicking the subscribe button and clicking the notification bell so every time i post a new video you will know that okay without further ado let's get
started so the first thing we need to have a good camera so the camera will be a camera which i will just look in front of my object press six two or three times to make a 45 angle degree press shift a add a camera and press ctrl alt 0 to bring that camera closer to my eyes the focal length will be eight millimeters because it will make the things that are closer to the camera not so bigger than the things that are behind the camera if we do that same thing with a 22 millimeters
camera you can see that the things that are closer to the camera look uh extremely huge compared to things that are further away from the camera as we are looking for a more natural feeling we're gonna use eight millimeters and make sure that this object will be more or less in this position in our shot and now i would like to bring it down a little bit but i don't like to rotate my camera like so i prefer to use the camera shift option which i can hold shift and bring my object to the center
of my scene in that way i don't need to rotate my camera i prefer to work like that because i prefer to keep my lines correct in my final shots usually this is more useful in interior shots but in this case i think it looks more pleasing to the eyes should do that besides to rotate the camera okay now let's put it in the hand review in our other screen and let's press ctrl b select everything to make sure that my i'm seeing only what the camera is handling so first we need a 4 so
let's press shift a mesh plane i will enter that mode and increase the size of that plane something like this is good enough and then i will extrude this thing up only that corner edge here exert it up like so and then i will press ctrl b to make a bevel so your bevel will come like so and you need to to rotate your mouse wheel to increase the number of bevels and then we can move this like so or just select those edges here and move until it gets all our shot covered okay let's
press the right mouse button is more shading and make sure that our object is smooth and good to go so let's deal now with lightning first thing first i don't want to use the word lightning so i will just come here to the color and make it pitch black i only gonna use the artificial lighting from lenses so the first one it will be the shift a light area light and this area lights will be our key light our main lights which will be responsible to really review our scene so i will rotate that by
90 degrees and then i will make sure to put it in about 45 degrees in about the 45 degree angle of my subject also using the r key and press x twice i can rotate my light in his own object axis so this will make sure that i will have a good lightning in my scene okay it's too weak so let's increase the strength the power now is 10 watts let's increase each to 100 and now we are seeing something everything and to make it pop even more you can deal with your shadows so to
have more pronounced shadows you can reduce the size of the lamp so you can see that a smaller light saucer will give you a more sharp and defined shadow and a bigger light will give you a more blurred and undefined shadow so do whatever you prefer for your scene in our case i will put it in point eight centimeters which for my taste is good enough in this case last thing to make it really pop up let's bring a little bit of color to that so to do that i will click here in use notes
and here on the color i will click on this button and i will add a black body node which will allow me to use the temperature to drive the color of my lens so i will increase that to something like 45 0 zero which would bring a more yellowish but neutral color perfect it's good for my taste you can play with those values to make sure that you are getting things closer to your taste or your style let's press shift to d to duplicate this lamp here and let's make now our view light the fuel
light has only one purpose which will be to make the shadows is move and less pronounces so the power of that light should be smaller than the key light because now as you can see the scene is basically flat let's reduce the power to something like 45 watts i think this is good enough and you can see that now we have a really really soft shadows you can before that we have this rohush in dark shadows after that we have these shadows here you can play with this valley but in my case this is good
enough for me and for the temperature i like to increase that something more like like a bluish color something like a seven five zero zero because the main lights will be warm and the shadows will be cool will be bluish which creates a really good complementary color scheme so now it's looking really good it's looking really professional but we need another light to make things pop up a little bit which is more like a situational light you can see that the background is really dark so let's press shift a and let's add our area light
which will be responsible only to illuminate this background so let's increase the strength to 100 so let's bring it up like this as you guys can see now we have a light that is really only lightening the background that's right 200 yes like something like that these lights so before we had that which is awful and now we have a more clear background to see and finally let's add a ring light with the light that we're gonna use to draw an outline behind our object so to do that all we're gonna do will be the
following so the first thing first let me test yeah this light here i don't want this light to cast shadows so if i turn off the cast shadow for this light here we're gonna have more control to the shadows in this corner you can see that we have some bug-ishy stuff on the shadows here you can see that is really strange so turning off the cast shadows for this light here really allow us to get a more interesting result as you guys can see anyway uh let's add now a ring light so let's press shift
a light area light let's point it behind our object like so and let's put somewhere like here more or less a 45 degree angle like so i will hide all the other lights to deal only with my ring lights and then i will move it up and this is exactly what i'm looking for i would like to have these pronounced lights here behind my object but let's bring it up a little bit let's bring it down like so something like this and yes let's increase now the power something like 55 55 i believe will be
good enough and look how dramatic it look it looks it's really interesting so i will press alt h to unhide all my other lights and you can see that we we really got a professional result here finally that we have our lighting done let's play a little bit with the colors of our backdrop to do that i'm gonna do is to come here to the material section create a new material i will call it material backdrop should deal with the colors i really prefer to use complementary color scheme so what i like to do is
i come to the base color click in this eyedropper and click here any part of the wood somewhere around here okay i will also take this color come here to the extra decimal stuff copy the hex code and come here to this website which is the color.adobe.com where we have a color wheel i would like to put in complementary it's in brazilian portuguese but anyway no one cares let's just put it here and now you can see that we got some options for complementary colors for example we could we can try this blueish color like
so you can press ctrl v here in the blender and as you can see we have a complementary color screen in our background something blue-ish so if you're looking for something more i don't know blue-ish cold like this you can try that in my case i think this orange here is really better so we can try something like this and you can use whatever you want in your background color but the cherry on top of the cake will be the following as soon as you finish your lightening it's looking professional it's looking good let's stop
a little bit and talk just a little bit about this speculative here so to get rid of that let's increase the roughness onto almost each that's one okay now it's looking better but anyway the cherry on the top of the thing will be to come here to the handling section come here to color management and change it from non which is the default inside of blender to high contrast it will make the colors pop up look how the non look is washed out and look like look how the high contrast stuff is really popping up
the colors make things really pop up really looking good so did you like this tutorial so click in the like subscribe to the channel and click the notification bell thanks for watching and i'll see you in our next video bye
Related Videos
14:49
The Key to Beautiful Lighting in Blender
DECODED
19,574 views

23:55
How to Make Studio Lighting in Blender
Blender Guru
850,514 views

16:41
The Only Product Lighting Video You'll Eve...
The Blenderender
7,878 views

13:44
Product Lighting Tutorial in Blender - Rim...
Motion Nations
34,153 views

10:04
The Power of LIGHTING in Blender!
Kaizen
467,821 views
55:58
Lighting Fundamentals: Master One Light in...
Wenbo Zhao
115,265 views
5:45
Infinite Background Blender Render
What Make Art
33,898 views

4:00
Easy Product Lighting in Blender (Tutorial)
Architecture Topics
6,480 views

29:41
How to Visualize Products to MAKE MONEY (A...
Aryan
43,271 views

9:51
WATCH THIS Before Picking Your Lights in B...
Ducky 3D
116,366 views

9:11
How to Render Faster In Blender Cycles
BadgerBricks
33,476 views
11:20
The Blender animation SECRETE NO ONE IS TA...
Blender for Archviz
1,939 views

13:57
😲 Most REALISTIC AND EASY Asphalt you'ill...
Blender for Archviz
13,497 views
14:31
The Key to Realistic Renders in Blender
Kaizen
102,358 views

2:27
Your Lighting Sucks. Here's Why
Smeaf
86,776 views
8:08
BEGINNERS Guide to Rendering in Blender (i...
Josh Gambrell
285,467 views

7:37
Create Realistic Lighting With Blender in ...
Kerem Eren
1,270 views
1:00:49
TV Table (Blender Tutorial) Photorealistic...
Ryan King Art
46,992 views

11:08
Simple Studio Lighting for Cars in Blender...
Ducky 3D
48,367 views

20:06
The Ultimate Guide to Portrait Lighting in...
FlippedNormals
121,143 views