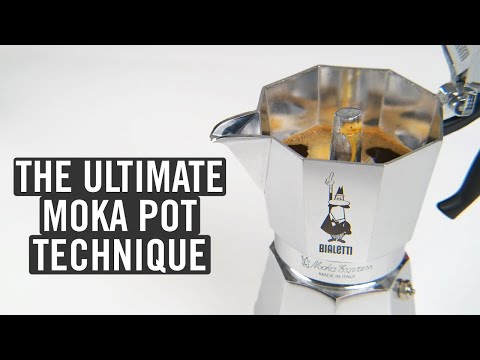
The Ultimate Moka Pot Technique (Episode #3)
5.42M views2729 WordsCopy TextShare
James Hoffmann
I hope you enjoy this technique, even if it is a little different to the other previous Ultimate Tec...
Video Transcript:
today we're talking about the mcka poot this is the ultimate mcka poot technique and this is going to be a little bit different to my other ultimate technique videos because well there is no one mocka poot they go from being great big things down to being nice and little and small there's different styles but they all kind of work the same way but it's a versatile Brewer it's a tricky Brewer and what I'm going to do today is give you some constants a few things that I would do for every single brew and then a
few variables to tweak to get the best out of each of these Brews if you watch this and just do the constants I think you'll get a better Brew but I would recommend taking the time to understand how to get the very best you can from the mcka poot let's begin though with a very quick explanation of how a mcka poot works for this we took a mcka poot like this and sliced it in half and you can see there's really three chambers to pay attention to the lowest chamber is your boiler you'll put your
water in here and as you boil the whole unit once it's sealed together the Steam and expanding air will press the water up the funnel through into the middle section which is where the coffee sits and that pressure built by the Steam and built by the expanding air will press the very hot water through the coffee into this chamber filter it out and then push the liquid up here and into our collection receptacle in the top from which we can then pour and drink it's a beautifully simple Brewer it's kind of fun that it kind
of Brews upside down instead of water on top coffee and then drink at the bottom it goes the other way the big challenge with a mcka poot is preventing the whole thing getting too hot and having incredible ibly hot water from the boiler pass through the coffee which tends to give a great deal of bitterness to a cup that's what we want to avoid so now I'll take a classic pot this is a 6 cup aluminium beti and I'll walk you through the constants first and then we'll Brew with it afterwards to go through the
variables in a bit more detail first constant is put boiling water in the base of this unit putting boiling water in the base of this thing brings the temperature down to the kind of low 9s which is perfect for putting on the heat and starting to brew with you can if you want to boil your water in the base first but do let it cool down a little bit I wouldn't recommend starting with the water super close to Boiling Point starting with freshly boiled water in the base means you have a faster Brew more suitable
Brew temperatures and I know that sounds surprising but trust me it works better this way and you'll get a better extracted more delicious cup of coffee constant number two you want a full basket of coffee now most of these Brewers work on approximately a 10:1 ratio if you fill the water on a boiler to just below the valve typically it will hold around 10 times more water by weight than you can fit coffee in the basket bear in mind though that filling the basket is a volumetric fill and a light roast will way more than
a dark roast will so it's difficult to say You must use exactly 10 to one but I tend to recommend that as a good starting point this holds just under 300 G of liquid in the base but I'm still going to aim for about 30 G of coffee into here ground freshly right before we Brew next up is Puck prep and consider this an optional extra I think it does help make the coffee taste better but don't freak out if this isn't an option for you firstly once your coffee is in the basket feel free
to give it a little tap to settle it down if you have a needle distribution tool for espresso this is a great time to use it it helps distribute the coffee in the basket and also get rid of any potential clumps that might be there feel free to give it another little tap after you've settled the other extra is one of these it's an Aeropress paper filter in a 3 cup unit and bigger you can get an AER press filter just here underneath the top part of the section this will add another layer of filtration
alongside the metal piece here which gives you a cleaner cup and also it seems a slightly better extraction overall with the slightly larger units I'd recommend just using a little water to wet the filter not to rinse it for paper taste but to help it stick in place so it doesn't move around when you're prepping your pot and the last constant for Brewing is avoid the hot sputtering phase at the end of Brewing when you brew keep your lid open and keep an ear and an eye out on your brew a watched pot is a
good pot in this situation at the end of a brew we definitely want to avoid uncondensed steam passing from the boiler right through the coffee causing an angry spurting sputtering phase if that happens it's making your coffee taste very bitter and at that point you want to rinse the pot under the cold tap to cool it down immediately and to stop Brewing before it adds too much bitterness to the cup these constants I think will make any Brew better but we can take it even further let me walk you through a brew of a particular
coffee from start to finish and give you the additional variables that you need to to worry about so of course the biggest variable you're going to use is going to be the coffee that you choose to brew here I'm brewing a relatively light roasted coffee that is roasted for espresso but it's still on the lighter end of things that's going to dictate a couple of key things firstly how fine I grind the coffee the lighter the roast the finer you'll need to grind it to get a good extraction from it lighter roasts are harder to
properly extract than darker roasts here I'll be finer than filter coffee but certainly not close to Espresso good bit closer than espresso but f then you might want to brew a one cup V60 if you're brewing a pretty fine a press you're kind of getting in the ballpark for a brew of this size secondly it's going to determine how full my boiler is now in some situations I want to fill the boiler a little bit less a less fill boiler will brew a little earlier and have a lower overall Brew temperature so if I was
brewing a darker roast I might only fill this boiler 2/3 to 3/4 of the way full with a lighter roast I need all the water I can get to proper extract the flavors from this light roasted coffee therefore I'm going to fill this right up until the base of the safety valve this technique is aiming to get as much water as possible through the coffee before it starts to sputter and get angry if you do that well you can really beautifully extract pretty light roasted coffees and have a very tasty cup with a darker roast
it can be advantageous to have less water in the boiler below not just from a brew temperature perspective but it will stop you brewing a little bit earlier your end cup will be stronger ER thicker richer but that's often what people want from a darker roast just with less of that harsh bitterness at the back of your throat freshly boiled water into the base coffee in and then you're going to need a towel just to hold the base as you screw it together now this is where things get a little bit more complicated and this
is really key to the whole technique when we Heat this pot we want to generate enough heat in the boiler to create steam pressure to press that hot water through the coffee what we don't want to do is keep heating that pot to the point that there's loads of pressure the water gets really hot and the whole thing overheats and tastes bad so what we're going to look to do is heat the pot until liquid begins to flow through coffee and then try and maintain that pressure not increase it much at all from that point
onwards so here on this gas I've got a little adapter plate here to keep this thing nice and safe which will have an impact I'm going to put a relatively low flame on it and I would recommend that for most heating situations with an electric hob I would recommend preheating the hob before you even think about making coffee otherwise you'd be waiting a very long time but with gas uh with induction with an adapter plate I would go for a relatively low heat certainly below half power heating the water gently is key to the technique
I've seen people have some success by putting the pot in a frying pan to help buffer the heat from the flame that's just a little bit wasteful because you are really heating a lot of excess metal to heat a pot not a truly efficient Affair but it kind of works and so I quite like adapter plates like this for gas and and induction as soon as it's on the heat I'd recommend opening the lid so you can see what's happening we're going to pay a lot of attention to the liquid coming out of the pot
because as soon as liquid appears we want to essentially reduce the heat as much as is possible without causing the whole thing to lose temperature and the Brew to stall so in this case when liquid starts to flow I'm going to turn off the gas knowing that my adapted plate is still very hot and adding heat into the system if I was on an electric Hub I might move my pot just to the side cuz it does stay hot for quite a long time afterwards and on gas if I'm on a direct flame I'd want
to run as low as I possibly could same with induction with an induction friendly pot you want to run as low as is possible once liquid starts to flow if that liquid flow increases in speed I'd temporarily remove the partt from the flame if it slows down and seems to stall I'd want to add a little bit more heat in again with the adapter plate it's kind of easy because I can just turn off the heat and generally speaking the plate will supply enough heat for the rest of the Brew but we'll measure the Brew
at the end in a simple way to see how successful we've been and we'll know then how to tweak and improve our recipe for the next Brew I've now cut the heat and I'm just going to watch this flow if it starts to pick up a little bit too much I may remove it from the heat entirely but right now it's looking nice and steady and even and that's good and I'm just watching and waiting for that sputtering sound which will mean we really have to stop this pot's too hot a quick shout out to
the wired Gourmet Channel his video on mocka pots I think was really useful and kind of pioneered this technique of temperature surfing the pot to get as much liquid through as you can the pot's pretty close to done we're starting to get some sputtering time to stop now as soon as you've brewed you want this liquid out of the pot the pot was very hot uh especially the aluminium ones and that doesn't necessarily make the coffee taste better what we're also going to do is weigh how much liquid we got that's actually really useful so
in this case we've got about 200 g out that's a really high yield for a pot here where we got maybe 280 G of water in the base generally speaking about 2/3 of what you put in is the maximum that you're realistically going to get out and with lighter roasts I would say you want as much through the coffee as you possibly can with darker roasts I'd be I'd be much happier with say 150 coming out of this pot or even 120 because I don't need all of that water to properly extract the coffee now
this here is pretty strong it's pretty intense it's very enjoyable if you like a stronger coffee I'd say it's even more enjoyable with lighter roasts to dilute it down a little little bit as a kind of mcka poot Americano or you could go for something like a milk drink where this is the base of your drink and you going add steamed or heated milk to that for a delicious beverage now if your pot comes up short if you start sputtering before you've got your desired amount of liquid out then there's two things that could be
at play one your grind might be a little bit too fine that tends to cause the system to heat up much quicker and that can be a problem however generally speaking I want to use the finest grind that I can especially with lighter roasts to get maximum flavor so the other issue may be that the pot got too hot too quickly try reducing the heat more once liquid starts to flow or having the pot spend a little bit more time off the heat that way you should be able to get to about 2/3 of the
liquid out of the pot uh without hitting that angry sputtering phase that adds so much bitterness to your cup one last variable to discuss is the size of pot that you're using and this is really going to come into it when it comes to reducing the heat with a much larger pot like this you can let the Heat run that little bit further into liquid starting to flow than you can do with a much smaller pot here as soon as liquid appears I'd pretty much take the whole pot off the heat uh it doesn't need
any more energy to get that very small amount of liquid through the coffee with this thing you are going to add a little bit more heat for a little bit longer just because there's so much water in that base compared to this thing here there's a lot more energy required to kind of maintain that temperature and pressure it might seem like a lot of effort a lot of fuss it gets easier the more you do it it I'm not going to say this is the easiest Brewer in the world I know it's popular I know
it's in so many households and brewed with every day by so many people but when it comes to Specialty coffees it does need a little bit more care and attention but I still think you can get some really great results but now I want to hear from you down in the comments below let me know how this has changed the way that you brew your mocka Poots let me know the results how has the coffee changed for you is it better is it sweeter is it cleaner is it less bitter that's what we're really aiming
for here let us know down in the comments below but for now I'll say thank you so much for watching and I hope you have a great day
Related Videos