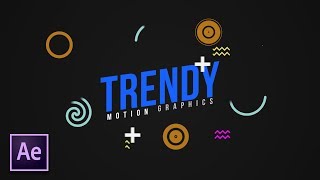
everyone has their favorite go-to effects but what happens when you combine several of the best effects together let's explore After Effects it Mak some of the coolest projects by exploiting the best effect Stacks I'm calling this first effect stack light leak shaper and this can be applied to any shape or graphic which will turn it into a cinematic element so how we can pull this off is by applying the gajan blur effect and blur the heck out of it then we can use the four color gradient to colorize your graphic I'm using warm colors for
this but it doesn't really matter then use glow from styliz and set the radius to 400 simple like that next use the noise effect and increase the amount to around 20 then this will allow us to use the posterize effect to help make the colors pop and lastly let's throw in the brightness and contrast effect from color correction and we can use the wiggle expression to give our shape a flickering effect wow cinematic and six effects and I should mention you may want to throw on a wiggle Path property to give your shape motion giving
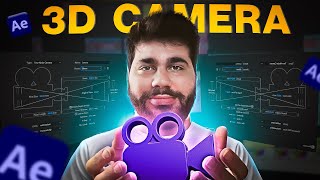
your 3D work that beautiful depth of field effect requires several effects but it's super simple so let's figure it out when your 3D work is done be sure to precompose it and apply the mega boss 3D channel extract effect from Channel then just use the black and white points to create a depth map then use the depth the Field Effect to smooth everything out with the maximum radius then duplicate your layer and delete the effects and apply the best blur effect which is camera lens blur set the layer drop down to your bottom layer and
then set the other drop down to effect and mask when we increase the blur radius this will look so sick and I love it now are you ever looking at your work and you think to yourself this is so bad I'm going to get fired well in this next stack this is what I'm calling cinematic texturing or better yet the career saver with an adjustment layer above your project use the noise effect and set it between 6 to 12% uncheck use color noise next try the glow effect you may be able to increase the glow
radius to you know 250 and then adjust the intensity and the threshold until the glow looks natural for your project you may also want to alt click the stopwatch for glow radius and use the wiggle 5 comma 100 expression to animate the glow the next effect that makes it all happen is posterize from stylize adjust the level as needed to pump in the style and lastly try posterize time and cut the value and half to give your edit a stop motion feel beautiful but that last effect is clearly optional like waking up in the morning
you could have just stayed in bed and actually you could stay in bed longer because you can crunch down on your animations and Save hours of time by using our free animation presets you can select any type of graphic or title browse a preset and watch your project come to life in second you can utilize over 10,000 presets by checking the description below what good would there be without cinematic lows sometimes the basic glow effect needs some love take any white shape that you want to glow and apply the next best blur effect gajin blur
set it to around 30 to 50 points now apply the glow effect and try a glow radius of 100 and add the wiggle expression 1 comma 10 then duplicate the glow and max out the glow radius at 1,000 and then adjust a wiggle to 2 comma 200 or whatever you like these are just general settings and beautiful I just saved you 50 bucks at least for now this next one is possible when you have a white graphic and you want to turn it into a glowing outline just in a second's time if you have a
PNG and you're unable to turn it white apply the fill effect and make it 6 FS then lose it all with the Vagas effect under generate all we need to do is set the blend mode to transparent the color to anything that you like then the hard hardness midpoint opacity and end opacity to one and for what I think is a good practice I would set the segments to one and the length to almost one and you can animate the rotation to create a moving stroke lastly apply the glow effect and adjust the radius then
go ahead and duplicate the glow effect and further the radius for good measure to create this glowing outline seamlessly moving along creating beautiful seamless transitions only requires two effects the first effect is motion tiled which needs to be be applied to an adjustment layer with your footage underneath we can then animate The Tile Center and this will create a repeated rolling motion and I believe it would be wise to apply another great blur effect directional blur all you need to do here is animate the blur length to go along with your motion tile and I
would recommend making the first and last key frames easy ease key frames by hitting F9 on keyboard and going on the graph editor and just smoothing those out as best as you can to create easy and seamless to become the one here's the playbook for creating Neo morphic design that Matrix reference may be out of date but you know take a graphic that is the same color as your background and apply the bevel Alpha effect adjust the light angle to 45° and slightly adjust the light intensity now you can apply the drop shadow effect set
the opacity to 25% and the distance to 10 and perhaps softness of 25 as well the secret is to duplicate the drop shadow effect two times and on the third cop you can change the color to a light gray and the opacity to 100% And just double the softness like a double hamburger and set the direction to the same angle as the bevel Alpha finally do one more duplicate and that's the neomorphic stack let's control the Revolutions of your graphics to spin around objects first you need a long composition of your titles and other objects
ready to go and with that comp inside of your main squeeze apply the CC cylinder effect from perspective you you can adjust rotation values as needed but animate the rotation y with the time expression to spin your title set the render to outside and duplicate this Banner set the render to inside and place the layer under your video or 3D object but to make this look Pro apply the drop shadow effect to the top cylinder and adjust the opacity and softness to make this look absolutely epic speaking of Epic the git sphere stack consists only
of two effects on a 1080x 1080 solid layer apply the well you guessed it D effect I like to use width and height sliders as it's easy to set the width and height and I think you'll agree with me on that adjust the Border as you like and then animate the anchor to move the grid the second effect is CC cylinder's better cousin CC sphere set the render to outside and the ambient to 200 then adjust a rotation as needed and you know what less recommend creating a stroke circle around your design to make this
look contained but the world of all the grids is now ours not to get tripped up but it's time to get trippy the last stack is creating trippy graphics with a solid layer grab the radio waves effect from generate set the stroke color to whatever you like and we should increase the start and end whiffs to something like 40 but it doesn't really matter much then experiment with the right settings of frequency and expansion then just increase the lifespan for good measure and this will animate forever if you like you can apply the turbulent displace
effect to actually make this trippy I would increase the complexity effect and animate the evolution with the time expression we can also use the Optics compensation effect from distort increase the field of view and be sure to check reverse lens Distortion and the last Distortion effect in the stack is CC lens just mess with the size until the Distortion around the edges start to stretch boom 10 effect Stacks this was fun but subscribe to become the best and always be creating