MORE Consistent Characters & Emotions In Fooocus (Stable Diffusion)
82.84k views3211 WordsCopy TextShare
Jump Into AI
We Have More Tips for Character Consistency With Faces, Expressions, and Emotions in SDXL Stable Dif...
Video Transcript:
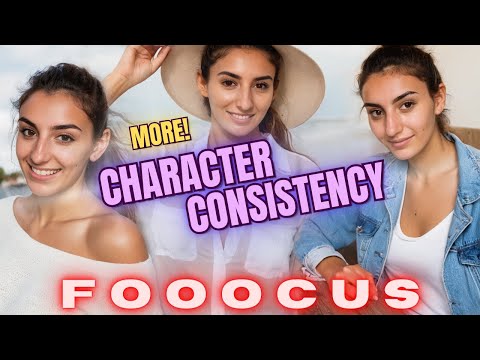
today I want to talk to you a little bit more about character consistency in my first video I showed you how to take a grid and create several near equal faces at different angles I wanted to expand on this and go a little more in depth on creating a character from Stark to finish using the face grid and focus and with that let's get started last time I used the grid of nine faces which in some circumstances works pretty well especially a cartoon or anime but the overall detail can be a bit low since the
faces are so small and when going for realistic images we need a little more to work with so this time around I will be using a grid of four faces each image will be larger and more detailed you can try to generate a grid and focus and then stitch them together but I found it more reliable to just do an image search and Google with phrases like different angle face reference sheet and with a little bit of looking you can find something usable you can copy this image and use whatever image software you have to
edit even just using something as simple as Microsoft Paint and you can create a grid I will do that real quick just to show you how easy it is once copied go ahead and paste into the paint program you can use the zoom functions down here using the selection rectangle tool I will outline and copy these two faces then I'm going to open up another Ms paint window then hit this resize button here change this to pixels click off the maintain aspect ratio button and type in 1024 in both boxes then hit okay then paste
in the first two faces move them around to about here here and we will need to make them a little smaller to fit all four to do that hit the resize button again while the images are still selected and resize it down to about 90% then go back and grab another face from the first paint window and copy back to the second window and paste and resize like the others to 90% and let's go back for one more face select and copy and paste and resize when you are happy with it you can save depending
on what you are using the basic Ms paint even has a background removal but I will leave mine white you can separate the boxes with the line tool here I do this since having them separate helps keep the generations in their own spaces without it they are more likely to blend together for those who still find this too much of a pain I will include this grid as a download in the description now let's go to focus and go into the input image then image prompt check advanced and load in our grid we want 1024
by 1024 so it matches our grid size I am going to remove the Styles I do this because I want a little more control over the prompt but it's not needed I would suggest not using the focus V2 since its prompt changes with every generation and we want consistency for realism any of the big models will work like Juggernaut or real viz or realistic stock photo you can even use the lightning models if you prefer for this I am using realism engine sdxl but if you try the same prompts on all of these it will
probably look fairly similar so don't overthink it I would suggest starting with a simple prompt and going from there I began with just Italian female and slowly built that out with age hair description and then the rest of the facial Fe features getting to the desired result in less words is ideal the stop at and weight numbers down here are where I ended up at but you can change them however this is pretty close to the default numbers uh I wanted more of a real face and skin this time so I added no makeup imperfections
and blemishes the go-to lately seems to be adding Freckles but I really didn't want that after quite a while of generating I ended up on this adding imperfections is good cuz the face swap always seems to smooth the skin a bit anyway and I am trying to get away from that fakey to Perfect Look if it starts morphing together I would suggest bringing the stop at higher while trying to leave the weight around 0.9 to one when you get an image you like we can move on to trying to get some emotions if you get
pictures that are good but the eyes are messed up don't worry we can fix that with in paint later so let's make sure we have random seed unchecked here and I'm going to use the new array support function to try to get four different emotions in one prompt to do this I want to make sure I go to Advanced debug then scroll down to the bottom and check disable seed increment using an array with the uh seed increments disabled will allow us to create multiple images with the exact same seed and prompt and the only
difference between them will be the single word or phrase we will change between them so in this case I have random off and disable seed increments checked and in settings I will bump up image number to four if I generate this right now as is I would get four of the exact same images not what we want so let's add an array to create a different emotion in the images at the beginning here I will type in two of the left brackets then Happy comma laughing comma angry comma crying then two right brackets then generate
and we get a little bit of each emotion happy laughing angry and crying if the emotion isn't coming through you can also use weights in the array however for me adding a bit more to the text helps like if crying isn't enough try hysterically crying or insane laughing things like that you can mix all these up and get multiple levels of emotions all depending on what your end goal is of course and you can always come back later and throw in your first image you settled on into the py cany and create more emotions based
off of that there's also benefits of trying to get the same faces in different lighting which will make sense later for this I just regenerated my original image and dragged it down to the pyan slot and we'll type in something simple like in a living room at night it might take more than that to get a good low light image but just keep trying face swapping with a picture in low light will generally give more nighttime images once you have the images you want the next step is to do any inpainting that is needed make
sure when in painting that you are using the same model that you generated the images with also we are done with the disable seed increment setting so be sure to uncheck that in the debug menu I'll edit one image at a time for my image only the eyes need a little work also I will be using the improved detail setting in the extra prompt box I'll add detailed brown eyes and just mask one set of eyes at a time trying to do two or more won't look as good and you will just waste your time
make sure you are dragging the image down each time you fix one of the faces before moving on to the next I went through and found a couple different emotions and fixed those up this does take time and it depends on how much versatility you want but this way you will have multiple different faces at different angles with different Expressions once you have everything you want we will need to split the four Images up you can stick the grid into the face swap but it will just pick one face out of the four once again
any image software is fine but even Microsoft Paint will do open one of your images into the program and I will just drag this corner down to one square then click file save as PNG and save my first image then come up here hit undo then do the same with the next image and do that till you have them all separated now we have a collection of faces to swap so let's look at three ways to use these images the first is going to be obvious and that is to load our images into face swap
now before anything I want to make this clear the image you are going to get in the end will never be exactly like the starting picture the reason being is that the face swap model that nearly every stable diffusion software uses has a low resolution base of 128 Focus then tries to fill in the blanks as it upscales and swaps the image what you get in the end is a likeness but never one for one but what can be accomplished is keeping the image that is created consistent with the next while it might not look
like your input images the generations themselves will be fairly close to each other so this way we can create a somewhat consistent character just not the one in the base photo for me using three images at different angles keeps the generations pretty similar the weight settings can change with different subjects but keeping it pretty high at Point 9 to one to start seems A good rule of thumb the hard part is trying to get a motion to show without losing the face characteristics too much we can do this by lowering the weight sum and prompting
for heavy emotion in order to get some to show or if you generated another set of faces with aemotion we can switch to those and get ourselves some nice ugly cry faces without having to try and prompt for them and we can easily throw in an image to get a pose we want one thing to note is the further away the face is the worse the detail of the face is going to be one way to solve this is to choose an image where the face is closer and then use out paint this is a
great way to get lots of detail as we are using the full power power of the generation on each section so the overall image will have more detail and that is because we aren't just adding detail but resolution every time we out paint so get a close-up image you want to out paint and drag it down select the inpaint and out paint setting then check the boxes of the directions you want to expand the image and then generate you can expand the image as far out as you want if you need to go further just
drag down the next image change the directions if needed and generate again now we have ways to create multiple types of images but um one thing you might notice is all these are in the bright daytime trying to get nighttime shots will be near impossible one way around this is if you created a grid in low light or I imagine with some editing skills in Photoshop you could darken them up with these we should be able to get some darker photos now and with the same prompt for nighttime but using the the darker shaded photos
we can get at the very least some evening time pictures to get more poses we can easily find one we like with Google Images I will type in something random in the search click images go to tools and change image to large so we can get ones that are higher resolution ideally nothing with a watermark although with a low weight it might not show when we find something we can drag it right into our box keep in mind we want to use an image that has an aspect ratio similar to what we are generating and
as usual if we get an image that's somewhat far the face will look bad but we can fix that with inpaint go to the inpaint tab and drag the image down we want to use the face swap function here but we will need to activate it so let's go to the advanced tab then the debug menu and click the control tab then check mixing image prompt within paint box then we will want to go over to the image prompt Tab and make sure we only have faces selected remove any poses for this part mask the
face area and switch the method setting over to improve detail then when ready click generate you can raise and lower the strength of the inpaint den noise as needed with this setting here since this is basically repairing the face and not putting an entirely new one on I think the0 five works for me if you want to use the other inpaint presets for face swap other than improved detail you will need to deactivate the refiner switch or else the face will change to something entirely different to do that go back to the advaned Tab and
debug tools then down to forced override of refiner switch step you just need to type in a number higher than whatever steps you are using to be safe just type in something above 60 and you're fine but for our purposes the improved detail setting will work best so now you have some images to work with but perhaps your ultimate purpose here is you want the exact face in the photo if trying to get a specific face into an already existing image the method you would use is one that's been around forever and that's photoshopping the
face into the the image I am absolutely terrible at Photoshop but what we can do is create a transparent image of the face and try to set it on an already existing photo and let Focus blend it in for us if your image has a white background like mine Microsoft paint's background removal should be sufficient there are lots of tools that do this now and for our purposes it doesn't need to be perfect unfortunately the paint program has limited tools to manipulate and rotate the image so another software will be needed you only really need
to be able to resize and rotate the image in order to place it over the old and then erase everything outside of the face the image and the face hopefully at least match somewhat in color and lighting otherwise you will need to try to correct that once you have something you are satisfied with we can bring it into focus and try to smooth it out put it into in paint and use improve detail and mask around the edges try not to mask into the face too much or else it will change it also be sure
to uncheck the mixing image prompt and in paint box we don't want our images to try and face swap at this point and check images when done if that's good enough you can stop there or do more in painting you could also pull down one of the images and mask the face and run it with a really low denoise it will change it some but on low Den noise it won't be much and can help it settle the image a little more it still might not look great especially if you are an amateur photoshopper like
me but it's one way to do this the last way is sort of doing everything we just did but in Reverse we are going to use just the face on a blank canvas and then out paint everything around it we only want to mask the face this time and try to keep it as close to the edges without going over then we will go to debug menu and in the inpaint tab we want to go to the bottom and check the invert mask using this setting makes it so that everything outside of the Mask will
be changed instead of inside the mask and then we make sure we are on in paint or out paint and then check all the out paint directions type in your description for the scene you want and then click generate if you like the outcome you can keep expanding this image and if needed change the prompt as you go now remember we have invert mask checked if there is no mask on the image then it will think the entire canvas is masked and we will get a completely different picture so if you run into that issue
that is why so uncheck invert mask and then we can generate again and you can make this as large and out painted as you like a couple of things I didn't mention when using the three faces at different angles you might want to have one show more than the other if you want the image to be closer to this angle simply keep the stop at and the weight of this one high and lower the others I'll put the stop at for these two at 6 and the weight at8 while keeping the one I want at
a stop at of .9 and a weight of .9 if you want more of a straight on picture then we can do the same thing just switching the numbers between these two pictures I didn't use the side view much in this tutorial but it works the same way just lower the other two like before but make sure you aren't losing the overall likeness of your image and while I showed only realistic images mostly I want you to know that this works with all types of images from comic book to anime the stop at and the
weight settings might need to change especially if the face is more outside the bounds of realism if you are going for Something Completely nonhuman face you can start with the grid and your prompt and then take the best image of those drag that down and replace the starting grid with the picture then keep generating till you get the next closest one pull that one down and build off of that slowly the new form will come to life and I think that's all I have for you guys this time I hope you learn something from this
and as always I will see you in the next one
Related Videos
4:50
Fooocus 2.3.0 – New Preset Feature & Light...
Jump Into AI
19,373 views

16:44
Make CONSISTENT AI Influencers With Flux A...
Brain Project
66,033 views

13:12
Product Placement Tips For Fooocus Image P...
Jump Into AI
46,850 views
12:39
Create Consistent Character Face/Body/Clot...
Jump Into AI
150,273 views
13:02
How To Fix Hands In Fooocus (SDXL Stable D...
Jump Into AI
23,562 views
53:15
The Ultimate Guide to Adobe Bridge: Week 4...
Rick Burress
32 views
23:03
Stable Diffusion - FaceSwap and Consistent...
Kleebz Tech AI
26,309 views
12:52
Create CONSISTENT CHARACTERS for your proj...
Mickmumpitz
181,678 views
26:20
Full Body Character Creation Mastery with ...
AIchemy with Xerophayze
15,885 views

20:29
Suno AI: Everything You Need to Know (Ulti...
Master AI Fast
21,434 views
6:59
The Truth About Consistent Characters In S...
Monzon Media
74,662 views
5:28
Fooocus Face Swap With Ease!
Monzon Media
187,739 views
15:47
Pixelmator Tutorial EP 1 | Quickstart for ...
Jenn Jager
56,747 views
27:12
Overlooked Fooocus Tips and Tricks (and AI...
Kleebz Tech AI
23,213 views
12:46
Fooocus Tutorial Part 4 - Tips for Inpaint...
Jump Into AI
27,681 views

27:10
How to use Stable Diffusion. Automatic1111...
Sebastian Kamph
346,133 views
16:02
Stable Diffusion - FaceSwap and Consistent...
Kleebz Tech AI
23,799 views
7:33
Fooocus - FaceSwap ? - What is PyraCanny a...
AI Ninja
6,842 views

3:58:16
Retouching, Compositing, and Custom Type! ...
Adobe Live
27,771 views

5:49
How to Inpaint In Fooocus
Monzon Media
63,562 views