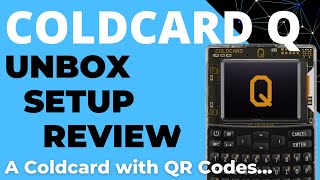
Coldcard Q Bitcoin Wallet - Air Gapped QR Device for Mobile and Desktop
13.76k views13877 WordsCopy TextShare

BTC Sessions
This tutorial teaches you how to set up, use, backup and recover the Coldcard Q from Coinkite to sec...
Video Transcript:
the cold card Q is one of the best hardware devices on the market today when it comes to securing your Bitcoin today we're going to set one up from scratch learn how to use it with your mobile device and your desktop computer and we're going to do it using something called the airgap QR method I am Ben with the BTC sessions this is your daily session [Music] huddled as [Music] Bitcoin Bitcoin well is on a mission to enable independence by being one of the easiest and quickest ways to purchase Bitcoin in Canada and the US
the best part about it every buy goes directly into your own self- custody they never hold your coins you can add a Bitcoin address as part of onboarding there's a transparent 1% spread no hidden fees no withdrawal fees plus they have kyc free sales and bill payments on their website they're also a publicly traded company under the ticker BTC W on the tsxv check them out over at Bitcoin well.com check out my full tutorial on how to use them and you can check out the links in the show notes down below and sign up today
coin kite.com has some of the best hardware on the market today to secure your Bitcoin the cold card Q is an absolute Powerhouse and is my daily driver and on top of this they have plenty of other goodies including the markv the T signer open dimes the blog clock and much more if you head over to their website make sure you use code BTC sessions at checkout to get a nice discount links are in the show notes down below backups are important and sore. has one of the most robust and beautifully designed steel backup Solutions
on the market today you can stamp your seed phrase into solid steel with one of their starter kits for one or two seeds and secure your seed phrase from the elements like fire water and corrosion on top of this if you ever need to swap out any of the information therein you can just grab a new set of discs and slide them into the capsule as you see fit I've done a full tutorial on them that you can check out otherwise click the links down below for the best shipping options for you so let's start
by chatting prerequisites what are you going to need to know in order to successfully navigate this tutorial well first let's cover what you're going to need physically uh you're going to need of course your cold card Q you're going to need three AAA batteries and then finally you're going to need an SD card or rather a Micro SD card and that SD card should be no larger than 60 64 GB in size if it gets larger than that it can be finicky with these devices um you're also going to require an app on your phone
if you're going to be doing it that way or an app on your computer if you're going to be doing that way or both if you want to try both but what are these apps number one is nunchuk wallet you can go to nunchuk doio to find it or you can just search in your app store and look for the nunchuck logo this is available for both IOS and Android and then on desktop you're going to need Sparrow wallet this can be found at Sparrow wallet.com once you get to that website up at the top
right there's a download button it's also over on the left on Blue uh in blue rather and if you click on it you will see options depending on what type of computer you are running you can simply download and install it uh outside of this what are you going to be need to be familiar with well if you want beyond kind of the basic explanation of those pieces of software or those apps you can look in the show notes down below I have super in-depth coverage of nunchuk and Sparrow so you can check out those
tutorials if you like or you can do that after this one if you want something more in depth um other than that I think you're pretty much set you're going to need a place where you're obtaining Bitcoin so you're going to be getting that from uh an exchange like Bitcoin well that's uh mentioned in the beginning of this video or anywhere else that you happen to obtain Bitcoin uh so that you can then deposit it into your long-term savings anything else that I mentioned in this video that I may not have mentioned here will of
course be in the show notes down below and finally you may be watching this video coming from a previous cold card so one of the older versions of this device and you may be curious is this a worthy upgrade is it worth checking out um I'm going to be covering that in the final thoughts section of this video what I thought of the device um what I think of the upgrades and you can also find my other cold card Q videos um in the show notes down below because we are just using one method in
which you can utilize this device there are many methods we're going to be doing the air gapped method with a little QR Scanner up top there are a few terms that I want to Define here so that those that are relatively new to bitcoin understand them as I begin to throw them out through the course of the video These are hot wallet cold wallets and air gapped wallets so a hot wallet is an account of yours where the keys to your money reside directly on an Internet connected device like a phone or computer this means
you don't need a special device like the Q to be able to spend your money now when it comes to hot wallets they are only as secure as the device they are on so if your phone gets hacked or stolen or accessed by some somebody else and same with your computer they have all of the credentials they need to spend your money and send it into their own custody so it's not to say that you should never have a hot wallet but you should treat it as a spending wallet with an amount that you would
be comfortable as cash in your pocket now when it comes to cold wallets this means that the keys to your money reside in a device that is entirely disconnected from the internet something like a cold card Q or many of the other Hardware options out there on the market now these devices vary in how you use them some of them plug directly into your computer and some of them do not and explicitly stay disconnected from everything entirely thus the term air gapped wallet you communicate with the device in a way other than plugging it in
directly thus the term air gap there's a gap between this device and my phone or this device and my computer now what is the benefit of an airga cold wallet versus one that you plug in directly I will say that there's some marginal security um improvements from that and that's primarily from the fact that when you plug in a a device to your computer whatever software you're dealing with in order to to prompt that device to approve a transaction it has a marginal amount of control over the device meaning that it can send a signal
through the cable that it's connected to and require the device to act without you manually commanding it to whereas with an air gapped device as we'll see as we begin to utilize the queue in order for this device to do something and begin to appr Pro a transaction or begin the appr uh the process of that I need to manually say to the device hey we're about to do a transaction pay attention now and start working for me so if you are somewhat uncomfortable with the idea of your computer allowing um or your computer gaining
a degree of control or prompting your device to do something then air gaft may be the route for you it also helps not having to directly plug into something just out of convenience the ability to just scan a QR code back and forth and not needing cables and all of that you can just have your phone and the que and scan or you can just have your queue and your computer and just scan back and forth and you don't have to be carrying around cables to be able to approve transactions so these are our different
terms hot wallet keys are on an Internet connected device cold wallet keys are on a device that never directly connects to the internet airga wallet never gets plugged in to anything that is connected to the internet so there we have it so with that uh let's dive into the device what's in front of us how it functions and then we'll get set up okay so let's take a look at this device and what came in the bag or the Box rather so the device itself you're going to get um I've already inserted my three AAA
batteries there's just a little latch on the back so that you can open it up as such I'm sure you can figure that one out on your own um the device itself has uh an LCD screen in front you have your navigation buttons here up and down and side to side you have a power button in the top left and then you have your full keypad your numbers cancel enter NFC button QR button uh and down at the bottom you've got a button for a flashlight you've got uh to Shi for upper and lower case
you've got a button for symbols uh backspace or delete and a space bar over on the side you actually have two SD card slots you can do whichever one you choose I tend to just use the top one uh sometimes you may have use for both we're primarily going to be using that for upgrading the firmware uh the software that is running on this device today and other than that we're not going to need any plugins however there is a USBC port port on the bottom so you can power that uh through this or you
can plug it in directly to your computer to use it that way that's not how we're using it today but I have a video on that listed down below and then on the top side you're going to have your QR Scanner and this is um an actual uh laser scanner it's not just a a camera um and you also have your uh flashlight up at the top as well and I think that is pretty much all you need to know about this device let's take a look at the bag here now of course this came
sealed in this bag and you're not going to throw this out right at the gate inside of the bag there is a little slip that has a number on it you want to double check that the number is the same as the number outside of the bag this is just like a tamper resistant thing and we're going to uh take a look and confirm the number on the device when we turn it on for the first time as well and then the only other things in the Box here are a couple stickers but more importantly
your backup card so this is where you're going to write all the important information for your device the backup of what we'll say is the keys to your money will be coming in the form of 12 or 24 words what you're going to put on this sheet of course if you want a more secure backup in steel there are plenty of options for that and you can check in the show notes down below for that it's also where you're going to write down the PIN for your device so that nobody can just pick it up
and use it you're going to need a special pin to be able to turn it on on and access your money so all of this will go here and we'll get details about that as we use it and then of course I've still got my SD card here by the way this device when you order it it doesn't come with the SD card or the batteries you're going to need to grab those yourself so you can either uh order the SD card from coin kite if you want or if you have others you can use
them as well just keep in mind below 64 gbt it's desirable and batteries doesn't really matter just grab them wherever uh and then finally I should mention that when it comes to the SD card here you're going to want a way to be able to plug this into your computer okay um because that's how you're going to be upgrading the software on this device there are updates from time to time it's good to keep your device up to date when you can um and we're going to show that in the initial setup here so that's
pretty much what we have in front of us let's get this device set up and upgraded before before we start interacting on our mobile device and our computer all right so to power on my device for the first time I'm going to hit the power button in the top left just hold it for a second you can see it's booting up it says by using this product you are accepting our terms of sale and use read the full document at coldcard docomo press enter to accept the terms and continue I will do so now all
right your new cold card should have arrived sealed in a bag with the above number please take a moment to confirm the number so this is what I was talking about uh just to make sure that your device and your packaging was not tampered with number is up here 18202 1794 663 yours will be different than mine but I can see by looking at the slip inside the bag that isn't is the same and on the outside of the bag that is the same so we are good to go I can scroll down with the
arrows if it looks good I can just simply hit enter all right it now allows me to choose my PIN code that is the top option there are also uh Advanced tools and bag number this is your initial setup screen so I'm going to go ahead I'm going to choose my PIN code for the device I'm going to hit enter it says pick the main wallet's pin code now you need to be more clever but an example would be 1 2 3 and then the second part would be 456 it goes on to detail it
has two parts a prefix and a suffix so a beginning and an end each part must be somewhere between two and six digits so another example is it could be 1 2 3 4 5 6 and then the second part could be 1 2 3 4 5 6 or whatever you desire um total length can be as long as 12 digits as I just mentioned the prefix part determines the anti fishing words you will see each time you log in your new PIN protects access to this cold card device and is not a factor in
the seed wordss or private keys so the backup of your device will not be dependent on your PIN it's just to secure the queue itself not the words that you're going to write down the words that you're going to write down are a full backup you will only need the words to access it whereas this device if somebody gets a hold of it they need the PIN to log in okay so it says there is absolutely no way to recover a forgotten pin write it down we'll hit enter and continue warning again there is absolutely
no way to reset the pen or factory reset the cold card if you forget the pin do not forget the PIN code they put it in all caps pay attention press six to prove you read to the end of this message they really want you to know this so press six to continue all right first part of the pin so I again I should say you can reset the pin if you know the original pin but not if you don't okay we're going to use the example I used 1 2 3 4 5 six twice
so I'm going to enter that now I entered that and hit enter now it gives me two words Arch and feel these are my anti- fishing words I'm going to explain those in a moment moment but I will put in the rest of the pen but before I do that I'm going to write down my two words and the beginning of my pin on this backup card all right I wrote everything in let's enter the rest of the pen one 2 3 4 5 6 and hit enter so it now bumps me back to the
beginning of the pen so it is confirming that what I typed the first time is what I want as my pin so I'm going to enter the beginning of it 1 2 3 4 5 6 and hit enter and I should see the same words Arch and feel good sign we're on the right track we're going to hit the rest of the pin 1 2 3 4 5 6 we'll hit enter and it is saving perfect so that means we entered it the same twice in a row if you get an error message then you
may have entered it incorrectly the second time or incorrectly the first time and not realized it either way we're now to the main screen we now have a pen and I have written down both parts of the pen and the anti- fishing words in the process so pin is now set up for this device we're not done but we have a pin that is allocated to it now really quick I want to describe what these two anti- fishing words are Arch and feel these two words are dependent on a couple factors number one they are
specific to the device so they are specific just to this device and they're specific to this beginning of my pin if I do not see these words when I enter the first half of my pin it means one of two things number one which is more likely is that I accidentally entered the wrong beginning of my pen that is most often the case but if you go back and you re-enter your pen you're certain you've put it in correctly and you're still seeing different words what this means is that your device may have been physically
tampered with by someone else okay so this is designed to let you know if somebody has been messing with your Hardware again go back re-enter your pin the beginning of your pen um but it denotes that if you're certain you've put in these these letters or these numbers correctly multiple times and you're still getting the wrong words then device may have been tampered with that is the purpose of those words you will likely begin to just remember and recall these words every single time and uh yeah that that is pretty much that so we are
good to go now and we can move into the rest of our setup so I'm going to go ahead and I'm going to hit at the top new seed words so I'll hit enter and it gives me some options 12 words 24 words 12 with dice 24 with dice we're going to ignore the dice part today um and we're going to keep it simple today we're just going to go with 12 words 24 words does have marginally more security but the amount of security with 12 words is quite substantial nobody is just going to randomly
guess your words um but if you feel more secure with 24 you are more than welcome to go and choose that option but let's keep it simple for this one we'll choose 12 and hit enter so the cold card is now randomly generating 12 words for me we are going to record these on our backup sheet and then we're going to come back we'll double check them uh but it's going to be a skill testing set of questions to make sure that we have these words correctly recorded so we'll be back in a moment once
we do that okay with my words recorded I'm now going to scroll down I kind of gave it a quick double check with the list here and it says that you can press four to add some dice rolls what that means is if you don't trust that the cold card is being random enough in selecting your words you can roll dice and record the numbers of those Dice and it will uh add Randomness and change the words based on the dice rules that you do we're not going to do that today but it is a
cool feature that is fun to play with uh and then it says uh press QR to view as a QR code we're not going to do that right now I'm just going to go ahead I'm going to hit enter now it's going to ask me all of these words out of order and my job is to for instance here it says word 8 is I can look on my sheet and see that it is small and I then look here on the cold card it says option number three it gives me three options sound rice
and small I can see number three was correct so I'm going to hit three and it moves me on to the next one I'm going to do this for all of my words all the way through randomly uh it out of order and once we're done we should be all set up okay just got through them it says applying welcome your cold card has been configured for the best SEC practices everything is disabled so the USB port at the bottom is currently disabled the NFC which means you could tap your phone to it that is
disabled and the virtual dis which means it can use some of the circuitry inside to store information longer than uh during the course of our session here that is also disabled you can turn those on in the settings I have videos on how to use things like NFC and virtual dis and everything in other videos so that is covered externally we won't need that today and it says you can change these under settings Hardware SL on and off if you do want to play with them I'll also include those videos down below so I'm going
to go ahead and hit enter to move on this bumps us to our main screen this is the home screen of your entire cold card every time you boot it up after you put in your PIN you will land here now there's one other thing we want to do and we want to upgrade the fir firware so we're going to jump to the website so that we can get the appropriate firmware or the appropriate software to load into this device okay so here we are on cold card.com slocs upgrade I will include this in the
show notes down below and this is where we can upgrade our firmware they have a convenient little part at the top what shows you the latest updates and we can see for the queue right here in the middle uh this was released just very recently in the past week or so as of recording this video this is the latest version of the firmware so I'm simply going to tap on this and download it to my computer so this will go to my downloads folder now what I want to do and I'll just get this out
of the way is I want to open up my SD card on my computer I've previously plugged it in before starting this so I'm going to open up and I'm going to select my SD card and open up a finder when you by the way I am on a Mac this will be slightly different if you're on Windows but you'll get the gist of it you need to access your SD card which I've selected over here on the left now I need to find my downloads um and I can see this is the file that
I've just downloaded I'm going to drag it onto my SD card here okay you may do this as a copy and paste if you're in Windows but you're basically going to copy the file that you've just downloaded onto your SD card and then go ahead and eject it all right so now I can take that SD card out of my computer and I can jump back to my cold card and I'm going to be plugging it in now you can see on the front of the cold card here there are two little diagrams about how
the SD card goes in but the the little pins the gold pins are will be facing towards the screen when you enter it and it goes in the side there so just get the proper orientation press it in yes it will be out the side of the device it doesn't go all the way in you're just going to press it firmly so that it goes in like so there we go okay so now we are going to scroll down until we get to advance SL tools and then hit enter and then we're going to go
down to upgrade firmware and we're going to hit enter again we are going to choose from our micro SD card because that's what we have plugged in with a new firmware and it says hey look there's a a a file here that we can use to upgrade do you want to select that one we're going to hit enter there says loading do you want to install this firmware uh it says that it's going to be verified and everything before changes will be made uh so we're just going to hit enter to continue says verifying now
upgrading it's going to go through a quick process and if it's all good it will reboot with the new firmware all right this now bumps us back to the main screen we're going to put in our pin and once we get through the pin we'll double check our wordss Arch and field those are the same the rest of the pin and we should be finished with a freshly upgraded device ready to go and ready to use with our mobile device and our desktop computer and there we are back to the main screen don't need the
SD card in there anymore in fact we won't need it for the rest of the video just so you know you can delete that file off the SD card no need to keep it you've already upgraded the device and thus that file is no longer needed in any way so with that we can now move on to using our cold card with our mobile device first before we check out desktop okay so I have my mobile device here on my desktop here um I've also got my cold card Q ready to go and I do
have my mobile device pulled up on the screen here so you can see it a little bit more clearly I have nunchuck wallet installed and importantly if you already had it updated to the latest version so that it has support for the cold card QR standard okay uh so I'm going to go ahead I'm going to open up nunchuk wallet and if it's your first time using it you'll get some intro screens things like that you can just kind of bypass that you're eventually going to get to uh this main screen now you can sign
up for an account as well um which would be associated with an email address you can feel free to do so um it's not not a bad idea I think it's kind of convenient having some um to be able to utilize different interfaces keep in mind this will not compromise your funds in any way because even if somebody gets a hold of your phone um then they're still going to require the cold card and the pin in order to spend your money so with that uh we have two sections here on our main home screen
with nunchuck wallet we have wallets and keys well we need a a key in order to create a wallet where we can see where we can receive and send funds from so we need to import a little bit of information about our cold card so that the nunchuk wallet on our phone knows the device we're even dealing with and what addresses are ours in order to receive money so under the key section what you're going to do is you're going to hit the plus sign now this is going to give us some options do you
want to add an NFC key like a TAP card something like that an air gapped key or a software Key Well we want an air gapped key and what air gapped means is that the device that holds the keys to your money which in this case is our cold card Q never directly gets plugged into anything that is connected to the internet and that is what we're doing with this device here it's not going to be plugged in we're simply going to be using airgap mode uh via scanning QR codes to manage our money so
I'm going to choose that I'm going to click airgap key it says make make sure you've done the following number one you need to initialize the device and follow the vendor's instructions to set up your device with a seed phrase already did that and then we need to unlock the device um you might need to enter a pin or a passphrase directly on the screen and we've already done that our cold card is already good to go if you haven't go through boot it up make sure you have your PIN entered and you're ready we'll
hit continue so this takes us to our add an air gaap key screen first thing we're going to give the key a name what do we want to call call it I'm just going to call it something simple for this tutorial but I'll just call it uh ccq pretty simple and then I'm going to get rid of my uh keyboard there it gives us two options we can import via file or we can import via a QR code we want the QR code method and we're going to utilize that in a second but we got
to get it ready on our cold card so what do we do on the cold card we're simply going to go down to uh all the way down to advance tools and hit enter then we're going to go down to export wallet which is the second option and then we are going to scroll scroll scroll until we see the option for generic Json and we're going to hit enter it gives us some options here it says that we can enter one to do nonzero count numbers we're not going to do anything fancy with that um
we're just going to go ahead and hit enter again it's going to generate the necessary information that we need to communicate with nunchuk and it gives us options you can save it to an SD card you can press B for the lower slot remember we got two slots we don't need to deal with that it gives us the option though to press the QR button to show this information as a QR code that's exactly what we want QR button is up here beside the power button so I'm going to hit that now and it's going
to bring up an animated QR code so one that moves because there's a bunch of information to relay so this is all set I can just lie this down and I'm going to grab nunchuk wallet and I'm just going to hit that scan QR button over here on the right it's going to open up my camera and I should now be able to scan what is on my cold card to get it into nunchuk wallet there we go okay so we now have some options on our screen uh where're just just going to use the
very top one the very first one we're going to tap that and that Imports all the information we need we can now hit the add key button at the bottom and there we go our cold card q key is now imported we can hit done and now we have a key on our main screen we just need to create our wallet where we're going to be able to receive money and and view our balance and all of that so really simply up at the top right under the wallet section we're going to hit the plus
sign we're going to choose create new wallet we're going to give it a name I'll just call it Q for something simple um I'm not going to do any of these uh additional Advanced options customize address customize wallet type I'm just going to hit continue it says what key do you want to use for this wallet well of course we're going to use our cold card that we just set up we'll check that um down at the bottom it asks for the number of required keys this is for something beyond the the scope of this
video but you can use nunchuck wallet for multisig wallets where it requires multiple keys or multiple devices to unlock your funds again you can check that out in some of my other videos I'll link them down below but it already says we have one key and we're going to require one of them to move our money that's all we need to do it's autofilled we'll hit continue so this gives us a summary our wallet name our configuration is single Sig meaning you need a single key or a single signature in order to spend your money
standard wallet address type you don't need to worry about too much and it says which key are you using well the cold card CU we're going to hit continue at the bottom then it asks if we'd like to save our bsms file this is primarily used for multisig wallets we're not going to worry about it right now we're going to choose I'll do this later and there we go we now have our key down at the bottom and we have our wallet up at the top and we all set up let's take a quick peek
at what the wallet itself looks like and you can do that by tapping on the card itself this takes us to our main screen and let's just get an overview of what's in front of us we have a balance at the top the balance is in SATs and in dollars you may have that in Bitcoin um if you like seeing full or if you like seeing uh decimal points you may have it still in Bitcoin this can be done through the settings and change changed you can also um uh see the dollar amount down below
if you're unfamiliar ASAT there is 100 million SATs in a single Bitcoin uh I tend to like looking at SATs more than the decimals of of Bitcoin by the way I should say that uh on your Quil card you can just hit enter it'll bump you back if you want to hit cancel a couple times it brings you back to your main screen you don't need that anymore okay so again investigating what's in front of us with our wallet here um in the wallet you have a send and receive button you have uh down below
when you first start it up you'll have your first receive address and this is a QR code anyone can scan this and send you money alternatively done below it there is a string of digits this is also the same information it's your Bitcoin address you can copy it you can paste it into a message share it with anybody they will be able to pay you with that information there's also a share button down in the bottom right and that will give you a list of apps that you could share this through potentially so that's kind
of lay of the land um we'll go into some of the settings and stuff later but we're just going to use this thing as a regular wallet we're going to receive some money we're going to send it with the assistance of our cold card q and we shall go from there all right so one of the first things we're going to want to do is be able to receive money into nchu that will be secured of course by our cold card and so um up on the screen here right now I have um of course
my nunchuck wallet and then I have an exchange a lot of you will likely be withdrawing from exchanges to get it into what's known as cold storage keeping your funds safe and offline um some of you may be sending from hot wallets things like that but for this example we're going to use an exchange so I have Bitcoin well pulled up here which is in Canada in the US um and I'm simply going to go into uh the first any exchange is going to ask for your receiving address okay and so um it does give
me the option to add addresses here and I can do that under wallet management and add a new wallet and give it a label on a Bitcoin address and so I've done this before so that you don't have to bear with me and go through it um but basically what I did is I copied the address from my nunchuk wallet my receive address um which if I wasn't on the main screen and it wasn't my first transaction I would just hit receive and I would copy that information there by hitting the copy and then I
would be able to paste it into Bitcoin well but nonetheless uh I've done that and I've added a wallet and I've labeled it ccq so that is already available here so from my home screen I'm just going to hit buy Bitcoin I'm going to type in an amount so I know what I'm going to be getting for that this is in Canadian dollars just so you're aware whereas my nunchuk is currently Den it in the US dollars but nonetheless I can see the current price of Bitcoin the amount I'm going to be spending and the
amount of Bitcoin I will get for that and it also down below says it's going to be going to this address you've designated which is the same as the one over here for my cold card in nunchuk so I'm going to go ahead that looks good um by the way um I've set my withdraw preferences here on bitcoin well to Urgent um and in order to do that I need to bump up my fee but just so you know I you you can have no withdrawal fee by using that option as well in your speed
settings so nonetheless uh I am now ready to make a purchase um and I'll just go ahead I've already set up the transaction but I'm basically doing a Canadian e transfer to send over $200 I'll hit continue I'll hit send now and they'll be some verification process here which um you don't need to be a part of so I'll skip ahead to after I have done that and we will see the transaction coming in shortly okay perfect money has been sent off we can get out of that we'll go back to nunchuk and we can
just go to our home screen here and uh we'll just do a little refresh these are usually pretty quick to go through on this website so it you know typically takes uh a minute or two to show up and if you have your settings set to Urgent then the transaction will be sent pretty much right away so just do another quick refresh here and uh we should see it very very quickly okay there we go so it just popped up there says hey there's your transaction um and so we should see it be popping into
our wallet momentarily so I'll just go here on nunchuk by the way on nunchuk if you want to refresh your wallet to um show the latest balance if it's not uh showing yet you co can go into view oh I didn't even need to do it there it is okay so we now have received funds into our cold card so that updated right away uh so we went from uh buying Bitcoin online to directly into our own Cold Storage uh within a few minutes there so this These funds here in this wallet are now secured
by the cold card itself uh and so we now have full control of our funds the keys to that money are entirely offline with the cold card we did not need to have the cold card turned on in order to do that again you can think of this as the keys to your money um imagine if you were sliding cash into a safety deposit box that had a little slot on the front you can slide in cash all day long you only need the key to the safety deposit box when you want to remove cash
okay so we didn't need the key to deposit we need it to withdraw and so that's what we are going to cover next okay so let's say it's sometime later and you would like to spend some money out of your cold card via nunchuk wallet how do you go about doing that well first off you're going to go into your wallet you're going to click on the account that you desire to spend from and you're going to hit your send button this is going to allow you to choose how much you would like to send
you can denominate this in SATs or Bitcoin if that's your current setting you can switch to a USD value it'll figure out how much Bitcoin you need to send uh alternatively you can send the entire balance uh if you want there's a send all button so I'm going to hit that now um and then you can continue on so I'm going to hit continue and then I need an address where am I sending this to and so I have a secondary wallet up here over on the right this is Sparrow wallet we're going to use
this in a moment to actually use our cold car but for now I just have a tutorial wallet that I often use up and I have an address that I can copy I want to send to this address so I'm going to copy that now just so you know alternatively and actually maybe I'll do that right now is on the screen uh there's actually a a little QR Scanner up in the top right so maybe I'll just tap that right now and I'll scan what's on the screen here there we go okay so that has
now copied the address that is in Sparrow wallet so either way copy and paste or scan the QR code it all does the same job I can also give the transaction a note and maybe I'll just let it know that I'm sending it to uh tutorial okay great so all of that is all set up the only other thing I'm going to show you in setting up your transaction there is you can just kind of it'll do default settings and you can hit create but I tend to like to customize my fees so I'm going
to hit customize transaction and uh there's an option here in the middle of the screen for C manual fee rate so I'm going to tap that it lets me know hey depending on how fast you want this to go you can spend the following amounts fees just a side note have nothing to do with the amount you're sending they have to do with the amount of data that your transaction takes up as well as how busy the network currently is and how urgent the transaction is for you so I'm going to set this up for
the the fastest speed it said 31 SATs per bite so again a SAT there's one 100 million SATs in a Bitcoin so 31 SATs per bite of data being used uh so I've now set that I'm going to hit continue it gives me a summary hey you're sending this much Bitcoin to this address with this fee does that look okay to you I'm going to hit confirm and create create transaction now I'm not allowed to just send this I need approval why do I need approval well because the keys are not on on my phone
they are on my cold card so my cold card is already I'm booted up and ready to go on the main screen here so what I'm going to do is on uh nunchuck wallet I'm going to hit that sign button right beside where it says ccq so I'm going to hit sign and uh we need to export the transaction because we need to tell the cold card about it so we're going to hit export transaction and the option that we're going to do is via BB QR so this is the standard that um the cold
card Q uses it's uh more dense it's a more efficient way of using QR codes to relay data so I'm going to tap BB QR and that brings up this QR code and all I'm going to do is I'm going to uh on my cold card I'm going to hit the top option which is ready to sign now it says it's ready to sign spending transactions put it into uh an SD card uh alternatively you can hit the QR button to scan and that's what I'm going to do I'm going to hit the QR button
and this now turns on the QR scan you can see it's working right now I'm going to just point it directly at my phone there we go okay and so it says hey is this okay to send you're sending this much Bitcoin to this address with the following fee can scroll down press enter to approve or cancel to abort I'm going to hit enter and so what this is doing is approving the transaction it's giving a little signature it's unlocking the money and at this point it gives me a QR code which is the approved
transaction with a signature from my device saying this is okay to send and so I need to now import this into nunchuk because nunchuk is the thing connected to the internet so just down at the bottom there's an import signature button that's going to allow me to see what's on the cold card which I just scanned and uh it says hey now it's signed there's a little signed uh check mark beside here I can now broadcast this off to the network and it will go through and maybe what I'll do is I'll hit broadcast and
I will quickly fade over to my desktop so we can see it come through so hit broadcast let's fade over and momentarily on our desktop we should see a notification from spare wall I can see it flashing now as that transaction comes in to the receiver there we go Okay so we've now received that transaction I'll go back to my transaction screen can see it right there so we've basically gone through we said on our uh phone we said hey we want to send some Bitcoin but we could couldn't just send it we needed our
cold card to approve it and sign it and then we could send it off to the network and it would get where it needs to go so we've now successfully done an air gapped transaction using our cold card Q now I just want to show one cool feature here on the cold card Q um you may be wondering well how do I know that the address on my phone or computer belongs to my cold card what if it's it's not mine what if my computer on my phone is infected with malware and it's feeding me
uh an address that is incorrect well you can actually check with your cold card how do you do that you just scroll down to scan any QR code and hit enter and you simply point it at the QR code in question so I'm going to do that right now I point it I turn it around it says hey this is a payment address it gives me the address I just scanned I double check it looks the same it does and then it says press one to verify ownership so I'm going to press one it's going
to search my wallets and see is this mine and it says verified address it's found in this wallet gives me a bit more technical information but I know now that this address is mine and it is safe to send to it okay so we are now going to see the cold card queue in action with a desktop wallet Sparrow wallet uh which you saw briefly in the previous segment so we're going to um assume that your cold card again is already set up as we did in the first part uh but we're going to now
get our balance and addresses and all of that visible on our desktop wallet much like we did in nunchuk with Sparrow this time and then be able to receive and send transactions so let's go through that process uh first thing I want to do is I'm going to do a couple things on my computer I'm going to we're going to be going back and forth between the two So within Sparrow at the top of your Sparrow wallet depending on if you're on a Mac or or if you're on Windows it'll be at the top of
the window but on Mac everything in the menu is up at the top of the screen either way I'm going to click on file and then new wallet and then we're going to give it a name for this video I'm just going to call it uh my my Q that's easy okay and then I'm going to hit the blue button to create the wallet by the way in Sparrow general rule of thumb is hit the blue button when you're in doubt that'll probably take you where you want to go so I hit create wallet and
this takes us to our main screen now this is where we're going to pair Sparrow wallet with the cold card Q now this screen is a little intimidating but not to worry uh we'll just go through the stuff that you need to know not all of the extra bells and whistles and we are going to to be utilizing an air gapped Hardware wallet air gapped meaning we're not plugging it into the computer whatsoever so you can see that option down here kind of near the bottom and it looks like a little SD card you're going
to click on that and you're going to get this little popup and right at the top actually it shows cold card as an option for an air gapped wallet and it gives us the option to scan or import a file we're going to be using the scan function because we are using the QR method of air gapping the device device so let's take a look at our cold card and see what we need to do it's going to be very much like we did with nunchuk a little bit different but uh first we're going to
scroll down to once again Advance SL tools and hit enter then we're going to the second option which is export wallet then the second option again which is Sparrow wallet the exact wallet we are using we'll hit enter says hey this is going to save a file we'll just hit enter to pass that it's going to generate the file that we need just as before and now it gives us options to save it to an SD card or if we want we can show a QR code like we did with nunchuk so we're going to
do that we're going to hit the QR button and that's going to generate the information we need to give to Sparrow wallet and so now on Sparrow wallet we'll jump back there and all we're going to do is where it says cold card we're going to hit the scan button and then we'll hold up our cold card to the camera so that all the information can be given to our desktop wallet so I'll hit that now and there we go so we've now imported all the information we need uh so that we can use our
cold card with Sparrow on the cold card itself I'm just going to hit enter and that'll bum me back to the previous menu and in Sparrow we see that a bunch of info has been imported here you don't need to know the details of that right now all you need to know is I see a blue button that says apply I'm going to tap that now it does ask you if you want a password what this password would protect is if somebody got on your computer and they opened up Sparrow wallet they would need a
password in order to be able to see your balance keep in mind they could not spend your balance even if they get in because they re ire the cold card and the PIN for it in order to do so so if you want that extra protection you can add one um if you forget this password you can always repport your wallet through your cold card as we just did I'm just going to say no password for now once you do that there'll be a little loading bar in the bottom right of your screen and once
that's all done everything should be synced up and ready to go by the way at the same time you'll see this entire menu on the left hand side turn blue and that means that your wallet is all set up and done and so now it's time to navigate and see what we have in front of us over on the left hand side you have transactions send receive addresses utxos and settings we are on the setting screen right now now the setting screen you'll probably not be back to very often because this is kind of an
initial screen if you're changing some of like the label of the wallet you might come back here but odds are you're going to leave it as is the main three screens you're going to be looking at is transactions send and receive and if I go to transactions and this is kind of cool because we did have our wallet previously on nunchuk wallet well we're seeing the exact same wallet because we just exported the same information because we can see the previous transactions we did into and out of the wallet so you can kind of think
of the difference between nunchuk and Sparrow wallet as the difference between internet browsers you're looking at the same information through a different portal so you know if you were using Chrome or Safari or Firefox you would see the same website it's just slightly different in what's surrounding the website same thing here we're still looking at the Bitcoin Network in our particular account but we're using different pieces of software to see the same thing so our transaction screen we have a balance up top of course it's zero because we sent everything back out we have mempool
now what is mempool uh this this means that if you're in the process of receiving a transaction but it is not fully settled it will show that amount here so just for some nice round numbers imagine you had one Bitcoin total but of that you had just received half a Bitcoin it would show that half of Bitcoin is here in the mempool and that would mean that half of your total balance is not yet fully settled then finally down below you're going to have a list of previous transactions that you can sort through um and
we'll see a little bit more about these labels and things like that that you can use here too uh the receive screen that's pretty straightforward you don't need to worry about the bottom stuff again a little complex and Beyond the scope of this video but up top you have a Bitcoin address which you can click to copy and send to anybody you like there's also a QR code that can be scanned with a phone and down below label this is the spot you where you would typically type in if you know that somebody or a
company or whatever is going to send you Bitcoin you just label where it's coming from this is not for external use this is just for your own personal records so you recognize where the transaction came from the send screen uh we pretty much have pay2 where you going to send it so this would be where you would paste in a Bitcoin address alternatively there's little camera icon so you could scan something from a phone via your webcam label this is the inverse of what we just saw for receive where are you sending money to again
just for your own records amount how much Bitcoin would you like to send to this person or this address and then your fee you're going it's a slider you can slide it up and down left and right uh and this will let you know if your transaction is high priority medium or low depending on how busy the network is right now a little bit busier than when we did the previous part but the same lessons apply uh and then that is all I'm going to focus on for this section here we'll see it in practice
as we go through um furthermore there are a list of addresses these are just the the next 20 receiving addresses that you have every time you receive a transaction it will cycle to the next address and so you get greater privacy by doing so but there's no danger in sending to the same uh address twice when it comes to losing funds that won't happen it's just not great for privacy and then utxos we want we're not going to get super deep into that but you can think of Bitcoin as being very like cash and what
I mean is if somebody hands you a $50 bill a 20 and a 10 you can look into a physical wallet and see those individual Bank notes sitting there Bitcoin is very much the same but there's no specific amounts somebody might send you half a Bitcoin somebody might send you 0.1 somebody might send you 01 every time you receive that you'll see a new chunk of Bitcoin sitting in your wallet in this section so you can kind of see the bill um in this section or you can just go to transactions and see your general
full balance and then settings we've already been there and that is that so I think the next order of business is to receive a transaction and to send a transaction so for this section I'm actually going to send from the tutorial wallet that we sent to in the previous section so in Sparrow wallet just so you know you can have multiple different accounts open so right now I've got my cold card account open but if I go open Wallet I've got all these different ones that I play with from time to time but I'm going
to open up that tutorial wallet and we can see the balance there and previous transactions this is a hot wallet that is sitting on my computer the keys to the money are on the computer so the funds are only as secure as the computer itself and it doesn't have the added benefit of having keys offline like with a cold card nonetheless um I'm going to navigate so you can see the two tabs of the two wallets I have open tutorial wallet and my Q we're going to go to the receive screen on my q and
we're going to give it a label we're going to say tutorial so it's coming from my tutorial wallet now in this instance I'm going to use a special feature of the cold card to um check that this address belongs to me okay so let's just take a look here on the Queue I'm just going to scroll down to scan any QR code I'm going to hit enter and now I'm going to scan that uh that address that's on the screen and so that brings it up onto the cold card it says it says this is
a payment address and it shows me what the address is I'm looking at it right now and comparing and they look the same it says press one to verify ownership so I'm going to press the one and it's going to check if this address belongs to a wallet that the cold card controls it says hey this is a verified address and it is indeed yours great so I know that the address in Sparrow wallet is indeed my own and is safe to send to so I'll just go back to my main screen here and we
are now going to uh receive a transaction into that address that was on the screen and we're going to send it from the tutorial wallet so um from my Q wallet here in Sparrow I could of course just hit the copy button and then go over to the tutorial wallet go to send and then paste that address in alternatively Sparrow has a nice convenient little feature where I can hit the down arrow and it will show me any open wallet that I have at the moment so I can just select my q and that will
select again the next address I can double check 4 mzc go to there for mzc that is the same address in both okay great so I'll give this a label from the send field uh tutorial as well and how much do I want to send let's just hit the max amount there and then I'll just kind of slide and make sure that I'm good to go okay I've selected my fee there and I think that is pretty much all we need to do so I'm going to now just hit the blue button all the way
through so create transaction this gives me a summary finalize and now we need to sign the transaction oh actually we need to sign the transaction with the keys that are on the computer remember this is not being sent from the cold card this is being sent from my tutorial wallet which is a hot wallet meaning the key is just on the computer so I can just hit sign and then it's good to go all right now I hit broadcast off it goes to the network and we should get a couple of notifications pretty quick here
telling us going out of one wallet and into another and there we are one and two perfect so I can every time by the way you do a transaction in Sparrow it creates a new tab for what you're working on I can just X out of that once it's done so in the tutorial wallet if I go to transactions there's the transaction going out if I jump over to my q and go to transactions there's the transaction coming in so if we successfully received funds into our Q account and up next we're going to figure
out how to send in Sparrow wallet using our cold card Q okay so we're going to be sending out of this wallet and approving the transaction with our cold card que so I'm going to go to the send screen here uh and under pay to I'm actually going to use the camera this time because I'm going to be sending to a wallet on my phone so I'm going to tap camera icon a quick scan of that address and I'm double-checking it on my phone versus on the computer and it looks to be all good now
I'm going to uh give this a label wallet I'm using is called Sid swap so just a little note for myself and I'm going to send out the max amount from here I'm going to choose my fee again fee is a little high right now so um might want to watch some of my videos on how to avoid exorbitant fees and some of the best practices in and around that so that you can use layer twos and all all those good things that allow you to transact quickly and cheaply uh but nonetheless um we're setting
our fee everything seems all good here so I'm going to go ahead and hit the blue button and this gives our summary we're going to hit the blue button again and this is where we begin to use our Q now it did it does Auto turn off after a while which is good so you don't waste all your batteries so I'm just going to need to quickly log in with my pin okay so I am logged in and what I'm going to do now is in Sparrow wallet I'm going to hit the show QR button
and this is going to show my transaction as a QR code and I do have show BB QR clicked on Okay so QR standards that the cold card used that is selected by default based on how I set up the device uh and so now on the device I need to do something so we'll enlarge that here I'm going to tap on the first option which is ready to sign and this gives me some information on how it works again I'm going to scroll down and it says I can hit the QR button if I
like which I'm going to do once again this turns on the scanner and I'm simply going to point that at what is on on the screen right now shouldn't take too long to grab okay and then this gives me the information of the transaction it says is this okay to send you're sending this much Bitcoin to the following address it does give me a little uh a little warning in regards to hey the fee you know it's it's a bit of a high fee that you're paying I'm aware of this for the purpose of this
tutorial that's fine um I'm going to hit enter to approve or cancel to abort so I'm going to hit the enter button this now signs the transaction and creates it as a QR code on my screen and so now within Sparrow wallet again Blue Button pops up scan QR it wants me to scan my transaction approval from my cold card so I'm going to do that now perfect okay so now it shows that we have a signature here on the sparrow wallet I can just hit enter on my cold card or cancel rather and it'll
take me back to my main screen and in Sparrow we'll just hit broadcast to send it off and off it goes to the intended recipient and I have seen that go out there's my notification in sparrow and I'm seeing on my phone right now that I did just get a received transaction so we are all set we have successfully loaded up our wallet our account here into Sparrow wallet and we're able to both receive and send transactions using our cold card Q so what happens if you wipe your device or you lose it you break
it whatever happens you no longer have access to your cold card how do you access your funds yet again well we're going to do that right now and we're going to be utilizing our seed phrase okay so just to show you how you would wipe your device I'm not saying that you definitely have to do this but it is good to practice I would say first time around and maybe even have some skin in the game like have a 100 bucks on your wallet uh go and wipe your device which puts the pressure on to
make sure that you've done your backup properly once you've gone through this and recovered a wallet then you will be way less panicked in the future if or when you ever break or lose your device you will know and have gone through the process already and be relatively confident that you can do it again so on the cold card I'm going to go to settings and I'm going to go to so on the cold card I'm going to go to uh Advanced SL tools I'm going to go all the way down to the bottom which
is the danger zone and hit enter and then I'm going to go to seed functions from here I see the option to destroy my seed that sounds scary I'm going to hit it are you sure wiping the seed words and reset your resetting your wallet all funds will be lost you better have a backup of the seed wordss hit enter are you really sure though this action will certainly cause you to lose all funds associated with this wallet unless you have a backup of the seed words and know how to import them into a new
wallet press four to prove you read to the end of this message and accept all the consequences here we go four it says erasing and it's getting rid of all of my key information this device will no longer be able to unlock any of my funds and approve transactions it will reboot brings me back to the main screen it's going to ask for my PIN to log in again so let's see what happens once I put this in same anti- fishing words right loading it should take me to a main screen but we're going to
see that this device no longer has seed wordss because the first option we have is new seed wordss we do not have anything else here so how do we import our seed so that we can access it again well it's right here on the main screen we're going to go down to import existing how many words do we have in this case we have 12 words we'll hit enter and now we just simply simply type in what we've got on the card here so let's do the first word which is sound s o u and
d and it does autofill after at the most four letters it will autofill the word so just be aware that as you're typing you're not starting to type a new word afterwards okay so poem we're going to go all the way through okay now it's says that my words are indeed valid I've entered them so I'm going to hit enter it says applying and they should import my entire wallet back into my device welcome your cold card has been configured with the best security practices once again it set tells me what devices are disabled and
how to turn them on I'll hit enter and we're back to the main screen now how do I know for sure that this is the same wallet we were dealing with well I'm going to show you something kind of cool when it comes to Sparrow wallet so in Sparrow wallet if I go to settings down in the bottom left there's a little number here called the master fingerprint and it says be e580 B6 now if you notice on the cold card itself kind of hard to read from the screen here but I can see those
are the same letters and numbers b e e uh 58 0 B6 the master fingerprint denotes what account you are dealing with I can see that they are one and the same so I've properly imported this into the wallet now if I did need to redo everything let's say I needed a new computer a new phone all of that for whatever reason maybe there's a house fire or something I could go through and I could import this wallet back into Sparrow or nunchuk or whatever I prefer exactly the same as we did earlier in this
video and it would function exactly the same and it would have the full history of transactions and any amount that was sitting in my account before would still be there and accessible now I'm going to say one other thing about backups here of course I just gave the analogy of a house fire now if these two things were sitting in the house at the same time and there was a fire guess what poof they're both gone so you may want something a little bit more robust to back up your seed phrase especially if these are
in the same place which you may just want to put them in separate places but um again an example something like this this is a seedor and it has uh all of your seed frays can be put in solid steel on these washers and stamped in with a stamp and Hammer and this thing will survive an insane fire and you will be able to recover the data from within and uh you have that peace of mind if anything goes Ary also I kind of like the laser Edge than I did on the top but nonetheless
something in steel is definitely advisable when backing up so that if a disaster strikes you can literally sift through the ashes and recover your backup and know that even if this burned up you're still good cuz you got something a little bit more secure and physical by the way never ever store these digitally do not put a copy on your computer don't take a picture of it if that stuff goes to the cloud and somebody gets into your cloud account and they see this information all gone they've got the keys to your money they can
use it as they see fit and take that money and move it somewhere where you can't touch it so be smart do proper backups offline physically preferably in steel so just wrapping up with some final thoughts here in and around the cold card Que I am a fan uh I've been using cold car for quite some time now and this of course is a a big step up from the markv in my opinion so you've got a number of things that the previous iteration did not have here number one battery powered you're not having to
the previous version you had to have a cable running from this to either a power source in an outlet or or like a battery a 9vt battery this well you just got your batteries in the back so so that's that's awesome um with this one also the dual SD card uh slots are nice to have I won't say that I use them a lot but it is a nice option there um the full keyboard versus the the numbered keypad with arrows on the previous device is meaningfully easier to deal with especially in the midst of
recovering a wallet instead of going up and down to find your proper letter in the alphabet you can just type it out and and it happens a lot quicker so that is um in my opinion a a great function to have now in the context of this video I quite like being able to just scan a QR code back and forth instead of having to Fumble with SD cards the entire time so I'm very happy with that now beyond that this thing does have some other features that I will say have improved since the last
iteration namely NFC and NFC means that when using this with my phone even though we didn't do it in the video you can actually tap your phone to the cold card to relay information much like we used a QR code and that is still air gapped I did do a video on that I'll link it down below if you want to check it out but the NFC functionality on this versus the markv is marketly improved it's much easier to get a connection whereas with the markv if you didn't have the exact spot down pat it
could be a little finicky so um big Improvement on that overall um I quite enjoy the que uh I think it's a great option I think you can also use it very simply as I've covered just plugging it in and so in my opinion it's a great option for people of All Sorts because you can start using it relatively simply by plugging it in and then you can kind of level up over time and say hey I'm going to try air gapped with NFC or I'm going to try the SD card method or I'm going
to try the QR code method and then you can kind of settle into your preferred way of using it based on your skill level and based on what you're trying to learn beyond that of course the cold card has always had a just an absolute plethora of advanced features we didn't dive into a ton of the advanced stuff today but with the keypad and everything it makes those Advanced features also much easier to use so all in all big thumbs up loving the queue and um yeah this is uh my my daily driver is moving
from the markv now to the Q and I love that I was able to clone all my information also did a video on that it'll be down below from my old markv onto my new que so that I didn't have the headache of even having to import the seed so all the settings everything were copied over so uh hats off to coin kite quite enjoy what they they've done here and uh can't wait to see more thank you guys so much for watching as always please do like subscribe share all those things they help a
ton getting this content in front of more eyeballs if you want to help the show in another way please do hit up the previously mentioned sponsors in the show notes down below and if you want to grab a cold card Q there's a link down below for that as well and then finally if you're sorting through the tutorials on the channel and you're finding that you need a little bit of additional help some extra hand holding but you can head over to my website BTC sessions.com education sessions just through this booking section you scroll down
just a little bit and a lot of people tend to find that if they can't quite grasp some things in the tutorials or or they're they're missing some gaps in their knowledge that will help fill them in so go ahead go check that out and I am out for now have yourselves a wonderful day or evening wherever you may be see you guys next time for your daily [Music] session hled by Bitcoin [Music]
Related Videos

1:05:15
BIP85: Segregated Bitcoin Accounts From On...
BTC Sessions
11,830 views

1:54:50
Coldcard Bitcoin Hardware Wallet - FULL TU...
BTC Sessions
127,116 views
21:14
Coldcard Q Bitcoin Hardware Wallet (Unboxi...
Crypto Guide
2,965 views

50:13
How To Set Up Bitcoin Cold Storage in Air ...
Natalie Brunell
11,383 views

26:31
It’s Been a Good Run, Phone Providers.
Data Slayer
4,535,347 views

57:40
Coldcard Q Bitcoin Wallet - Beginner Tutorial
BTC Sessions
27,252 views

24:20
host ALL your AI locally
NetworkChuck
1,054,215 views

56:39
SPARROW WALLET: Manage Your Bitcoin (Hot, ...
BTC Sessions
86,946 views
9:58
Cracking Unsafe Bitcoin Wallets + Coldcard...
Crypto Guide
18,532 views
38:21
Tapsigner From Coinkite - NFC Bitcoin Cold...
BTC Sessions
37,775 views

53:31
Avoid A Bitcoin Fee NIGHTMARE - UTXO Conso...
BTC Sessions
44,723 views

25:22
Best Cold Wallets of 2024! (So Far)
Cyber Scrilla
20,757 views
43:44
How To Switch Hardware Wallets
BTC Sessions
44,013 views

1:36:12
NUNCHUK: Bitcoin Inheritance Multisig
BTC Sessions
15,660 views

50:26
Foundation Passport: Bitcoin Hardware Wall...
BTC Sessions
16,040 views

52:07
Secrets to Buying & Spending Bitcoin with ...
BTC Sessions
22,361 views
11:39
Coldcard Q: Unboxing and setup
Unchained
5,193 views

19:26
🔐 Discover the Ellipal Titan 2: The Ultim...
The CryptoDad
22,376 views

19:31
De-Google Your Life - Part 1: Start With C...
Linus Tech Tips
2,126,957 views

43:37
DEBIFI Bitcoin Backed Loans (No Rehypothec...
BTC Sessions
20,336 views