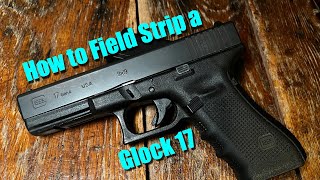
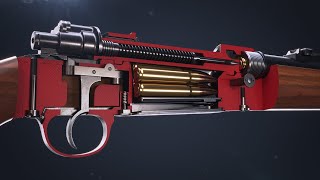
3D Glock Animation - How to disassemble and reassemble the G20
6.45M views670 WordsCopy TextShare

A.Y. HAWK
*** NOTICE: As of April 23, 2023, this channel has been re-branded to "A.Y. Hawk". This new name wi...
Video Transcript:
the G20 is one of the many highly sophisticated models in GL line of firearms in this video you will learn how to disassemble and reassemble the G20 first and foremost always treat Firearms as if they were loaded so keep the muzzle pointed in a safe Direction here we will handle the five major components of the G20 and not disassemble the entire weapon first remove the magazine by pressing down the magazine catch found on the left side of the receiver near where the thumb rests this will release the magazine allowing you to slide it out next
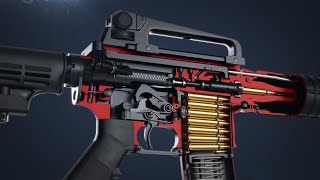
next make sure there's no ammunition inside the barrel to do this keep the gun pointed in a safe Direction pull the slide backwards and hold then look inside the barrel once you have verified there's no ammunition inside pull the trigger dry firing typically is bad for a gun but it won't be a problem for Glocks because of their quality Manufacturing in fact pulling the trigger at this point is necessary for the following step in the third step you will remove the slide verify that the trigger is still in the pulled back position if not this
step will be impossible this is probably the hardest part in disassembling a Glock there are two things you must do simultaneously to remove the slide first grip the gun in this fashion all four fingers on top of the slide and the thumb wrapped around the grip note the two slide locks on either side of the gun with your free hand place a thumb on one side and a finger on the other this next step is crucial on the grip press down on the slide with your fingers and pull backwards allow it to slide back about
a/2 in but no farther if you pull too far the slide will will reset the trigger once you slide it back a/ in apply forceful Inward and downward pressure with your other hand on the slide locks then guide the slide forward if performed correctly the slide will be released and move freely if it doesn't work repeat this step and remember to apply plenty of pressure on the slide locks once the slide is free remove it from the receiver and set the receiver aside the next step is to remove the recoil Rod which is found on
the bottom of the slide with a finger in thumb grip both ends and squeeze the inner end of The Recoil Rod towards the outer then pull the inner end away from the barrel and set it aside the last step is to remove the barrel first pull the barrel outwards away from the slide until it stops then push it farther forward into the opening it restes in and finally outwards again to free it the Glock is now disassembled to reassemble the Glock insert the barrrel back into the larger opening on the slides tip push the back
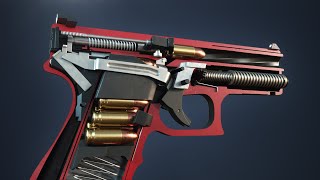
end inwards then pull it backwards into place next insert The Recoil Rod into the loop on the slide's tip making sure the end without the hole faces in the direction of fire note the little steps on the bottom of the barrel the back end of The Recoil Rod must rest in the cutout scoop to make this happen you must squeeze hard both ends of the recoil Rod until it lines up with a scoop then push towards the barrel to snap it in place on the receiver note the teeth sticking out on the top line those
up with the inserts on the rear of the slide pull the slide back as far as it will go to snap the inner components in place insert the magazine making sure the bullet count indicators are facing the rear note that there is only one way the magazine will fit in lastly pull the slide back to lock it in place you have reassembled the [Music] Glock [Music] [Applause]
Related Videos

18:34
Handgun 101: How to Safely Load and Unload...
Adiga Armory
1,380,899 views
5:16
How to Disassemble and Reassemble a Glock ...
UBR Arsenal
167,422 views
8:34
How an AR-15 Works
Matt Rittman
14,703,939 views
23:37
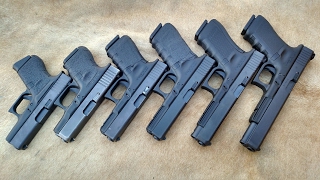
Every Glock 9mm
hickok45
7,259,325 views
2:55
How a Glock Works
Matt Rittman
91,019,606 views

9:17
12 Self Defense Gadgets You Can Buy Right Now
TechJoint
25,234,949 views

6:46
How A Glock 43 Works - 3D Animation
45Snipers
2,039,686 views

17:04
How Deadly Is A 22 Pistol? 22 Pistol vs Human
Garand Thumb
7,616,283 views

5:58
How to Improve Handgun Shooting Accuracy
BoomStick Tactical
3,481,015 views

12:21
How Glock triggers work and how they reset
MosinVirus
801,982 views

44:31
Glock Gen5 - Upper Disassembly & Reassembly
GlockStore
798,993 views
3:41
How a Kar98k Works
Matt Rittman
33,326,125 views
5:43
These small parts are turning handguns int...
CBS TEXAS
1,046,612 views

5:26
How A Semi-Automatic Handgun Works
45Snipers
6,037,659 views
6:20
Unboxing - Glock 17 Gen 5
GunBox Therapy
1,650,081 views

18:30
Gun Restoration, Colt M1911 U.S. ARMY 1914...
The Kinzler Bros
13,343,911 views

13:38
5 Common Pistol Shooting Mistakes We See A...
Tactical Hyve
2,896,632 views

8:33
5 Common Concealed Carry Mistakes New Gun ...
Tenicor
1,590,216 views
14:09
Las 10 Municiones mas LETALES del Mundo
Armapedia
12,389,542 views

18:42
I Built a Safe Cracking Robot
Startup Chuck
4,051 views