Typebot and Google Sheets Integration | How to Get data from Typebot to Google Sheets
203 views574 WordsCopy TextShare
ApiX-Drive [SaaS Service]
How to Get data from Typebot to Google Sheets ? Integrate Typebot and Google Sheets with ApiX-Drive...
Video Transcript:
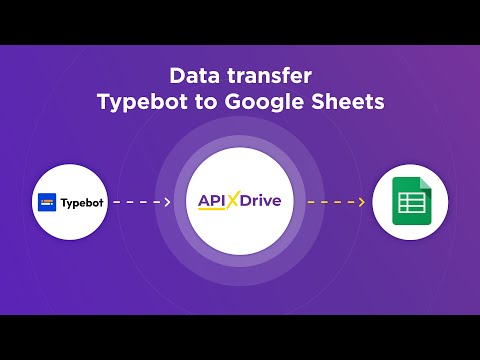
Data transfer Typebot to Google Sheets. ApiX-Drve Hello everyone! My name is John.
Today, I will tell you how to set up integration to transfer new data from Typebot to Google Sheets. This is necessary to automatically transfer new data from Typebot to other systems. For example, in Google Sheets, you can add new rows and conveniently interact with them in the future.
Now let's move on to the setup. First, you need to create a new connection. Next, select the data source system: Typebot.
Now, select the action: get data. At this stage, you need to create a virtual Typebot account in the ApiX-Drve system. In this window, you can change its name or just click continue.
When the connected account appears in the list, select it and click continue. At this stage, you see the URL for receiving data. It is to this URL that new data from Typebot will arrive.
In order to continue setting up, copy the URL and go to your Typebot personal account. Next, go to the bot settings, add another block from the integration section, and select "Webhook. " Click on it and paste the copied URL.
After this, connect the blocks together. Next, you need to generate sending test data to the specified URL. To do this, click "Test the request.
" After successful submission, save the changes. Next, return to the ApiX-Drve system and continue configuration. At this stage, you can set up a data filter.
In this case, there is no need for this, so just click continue. Now you see the data we just generated. If there is no data at this stage, try following the steps described earlier.
If you are satisfied with everything, click continue. At this point, setting up the Typebot data source has been successfully completed. Now you need to move on to setting up the data destination.
Choose the system: Google Sheets. Next, select an action: add row. At this stage, you need to connect your Google Sheets account to the ApiX-Drve system.
In this window, you need to specify the login and password of your Google account. Be sure to check all the boxes. When the connected login appears in the list of active accounts, select it and click continue.
At this stage, you need to select the file and sheet to which new rows will be added. Now you see Google Sheets columns to which you can assign variables from Typebot. In order to do this, click in the field and select a variable from the drop-down list.
Please note that you can use not only variables from the drop-down list but also enter data manually. When all required fields are filled in, click continue. At this point, you see an example of the data that will be sent to Google Sheets as new rows for each new data from Typebot.
If you are not satisfied with something, click edit, and you will go back a step. In order to check the correctness of the settings, click send test data to Google Sheets. After successful submission, go to Google Sheets and check the result.
If you are satisfied with everything, return to the ApiX-Drve system and continue setting up. This completes the setup of Google Sheets as a data destination. Now you need to enable auto-update and select an update interval, for example, once every 5 minutes.
That's all! I wish you successful integration settings and good luck!
Related Videos

5:11
Typebot and Gmail Integration | How to Get...
ApiX-Drive [SaaS Service]
84 views
9:17
Webhooks for Sheets — Google Workspace Add...
Sourabh Choraria
59,558 views

1:29:35
Music for Work — Deep Focus Mix for Progra...
Chill Music Lab
1,063,453 views
5:23
JetFormBuilder and Notion Integration | Ho...
ApiX-Drive [SaaS Service]
15 views
12:33
How to integrate Google Sheets and Harvest...
Sheet Director - Jivrus Technologies
16 views
11:21
Convert your decision table in Google Shee...
Nefer Lopez
1,142 views

12:14
Luma AI's INSANE Video Generator Is Here (...
AI Uncovered
2,817 views

27:17
Introducing Lindy 2.0 - The FIRST True AI-...
MattVidPro AI
37,182 views

5:18
Tally and Telegram Integration | How to Ge...
ApiX-Drive [SaaS Service]
37 views

13:41
Storytelling with Data | Dashboard Build Demo
Maven Analytics
73,810 views

17:11
🚨 YOU'RE VISUALIZING YOUR DATA WRONG. And...
Adam Finer - Learn BI Online
103,983 views

5:17
Part 2: Connecting Google Sheets API to Ty...
Nefer Lopez
734 views
4:48
Webflow and Brevo Integration | How to Get...
ApiX-Drive [SaaS Service]
23 views

2:35:17
Google Sheets for Excel Users Tutorial
Learnit Training
205,059 views

4:41
How to Get Contacts from Google Contacts t...
ApiX-Drive [SaaS Service]
6 views

11:37
Typebot & Google Sheets (Planilhas)
Alberto Godinho - Especialista em Typebot
5,043 views

1:39:57
FACELESS Videos 100% Automated (Make, Chat...
Stephen G. Pope
139,039 views

3:23:34
Power Apps Model Driven Apps FULL COURSE f...
Lisa Crosbie
505,342 views

4:24
HelpCrunch and Discord Integration | How t...
ApiX-Drive [SaaS Service]
25 views

3:35:30
ChatGPT for Data Analytics: Full Course
Luke Barousse
257,602 views