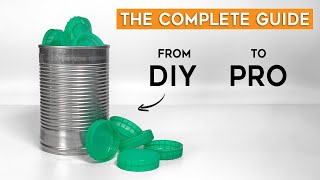
11 things we WISH we knew when starting Plastic Recycling
334.49k views3584 WordsCopy TextShare
Brothers Make
🚀 To try everything Brilliant has to offer for free for a full 30 days, visit https://brilliant.org...
Video Transcript:
we have been working with recycled plastic for over 5 years now and there are some things that we just wish we knew sooner as it would have made the whole process so much easier so while we're working on today's project we thought we'd take you through all the things we've learned working with recycled plastic starting at the very beginning where we get our plastic from let's go for a drive so when we first started we were kind of on a mission to save the world and we thought we're just going to accept everything from everybody
and that way the most plastic will get recycled and everyone will be happy but what actually happened was that we actually ended up with just a load of plastic that was super dirty people weren't listening to the kind of specific types of plastic we needed and our job ended up being basically cleaning plastic every single day awesome so now what we'll do is that we'll still take Plastics from anyone that wants to donate it to us but we're very specific about the types of plastic we accept and that where we don't have to root through
a load of stuff that needs loads of cleaning coffee while we wait for the car to sort itself out another thing that's really good to do is you can work with specific businesses and they can collect specific types of plastic for you like we work with hairdresses for their shampoo bottles coffee shops for milk bottle tops um cleaning companies for their cleaning supplies and schools are great as well cuz the kids love getting involved in milk bottle top collections or anything like that so specific companies specific types of plastic helps us save lots of plastic
in big volumes but reduces our cleaning need working now just about I not turn it off again and tell you that so now you've got your plastic sources set up you want to identify the plastic to make sure you're using the right type of plastic to be melting at home so the perfect plastic you want to be looking out for is HDPE so that has a number two inside the recycling triangle and if it has that marking perfect you know you're good to go but that's not always the case sometimes it comes without a marking
on it you need another way to work out what it is so we've done a whole video guide showing you how to work out a load of different types of plastics but what we wish we knew when we got started was that if it floats in water it's polyethylene or polypropylene and to work out the difference between those two all you have to do is this so if it shatters and cracks then we know it's polypropylene don't need that for now and if it sort of dents and squashes that's polyethylene perfect so the next step
in when you're trying to process your plastic is to get rid of all the stuff that shouldn't be there like the labels you don't need to worry about pens and Sharpies that generally just vaporizes when it's melting but obviously if you've got labels on here you need to get rid of them because that's going to mess up your plastic when you're recycling it now sometimes labels are made of paper and the paper part of it comes off relatively easy because it doesn't have adhesive all the way around but then you get this adhesive left over
which you need to get rid of because that's the bit that can mess up your plastic and there's various ways you can do this in the past we've used things like acetone WD40 actually works really well if you soak it and let it sit there for a little bit or even vegetable oil but the issue with that is that you're spending ages kind of scratching and it kind of takes a long time and also this can be very expensive particularly the acetone if you're processing lots of plastic so one thing that we wish we knew
back at the start is that when you've got labels like this which don't peel off nicely and leave all that horrible sticky residue behind really easy way is to use a heat gun to warm up that adhesive and that way it should peel off fairly nicely okayy look at that still a little bit there look at that bingo so now you're going to have all your plastic that's nice and Del labeled the next thing you want to do before you start melting is to make sure it's clean ideally people will send it to you clean
but that's not always the case so in that scenario you're going to want to start cleaning it yourself now hand washing is something we still have to do for bottles just to make sure they're properly clean but we've got thousands and thousands of these lids and trust me it's a fairly boring job to sit there and hand wash all of those so you want to do this instead I know so so much like it helps us with our clothes the ever helpful washing machine is going to be our best friend for Plastics as well all
you need is some of these mesh bags load it up with your bottle tops and then Chuck it on a wash with a low temperature fairly quick wash and that will get rid of pretty much all of the Milky cheesy residue lovely okay so you spent all that time cleaning your plastic it's all ready all the labels are off and you've got the colors separated so you can actually work with it the next job is to start thinking about melting it and one comment we get all the time is if we were to melt this
plastic isn't that super dangerous for your health uh is it going to create all these fumes and stuff like that and the truth is is that HTP is completely safe to work with we've done a whole video about this we're never actually burning this plastic if you were to set this piece of plastic on fire of course that's going to be awful when we're melting it we're only melting it to the point where it's molten and not where it starts to burn you do want to still be mindful about your cleaning if you're cleaning isn't
perfect and you've got adhesive remnants or food residues or anything like that that could be something that burns and becomes a hazardous thing in the air so for that reason I would always recommend keeping your doors wide open when we first started we were in this tiny little garage and we had our doors wide open all the time to make sure we have that ventilation of course you can work outside or if you're as lucky as we are we get to work in this giant space with super high ceilings and doors that can fully open
and that way we don't ever have to worry about fumes so when we started out we have always used these Panini presses for melting plastic and for good reason they are absolutely amazing at doing it they have heated plates both top and bottom so they are perfect for the job but when it came to scaling up a little bit or when other people come to us saying how do I do it we would always say these are the P presses you need these exact bevels but over time we've kind of learned that you just need
to be a bit creative and it's not only this that does the job in other videos we've tried things like churo makers we've done air fryers we use irons for plastic bags basically if it has a setable temperature like an air fryer or an oven we're not setting it higher than 180 degrees Celsius and if it's something like a penini press or a CH maker where you have no set temperature we've yet to come across one that goes above the burning point for plastic ultimately it's all about problem solving if we're trying something new we're
doing it in a controlled way so trying one bottle top doing a low temperature knocking up a little bit each time but realistically it's just being a bit creative thinking outside the box a little bit and finding something that works and while we're on the topic tell you what we'll give you an extra bonus tip on how to improve those exact problem solving abilities brilliant is where you learn by doing with thousands of interactive stem courses it's not just about watching someone explain Concepts you get to play with thousands of interactive lessons which has proven
to be six times more effective than just watching lecture videos we've been using brilliant to sharpen our critical thinking skills through problem solving and not just memorizing so it's helping us to not only build real knowledge on specific topics but it's actually allowing us to become better thinkers we've been enjoying courses that focus on math data and AI that we're able to implement to help us solve real problems in our Workshop so if you want to see what brilliant is all about then head on over to brilliant.org brsm make to try out for free for
30 days then if you love it as much as we do you'll get 20% off an annual subscription thank you so much to brilliant for sponsoring this video let's crack on with melting some plastic [Music] so a question that we get a lot is why do you only focus on milk bow tops and there's a really good reason for this is because they actually melt differently even though it's still HTP it's all got the number two in the Triangle it's still different there are different grades of hdp within that kind of categorization of number two
as a bit of a visual demonstration for this in this panini press we've put some blue bottle Toops and in this Pini press these are like cleaning bottles all got the number two but this will show you how different the two different Plastics are so so annoy right on the look up at a light turn around that one behind you it's gone it's going to happen right in the middle of a bit isn't it so here's a okay so and this fely pressed we've got the bottles and you can see if I peel this off
this is a proper slab ain't going anywhere even if I kind of pull it it kind of stretches back to its original shape you can stretch it out but it's definitely got a lot of resistance this feels like chewing gum you've been chewing for a bit too long that kind of texture of it whereas on the other hand on this panini press is just bottle tops and you should be able to see the difference now generally these are much looser much easier to work with you can already see that that's kind of dropping by itself
just under its own weight whereas the other one would never have done that there you go it's like a little slug isn't it something wouldve been very helpful to know when we were first starting out is that not all hdp is the same so this is why we like using bottle tops especially for beginner stuff this does work but you have to be a little bit clever with it you can take something like these Snips and you can kind of chop them into little bits and then disperse them throughout something with better flowing plastic and
that will help here's an example this is our color called tropical wellp pool which is one of our most popular colors that we use for our products on our website and this is a really nice turquoise color you can see here that the blue and the green all comes from these really nice flowing bottle tops and the white is what comes from these bottles and in this ratio I'd say maybe a third of it is probably the white bottles in that ratio it flows absolutely fine if if I was to do a color solely with
bottles like this only I would have a really tough time working with that and getting that to fillal right it's a big tip this one Matt do you know what it is it's trying to reduce the amount of air bubbles in your plastic as soon as you're working with plastic you are going to very quickly realize that your biggest enemy is air bubbles if you go back to one of our first ever videos when we worked with recycle plastic that beginner's guide you'll see straight away we made a pen made a lovely blank air bubble
the whole thing BW up so there's a couple of things that you can do to reduce the risk of air bubbles going into your piece so to get around air bubbles you're going to want to do a series of twists and folds to get the air out of the plastic now a lot of people are probably thinking right now oh when you're making candy and making rock that's exactly how you introduce air into it it's not the same with plastic well it might be on a microscopic level but the bubbles we're talking about are much
bigger give us an audio so the bubbles we're talking about are are bigger and if they're in your final piece we'll make a air gap and as soon as you're cutting into that they'll ruin the look of the overall product they just look rubbish so what we're doing is sort of twisting it folding it over and squishing it down and putting it back on the heat the only issue with the twisting and folding is that you can start to lose some of the really nice vibrant colors as you blend them more and more so what
we do now to get around that is is we melt our plastic in separate colors do all the twisting and folding at the end we can combine all the colors together just do a little bit of twisting and folding and that way you still get to keep all those really nice marbled [Music] pattern this is that tougher gummier plastic we talking about earlier so slightly harder to work with but it's still fine [Music] blue eggs blue BL [Music] eggs do you know that's another little sweet bonus tip Matt if anyone signs up to our patreon
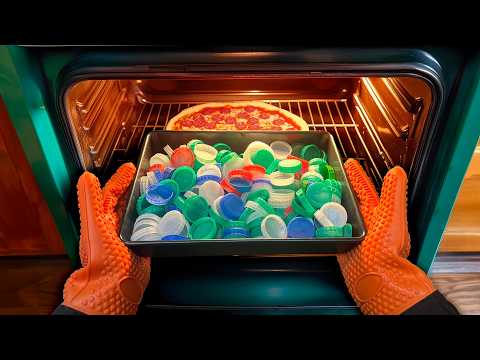
then they can get access to our plastic knowledge filled DMS they just shoot us a message we're always chatting to our patrons or we have our our regular Hangouts on Zoom we chat about recycling tips and stuff like that so I don't know that's just another random tip for you don't have to listen to it 12 tips someone's going to ask these are Teflon baking sheets these are silicon oven mitts every single video we should say in every video cuz it's the most common question we get [Music] get something heavy I do so when your
plastic is ready to go into the mold the most important thing you can do is make sure that the pressure is as high as you can and as consistent as you can because plastic does two things it shrinks as it cools but then it also wants to do lots of funny stuff and go warpy and wobbly and if you don't add enough pressure and it comes out the next day it's just going to look gross and ugly so fairly early on on in our plastic recycling Journey we built this guy this guy is a bottle
jack press and the idea is that you press him down the plates squish together and it adds really nice consistent pressure it would have been nice if we'd have built this a little bit earlier because that would have helped you can obviously use clamps you can use a Vie you can use anything you've got your hands on but this just allows you to be super quick and it allows you to get the mold in and get pressure on really really speedly and the other thing is that plastic takes a long time to cool down so
you need to keep adding the pressure for a lot longer than you would normally think what we typically do is we come in and then for the next hour or so we will keep adding this pressure and then every five or 10 minutes or so we'll come back and we'll just you'll feel it that this will have backed off a little bit or the plastic will have shrunk a little bit we'll come in and just add a little bit more and that way we'll keep the plastic nice and flat in this scenario we've actually got
metal mold plates to help keep it nice and flat but same thing goes if we just back the pressure off it would still go all wobbly and not very nice if we didn't add the [Music] pressure [Music] on now the last step is going to be finishing off your new little plastic creation and when we first started out we always sanded everything thinking that was the only way to get a perfect finish but since then we've actually realized that there's a load of ways to do this without making loads of tiny little bits of plastic
waste Dr [Music] boy so now as a rule in our Workshop we don't sand any plastic because even if you have got really good dust collection you're still going to be creating a load of microplastics instead we're opting for techniques that make much bigger bits of plastic waste so knives deburring tools thickness of plers are great for bigger slabs of plastic or if not a cheap option is something like a card scraper which works perfectly [Music] if you're just looking to get into DIY plastic recycling as a bit of a hobby or to use up
some plastic waste that you have lying around then those tips will absolutely see you through and trust me you're going to be 10 times better than we were when we got started plastic recycling you maybe but if you're looking to potentially make some money or even turn this into a business then our last tip would be around pricing this is another question we hear all the time and the tip we would give you is don't undervalue how much time it takes to make these products because yes the material is free and a lot of people
will say oh the product's going to be really cheap then isn't it that's not the case because you've taken the time to collect the plastic to sort the plastic shred it whatever you're doing this whole process takes time and your time is worth money it would actually be a cheaper to do this with Virgin material compared to recycled so there's a story there and you should build that in to your products about how you're working with plastics and taking material from the environment and reducing pollution around you and whichever way you're doing it if you're
doing it in a DIY method with panini presses and little molds or if you're using Machinery like we have and you invested in something in order to make products that are repeatable and wholesal to larger markets it really doesn't matter the process of how to price things is still the same work out how much money you're prepared to work for in one day and then work out how many products you can produce in that day and dividing one by the other will give you the price of the product and how much you should sell that
for and all of that should Encompass the whole process from cleaning the plastic all the way to finishing it up and packaging it and don't forget to include the cost of packaging strips and anything you're going to include when you send your product or somebody buys it from you any more tips for the viewers Johnny um don't dress the same on the day you're doing a video with the salmon Brothers today well hopefully you've finished this video feeling a bit more knowledgeable than when you started and feel free to go and watch some of our
other videos if you want to see other examples of things we've made from recycle plastic using either very DIY methods or other methods that we've got in our Workshop we've got a whole playlist which is called DIY Plastic Products or something like that and that is all products that you can make just using this very simple method that we've been through today so that should give you some ideas go make some money do it make us proud we'll take 5%
Related Videos
16:15
Your First Recycled Plastic Project
Brothers Make
86,998 views

20:07
Best Expensive Fails 2025 | Don't Show Elo...
FailArmy
413,323 views
23:57
This almost broke us..
Brothers Make
23,221 views
18:33
How 1.5 Million Plastic Bottles Are Turned...
Business Insider
3,872,056 views

13:44
Why The US Loses $800M A Year In Unrecycle...
Business Insider
1,049,291 views

16:05
This Could END Plastic Waste!
Two Bit da Vinci
444,207 views
14:43
The Myth of Plastic Recycling
Georg Rockall-Schmidt
93,073 views
21:24
Everyone Will Be Saving Cardboard When The...
HAXMAN
3,510,051 views
21:25
Why Used Chip Bags Aren’t Just Trash…
Brothers Make
91,335 views
21:36
#94 How we transformed 498 aluminium cans ...
Project Kamp
2,569,166 views

28:31
Here's How Professionals Deep Clean Things
BE AMAZED
614,091 views
21:40
Recycle 3D Printing Waste AT HOME
Brothers Make
163,949 views
1:48:56
11 Ways People Make Money Off America's Ga...
Business Insider
2,524,083 views

10:27
Recycle Cardboard into Anything with 3D Pr...
XYZAidan
2,121,361 views

53:36
Genius LIFE HACKS You Won't Believe Actual...
WOW Tech
983,680 views
22:50
How FREE plastic waste can be turned into ...
Brothers Make
164,767 views
16:36
Can Your Chip Bags Save Lives?
Brothers Make
86,021 views

16:37
I made a Copper Ice Press that Turns Ice i...
Robinson Foundry
1,601,222 views
16:07
7 Ways to Make Stuff from Recycled Plastic...
Brothers Make
878,817 views
1:29:27
Incredible TOP 6 Recycling and Manufacturi...
All Asian Production
2,509,692 views