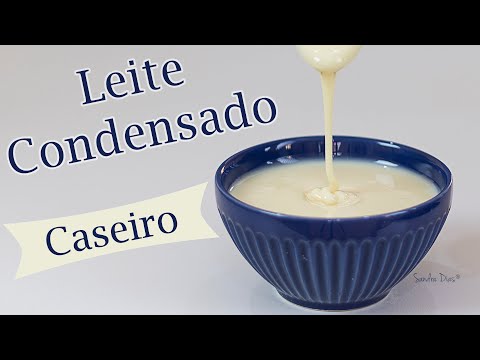
Leite Condensado CASEIRO Perfeito | Receita fácil e de baixo custo | Receita Sandra Dias
764.29k views2210 WordsCopy TextShare
Sandra Dias - Cake Designer
Aprenda como fazer o Leite Condensado Caseiro Perfeito - é uma receita simples, que leva apenas 2 in...
Video Transcript:
[Music] Did you know that condensed milk was originally created in order to make cow's milk last longer without refrigeration? [Music] Hello! I’m Sandra Dias, professional cake designer since 2001, and welcome to my studio!
This is where I make my decorated cakes, my sugar flowers, my macarons, but this is also where I teach practical classes to people who also want to become a cake designer. The purpose of this channel is to help you improve your cake decorating skills, either by sharing with you cake decorating techniques or delightful recipes that you’ll be able to add to your menu, offer to your customer and increase your income at the end of the month. Most of you must be aware that milk is an extremely perishable product, which spoils very fast, especially cow's milk.
We're lucky that nowadays there's the pasteurization process, which provides a longer shelf life to the milk. However, this wasn't the reality back in 1850, when condensed milk was first created. So the idea behind condensed milk was actually this need to make milk last longer.
But it wasn't that simple. . .
They took some milk and added sugar to it. That's right. Sugar is actually a natural preservative.
They have added sugar to the milk and cooked it at a very low temperature for a long period of time. This process makes the part of water that had been added to the milk, because pure cow's milk is extremely concentrated, for that reason, water is added to dilute the cow's milk. This water evaporates during the cooking process.
Sugar, by the way, since it's cooked for so long, gets caramelized. That's why the milk gets a thick consistency and that's exactly what makes it have a longer shelf life. The slow cooking process for a long period of time with sugar has turned cow's milk into not only a sweet and creamy milk with a dense consistency, but also very long lasting.
Today I'm going to teach you how to make homemade condensed milk, which is a way to remake the original process of creating condensed milk. However, there are certain tips and tricks you should know in order to make it work and obtain some delightful condensed milk! It's going to turn out so wonderful that you won't even be able to tell which condensed milk is manufactured and which one is homemade!
Here's the first important tip, you're going to need a pan with a thick bottom. This stainless steel pan, for example, has a triple bottom, which is a very thick bottom indeed. Why does it make a difference anyway?
Because a thick pan doesn't transfer the heat as intensely as a thin pan would. This detail makes the difference in the result. I have here 450mL of whole milk.
This is manufactured milk, which is 3% fat content. In this case, if you used skimmed milk, you would make diet condensed milk. It's low-fat, of course, but it's still possible to make condensed milk from it.
Add 150 grams of sugar. This is granulated sugar. I think it's interesting that, since I've been a teacher for so many years and I've received students from all over Brazil, I always meet people who ask me if they can use sanding sugar, instead of granulated sugar.
I've noticed that it's actually a regional behavior. There are certain locations in the country where people use sanding sugar more often. Honestly, I don't understand why.
I still don't get that. In some recipes such as this one, sanding sugar is not appropriate at all. In this recipe, before we turn on the fire, we must dissolve the sugar completely to avoid becoming crystallized.
If it becomes crystallized, instead of caramelized, it means you have wasted the condensed milk. If you used sanding sugar, it would take endlessly longer to dissolve, and it's very likely that there will still be some undissolved grains of sugar which may get crystallized in the milk. For that matter, don't use sanding sugar.
Overall, there's this information that most people don't know about. . .
In confectionery recipes, when you read the recipe, or when we mention a certain amount of sugar, we always mean granulated sugar. If there's a requirement for a specific type of sugar, such as light brown sugar, dark brown sugar, or powdered sugar, then it must be mentioned. If it's not specified, "sugar" always refers to granulated sugar.
Okay? If you're one of those people who live in a region where most people use sanding sugar or simply prefer it, let me know in the comments why is that? This is a curiosity of mine, which hasn't been clarified yet.
There's that. In certain recipes such as this one, sanding sugar may crystallize and cause an issue, even waste it all. So, tell me!
While I'm stirring it, I feel that most part of the sugar has already dissolved. I'm going to turn on the fire now. It may be at high temperature in the beginning.
Keep stirring it to make sure that the sugar is completely dissolved indeed. This is one of the things that could go wrong, if there are still undissolved grains of sugar, they may crystallize in the future and waste the condensed milk. Keep stirring it and don't allow it to boil.
When you realize that it's about to start boiling, raising bubbles, turn down the fire. I'll show you what it looks like, in a little while. It's going to be cooked slowly at low temperature for thirty to thirty-five minutes.
I'll show you the phases of the preparing. I won't keep talking to you for thirty-five minutes straight. I'll show you the phases and warn you when you should pay attention.
Look, when there are some bubbles showing up on the surface, around the edges of the pan, is when you know it's about to start boiling. Right now, sugar must have dissolved already, so you're going to turn down the fire and set it to the lowest heat possible. From this moment on, you mustn't stir it anymore.
You mustn't insert the spatula in the pan whatsoever. Leave it alone to cook at the lowest heat possible. After about twenty-five minutes, you should start paying attention to it.
It has been about ten minutes that condensed milk is being cooked at very low heat, without boiling. Don't touch it. Don't mix it.
Don't do anything. Leave it alone. Look.
It's already getting foamy on the surface. This is exactly the water being evaporated. So if there's any residues in the milk, they get accumulated on the surface through this foam.
This milk is going to continue cooking for another twenty minutes, approximately. I'll show you when and what it looks like when it's ready. Here's another tip, if you intend to make double the amount of this recipe, it's not as simple as adding double the amount of ingredients, you'd also have to use a larger pan for this.
The larger is the quantity of milk there is in the pan, the higher is the possibility to boil over, even earlier than it should. The larger is the quantity you intend to make, the broader in diameter the pan must be. It's not as simple as adding double the amount of ingredients in a small pan, because that wouldn't work either.
It's a fairly uncomplicated process, however there are these little tricks to avoid issues and obtain flawless condensed milk. Nowadays, manufacturers have developed machines, which are able to do this process more easily, but in a sophisticated way, and because of that, they're obviously capable of producing endlessly larger amounts of condensed milk than we can at home. While this milk is being cooked slowly at low heat.
. . If you’re not subscribed to the channel yet, but would like to continue following my tips and recipes, take the opportunity to subscribe!
Click on the red “Subscribe” button below. Click on the bell also, because it’ll activate notifications and every time there's a new video available on the channel, YouTube will let you know about it and you won’t miss it out! If you’re not following me on Instagram yet, it’s worth taking a look over there!
Besides seeing photos of my work, my cakes, you’ll also see photos of my students’ work, results of practical classes. Sometimes, I post an easy and delightful recipe that doesn’t require many explanations in a video, but it's really worth checking out! On my Stories normally I share things from my daily life, what's happening during practical classes.
Sometimes, when it’s possible I also go live and chat with whoever is available and it’s much more fun! If you use a recipe that’s mine and tag me @sandradiascakedesigner, Instagram will let me know about it, I’m going to see your post, I’ll like it and write a comment for you to know that I’ve been there! If you’re enjoying this recipe and all the tips that I’m giving you, like this video as well!
I’ll be very glad to know that you’ve enjoyed it! It's still cooking. It's been cooking for nearly twenty minutes.
It remains untouched. Here's another important tip. .
. I imagine that this question may show up. This condensed milk recipe only works with types of sugar that get caramelized.
That means any types of sweeteners, even the ones for professional use, don't get caramelized, so they don't work for this recipe. You may substitute it by dark brown sugar, light brown sugar, or even honey, all of these get caramelized, except sweeteners. Therefore, sweeteners are not appropriate as a substitute in this kind of recipe.
The milk has been cooking for about thirty minutes now. And it remains untouched. Now we can carefully, using a spoon and a little bowl of water.
. . You realize that part of the water has evaporated.
You can notice that because of the foam on the surface. Like I said, water evaporates and any residues from the milk stays on this foam on the surface. You may remove this foam very carefully using a spoon, avoid touching the milk.
Look. Get rid of this foam. Remove the foam very carefully and keep the milk on fire, because it's almost ready.
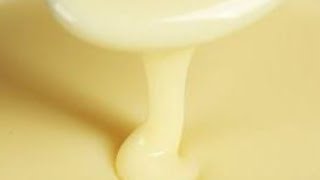
You notice that it's almost ready also because of the color it has become. It has become this light yellow condensed milk tone, you know. So it's almost ready indeed.
It has been cooking for thirty-five minutes. It has become light yellow. It has reduced.
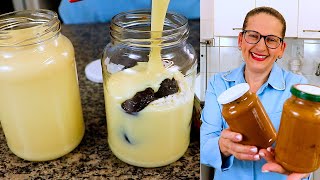
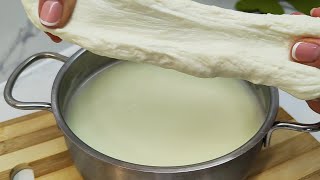
So we can turn off the fire now. Having finished the cooking process, now we're going to transfer this content to a jar and let it to cool down. Let it cool down completely.
Since it's still hot right now, its consistency is liquid indeed. Transfer it to a jar and leave it alone. Don't close it with a lid or anything.
Just let it cool down completely. Don't scrape the bottom of the pan, just pour the content from it and leave it as it is. Look, there's still some foam in it.
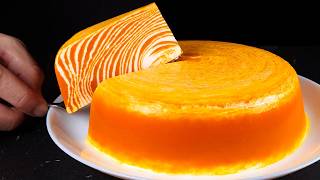
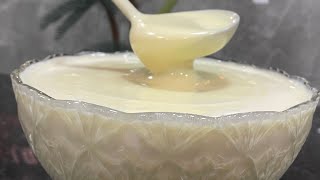
Leave it as it is. In order to show you what the consistency looks like when ready, I have another recipe here, which I had made earlier and has already cooled down. Look.
The color is very similar. This color depends on the cooking time. Okay?
Look. Look at the consistency of it! And its flavor.
. . is as delightful as the manufactured one.
The brand of milk also makes the difference in the flavor, of course. Overall, it's extremely tasty and has a great consistency! Since there's no way we can storage the product, canned or boxed, the same way manufacturers do at the factory, it doesn't last very long without refrigeration because of the package.
So if you don't intend to consume it right away, you can keep it in the fridge for six months, at most. You’ll be able to use this homemade condensed milk interchangeably in every recipe that you would use manufactured condensed milk! Have you seen that it's uncomplicated to make homemade condensed milk?
The key ingredient for this recipe is actually patience. Let it cook slowly at low heat until it achieves the ideal consistency. I hope you’ve all enjoyed it!
If you have any questions, use the comments section below! Leave your questions and, as soon and quickly as I possibly can, I will personally reply to each one of them. Here's another tip for you!
Usually, on my videos, both in the description box, and in the first pinned comment, I mean, in the comments section where you intend to leave a comment, the first pinned comment is mine, I've typed it, and I have provided some useful information which may be helpful to you, and perhaps even be the answer to your question. Before you ask, to avoid waiting for a reply, take a look at these two sections. Perhaps your doubt has already been clarified.
If you still have any further questions, don't worry. Leave a comment and I'll reply to you as soon as I possibly can. I wish everyone has a sweet week!
Take care of yourselves! Until next time! Thanks for watching!
Related Videos
9:17
JUST 2 INGREDIENTS: TRADITIONAL AND DIET C...
Anelyse Martins
22,616 views
14:19
Homemade Mascarpone Cheese | The Only Chee...
Sandra Dias - Cake Designer
1,074,520 views

10:55
Leite Condensado Caseiro Econômico - campe...
Padaria sem Segredos
637,416 views

3:31
ABANDONEI O MERCADO, AGORA FAÇO MEU PRÓPRI...
Culinária em Casa
25,163 views
17:47
Homemade Whipping Cream | Easy And Inexpen...
Sandra Dias - Cake Designer
3,145,452 views
12:20
Homemade Cream Cheese | Easy And Inexpensi...
Sandra Dias - Cake Designer
1,439,990 views
13:58
Aprenda a fazer leite condensado caseiro d...
Gordices da Deia
415,019 views

15:37
FAÇA COM (ÁGUA) E AÇÚCAR MELHOR QUE OS ORI...
SORVETE CASEIRO LUCRO CERTO
775,293 views
15:23
Baba de Moça Tradicional | Recheio para bo...
Sandra Dias - Cake Designer
109,831 views
19:52
"Crémeux": Cremoso de Chocolate | O rechei...
Sandra Dias - Cake Designer
676,949 views
15:18
Just pumpkin and cottage cheese! A great n...
Süße Blog
378,995 views
12:53
leite condensado caseiro com 3 ingrediente...
Canal Babi
835,405 views

16:04
IOGURTE NATURAL CASEIRO! Com apenas 2 ingr...
Lilian Chef
2,182,210 views

9:12
FAÇA COM ÁGUA ECONOMIA DE 100 % NÃO COMPRE...
Como fazer sorvete caseiro
162,216 views

4:39
FAÇA 3 QUILOS DE QUEIJO COM 1 LITRO DE LEI...
SORVETE CASEIRO LUCRO CERTO
403,949 views
10:35
DESCOBRI ESSE DOCE DA VOVÓ SUPER CREMOSO E...
Isamara Amâncio
978,860 views

7:19
Fiz Mais de 1QUILO de LEITE CONDENSADO gas...
Dicas da Pri Confeiteira
577,768 views
15:59
Lemon Fudge With Almonds | Make And Sell |...
Sandra Dias - Cake Designer
298,441 views
15:14
Homemade mozzarella made from 2 ingredient...
Einfaches Rezept
1,278,303 views
7:43
Leite condensado integral caseiro. CHEGA D...
Delícias da val confeitaria
164,123 views