FULL Shopify Tutorial for Beginners - Best Guide To Set Up Your Shopify Store 2024
24.48k views6405 WordsCopy TextShare

Shopify Success
👉 BEST CURRENT DEAL - Get a 3 day Shopify FREE TRIAL claim a $1/month discount for the first mont...
Video Transcript:
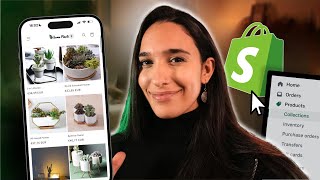
hey guys Julia here in this video I'm going to guide you through the entire process of setting up your Shopify store we'll cover everything step bystep breaking down all the different features and configurations so that by the end of this video you will have a fully functional Shopify store to begin selling your products if you haven't signed up for Shopify yet I'm also going to go ahead and leave the best current deal for getting started Linked In the description right now it's at $1 for the first month once you signed up follow the prompts to
create your [Music] account and you'll be taken to your Shopify dashboard so the first thing we're going to do is choose a theme for the store if you don't know what a theme is these are ready-made templates available on Shopify that we can use to customize the store design so to choose a theme click down here on online store and here you're going to see a few theme options by default your online store will be set to the theme Dawn if you want to view other theme options you can click down here on visit theme
store so I recommend you browse through this and look for something that suits your vision you can click on them and then click on view demo store to have an idea of what your online store could look like using one of these themes and while choosing a theme is important know that all of them are very customizable and you can always change your theme later if you want to You'll also see that Shopify has both free and paid themes if you want to try a paid theme you can add it to your library customize on
it for a bit and you'll only have to pay for it once you click to publish so that gives you a possibility to try a few different paid themes without actually having to purchase it until you're sure that it's the one you want to go with to view only the free themes you can take free here in the filter settings for this tutorial I'm going to go with one of the free themes available so click on ADD theme and it will be added to your library now make sure to click on publish so that it
becomes your main theme and once again if you're using a paid theme you don't have to click on publish now you can try customizing it first to see if it's the one you want to go with you'll only have to pay once you click on publish all right now let's start designing the store we're going to right click on customize to open the theme editor on a new tab when you first Open the theme editor you'll see a sidebar on the left hand side of the screen and your website preview here on this main area
so everything we're going to edit will be done here on the sidebars and you'll be able to preview those changes in this whole area as we go you can also choose to customize mobile views by clicking up here in this tutorial we're going to focus on desktop mobile is usually very well adapted by Shopify as all the themes are mobile responsive so you can go over this in the end and see if you want to make any small changes you'll also see a feature up here called [Music] inspector which Scrolls your page to where your
mouse is hovering automatically to make things more simple I'm going to turn it off for this tutorial you can turn it on and off by clicking on it so let's have a closer look look at the sidebar here you will find all the sections of your website with the drag and drop function no matter which page you are in whether it's the homepage a product page or whatever page the sidebar will always start with the header section and ends with the footer section and in between that is where you will add all the page content
you'll also notice that whatever theme you choose it will come with a few sections already added by default if you want to re reorder these sections you can simply drag and drop like this what you'll also notice is that some sections come with different blocks within it so here in the banner section for example you'll see a title block and a button block now to make edits in your contents you can just click the blocks and you'll see the settings here on the sidebar to delete a section or block you can click right here so
this is the main theme editor area where we'll be spending most of the time customizing here on the upper left corner you will find additional settings where you can change the fonts colors and a couple of other settings the first thing we are going to do is add a logo here you can select your logo image [Music] to adjust your logo size you can tweak this setting if you haven't created a logo yet I'm going to leave some of my favorite beginner friendly design tools linked for you in the description now let's go back to
the sections and the next thing we are going to do is adds a banner image to the store now I definitely recommend you spend some extra time Gathering the best looking images you can get as a visual appeal is one of the most important things when it comes to selling to find these images I'm going to leave a few websites linked for you in the description so click on image banner and here on the side you can select your [Music] image in this theme you can also add a second image to banners so the whole
thing splits in two and shows two photos so you can click here to add a second image if you want to and by the way I actually generated this image using an AI tool called imagine so if you're struggling to find really good images that can be a really awesome way to get exactly what you're looking for all you have to do is type in what you want to create and the AI will generate it for you I'm going to leave this linked for you in the description now here in the banner to help the
text stand out better you can adjust the opacity setting I'm going to leave mine a little bit darker to change the size of your banner you can choose one of these options [Music] all right now let's fill in some content click on this block and here you are going to add your store title if you want to add a short description as well you can click on ADD block select text and a new text block will be added to your banner now as I mentioned earlier you can drag and drop things to the order you
prefer so let's drag this text block above the button to edit the text content click on the Block and here you can enter your short description now as you can see we also have a button Block in the banner so let's click on [Music] it here you can customize your button text and where it links to I recommend you leave this text to something general like shop all or shop now and for the link setting I recommend you leave it linked to all products we'll be adding products to the store in just a moment here
on desktop content position I'm going to choose middle so the content moves up to the center of the banner depending on the images you are using for your banner this might look nicer finally down here on image Behavior you can choose one of these animations this can give a nice bit of movements to your page design now the next step is to add products before we can add the product sections here in the theme editor we are going to go back to the Shopify dashboards to create the store catalog now if you are sinking with
a print on demand or Drop Shipping supplier your products can be automatically added from their platform and if you have your own products in inventory you can go to products click on ADD product and let's fill out all the details first enter your product title and down here enter your product description you can either write this yourself or use this Auto write feature to generat a description for you now let's add some product photos click here and uploads your images keep in mind that highquality product photos are essential for attracting customers and showcasing your products
in the best way possible so make sure to includes multiple images that show your products from different angles and be critical about how this looks your product images are a make or break factor of your online store if you need some tips on how to get greatl looking product images either by yourself or using AI I'm going over multiple tips in this other video Linked In the description and you can then drag them around like this to choose which one will be the main one the bigger one will appear first now let's add the product
price let's say this product will cost $28 you can also use this compare at price to display a more expensive number with a strike through which would appear something like this in your online store so as an example I can say this product cost $42 before but now it's on sale for only 28 here you can also add your cost per item if you want to this is just to help you manage your profit margins and it will not be visible in your storefront then down here on inventory you can select how many products you
have available in stock I'm going to add 50 as an example that's the number I have available at the moment and as a quick note if this number goes down to to zero your product will appear as sold out so if you want to overwrite the setting you can just tick this box and the product will continue selling even if the inventory goes to zero so if you don't want to worry about this number you can just take this box down here you can add the weight of your products this is going to be helpful
if you wish to charge shipping based on product weights which we are also going to configure later in the tutorial if you are selling digital products you can untake this box moving on to the variant section this is where you are going to add any product options like size color or material if you are selling a t-shirt for example you might have options for different sizes or colors to add a variant first click here and select your type of option if it's not a size color or material you can choose style mine are going to
be different colors on option values you will enter all the different options of your [Music] product click done and if you have more variant categories you can continue adding them here now let's add some variant images Click on each image icon and add an individual photo if these are just different t-shirt sizes for example you can keep the variant images the same you can also enter individual variant prices and inventory numbers if you need to for example if you are selling a large Plant face and a small plant face here you can enter a lower
price for the small one and how many you have in stock if you wish to delete any variants you can click on edit and remove them here you can also select all your variants and bulk edit here now let's edit our search engine [Music] listing this is how people are going to preview this product page on platforms like Google type in your title and your description at this stage there's no need to overthink this as we just want to get a general structure down we'll be working more on this at a later stage now let's
scroll back up and make sure your product status is set to active so that it's actually visible in your online store you'll also want to click on manage sales channels and make sure online store is selected later on if you want to sync your store cat log with Facebook shop and Instagram shop this is also where you can enable each product all right now hit save and let's go back to create more products okay so now that we have multiple products ready it's time to sort them into collections in my example I could create a
cat's collection a dog's collection and other collections for feeding bowls pet clothing pet beds Toys and accessories now if you are running a store with a larger catalog like a clothing store you could create tons of different collections you can start with men's women's and kids and then for each of those you could create other groups like men's tops men's bottoms and men's shoes and then women's tops bottoms and shoes you can then go a level deeper and within men's tops you could create men's sweatshirts t-shirts and so on so have a look at your
products and come up with a logical way to organize your catalog once you have an idea of how that could look head over to collections here on the side menu all right now click on create collection and I'm going to set up my first collection add the title and you can actually leave the description blank as it will be more of a visual thing then here on collection type I'm going to go ahead and select manual we'll be adding the product manually in a moment if you want to create an automated collection I'm going to
leave some step-by-step instructions for you in the description now let's add a Collection [Music] image this will be the visual cover showing in your store so make sure to choose something that represents all of your collection's products down here you can also fill out some of your search engine listing information though as I mentioned earlier we are going to go deeper into all of this at a later stage so just come up with something basic for now so let's hit save [Music] and now let's add the products that belong in this collection just click on
browse and take all the products you wish to [Music] add once you have them all here you can choose to reorder which ones will appear first in your store to do that click on sort and you can choose between one of these criteria I'm going to click on manual to then change the order of your products manually you can drag and drop them like this I recommend you order them in a way that looks visually appealing you can also leave it like this for now and then come back later to experiment with a few different
changes and now let's go back to create more collections click on create collection and repeats the same process okay so now that we have our catalog ready we are going to go back to the theme editor and continue designing the store the first thing we're going to do is add a section which is going to show the products of a collection so click on ADD section and on featured collection now up here click to select the collection you want to show the first thing I'm going to do is remove the title to create a better
aesthetic and down here you can choose how many products are going to show you can also choose in how many columns they will appear [Music] [Music] if you want to you can also delete this view all button by unticking this box and down here you can activate this Carousel feature which allows users to scroll horizontally I'll leave mine like this make sure to all also enable this feature right here show second image on Hover this will create a really nice visual effect when the products are hovered next up click on ADD section and now we'll
add a collection list in this section I recommend you link to three of your main collections if you have more than three main collections you can add them later in a lower section of the page instead of stacking too many together this will very likely help with your store's aesthetic first I'm going to remove the title once again and down here I'm going to change the background color to create some [Music] contrast if you want some more color options than what's being shown you can click on edit to change the color schemes I'm also going
to disable the view all button here in the setting as I want the viewer to focus on one of these three options now let's go head and add our collections here on the sidebar you'll see the collection blocks so click on the first block and select your [Music] collection now click on the next block and select your second collection finally click on your third block and choose the last one [Music] if you want to reorder these sections you can simply drag and drop like this all right now let's click on ADD section once again and
now I recommend you have a look at some of these options to see what makes sense for you to add to your online store for this tutorial I'm going to add a featured [Music] product click up here to select your [Music] products and as you will notice most of the features are very similar to the previous sections here you can also choose to show a secondary background if you want [Music] to on desktop media width you can select the product image size [Music] now let's go ahead and add another [Music] section I'm going to add
another featured collection to display some more of my products the idea is to create an engaging shopping experience with a good amount of variation between each section now let's go ahead and add our [Music] collection first I'm going to remove the title as I've done previously and now if you click on enable Carousel and then move the setting to show more than four products you can create a nice horizontal scrolling feature you can also make the products bigger by moving this column setting [Music] I'm also going to disable the view all button to create a
better aesthetic now I'm also going to activate the show second image on Hover to create a nice visual effect in the section as well all right we are almost there let's click on ADD section and now I'm going to add an image Banner this is going to help us break the repetition and add some contrast and visual engagement I'm going to upload my first image and the second I'm also going to disable the [Music] setting since my my only goal with this section is to create a nice visual I'm also going to disable these blocks
and leave just the images next up let's go ahead and create another section this time showing another featured collection select a new collection up [Music] here and remove the title I'll leave the background of this section white as it creates a nice variation against the sections above I'm also going to disable the view all button can choose how many products are going to show now finally we are going to add the last homepage section collapsible content you can use this kind of section to share additional information about your online store I'm going to use it
to create an FAQ first enter your title and down here I'm going to change the background color to create some [Music] contrast now click on the first collapsible block fill in the title and the answer then click on the next block and repeat the process all right if you need to add more blocks you can click right here [Music] here as you can see we also have an email signup form here in the footer and here you can change the title next up let's move over to the product page so click up here select product
and default products as you can see Shopify has automatically created a product page for you which is assigned to all your products so if you make any changes to this product template it will end up affecting every other product page as well since we're still in the beginning steps of setting up our store this is going to be fine for now though later on I recommend creating unique product pages so that you can better communicate the benefits of your main products having strong product pages is absolutely essential if you want to convert visitors into customers
so I'll leave a link to another tutorial for you in the description which will guide you step by step into creating custom product pages I'm also going over a few Shopify app recommendations to help you get more sales though for now let me show you a couple settings of this page first let's click on product information and here I'm going to change the product image size on desktop layout you can adjust how your product photos will be displayed plate scrolling down you'll see there is a product recommendation section so let's improve the aesthetic here as
well click on related products and first I'm going to change the background color to a gray tone which helps create some contrast now I'm also going to remove the title to create a bit of space between these sections I'm going to go back to the product information section scroll down here and increase the bottom padding to create some space okay that looks much better make sure to click save and now let's go ahead and create a navigation menu so our visitors can better browse through the store go back to the Shopify dashboard and here under
online store click on navigation here you can customize your main menu and your footer menu click on main menu and now let's add some menu items I recommend you start by creating a menu item for each collection you have in your catalog we are then going to stack them into Main and subcategories in a moment so click here to add a menu item and here you can type in the title and choose where it links [Music] to so I'm going to repeat the process to create a few more menu items all right now to organize
these into Main and subcategories you can drag and drop like this [Music] you can also drag and drop a level further to create a subcategory within a subcategory this is going to be my example once you're done hit save [Music] and let's go back now you can repeat the same process to create your footer menu which appears at the very bottom of your online store we'll actually be coming back to the footer menu later in the tutorial once we've created a couple policy Pages which we'll also want to link in our footer menu so let's
go back to online store and click on view store as you can see the main menu has been updated we're now going to go back to to the Shopify dashboard and go over some management settings like shipping checkout payments domains policies and so forth so click down here on settings and first let's go ahead and edit the store details if you want to edit your profile settings you can click up here in case you might have signed up for Shopify with your personal email address I recommend creating a new email account later on and then
just updating it here in the account settings this will help you keep everything more organized as you grow your business then here you can also go ahead and edit your billing address if you need to down here we get to the store currency setting so make sure that this is matching your selling location and if you are selling internationally you can use Shopify apps to convert your store currency based on the viewer's location so if someone is shopping in Germany for example they will see Euros instead of dollars I'll leave some of those shop apps
linked for you in the description now let's head over to users and permissions if you are working with a team you can manage your staff members and what they can access here in the section if you are working by yourself there's nothing you need to do in this part heading over to payments here is where you can set up payment options for your customers this is also how you are going to get paid into your bank account depending on your location you might see an option named Shopify payments which is the payments Gateway set up
by Shopify I definitely recommend using Shopify payments however it does require a personal or business registration number so if you don't have that yet you can add another payments Gateway by clicking down here I'll also leave a link in the description so you can check what payment gateways are available in your location here you are also going to see PayPal I definitely also recommend activating this as an option all you have to do is click here and log into your PayPal account or create a new one if you need to now let's head to the
checkout settings here we are going to go over what information your customers will need to enter during checkout first we have the customer contact method here you can choose between email or phone or just email we're going to go ahead and choose just email as that's definitely a better and easier option especially for marketing later on then we have this box require the customer to log into their account before checkout I recommend you leave this unchecked because this can create extra Hassle and friction in the checkout process requiring accounts is actually one of the main
reasons for cart abandonment so definitely leave this unchecked especially if you're just starting out and haven't built a returning customer base next up we come into custom customer information here you can choose to require first and last name or just the last name depending on what you're selling Gathering first names can be very useful for your future marketing strategies when doing email marketing for example if you know your customer's first name you can then create emails on a much more personalized basis so let's go with require first and last name then on company name I'm
going to choose don't includes which is also recommended by shop ify if you are a b2c meaning business to Consumer and your customers are regular end consumers and not other businesses then I definitely recommend leaving this off however if you are doing B2B or business to business and your customers are other companies then it might be a good idea for you to require their company name address line to just leave that on optional and shipping address and phone number we will tick as required most mail services will require a phone number for delivery by law
so definitely make sure to check this one now let's click on Save and head over to [Music] markets here we are going to configure our selling regions meaning which countries we are going to be selling to if you are selling nationally you're going to need to add your country here in the primary market and if you are selling internationally then you'll see Shopify has already created an international market market for us so let's click on this market and click on edit here you can select all the countries you will be selling to once you're done
hit save and make sure your Market status is set to active here you'll also see a setting for languages and domains Shopify offers a free app you can use to translate your store into many different Lang languages if you want to do that you can go ahead and install the app it will translate each page of your store for you so you can Market more effectively internationally now let's go over shipping and delivery the shipping settings are split into two layers shipping profiles and inside each [Music] profile shipping zones or locations ship Shing profiles are
groups of products you can create to better organize how much you will charge for shipping based on the product type for example if you are selling clothing you might want to group lighter items like t-shirts and then group heavier items like hoodies and pants into another profile since you will likely have a different shipping expense depending on how much the package is going to weigh so using shipping profiles will help you organize your shipping pricing strategy in a way that is logical now shipping zones which are found inside each profile are groups of countries you
will be shipping to so if you're selling in Europe for example you might want to group Portugal and Spain into one shipping Zone as the shipping cost to those countries will be very similar you can then create a different shipping zone for South America for each Zone you are going to set a separate rate now there are many different ways to go about your shipping prices and ultimately it's going to depend on your price ing strategy you might want to set up different rates for different countries and products or decide to offer free shipping worldwide
offering free shipping can also help you lower cart abandonments if you want to offer free shipping then I recommend you increase your product prices to make up for those expenses alternatively you could also go for a totally different strategy you could set your product prices super low with a very attractive offer and then charge shipping in the back end if you do this you might face more cart abandonments but depending on what you're selling and what your sales funnel looks like this can also end up bringing more sales because the customer has already committed to
the products in an earlier step of the funnel so let's go into the shipping settings if you decide to either offer free shipping or charge the same fee for all of your products you can just use this General profile created here by default so click on General and down here you can group countries into shipping zones to enter the shipping price for each Zone you can click right here and enter your shipping rates if you want to offer free shipping make sure to add zero now if you are Drop Shipping you'll also need to make
sure your Drop Shipping supplier has been added to your shipping Origins inside Shopify you can also add something called conditional pricing which lets you charge shipping rates based on the exact weight of the products or the total order price I'll leave a link in the description showing you how to do that now if you want to create more shipping profiles to better organize your shipping rates you can can click here on create new profile and then follow the exact same steps for each profile now let's move over to locations if you are selling by yourself
from your home you don't need to worry about this part though if you are running a larger business and you have multiple inventory locations you can add each inventory address here make sure to then also go back to the shipping settings and enable these as An Origin if you are selling in person then I highly recommend using the Shopify POS system which you'll find here in point of sale you can order the Shopify POS hardware and your inperson inventory will be synced with your online store now let's head to the app settings here you can
manage all the apps that have been installed into your Shopify store you can install apps to increase the functionality of your store for example certain apps like kaching will let you create product bundles which are an excellent way to increase your sales UPC cards lets you upgrade your shopping cart experience which is also an amazing way to help you enhance your Shopify store I'll leave my top recommendations including these two apps linked for you in the description plus a discount code you can use for the first month I'm also going over these apps in a
different video so when your store is ready make sure to check out those marketing videos as well now we come into the domain settings you can think of a domain as a URL it's basically your website address by default your url will be set to something random. myshopify.com which is not very professional so to change that you're going to need to purchase a domain if you want to keep this as simple as possible without any complicated configurations like setting up your DNS settings then you can just purchase a domain right here from Shopify and it
will be set up automatically this is going to cost $15 per year now if you're looking for a more economical op option you can go for a platform called name cheep which I'm going to leave Linked In the description in this platform you can buy a domain for around $5 and then click here to connect it to Shopify once you've purchased your domain let's move over to the brand settings down here make sure to upload your logo files which are going to show in your checkout page and any automated emails and here you can also
add a cover image which is how your store is going to be previewed in profile pages and applications finally down here I also recommend you add your social media links which are displayed in the footer of your website if you haven't set up your social media accounts yet you can come back to this later moving over to customer privacy here you'll find the settings of how your customer data can be collect elected to comply with regulations in different states I recommend you add a page to your store to ask visitors for their consent you can
do that by clicking right here and finally we come into the policies here you'll see Shopify has some default policy templates so to make sure your store complies with certain regulations you'll need to enable some of these policies on each of these you can click on create from templates and then make any changes if [Music] necessary once you have it hit save and now we are going to add these policies to our footer menu so that they are actually accessible in the online store so close the settings go to online store and click on navigation
now here click on the footer menu add menu item type in privacy policy and Link it to your new policy next up I'm going to repeat the process for the other links all right now we're going to head to [Music] preferences and here we need to create create a homepage title and description which is how your website is going to be previewed on platforms like Google so type in your store title and shorts description down here you can also add an image for social previews which is seen when someone shares your online store on social
[Music] media now head to on online store and click on view your store looks like everything is [Music] ready if we add this to the [Music] cards and then go to checkout every everything is set up and you are ready to start selling now let's head back to the dashboards and we are going to remove the passwords to make the store public all right congratulations for making it this far now to start selling you'll need to find ways to start bringing relevant traffic to your online store so if you have a budget to work with
here my strongest recommendation is running ads on Tik Tok I'll leave a tutorial for that Linked In the description once you're seeing some traffic you can analyze your data here in the shop analytics section your orders will be found up here here under marketing you can enable different email automations Shopify provides readymade templates you can use for this so usually all you have to do is activate them and customize them to fit your brand I also currently have a marketing course in the making so if you want to be notified when the courses out make
sure to find the link in the description and enter your email address and if you haven't signed up for Shopify yet you'll also find the best current deal for getting started Linked In the description right now it's at $1 for the first month and if you have any questions at all feel free to leave them down in the comments and I'll do my best to help you out and that's all for now before you go make sure to hit that like button it'll be super super appreciated thank you so much for watching and I'll see
you in the next video
Related Videos
14:00
Shopify Tutorial - Create a Pro Shopify St...
Shopify Success
4,202 views

33:45
Best Shopify Print On Demand Tutorial For ...
Wholesale Ted
110,616 views

1:16:40
Easiest Way To Start Dropshipping in 2024 ...
Santrel Media
17,608 views

31:34
How to Use Shopify for Beginners - Crash C...
Kevin Stratvert
237,568 views

1:21:09
Best Way To Start Dropshipping in 2024 (Co...
Santrel Media
623,715 views
52:34
BEST Shopify Tutorial in 2024 -- Set Up A ...
Santrel Media
236,177 views

3:05:22
Shopify Tutorial For Beginners 2024 - COMP...
Davie Fogarty
1,719,506 views
1:23:27
Shopify Store Design Tutorial 2024 - Full ...
Santrel Media
96,201 views

17:23
The Best Print On Demand Company That NO O...
Wholesale Ted
90,810 views

39:06
Full Print On-Demand Tutorial For Beginner...
Greg Gottfried
436,724 views

17:50
5 easy AI digital products to sell online ...
Kate Hayes
146,544 views

2:27:38
COMPLETE Etsy Tutorial For Beginners 2024 ...
Ryan Hogue Passive Income
537,276 views

40:17
The CORRECT Way to List on Printify & Etsy...
heatherstudio
33,854 views

31:06
How to Start Dropshipping in 2024 (Best Tu...
Charlie Chang
91,577 views

15:01
15 Ways To Make Money With Canva That ACTU...
Wholesale Ted
431,523 views
48:12
Ultimate Shopify Tutorial for Beginners - ...
Shopify Success
52,498 views

12:49
I Studied 100+ Etsy Shops to CRACK the Alg...
Brandon Timothy
79,880 views

13:59
The UGLY Truth About Dropshipping That No ...
MyWifeQuitHerJob Ecommerce Channel
1,125,577 views

29:48
My New Print on Demand Store is Blowing Up...
Shimmy Morris
50,989 views

33:43
Full Print On-Demand Tutorial For Beginner...
Mark Tilbury
621,965 views