CAD Modeling In Blender 3.2 | Using CAD Sketcher
350.62k views5579 WordsCopy TextShare
Keep Making
Learn how to do and see how I do CAD-like modeling in blender 3.2 using CAD Sketcher. This is pretty...
Video Transcript:
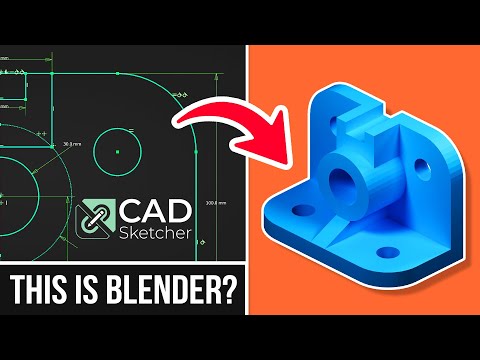
so this is how to use cad sketcher as it currently is right now so very much work in progress to make this thing right here now it's not super duper complicated but it's not super duper simple either and the end result is pretty clean overall it's definitely 3d printable so let's go and dive straight into it starting with a nice fresh new blender file let me show you how to get the technical drawing so it's down linked in the description you can get the technical drawing and in that technical drawing you can then just drag and drop that over into blender you can use it like this but i don't like using it like that so i'm going to select it delete it and then on the top left just in case you don't know the blender you are you can drag out a new window change this over to the image editor and change here on the drop down next to new to the image that you just brought in so you can then look around use the middle mouse button to move around now i'm not going to keep this super duper simple i'm going to think that you know a little bit of blender i'm just sort of going to jump into a little bit of quite a bit deeper parts of blender i am going to keep this here on the side just so you can see exactly where i'm going to be working with now there are a whole bunch of shortcuts that i'm going to be using that are new to cad sketcher and they are also linked down in the description so let's jump straight into this with a new shortcut of ctrl shift a to create a new sketch i'm going to go here on this plane right there i'm going to press 1 to look directly at that plane and i'm going to create myself a rectangle right there i'm going to right click to cancel the tool and go back to selection i'm going to click on the origin point click on this line here and i'm going to use the shortcut shift n for midpoint constraint now i have no idea what size this really is right this minute so i'm just going to grab these two bottom points right here i'm going to press alt d because all the alt shortcuts are for dimensioning all the shift shortcuts are for geometric constraints i'm going to click into here and i'm going to make this a hundred and fifty so now i'm getting a little bit more perspective of the size of the model there we go now i gonna have some rounded corners here unfortunately we don't have the fillet tool just yet so i'm actually just going to delete all of these points right here i'm not going to use them for the time being what i'm going to do is i'm going to create a line upwards this way create a line upwards this way and create a line along like that i'll press a for the arc tool then i'll click and then just create myself two arcs like this and like this now i technically could mirror all of this but i just want to make my life nice and simple i'm going to right click to cancel that i'm going to select this select that press shift t to create a tangent constraint so i'm going to tangently constrain all of these to one another so once all of that has been tangently constrained let's make these two arcs as well let's make them equal to another so let's shift e for equal and now let's actually do a radius on them as well so select this here and that would be alt r for radius or alt d automatically it will do it for an arc so here the radius that i have set for this one is 30 so we'll click into it type in 30 and that is now set i want to press n to open up my side menu go to cad sketcher and i want to just double check my degrees of freedom you should technically always sort of have this up because it will let you know when things are going wrong and i know what it is it's this top one right here so i'm just going to move this little thing down select this point here select this point here and this is a dimension so let's go for alt d for the dimensioning now this is the distance between those i want this to be the vertical distance so let's click into here change the alignment to be the vertical distance that's more like it and i want to change this to be 100 brilliant now that we have this set in place let's add a couple more things i'm also just going to close this up just a little bit this way more than i think i just want to show you that model because i sort of have this already on to my side here that i can see it so i'm wanting to actually create all the referencing for everything here yes we're going to be doing a little bit of referencing so let's create a line i'm going to go from the origin point all the way up to here brilliant i'm going to right click on this and set this to construction and then i'm also going to grab myself a circle pro c for the circle do one circle do another circle making sure that i'm going from the center so those are both using this point right here so i can select that point select the origin point press alt d and set the dimension here that i'm looking for which is 53 okay so we have degrees of freedom which is these ones obviously right here so let's grab this circle here alt o for this one and i'm going to set this circle right here from the sketch it is telling me that this is 30 and then we've got this one here alt o and from the sketch let me just drag this out so things a little bit more visible this one here is going to be 55 so now that those are set we don't want this outer one actually because that's not going to really help us in any way so i'm going to right click it and turn it into a construction line now i want to add the holes that we're going to have here on the side so i'll press c for circle i'll create a circle here create another circle here right click to cancel and go back into my selection select both of these press shift e for equal select one of them and then i'm going to do alt r for radius i'm going to set the radius of this one to be 18 but that is not what i wanted what i actually wanted is the diameter so i'll change it right here so i'll put that into 18 but that's not what i want i want to change this toggle right here and then change that back over to 18 diameter like so okay so now that i have that like that what do i have left well i've got this little top notch that i want to add some construction mesh for later so i'm going to add another rectangle so that is r to bring in a rectangle like so i'm going to actually coincident point this one here right click i'll select these two and i'll press shift c to do a coincident point there and there is a degree of freedom right this minute right here so i'm going to select the point here that point there press alt d to do a distance constraint there and this distance for this one is 40. now all of this here is a little bit much i don't need this to actually be real lines i need to turn this into all into construction lines so i'm selecting all of these and turning it into construction lines now this one here and it's getting in the way so i have to right click and get rid of the visibility so i'm able to turn this one back into construction line and i'm going to have to go back into my entities scroll down and bring on the visibility okay now there's one more that will cut out that i want to put in here now remember all of this is still very much in development so don't go too critically on this um so turning all of this into construction there we go construction construction construction and i'm going to set this point and that point there with a shift m for midpoint constraint select these two points here go alt d for a distance that should be 10. oh i'm close but not close enough so that's now 10 here and lastly i'm pretty sure we only have one freedom left yep which is this one right here alt d and we're going to set this one to 20 and that is this sketch now completely done so i'm going to change this one i'm going to call this the back plate so back and underscore plate i'm happy with that i'm going to change this into mesh when i go out and leave this like that okay now that i've done this i'm going to press w for my normal selection select what i've just created here go to the modifiers and change this modifier with a solidify and the thickness that i'm aiming for is 13.
okay here we have it that is now in place like so so how am i going to be creating the rest of this well let's create the base first so to create the base first i can't actually do any referencing of the actual sketch which is a little bit of a shame so what i'm going to do is just create another sketch and i'm going to go from the top down and i'm just going to start building exactly what we just did but once again so with that like that i knew be able to see the origin point and i don't want this mesh in the way so i'm just going to click over here and turn off the mesh right there brilliant i'm then going to select these two press shift m you already know what i'm about to do here so let's just go with it these two here we're going to do a distance constraint set that to 150. now these here are technically not really what we're needing because we have some lovely arcs and all the rest so this time i'm going to start with the arcs and let's go for an arc here and an arc there press l for the line we're going to go from line to line another line over here and yet another line this way let's turn this one into a vertical line so shift v and then make all of these tangent to one another so remember that is shift t to the tangent constraint so with all of these now tangent to one another let's also make these two equal to one another so shift e and then lastly we have this degree of freedom as well as the radius of this so i'm just going to select one of these go shift r and click on this radius oh it's not letting me i'm going to do alt o and that's going to let me do that one because it's not a radius that i'm wanting here and so i've got to change this over to 30 i'm pretty sure but it is a radius of 30. so change this here to a radius here of 30.
there we go radius of 30 that is now set in place that's all looking good to me we do have one degree of freedom left which is this one right here alt d change that again to a vertical and we're going to change this one this time to be 80. brilliant so now let's do the holes that we need to do so grab one there and another one here make those two equal to one another and let's also set this with an alt o and these are going to be 18 so that should be everything in place it is a fully defined sketch i'm going to call this one the base plate um base plate because the other one is the back plate and the plaque plate awesome and make sure that this is converting it over to mesh leave it this way then i'll press w select this one once again add a solidify modifier we're going to go up by that number of 13 once again this time in one make sure that it's an even thickness just in case this one even thickness as well so there we go we're coming together coming together now this back plate i want to be able to see this sketch so i'm going to turn this on as i can see that sketch and we're going to be sketching on the same plane once again we're actually going to be able to use the mesh the whatever is that sketch the magic things that are card sketcher to sort of reference it that's right there's technically already referencing so let's add a sketch once again on the same plane and this time i'm going to turn off the mesh and we're going to have our sketch left here i'm do a circle i'm just going to click here and click it out click here and click it out and i want these two to be equal to one another so right click to cancel and just have selection select those two press shift e and that is it done i'm gonna go to this one here this one here shift d and that one's done and that is that sketch already sorted out this here is going to be my pipe sketch i'm going to convert this over to a mesh let's leave this here let's head on over to w here select that mesh of the pipe let's go for a solidify here and i'm solidifying this one out by 53. yes indeed i am there we have it so that's this one now very quickly let's have a little break as i tell you that cad sketcher is very much still in development and remember that it's not just an add-on it's actually a project to bring a whole bunch of cad-like features to the world of blender but with that said i need to say that we're not looking to replace cad just bring incredible features to blender so how is all this gonna happen with your support and it really does mean this by your support this is completely an open source community two bucks a month really makes a difference especially when we're talking about hundreds of you it really makes this project completely possible but remember we do need to have an understanding of mesh modeling if you want to take full advantage of cad light precision inside a blender and if you want a way of getting started with that link to down in the description is my free course here on youtube that tells you everything that i know about blender and if you want to learn blender through projects i have a paid course down there as well and i have to mention this but this video is probably already out of date because that's how fast development is going on with cad sketcher so if you want to be in the know right away be sure to join the discord community once again link down in the description now this top bit i want to do this in two things i want to do it the notch itself and the notch cut out because this is the blender sort of cad workflow which means we're using modifiers to do these pocketing operations i could technically do it all the way out all at once but i'd rather have a little bit more control of it so i'm going to go like that i have the back plate already set so i'll use and create a new sketch we're creating this sketch hiding the mesh and this time i'm going to use the line tool i'm just going to draw this quite haphazardly though because if not i'm going to over constrain the sketch a bit it's already constrained itself there didn't mean to do that and then i'm going to select these two here so select you and you gonna go with a shift c u and u shift c i'm going to remove that constraint there because everything is already constrained on the other sketch and that's going to sort of translate over to this one and this one here is called the top notch i can't spell there we go top notch and we're turning that into mesh convert it brilliant w select that up once again add that solidify modifier and we're going to push this out by 40 this time brilliant make sure that that is even and we'll do that once again but this time when we're creating this new sketch we're thinking that this is just the cutaway of it so i'm actually going to call this the notch ca for cutaway again i cannot spell to save my life today so there we go top notch there we have it i'm going to hide that mesh once again and i'm just wanting this lovely little bit up here so we'll go with that line once again like i said haphazardly i'm just creating things so that nothing is really constrained to anything so that i'm able to just go and select these two later on and constrain these points like so it's a much quicker and cleaner way of doing things and that's it pretty much done and dusted okay so turning this into a mesh leaving the sketch pressing w selecting the mesh we just created there adding a solidify modifier to that and i'm going to pop that out by 55 because i know that that is definitely enough to cut all the way through that now i could technically do the cutting operation right now but i'm going to leave all of the boolean operations for the last thing now lastly we have this little sort of support bit here down at the bottom and well there is no pretty way of doing this so we're going to have to just hide that back plate now take a look from this side view here and let's create ourselves a sketch so ctrl shift a for a new sketch on this plane and i'm going to call this the pipe support and then now that i have that there i know i'm going to be turning this into a mesh later and i'm going to start by creating myself a line upwards like this i'm don't actually need the mesh here i want to turn this into a construction line and there's a reason why i'm doing this i need to give myself a whole bunch of references now unfortunately so let's turn this alt d and make sure that this is a 53 so we know where it is exactly that we're working with here and now i know what i'm creating is going to be around here so i want to sort of see where that pipe bit is up at the top so i'm going to create this i'm going to also turn this all into construction because i technically don't need it in any other way i i'm going to select these two points though go alt d add this one to be 55 no 53 that is it and i'll select this one select this one shift m to do a midpoint constraint on that and then i'll select these two here go alt d and this one here is going to be let's see that is 55 there that's more like it so now i'm starting to see this here actually i could use this line but also take a closer look exactly what's going on right here there is a little bit of a something happening look right here that doesn't go all the way up to here there's a little bit of a gap so that means it's going all the way up to that point so let's just hold off on turning this into an actual line let's give ourselves a little bit more of a reference line once again so i'm going to create myself a vertical line this way sorry horizontal line this way and then i'm going to select these two let's add a distance we know that this should be 13 and then this one here from that line to this line here at a distancing to this one and this here should be 80 and then we're going to be going from this point here to that point there with a line so line that up but let's see because this is going to be round we need to go up a little bit here so let's just add a line going upwards so let's add a line going up make it over here now it's over constrained because we've got a vertical and a coincident so what i'm going to do here is i'm just going to select that coincident and just delete it and you can see now it tells us we're back to one point of freedom here so i'm going to select it right here go all the way across and do this once again from going here all the way back down to that point here we are over constrained completely here so let's just see where are we gonna stop we don't need this one here that one is okay that is constraint there that is constrained there there is one degree of freedom left which is the height of this one right here let me just double check that it is so i'm going to select these two here let's just put in a dimension i'm going to go for five millimeters yeah that's looking good to me there so now that i'm happy with that let's leave this and create that mesh so here we have the mesh of that one right there i'm going to select it so w then select it add that solidify modifier and this is going to be 15 millimeters but we've got to set this to zero and an even thickness so that it's sort of thickening it up from the middle and now you can see why we can go from right down here because it actually goes around in this way like that okay now that we have everything set in place make sure that you save your file if you haven't saved your file file save as and so on and so forth now i'm going to be using the ball tool so in case you don't have the ball tool that is edit preferences over here type in ball tool make sure this is on because i'm going to be using the shortcuts of it to sort of bring this all together now so let's bring this all together so we're going to select this one select this one select this select this and select the back plate as the last one and then i'm going to be using control numpad plus and that automatically has done an union boolean to all of these to this mesh back here now i want to do a cutaway boolean so i'm going to select this one here i'll shift select this one so it's the last one and i'll do a control minus and there we have it all nice and cut into it things are looking pretty much done and set all of these here are the bounding boxes of all the booleans so i'm just going to select them all and just press h to hide them away i don't really need them brilliant and then lastly i want to actually select what we've just created here if you don't have this this is modifier tools add-on or something like that just look up modifiers and it's going to be there let me just quickly show it to you yeah modifier tools that's how i get all of those i'm just going to toggle the stack all the way down we need to add one more thing here so i'm going to add a weld modifier right at the end make this connected i'm going to set this to 0.
1 just to make sure that it cleans up anything that might not be right here so now that we've got this to this state and everything is looking great let me just show you how this is completely parametric so let's go over to this back plate let's change this here we're going to change this to i don't know 200 hit enter there we go and we'll leave that and it has done that we now know that the base plate needs to be changed because right this minute we cannot refer to one another so let's go and do exactly the same and here we have it brilliant now things are going a little bit awry up there that means we need to sort of pump this up a little bit because there's a little bit of a rounding error going on there so just be aware that things can go a little bit strange sometimes so let's bring that back to 150 leave that here and we're going to go back to the back plate as well so this one here go back to 150 let's have that here and 50 leave that there now if you're having this problem continuously let's go to that top notch cut away here and change this over maybe to a fast one where is it um is that the cutaway i don't think it is there it is cut cut away let's change that to fast exact it's going weird for me why are you going weird for me well let's fix this right now while we're at it so i'm just going to go over to that back plate right there and we have this right here i need to give this just a little bit more of room going upwards so i'm going to actually change the way that i have constrained this so there's this center midpoint constraint there i'm going to turn that off and then i'm going to go and bring this up actually no well i'm not going to do that at all what i'm going to be doing is adding another constraint point down here so let's add a point to this line and then i'm going to grab this point here grab that point here and go alt d and change this to be 10 there and the main reason why i'm doing that is because i want to grab u grab u go shift m and then i'm going to bring you and turn you into 11. so you're popping out like that a little bit now when i leave this that's going to edit the cutting object that is there so it's going to easily clean that up now this rounding error is definitely something that's going to be worked out on the future i've done this model about five times and this is the first time that i've had that rounding error so just be aware that sometimes you just need to figure out workarounds to make things work but now let's turn this into something that is 3d printable but at the same time being able to keep this in a way that is sort of parametric in a way so to do this is as simple as literally duplicating it so that is shift d so making sure that this the back plate is selected i'll press shift d now you're going to see things go a little bit weird at this point don't worry just right click and cancel that you have these two back plates here one is a duplicate one is the original we're going to go to that duplicate and just apply everything on it now that everything has been applied we can press g and move it out and this is now ready so this here is sort of your parametric sort of ready to be edited model and this here is your ready to be printed model now there is one more thing that i would do just before going into printing this i'm actually taking this into edit mode so press tab you can see it's not exactly the cleanest thing out there someone just select everything with a press x and do a limited dissolve but i want to limit this dissolve to 0.
Related Videos
14:19
CAD Sketcher In Action | 10 Minute CAD Cha...
Keep Making
37,118 views

14:33
CAD Sketcher VS Precision Modeling In Blen...
Keep Making
251,589 views
35:41
Blender Modeling Introduction: How to crea...
ExplainingComputers
420,728 views
27:32
Hard Surface Modeling in Blender is EASY O...
JL Mussi
46,137 views
21:00
CAD Modeling In Blender 3.5 | CAD Sketcher...
Keep Making
52,913 views
1:04:01
Getting Started with Plasticity as an Abso...
Learn Everything About Design
12,738 views
22:11
CAD Sketcher 0.24.0 Update | CAD Modeling ...
Keep Making
51,857 views
13:27
Precision Modeling in Blender? | You Decid...
Learn Everything About Design
19,684 views
12:50
I'm Ditching Blender for Onshape
The Next Layer
437,696 views
29:39
6 Powerful FREE Blender Addons For 3D Mode...
JL Mussi
66,496 views
21:49
Complex design from start to finish - 3D d...
Teaching Tech
287,967 views
13:17
Five Topology Tips Every 3D Artist Should ...
DECODED
866,697 views

8:52
Why do Studios Ignore Blender?
Film Stop
455,140 views
12:54
Why THIS is my Favorite Modeling Technique
Kaizen
450,009 views

17:44
3 Hours vs. 3 Years of Blender
Isto Inc.
6,292,508 views

9:21
CAD for Blender is FINALLY HERE! (Free Ble...
The CG Essentials
102,124 views

4:11:34
Free Blender Course for Beginners (3D Desi...
Skillademia
136,104 views

31:06
Blender Hard-Surface Modeling Fundamentals...
CG Boost
392,462 views
1:52:45
Modeling in Blender for complete beginners
Joey Carlino
131,223 views

41:38
BEST FREE CAD / 3D Modelling software 2024...
Maker's Muse
1,359,686 views