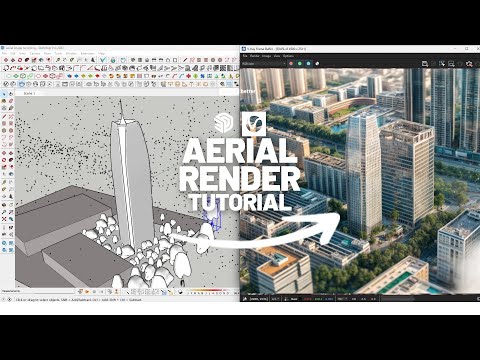
How to create an Aerial Render with V-Ray for Sketchup Gaussian Splats
21.17k views2252 WordsCopy TextShare
Show It Better
Download VRay for Sketchup here: https://bit.ly/vray7-for-sketchup
Thanks to the team at Chaos for s...
Video Transcript:
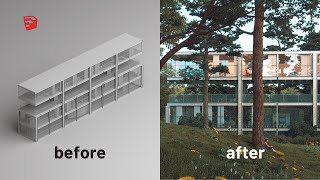
aerial renders are some of the most jaw-dropping images you can create for a project they capture scale context and impact like nothing else but let's be real they're also a pain to make so when done right aerial renders evoke emotion showcase all of the work you put into the design and let's be honest just look insanely cool so traditionally creating an aerial render meant modeling the entire surrounding context to get something semi-realistic and we all know that's brutal either you spent a whole week crafting an ultra detailed cityscape just for a few seconds of Animation
or you go to the conceptual route with white boxes planes and a whole lot of but what if there was another way a way to get detailed realistic aerial renders without spending days modeling everything well with vray and its new support for gaussian Splats that's exactly what you can do so let's get started and hey if you're in a hurry I've added time stamps below so you can jump straight to the parts that interests you the most before we dive in I need to quickly explain three simple things first what a gaussian Splat is second
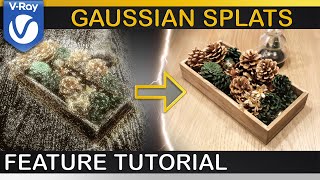
how you can create one and Third how to import them into SketchUp so what exactly is a gaussian Splat at its core gaussian splatting is based on 3D gaussian which are these tiny Blobs of color in opacity scattered in 3D space they don't act like traditional polygons but instead they blend together to form incredibly detailed photorealistic renders when projected onto a 2D image so why should you care so for Architects and visualization artists this means faster more interactive 3D presentations without needing a monster GPU high quality scans of real world environments ideal for site analysis
and context modeling and integration with game engines for interactive walkthroughs and Next Level presentations now how do you actually create one let's get into it for this example I'll be using the website polycam which you can use with a free trial and test it out here you can filter your search for models that specifically are Splats and download them and use them in your 3D models or you can also create your own gaussian Splat to create your own Splat let's click on the create button and select gaussian Splat here you can either upload images or
a video so I did some test to see if I could create some models from Google Earth sites like this one so I went to Google Earth selected a site and started recording my screen and made sure to record it all from all types of angles the more information you have on your site the better it will be represented and of course you have to take into account that the longer the video is the heavier the output file will be so I'll try to keep it under 2 minutes for now after I recorded my screen
I imported it into Premiere Pro to crop the borders and only keep the Google Earth visuals then I imported the video into polycam and it took about 40 minutes to create create the model with this technique I created three different models of three different sites of Google Earth to test out how these different models could look and if they were somehow usable for architectural purposes the thing is these models will be limited by the resolution of Google Earth and depending on your site it might have some 3D information available or it might look flat so
you want to take that into account as well now ideally if you had some Drone footage of your site it could work 10 times better than this technique it could represent better each texture and get closer details so if you have the chance to get some Drone footage of your site and then turn it into a Splat and place your project this would be a really good workflow you wouldn't have to model your whole site now let's import these models into SketchUp so click on the model click on download and select Splat PLY and wait
for it to download after you downloaded let's open SketchUp now in your vray tab let's go to import proxy and here I'll select my Splat and import it after importing I'll open my V asset editor and select my Splat and on the SketchUp view you will see a point Cloud that doesn't really say much and it may be hard to read and understand so I'll open my vray interactive window and put it on one side of my screen so I can really see what I'm working with now we will see in our asset editor a
series of options some of these are pretty self-explanatory so I can increase the preview percentage that way I can get a point Cloud that is much more dense and defined also there is a chance that the scale of the model might be off so you might have to increase the scale factor this part can take a while hopefully there's an easier way of scaling it precisely in the future meanwhile I can import a model from chaos Cosmos for reference and change the scale factor as many times as possible here we have some more options but
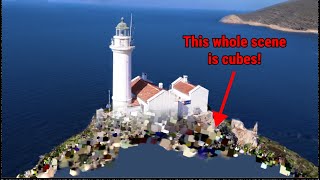
I'll explain these further down in the video for for now let's take a look at our model so as you guys can see a gaussian Splat is a pretty interesting method for the amount of visual information that we have in our model it's also pretty lightweight if you were trying to create this whole model in 3D it would first of all be really really heavy and second of all applying all these textures so it can look realistic would be impossible now of course this is a technology that is in constant development and there are some
things that can be perfected so for example if you zoom out you can see a lot of irregular blobs that look a bit weird and sort of translucent so in some areas it's not really solid and you can see through the terrain which for some scenarios is not ideal also you can see if we get really close the quality of the texture looks a bit low so for now I imagine it can work for aerial images that don't require that much detail and I mean supposing I already had my architecture model finished I would just
import it into my Splat create a general area render and that's basically it whole process would take less than 2 hours in comparison to the workflow of creating the entire context and trying to make it look realistic okay so now that you have seen how to create a Splat and import it into SketchUp I want to try to create an aerial render with this same technique so we're going to go back onto poly cam to search for a Splat of higher quality and import it into our model hopefully a Splat that was created with some
Drone footage so in the search bar you can filter your search by file type start searching and I think the these city blocks right here are in a good quality to create this render so I'll download the model and now open SketchUp go to import proxy select the proxy and import it now I'll open the asset editor select the Splat flip the axis and increase the scale again this can take you some time to get the hang of and be precise for this model I scaled it up to 20,000 and I still think it wasn't
as precise as I would like it to be now I'll go on to my chaos Cosmos library and type building in the search bar so for this image I'll use this skyscraper model from the cosmos library but in your case you would either copy your finished architecture file or import the Splat in the finished file now import this building onto your model I'll place it towards the center of the Splat again this process can be much easier if you open the VR interactive rendering and try to see where your building will be placed so that's
what we're going to do right now here I'll also slightly increase the scale of my model just so it stands out from the rest now there are many things that are still wrong with this image that we need to fix first our skyscraper is receiving light from the opposite side of the Splat which obviously is not ideal so our model is grabbing the light from the default sun in vray while the gaussian Splat doesn't need an external light to illuminate it already has the light that it came with the gaussian Splat illuminates by itself so
what what we need to do is match the vray light to the gaussian light so I'll go to the asset editor click on the light icon then select the sunlight activate custom orientation and we can see that the sunlight is coming from the right side of the screen and there are hard Shadows on the left side of the volumes so I'll adjust the Sun and try to match it as best as possible and this looks much better now we can also see that we don't have any Reflections refractions or Shadows of our building so it
doesn't look very real let's go to our asset editor select the gaussian Splat and activate the options Reflections refractions and cast Shadows this way if I render my image again I can see that the skyscraper looks much better it's receiving Reflections from the gaussian Splat and also Shadows but we still don't have a shadow from our skyscraper onto the Splat now since this Splat is not an actual solid it can't receive Shadows but we can create a basic volume that can act as a shadow catcher so let me show you how so first first I'll
try to create a basic model of the surroundings where the building will cast some Shadows you don't want to spend too much time on this just create a basic model so more or less something like this I can correct it later but for now it serves the purpose just fine now I'll open the VR asset editor go to materials right click and select wrapper now on the wrapper I'll right click and apply to the selection in the material settings I want to make sure the base material is none the alpha contribution is black alpha the
matte option is on and the shadow option is on now if I click on interactive render again I'll see the Shadows projected onto the volumes but the volumes will be hidden now I can also import things like trees from the chaos Cosmos Library so I'll go to the library search for the trees I like the most and import them into the base of our skyscraper I'll do this for some more trees and place them around our image now this is looking pretty good and take into account that this workflow can speed up your rendering times
and help you create many aerial renders with very little effort of course for the moment some of these gaussian Splats are low quality but with future updates I imagine all of this will be improved and easier to work with after I have my final render I can always import it into Photoshop do some color correction general image correction and I can even use AI to improve some parts that for now look in regular quality so this is the final render from B this is with the improvements in Photoshop and this is with some slight AI
adjustments pretty cool right now these videos wouldn't be possible without the awesome support of chaos the sponsor of today's video huge shout out to the team at chaos not only for sponsoring this video but also for genraly supporting the content that I want to create they're always open to my ideas and help bring these cool tutorials life for you guys so if you're looking to dive deeper into vray4 SketchUp use gaussian Splats and use all the features I dropped a link below where you can download it test it out and start creating your own aerial
renders and honestly I'd love to see what you come up with if you make something cool tag me or drop it in the comments and if you want to see all the latest V for SketchUp updates I've got a full breakdown right here in this link or you can find the link in the description of the next video now if you find this video helpful hit that like button subscribe and drop a comment down below will you be trying gaussian Splats in vray what's the biggest struggle you face when creating aerial renders and what features
do You Wish Vray had for sketchup please I'm dying to know comment down below let's keep the conversation going in the comment section and as always thank you for watching check out more rendering tutorials right here on this playlist and that's it see you in the next one bye [Music]
Related Videos
16:01
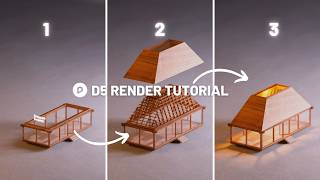
How to Create a Digital Maquette with D5 R...
Show It Better
48,290 views

54:02
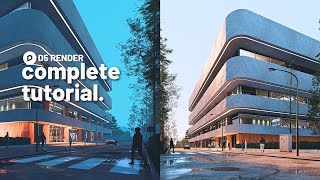
Create Interior Visualization in V-Ray for...
Educk
6,770 views
13:32
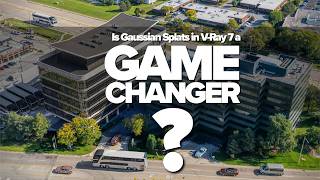
More than a photo: Gaussian Splats in V-Ra...
CGarchitect
10,597 views

4:57:25
Music for Deep Intense Focus of Work and L...
Uplifting Brainwaves
136,265 views
14:45
D5 Render 2.5 Magic: Crafting Animations L...
Show It Better
106,672 views
34:07
Enscape for beginners / creating architect...
Show It Better
463,644 views
![Instant Energy Boost ☕️ [upbeat lofi / productivity mix]](https://img.youtube.com/vi/LhCXGVW8-CU/mqdefault.jpg)
3:01:51
Instant Energy Boost ☕️ [upbeat lofi / pro...
Chillhop Music
771,528 views
16:44
Breaking Down the Best Architecture Compet...
Show It Better
30,051 views
17:44
How to Render like Fran Silvestre Arquitectos
Upstairs
55,103 views

13:15
D5 vs Twinmotion vs Lumion, a Render Battle!
Upstairs
146,140 views

9:20
4 Composition Techniques for your Architec...
Show It Better
91,285 views

2:53:45
Chill Music — Deep Focus & Inspiring Mix
Chill Music Lab
2,120,571 views
17:40
D5 Render’s AI Tools Explained: A Game-Cha...
Upstairs
54,128 views
30:50
Vray 5 for Sketchup - Postproduction
Show It Better
97,071 views
27:55
V-Ray | GAUSSIAN SPLAT Workflow in V-Ray 7
Jonas Noell
6,554 views

4:20:20
High-Energy Lofi Hip Hop Beats 🏋️♂️ for...
Lofi & Chill Beats
2,217,733 views
12:42
Are Voxels Making 3D Gaussian Splatting Ob...
Pixel Reconstruct
59,598 views

18:21
How MVRDV is using AI to design their buil...
Show It Better
156,754 views
36:48
D5 Render Full Beginner Tutorial!
Show It Better
278,845 views
21:07
7 WAYS TO MAKE YOUR MATERIALS MORE REALIST...
PRODESIGN
12,598 views