Simple HTTPs for Docker! // Traefik Tutorial (updated)
73.87k views7168 WordsCopy TextShare

Christian Lempa
Supercharge your data workflows and try out Bright Data for free: https://brdta.com/christianlempa
...
Video Transcript:
hey guys Chris Shia and in this video we are covering traffic the free and open source reverse proxy that allows you to easily set up and manage routing and https for all of your applications and get rid of this annoying certificate warning in your browser it is absolutely amazing I know if you're following this channel you might know it already since I often covered it in previous videos however since the latest version of traffic changed a couple of things here and there and my last tutorial is already a bit old I wanted to make this new video to recap all of the important installation and configuration steps in traffic to easily get started today we'll focus on the docker integration as well as setting up trusted T certificates from let's encrypt so no kubernetes in this part but don't worry I'm also working on a second part of this video covering the kubernetes deployments as well so this video is for everyone using traffic and DOA no matter if you're just a beginner or you're already familiar with it but you just need a little update about the new version configs so keep watching and let's check it out together before we start I've got something else that might be interesting if you're a developer using Docker to automate workflows or if you're handling data collection tasks then you should definitely check out our today's sponsor bright data with bright data you can seamlessly integrate Advanced tools for web scraping proxy management and Cloud connectivity right into your darker containers right data offers a robust Global proxy Network that lets you bypass gear restrictions and captur seamlessly all from within your darker containers just imagine you need access to gear restricted content for testing or web scraping these proxies are super useful for that task and they let you operate like a local in any region worldwide and just because we're talking about security and hdps in this video of course they've got https enabled making your data collection fully encrypted and secure as well with just a few lines of code the bright data's web scraping API can scale data collection tasks across multiple containers make it ideal for handling large data sets in no time but it's not just about collecting data what happens next right data also integrates smoothly with any major cloud service like AWS Google and snowflake so what are you waiting for supercharge your data workflows today try out bright data for free and simly integrate powerful web scraping tools Global proxies and secure data collection right into your Docker setups of course you will find a link to their website in the description box down below and now let's get back to topic and start setting up traffic okay so I know some of you might be already familiar with traffic so I'll try to keep it short in simple terms traffic is a free and open source reverse proxy that allows you to Route Network requests to services and apis in an easy way it is often used to have a better control and protection of unencrypted web applications and protect them all with https or TLS to make sure the network requests are always encrypted and the connection is always trusted it can also act as a load balancer to to automatically distribute the incoming requests to multiple Target services or noes that's why it is often used as a kubernetes Ingress controller but in this video as I said we'll focus on Docker only but just that you know traffic is a pretty versatile application that can work in several other scenarios as well and that's why I absolutely love it and I'm using this on all of my Docker servers and kubernetes clusters to protect my web applications and manage TLS certificates in an easy and simple way now to get started with it you first definitely should check out the official documentation pages I know since I've started to use it in many of my videos I've always heard people saying that traffic is kind of complex and it doesn't work for them and so on and yeah to some extent I have to agree it definitely need some time to understand how to use it and configure it correctly but in my opinion that's mainly not because traffic itself would be complicated that's just the nature of networking web security and protocols there are so many different technology Stacks that all need to play together here but don't worry we will go through all of the stuff together step by step I also want to point you to my public repository boiler plates on GitHub so this is a place where I'm collecting all sorts of templates for Docker ketes terraform anible yeah all the amazing Technologies I'm covering in my videos and of course here you will find also some great examples for traffic as well so definitely check it out that will help you to get started and configure traffic to work with your applications now first let's have a look at how to install and set up traffic on one of my virtual Docker servers so if we go to the official documentation Pages there's a great quick start guide you will find some instructions on how to install and setup traffic with the darker provider so I'm just going to copy this template here and modify it a bit and for this quick demonstration I'm opening a new connection to my server demo 1 and create a new project directory traffic demo 1 CD into that so this is what we can use as a quick demonstration here now let's go into this directory on my remote server using vs code so here we can create a new Docker compost file where we can paste all the content from the documentation quick start guide uh by the way I hope you have some general understanding and practice in docka if you don't well I've made some nice tutorials on my patreon page that give you a great introduction of course I'll link you this in the description box down below and yeah so here uh let me just modify a few things of this file a bit so first of all I'm going to change the name reverse proxy to just set it to traffic I'm going to remove some of the comments here we don't need that and also add a container name I think this is uh much better to differentiate the projects from each other and I'm also going to add a specific pin version TCH here so you can see this is currently using the version 3. 1 which is at the time of recording this video probably the latest version but I'm going to check it on the docker Hub so here we can see if we search for traffic you can find the docker image and all the version tags so here we have a release candidate for version of 3. 2 but I'm going to use what is equivalent to the latest version tag this is usually the latest stable version this is the 3.
1. 5 and I'm also going to add the restart policy and set it to unless stopped so this makes sure whenever you're making updates on your Linux server and you need to restart the server the traffic reverse proxy is automatically restarted as well and always up and running unless you manually stop this stalker compost project now one thing that is very important at this point that you have to take care of when you managing a bunch of different Docker containers in separate Docker compost files so usually if you start this Docker compost project it will automatically create a separate Docker Network just for this project and connect all the services listed in the docker compost file to this project so when you are adding a bunch of other services that you need traffic to get access to you can just list them here and you don't need to care about networks but most of the time when you're managing multiple applications on the same Docker server but you're managing them in different Docker compost projects they are usually creating always isolated networks and it is important that the traffic container can reach out to all of the other containers that you want to make accessible through traffic so that's why I usually create a separate Docker Network just for adding the proxy services so you can easily check with the docker Network LS command what uh current Docker networks you have Creed on your machine don't choose the default Bridge Network for this because um there is no DNS resolving possible in that Network so I would definitely create a new Docker Network that you're just going to call I don't know proxy I most of the time use the name front end for this so here we can check the docker network has been created and when we go back to the docker compost file we add a new section here that is called networks and add the name of our custom Network in here now we need to make sure that we set the external flag to true because otherwise doer compost will try to create this network but because we have manually created it and managed it on the docker machine we just need to import this externally managed Network to this composed project and of course we also need to attach the container to this network as well now this is a simple and very minimalistic setup that would in theory work but I just want to make a few more customizations to it because uh first of all as you can see here in the command Flex there are some Flex that configure certain settings of the traffic reverse Pro and I don't like to do it this way so I'm just going to remove it here and creating a new directory in the project directory that I'm just going to call config where I create a static config file for traffic called traffic. yaml and if we go back to the docker compost project of course we need to mount this static configuration file in the container so I'm going to refer to the current project directory config and I'm just going to mount this single file into the ETC traffic location so this is where traffic will look up its static configuration file and set it to read only so the container cannot make changes to its config file now before we edit this config file I think we should also quickly talk about the different types of configurations in traffic as I think this is a quite important concept to understand so traffic has two different types of configurations first the dynamic routing configuration which contains the router the service the middleware and certificate definitions we'll talk about this later and the Startup configuration also referred to as the static configuration which contains the main settings of the traffic application to define the entry points the providers and some other general settings like logging and so on this static configuration file can be set in three different ways which are mutually exclusive so that means you can only use one at the same time you can use a ml or toml formatted config file just like what we're doing in this tutorial but you could also think about using CLI arguments or environment variables I personally prefer using a static config file in yaml because I think that's just the easiest way since most applications we are using half yaml based config file so everyone is familiar with the language in syx and we can easily Mount that config file into the containers fight system of traffic edit it in vs code and yeah that's really practical but just that you know in the end it is basically up to you what you prefer using if you're searching in the traffic documentation for any settings of the static configur uration you usually find examples for all these three different types of configurations and also no matter which method you're using the config settings are always the same so it doesn't really make any difference what method you prefer using all right so let's go back to vs code and let's add some general settings in this traffic configuration file so here in the global section you can Define some things like check new versions set this to FSE so I like to update my traffic and container images myself I don't need any notification and I'm also going to disable any Telemetry and what is also pretty useful especially if you're beginning to learn how to use the traffic reverse proxy you might want to set the lock level to debug because otherwise you will only see the errors so by default it is set to the lock level error but sometimes um if you experiment with a bunch of different flags and settings in traffic and it might not work directly you just want to know if it's actually processed and what is the reason behind this error and then it usually helps a lot to enable the debug locks of course you will also see a lot of noise in the locks but sometimes it's really helping for troubleshooting also I'm going to add the dashboard to the API and set it to true so this is the administrative dashboard and traffic also has an API that you can access and now we also have to add the entry points by default it always enables this web entry point here for TCP traffic which is the standard port for HTTP but you can of course also add any other entry points for example a web secure entry point with the address for for free so that's the standard port for https traffic or you can also add any other TCP or UDP port and protocol just look up the documentation page for entry points as a reference and also don't forget if you added some entry points to this config file that you of course also need to make them accessible in the docker container so here I'm also going to add the port 4 for free for the web secure entry point the port 88 is by the way the port for the insecure dashboard and API in traffic so because we have enabled it here we don't need to manually create this entry point because it's automatically managed by traffic when you enable the dashboard and insecure settings of the API don't do this in production this is just for testing all right so that's basically everything that we need uh we have created the static config file the docker compost file let's go back to the terminal and let's start the traffic reverse proxy by executing a Docker compose up so this will pull down the latest version and start up the container so I'm currently starting it in the foreground so that we can see the lock files as I've explained if you enabled the debug logging so then you will get a lot of noise in here but it also would tell you a lot about how the system functions and if it's processing the specific rules and settings you have configured once we have that you can also try and get access to the dashboard so just enter HTTP your server name or IP address where traffic is running on the port 8080 and then you get access access to the traffic dashboard by the way by default it usually doesn't have the dark mode enabled so definitely click on that button here so that it just looks a bit nicer and here in the dashboard you can see all the information about what rules Services entry points routers you have configured don't worry we will go through all of the settings later here what is also pretty nice in the latest version of traffic there is a new button in here is called plugins which takes you to the traffic Labs plugin catalog so here you can also connect different other plugins to this reverse proxy some of them are really very exciting so I definitely will take some time looking at those and making separate videos for example about mod security where you can add stronger uh protection and malicious pattern detection to your reverse proxy it's pretty cool and basically make this a web security Gateway but yeah for this video we don't have to mess around with that okay guys so that's how you install traffic in Docker and set up the static configuration file with the entry point and some other general settings now let's have a look at how to route the incoming Network requests to the Target application services and to explain how you can do this very easily in your network we also have to look at your DNS because let's assume you're running two or more applications on the same server to differentiate those incoming requests you usually would have to expose them on different port numbers because only one servers can listen at one port at the same time so without any reverse proxy you would have to to connect to the IP address or DNS name of your server where the container is running and use the port number to connect to the desired Target application but of course that's not really what we want when we're using a reverse proxy because we don't want to connect to our applications directly and Define the different port numbers instead we want to use traffic to receive all the incoming requests for the applications on the two entry points and the standard ports and then traffic should take care of forwarding those requests to the actual Target application and the best way to differentiate those incoming requests is to use a new host name for each of your applications you want to access just to give you an example how that would look like in my home network so for example if I want to access app one the fqdn the fully qualified domain name what I need to enter in the address bar of my browser would be ab1 do server demo one.
home. creative. and of course the same would also work for the application too on my local DNS server which is an authorative DNS for the home docreative dode domain I'm having two DNS entries here one for the server itself and a so-called wildcard DNS record which resolves any name in front of the server's name to its IP address as well so that means when the client makes a request to the fqdn of application one the DNS server will resolve the IP address of the server where traffic is running traffic because it's listening on the main entry point will receive this incoming request and by configuring a specific host rule in traffic for the fqdns of your application it knows where to send this request to then you don't need to expose the application itself on a different port number anymore you can just use the fqdn to access your applications on the standard ports 0 or for for free for hdps and every request is automatically routed and protected by the traffic reverse proxy just a quick side note at this point here if you don't know how to manage and set up a DNS server for your home lab and you generally want to know how to set up DNS record and an authorative DNS server I've made a tutorial about this entire topic so I link you this in the description box down below but generally speaking you could also think about just using your home router for this yeah most home routers allow you to set static DNS records for any domain or DNS record that you want or you can use a network security firewall if you got something like this and so it's depending on your setup and environment how the DNS names are managed now to configure those specific rules for the application containers in traffic that I've talked about we will need to use the dynamic configuration of traffic now remember this is the second configuration type which is a bit different from the static configuration because here you have to use the supported providers in traffic providers are infrastructure components and have again different ways of configur them I don't want to go into too much detail here at this point and if you're interested in learning these providers here in this table you can see what provider is configured in which way but for this tutorial we only need to know the docker provider and this is configured using labels that you attach to the Target applications containers but first of all we need to enable the docker provider which makes traffic monitor all the events of the docker demon therefore it needs to have access to the docker socket so if we go back to the docker compost file you can see that we've mounted the docker socket as a volume into the container's fight system if there is a new container staring up with some Docker labels and that's where it gets its configuration from so to enable this we just need to uh put those entries here in the steady configuration of traffic so we need to go back to the traffic.
EML configuration and add this section in here now one thing that's also pretty important by default traffic monitors or the docker events and it tries to expose each container that it can see on the docker socket and this is usually enabled by default and honestly I don't like this setting because I like to control myself which containers I want to expose and make available on the traffic reverse proxy and which ones I might not want to expose and so therefore I usually recommend to add this setting to the docker provider and set the exposed by default flag to false now that we have configured the docker provider we can now start adding the docker labels to our example application to make it accessible now in traffic there are three different functions you should know that Define how the requests are routed to the Target applications first the routers which configure how the incoming requests are handled so here you can Define the rules the encryption settings and so forth then the services which are used to configure how to reach the target application usually this is configured by default in the docker provider so this is done automatically for us and the middlewares which are used to change specific parts of the requests like changing adders paths adding basic authentication and so on in this video I'm not covering middleware as I think it should be covered on a separate video and it is very much depending on your use case and the target application so for routing simple web applications we don't need to mess around with services or middleware so we'll only focus on routers for now now as a reference again look at the official documentation page of routers so here you will find all of the settings you can configure in the rules which are a set of matches for the incoming requests you can specify depending on which rules traffic should forward the traffic to the actual container application so here for example you could use a header matching so if it matches a specific header in the htdp request you can use regular Expressions you can use host regular Expressions you can also use path mattres so for example only specific paths should be forwarded to specific containers I think the most simplest way to achieve what we want is to use a host matcher so this will basically match the fqdn of our container application and to demonstrate how that would look like let's go to one example project that I've deployed so here for example this is a simple enginex Darko container that is an example like any other container that you might want to deploy on your network again as I said uh in the installation part of this tutorial if you want to access those containers with traffic you need to put it to the same Docker Network so here we also need to define the front and edor where we have put the traffic reverse proxy to make it externally managed and then attach this container to the frontend network so that traffic can see and connect to it and now we can add the rules settings to the label section of the darker container so here first of all because we have set the exposed by default flag to Falls traffic will not try to Monitor and expose this container by default this you can do with the traffic. enable flag and set it to true now we need to add the router and then we need to define a name for our router you can give it any name that you want for example engine x- htdp that's usually the name that I prefer and then we can add a rule to this setting and here if we go back to the documentation we can use a host rule or host regular expression whatever method we want to use let's give it a name just enginex I think this is fine enginex do server demo 1. home.
c. de so this my local DNS server because I've added a wild card DNS record will automatically resolve to the IP address of where traffic is running now we also need to attach this to an entry point because in the traffic dashboard you can see we have defined multiple entry points and I don't know by default I think it will attach it to the web entry point but I think it is better to specify to which entry point it should attach the router to so let's just add the next configuration setting for the same router and now we can set it to entry points set it to web so one thing is also important to understand if you change any configuration to the labels of any the container that you want to expose via traffic you don't have to restart the traffic reverse Pro you just have to redeploy The Container if you changed the labels again as I said traffic will monitor the docker socket and automatically apply those new rules however because we edited something in a static configuration file this requires a restart so that to enable the docker provider first we need to stop the traffic container in the terminal and let's just restart it let's let's put it to the background here so I think this is fine and now that the traffic proxy has enabled the provider for Docker we can simply take this container down and restart it with the new labels that we have attached to it and let's go back to the terminal here I just want to show you the locks here so here you can see in the debug locks that's why why I said is is really important for beginners to learn how it's working you can see some debu loocks configuration received for enginex demo one here you can see the router engine x- HTTP that we have defined with the entrypoint web the rule set that we have configured it automatically created a service object for us so that's why I said we only need to take care about the routers here but if you want to customize the service settings you could also add another label referring to this service name here and change any of the those specific settings if you want now let's try to open this engine X web server so here I'm just going to use the fully qualified domain name in the browser as you can see this is uh notifying us that we're using an un encryption connection so we're using the web entry point with the HTTP protocol it's not using https therefore it's saying not secure but as you can see we get access to the engine X service without having to expose the engine X server using a port number or anything all right guys so that's it about the first part of the video that's how you configure traffic throughout incoming requests to the Target applications now let's come to the interesting part let's talk about TLS because as you might have noticed we only used the unencrypted HTTP protocol for now but of course one of the main benefits using a reverse proxy like traffic is that you can add https encryption to your applications and issue trusted TLS certificates to explain how that's working we need to go back to the presentation don't worry I'm not going into too much detail on how TLS and hdtp works by the way I've done a video Once on self sign certificates in the past where I explained a lot about the certificate verification importing the certificate chain in your browser and so forth if you're interested of course I'll link you that in the description as well but for this video I want to focus on certificates from lets en Crypt which is a nonprofit CA a certificate Authority that allows you to issue trusted te certificates completely for free the cool thing about this is that if you're using those certificates for your applications you will never see a certificate warning in the browser again because the ca of let's encrypt is imported into every devices browser or operating system as a trusted CA by default so any application or service that is using valid let encrypt certificates will be automatically trusted by any device in the world to issue those trusted TLS certificates from lets encrypt you have to have a public domain which you also Ed in your DNS server to resolve the IP address of traffic that's by the way Al the reason why I'm using a subdomain of my C creative. de domain for my home lab because then I can easily have trusted and valid certificates for any services in my entire network now to issue TLS certificates from let's encrypt in traffic you also have to connect it with a DNS provider like Cloud flare that supports the akma protocol which stands for automatic certificate management environment I know technically there are also other ways possible traffic has Integrations for many other DNS providers available that automatically handle the DNS Challenge and the verification of course you could also do it manually and so on but I think using Cloud flare as a DNS provider is just the best way to do it because Cloud flare is free it is super reliable and it also has some other very exciting features like apis web security and other cool stuff so yeah Cloud flare is absolutely amazing a big recommendation from my side however if you prefer using a different DNS provider then feel free to check out the documentation of traffic if your DNS provider is listed here if it's not well you might consider switching over to one of these supported providers like Cloud flare don't worry you don't have to transfer your entire domain to Cloud flare you just have to switch the name servers on your DNS regist so where you have registered your public domain and just insert the name servers of cloudflare just check the documentation of your DNS register how to do that I'm pretty sure they have something about it and also Cloud flare has some great documentation about this topic so I think I don't need to go into too much detail here uh by the way for most common top level domains you can even use cloudflare itself as a domain register so they have added this service for about a year or two unfortunately you can't use it for the German de top level domains but for any or net domains I'm always using cloudflare so once you changed the name servers and imported your registered domain into cloudflare or maybe you have registered it directly in Cloud flare then you should see it in the administrative dashboard and you can start making changes state now to issue trusted CLS certificates that are valid for your domain you have to prove that you have the ownership of the domain and the way this is working is by using a so-called DNS challenge so let's encrypt will challenge the DNS provider to create a specific txt entry in the DNS settings and that way you prove that you have the ownership of the domain because only the owner of a domain should be able to make changes to the n settings right and using the akma protocol this is done fully automatically in traffic the way it works is you need to give the traffic reverse proxy access to the domain Zone that you want to issue the TLs certificates for and that is by creating an API token and adding it into the traffic reverse proxy to create an API token in Cloud flare you need to go to your profile click on my profile and go to the API tokens section here you can create and manage user API tokens and you can also download the API Keys now I personally would prefer to create a token because with a token you can very specifically Define permissions for the user otherwise with an API key that is global you give anyone access in to your entire Cloud flare account and maybe that's not what you want so I definitely would create a separate API token for each traffic reverse proxy that you that you have created you can use an API token toen template so you don't have to mess around with the permission flags and so on so just choose the edit Zone use template because as I said the traffic reverse proxy needs to create a simple txt record on your DNS zone so it only needs this permission here so here you can see all the domains that you have registered and just select the domain that you're using on your local DNS server for resolving the internal IP address no you can also give it an expiry date but yeah I don't like this because then you have to always change the API token on your traffic reverse box that's a bit annoying and let's create this token now this token will only show up once so make sure to store it in a safe location then attach it to the traffic reverse proxy the way how you can do this is by using environment variables so here in the main project directory I will create a EnV file and then you need to use a specific variable so in the traffic documentation when you go to https and TLS and go to Let's en crypto here you can see the specific environment variables that the resolvers need depending on what DNS Challenge and which provider you're using so here you can find all the DNS providers uh again we are using Cloud flare here we have to use the CF DNS API token so let's copy this value in here let's add this to the environment variable and if we go back to the dock compost file of course we need to add this environment and then the traffic container should have this uh secure token now to issue trusted TLS certificates we also need something else if we go back to the documentation in the overview section there is an object that we need which is called certificate resolvers so by creating certificate resolvers traffic knows how to issue and retrieving certificates from an akma server and of course we need to create a certificate resolver for cloud flare so I'm going to copy a template that I have created that I want to add to the traffic.
Related Videos

15:33
Secret Docker Commands you don't know!
Christian Lempa
33,493 views
28:17
SSL Certificates Made EASY With Traefik Pr...
Jim's Garage
84,636 views
![President Donald Trump's second inauguration address [FULL SPEECH]](https://img.youtube.com/vi/QmNCfDk5NAo/mqdefault.jpg)
31:22
President Donald Trump's second inaugurati...
FOX 9 Minneapolis-St. Paul
139,514 views

32:31
You want a real Name Server at home? // DNS
Christian Lempa
290,488 views

39:50
Secure authentication for EVERYTHING! // A...
Christian Lempa
212,694 views

24:00
Man Insults Keanu Reeves on a First Class ...
Heroic Acts
1,880,534 views

14:32
NGINX Explained - What is Nginx
TechWorld with Nana
308,448 views

30:31
Full Donald Trump inauguration speech: 'I ...
PalmBeachPost
458,436 views
35:56
Learning Docker // Getting started!
Christian Lempa
115,395 views

26:18
18 Weird and Wonderful ways I use Docker
NetworkChuck
477,501 views

25:45
Don’t run Proxmox without these settings!
Christian Lempa
338,972 views

19:33
Expose Your Docker Containers With Traefik
Techdox
33,592 views

39:37
Traefik 3 and FREE Wildcard Certificates w...
Techno Tim
165,710 views

Donald Trump Latest News | Trump Signs Fir...
CNN-News18

27:47
docker stack is my new favorite way to dep...
Dreams of Code
150,070 views

33:59
Secure your HomeLab for FREE // Wazuh
Christian Lempa
88,395 views

13:35
Best for Homelab? Traefik vs Nginx Proxy M...
Christian Lempa
191,626 views
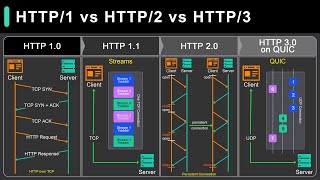
7:37
HTTP 1 Vs HTTP 2 Vs HTTP 3!
ByteByteGo
362,154 views
55:49
Traefik 3.0 upgrade and new features walkt...
Bret Fisher Cloud Native DevOps
1,764 views

26:25
Pres. Donald Trump's inauguration: FULL SP...
FOX 4 Dallas-Fort Worth
227,261 views